Page Table of Contents
Your essential data stored on your systems is always at risk, as a catastrophic system failure can devastate it. This can lead to erasing your precious data, making the ability to create and restore system images crucial. As a complete snapshot of your system's state, it provides a vital backup option.
The open-source software Rescuezilla is a widely popular tool for creating system images. This article delves into the step-by-step procedure for restoring a system image using Rescuezilla and explores alternatives.
📚PAGE CONTENT:
Overview of Rescuezilla
Rescuezilla is a widely esteemed open-source tool created to streamline backing up and restoring computer data using system images. Its intuitive graphical interface makes it easy to use and ensures even those with minimal technical skills can efficiently manage system backups. At its core, this software allows users to create and Rescuezilla restore system images. These are comprehensive snapshots of your entire system containing all data.
These include the entire system's data, such as the operating system, applications, and personal files. This capability is invaluable for disaster recovery by ensuring you can quickly revert to a previous state in case of system failure. Rescuezilla operates independently of your installed operating system, booting from a live USB or CD. This feature facilitates the restoration process and enhances the tool's flexibility and effectiveness.
How to Restore System Image with Rescuezilla
The process of getting your data back through the system image you created with Rescuezilla is straightforward and fast. Moreover, you will need to have two USBs with a minimum size of 2GB and 64GB, respectively. After that, employ the detailed instructions given below to use Rescuezilla to restore the system image:
Step 1. First, you need to create a Rescuezilla bootable media using the 2GB USB drive on a system. To do that, download its ISO file from the official website and use a tool like Rufus or Etcher to create the bootable media.
Step 2. Now, utilize the 64GB USB to get the system image you want to restore on your system. Here, make sure that the file is uncompressed and located at the root of the device. Afterward, reboot your system with the Rescuezilla USB attached and access the boot menu.
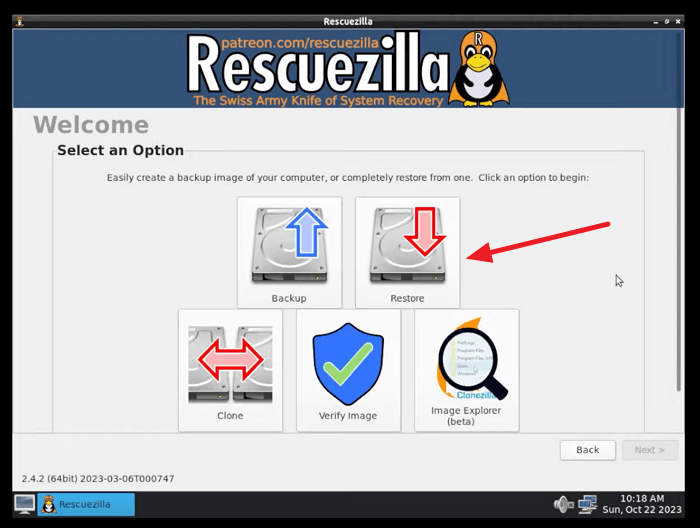
Step 3. Within the boot menu, find the boot order and give the USB with Rescuezilla the highest boot priority. After you have rebooted the computer, choose the language for the tool to access the main interface and select "Restore."
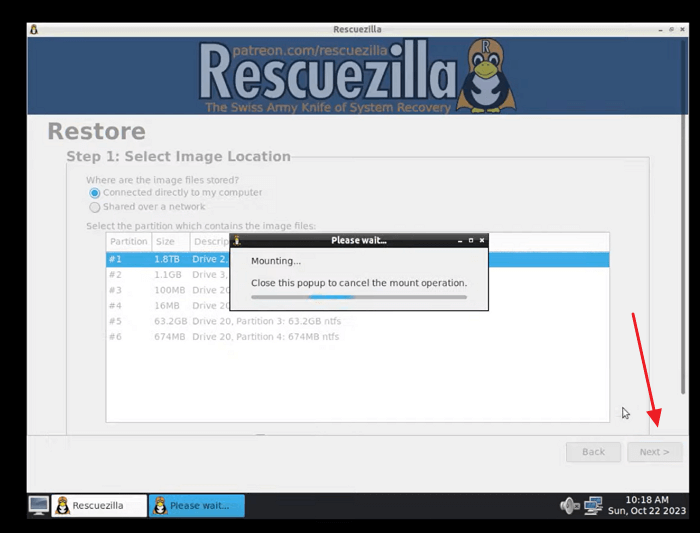
Step 4. The software will now show you the list of available storage devices so you can choose the one with the system image. In this case, select the 64GB USB drive where you unzipped your system image file to tap "Next."
🎁You may be interested: How to Use Rescuezilla Clone to Smaller Disk
Step 5. On the following screen, opt for the right system image and hit the "Next" button to select the targeted location for system restoration. After deciding upon the best location, utilize "Next" to select the required partition and confirm the restore configuration to start the process.

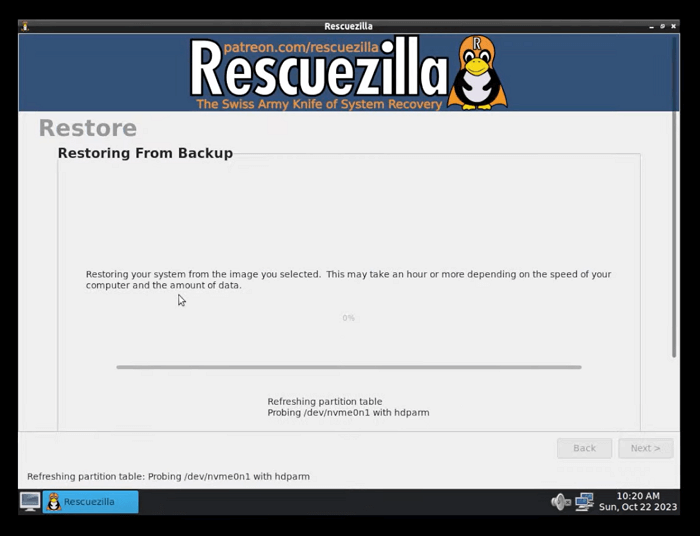
Step 6. It will take some time to complete the backup restoration, depending on the size of your system image. Once it is complete, you will be able to access your lost data after rebooting the computer by removing the attached USBs.
Share the post on social media to help others know more about Rescuezilla restore system image.
Easier Way to Copy System with Rescuezilla Alternative
While Rescuezilla restore system image is a powerful tool, some users might prefer an even simpler and more streamlined solution for backup and creating system images. Explore EaseUS Disk Copy, a robust alternative that offers an intuitive interface and comprehensive features for hassle-free system image creation. This advanced software lets you create a backup of your entire system data on an external hard drive to secure data.
A notable feature of EaseUS Disk Copy is its capability to directly clone an entire hard drive or partition. This function enables the creation of a system image, which can be invaluable for recovery purposes. It supports all major file systems and storage devices to ensure compatibility with various setups. Additionally, this software offers sector-by-sector cloning, which copies every sector of your disk, ensuring a replica of your system.
Windows 11/10/8/7
Extensive Guidelines to Create System Image via EaseUS Disk Copy
By following these steps, you can easily create a system image using EaseUS Disk Copy, providing an efficient alternative to Rescuezilla:
Before cloning:
- If your computer has only one slot, connect the target disk to your machine via a USB-to-SATA/NVMe adapter.
- If your computer has an extra slot, install the target disk into the empty slot properly, and make sure it is compatible.
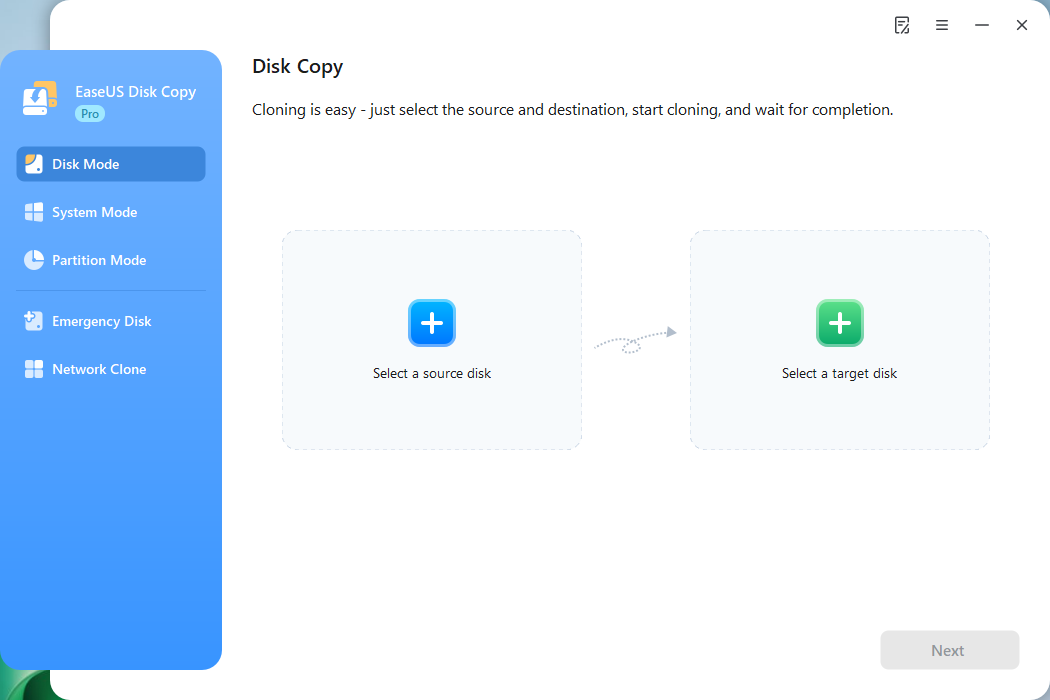
Step 1. Launch EaseUS Disk Copy and choose Disk Mode.
Install EaseUS Disk Copy cloning software on your Windows computer, then launch it and select Disk Mode from the left panel.
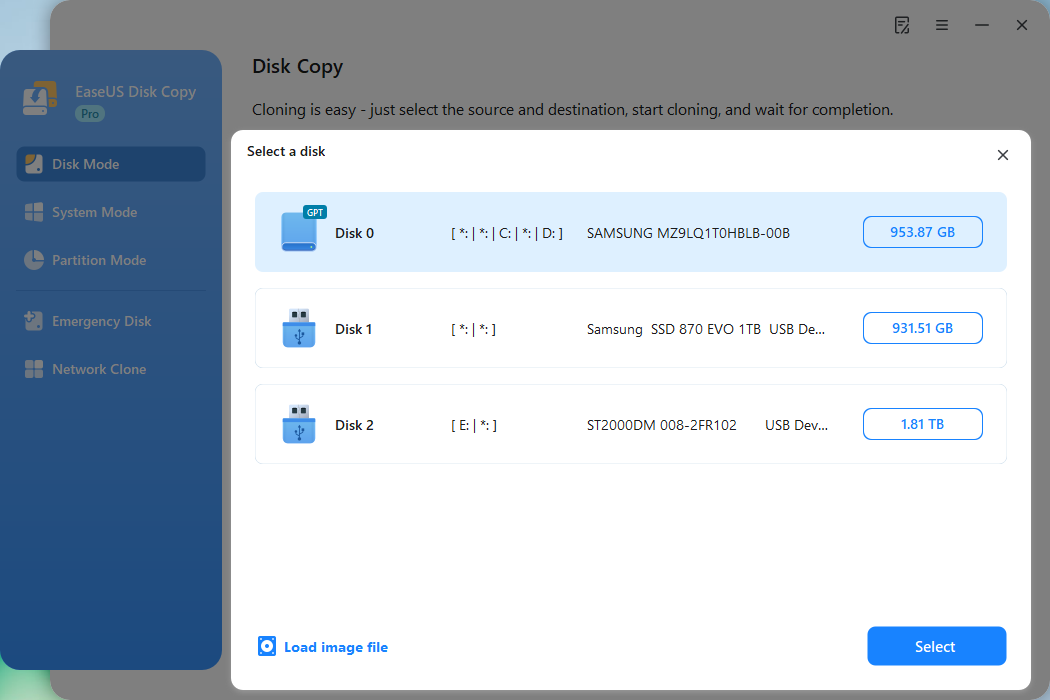
Step 2. Select the source drive.
Select the drive you want to copy, then click Select.
Step 3. Choose the target disk.
Choose the disk that you want to clone data to, and click Select. Note that the used space of the source disk should be less than the target disk capacity.
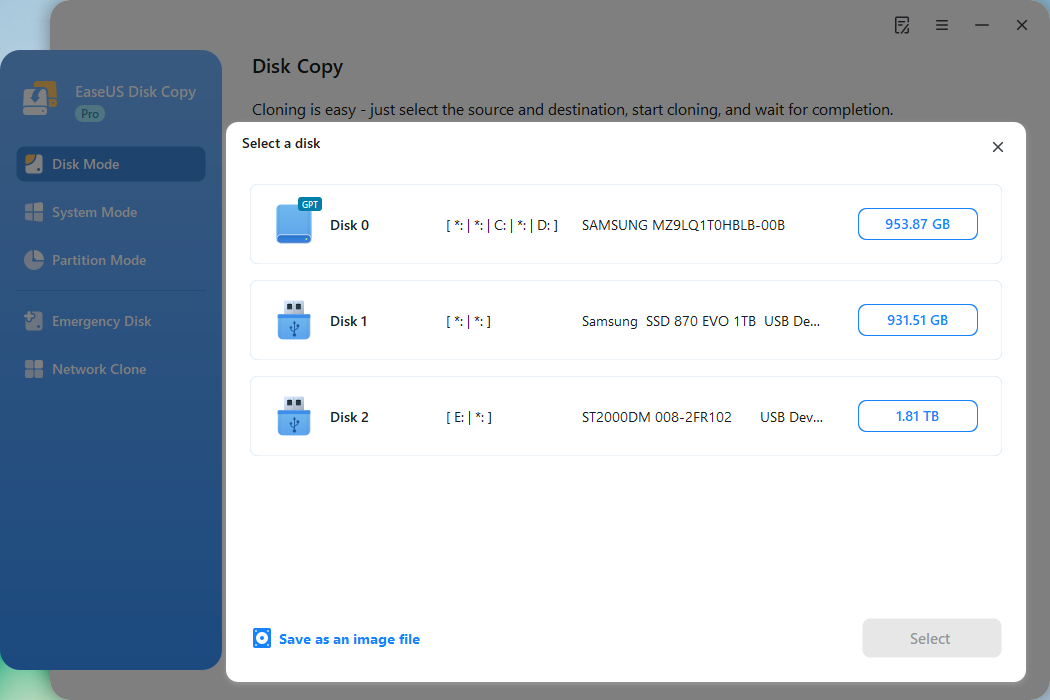
*At this step, you can also click the option "Save as an image file" to store your disk as a compressed image file, which can be restored without any data loss.
Step 4. Adjust disk layout.
Specify the target disk layout as your preference. You can choose among:
- Autofit the disk: makes some changes by default on the destination disk layout so that it can work at its best.
- Copy as the source: create a 1-to-1 copy of your source disk; the layout is the same as the source disk.
- Edit disk layout: allows you to manually resize/move the partition layout on this destination disk.
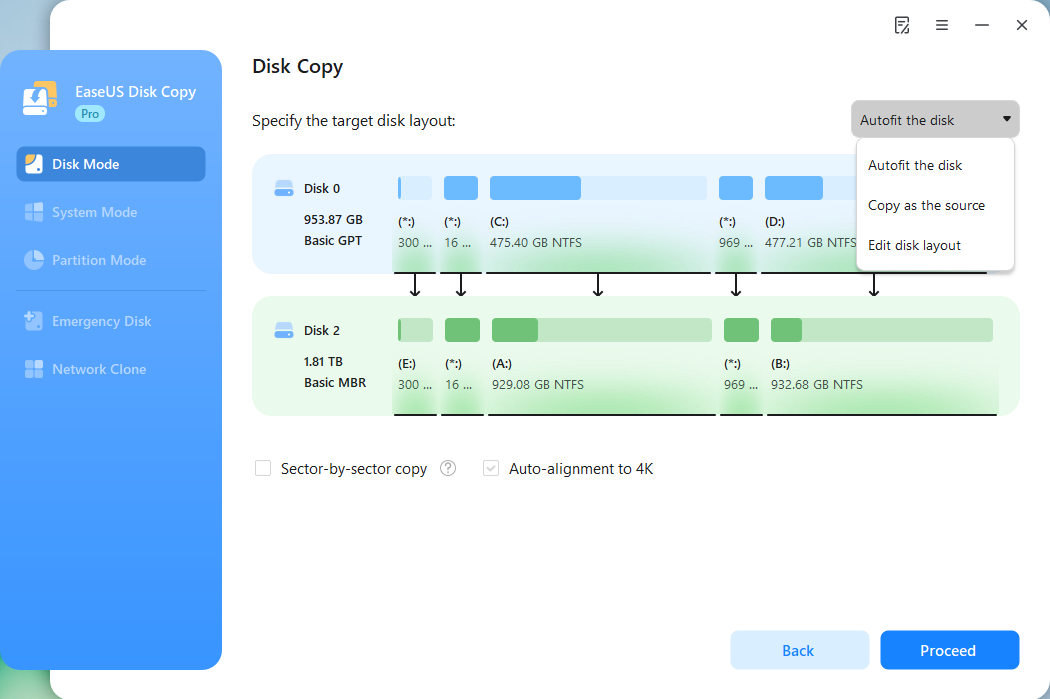
*If the target disk is an SSD, the option "Auto-alignment to 4K" will be checked automatically to optimize the performance of your SSD.
Step 5. Start cloning.
Click Proceed, and a message will appear, warning you that data will be lost. Confirm the message by clicking Continue.
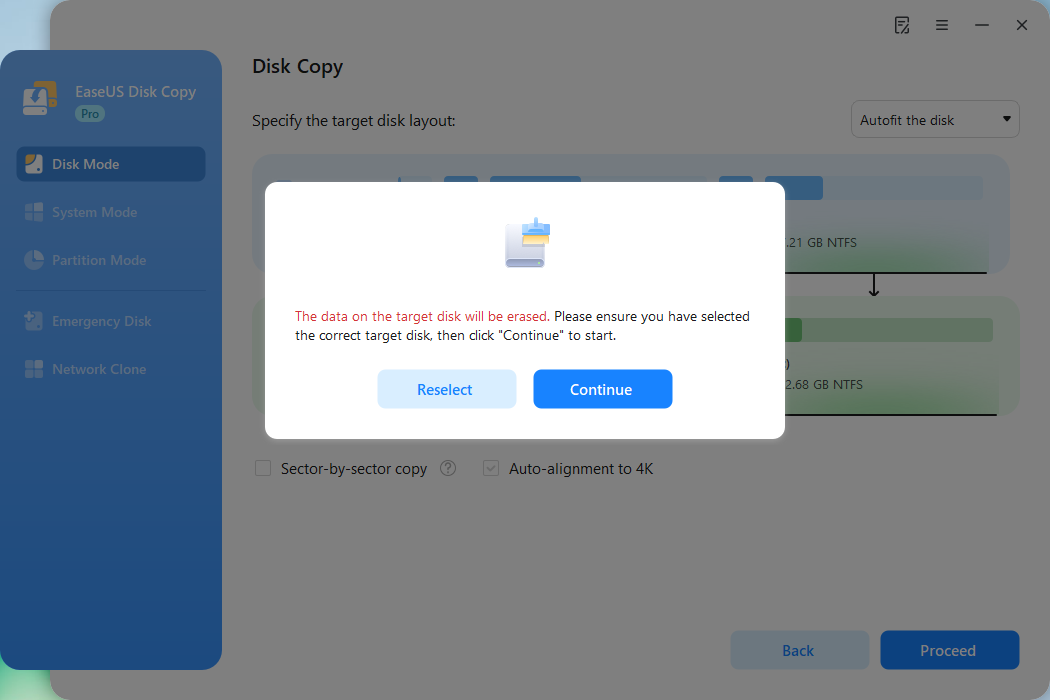
Now, it will start executing the cloning task.
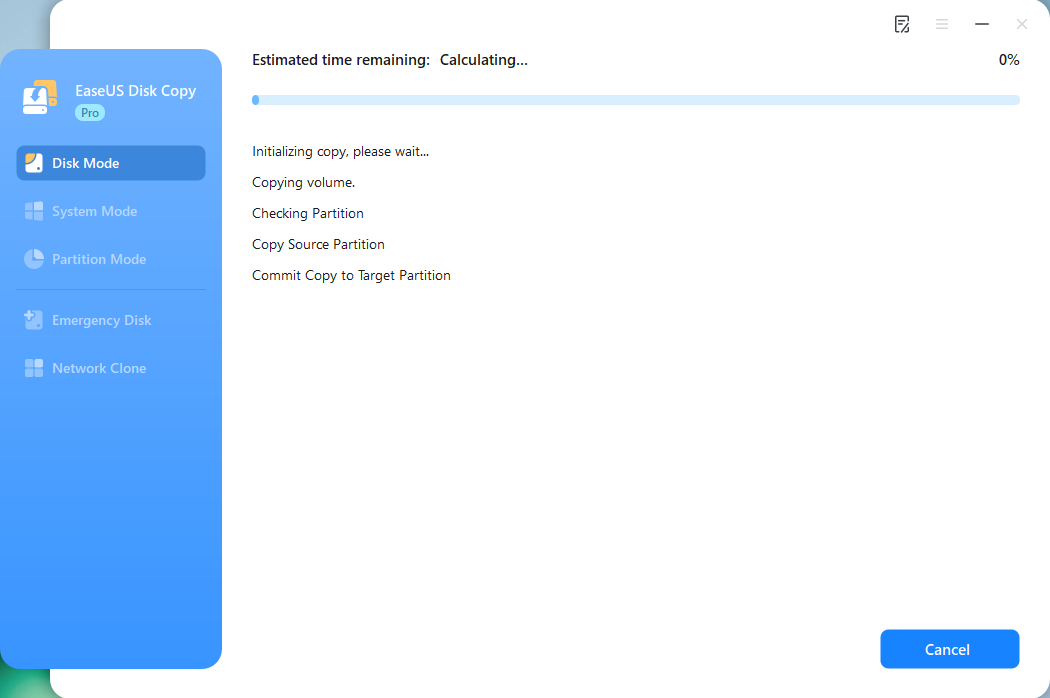
*The time it takes to clone a hard drive depends on how much data is on the source disk, and it will also be affected by the disk types, USB connection, etc.
After cloning, you'll get an exact copy of your Windows operating system, allowing you to replace the failed hard drive quickly with zero downtime.
Share the post on social media to help others know more about Rescuezilla restore system image.
Written In the End
In conclusion, safeguarding your computer through effective system image backups is essential for ensuring data integrity and quick recovery from unexpected issues. This article has outlined the importance of system image backups and provided a detailed guide on Rescuezilla restore system image. However, for those seeking an even more straightforward and intuitive solution, EaseUS Disk Copy offers an excellent alternative. Its sector-by-sector cloning feature lets you create an exact replica of your system.
Windows 11/10/8/7
FAQs about Rescuezilla Restore System Image
1. Is Rescuezilla legit?
It is a legitimate and widely respected open-source tool for creating and restoring system images. The graphical interface and robust features of Rescuezilla have garnered positive feedback from users worldwide. Therefore, it can be assured that it is a reliable choice for system backup and recovery.
2. Is Rescuezilla the same as Clonezilla?
Although both software programs perform system imaging and restoration, they differ significantly. Rescuezilla is a fork of Clonezilla that provides a graphical interface to help out newbies in system management. Conversely, Clonezilla relies on a text-based interface that presents a steeper learning curve.
3. Does Rescuezilla work on Windows?
This tool works on Windows as it operates independently of the installed operating system by booting from a live USB. This allows it to function effortlessly across all major platforms. That makes it a versatile tool for users needing to back up or restore their system regardless of the OS in use.
-
Updated by
![]()
Larissa
Larissa has rich experience in writing technical articles and is now a professional editor at EaseUS. She is good at writing articles about data recovery, disk cloning, disk partitioning, data backup, and other related knowledge. Her detailed and ultimate guides help users find effective solutions to their problems. She is fond of traveling, reading, and riding in her spare time.…Read full bio