Page Table of Contents
If you want to upgrade your PC's performance, moving your operating system (OS) to a Solid State Drive (SSD) is one of the best ways. Unlike performing a clean install copy of a Windows 10 or 11 system, EaseUS Disk Copy lets you migrate only OS to SSD without reinstalling anything.
Read this complete guide from EaseUS and know how to move OS to SSD and keep files on HDD.
Part 1. Preparations Before Moving OS
Before moving OS from HDD to SSD with EaseUS Disk Copy, comply with these necessary prerequisites to ensure a successful OS migration.
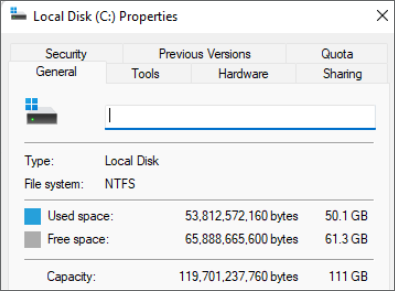
1. Check SSD size and compatibility.
(1) Ensure the target SSD has enough capacity to hold the system drive and OS-related programs & applications.
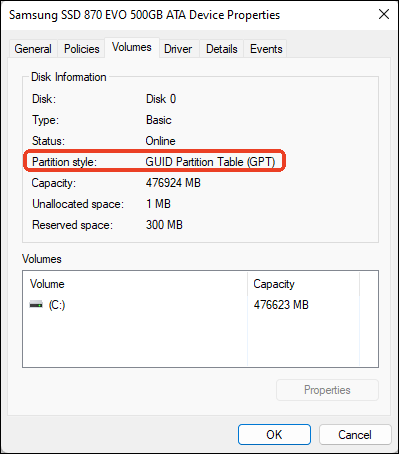
(2) Check whether the HDD and SSD use the same partition style (either MBR or GPT) before moving the OS to the SSD. Mismatched partition styles may cause boot failures after cloning. To do so,
- Right-click on This PC/My Computer > Manage > Disk Management.
- Right-click on your source HDD and select Properties > Volumes.
- Check the Partition Style field. It will display either a Master Boot Record (MBR) or a GUID Partition Table (GPT).
- Repeat the same steps for the target SSD.
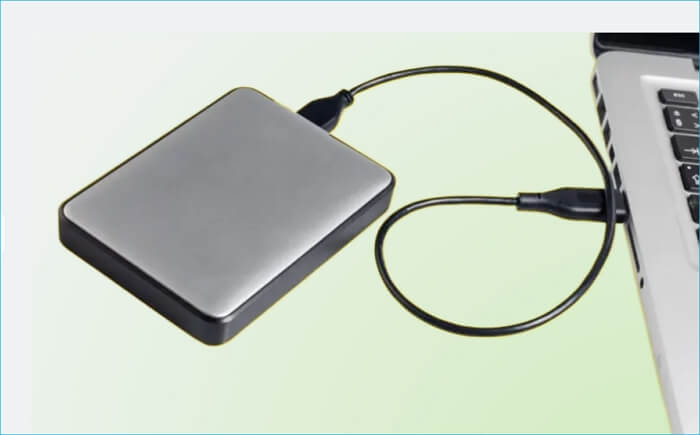
2. Install and connect the SSD to your computer correctly.
(1) Desktop Users: Open your PC case and connect the SSD to an available SATA port using a SATA cable. Ensure the power cable is also connected.

- Read also: How to Install Hard Drive in Desktop PC
(2) Laptop Users: Use a compatible external SATA-to-USB adapter to connect the SSD, or replace the optical drive (if available) with the SSD using a caddy.
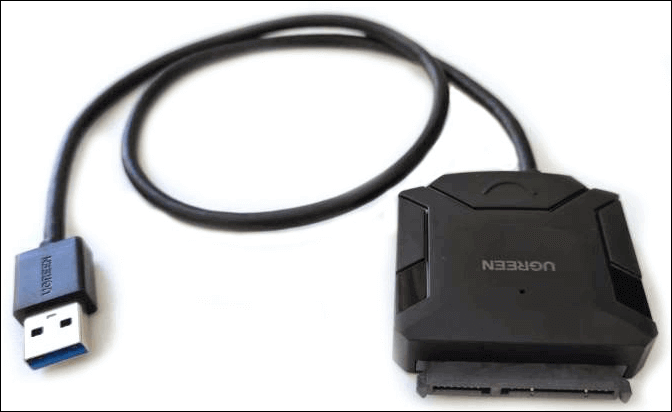
- Read also: How to Install Hard Drive in Laptop
3. Back up important data.
Although cloning preserves data integrity, it's always best to back up your important files to an external drive or cloud storage in case of unexpected issues.
4. Free up space on your current hard drive.
Move non-essential files (e.g., movies, music, and photos) on the system drive to an external drive or another partition to reduce cloned data volume and shorten the cloning time.
- Read also: What Is Taking Up Space on C Drive?
Part 2. Step-by-Step Guide During OS Cloning
Once the preparation work has been done correctly, download and install EaseUS disk cloning software on your current HDD.
You'll use this automated OS migration tool to move a computer system from HDD to SSD while keeping other files on the original disk.
Windows 11/10/8/7
See how to copy Windows OS to another drive using EaseUS Disk Copy.
Before cloning:
- Install or connect the destination disk that you want to move OS to your computer, and make sure it can be appropriately recognized.
- Ensure the target HDD or SSD has enough capacity to accommodate your system files.
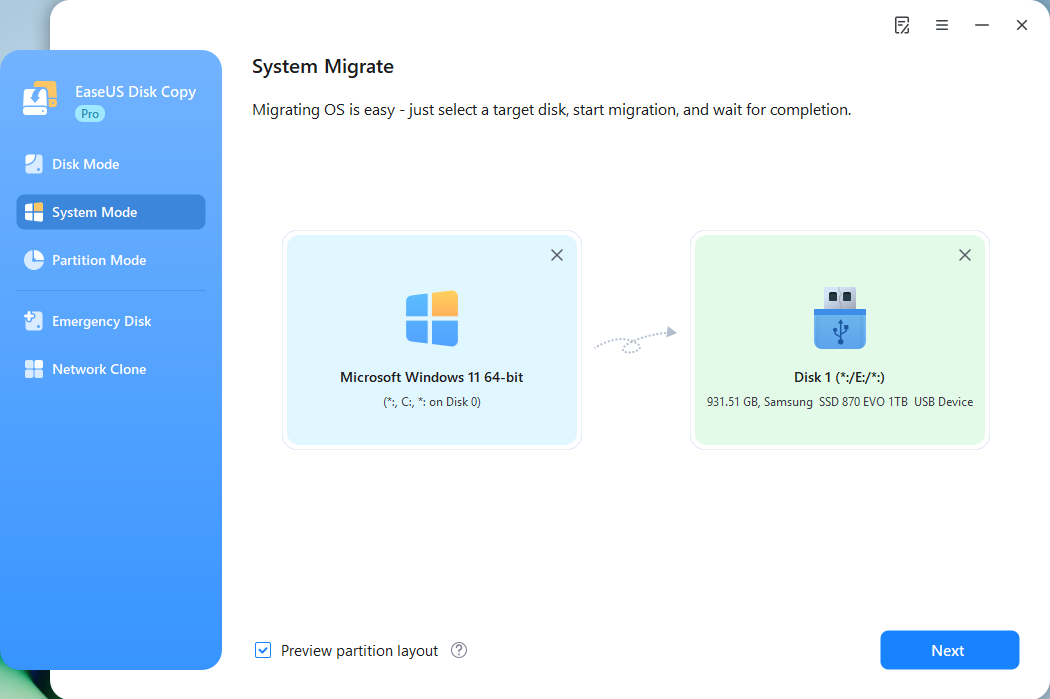
Step 1. Launch EaseUS Disk Copy and choose System Mode.
Install EaseUS Disk Copy system migration software on your computer, launch it, and choose System Mode. EaseUS Disk Copy will select the current system you use by default, including all system-related files and boot sectors.
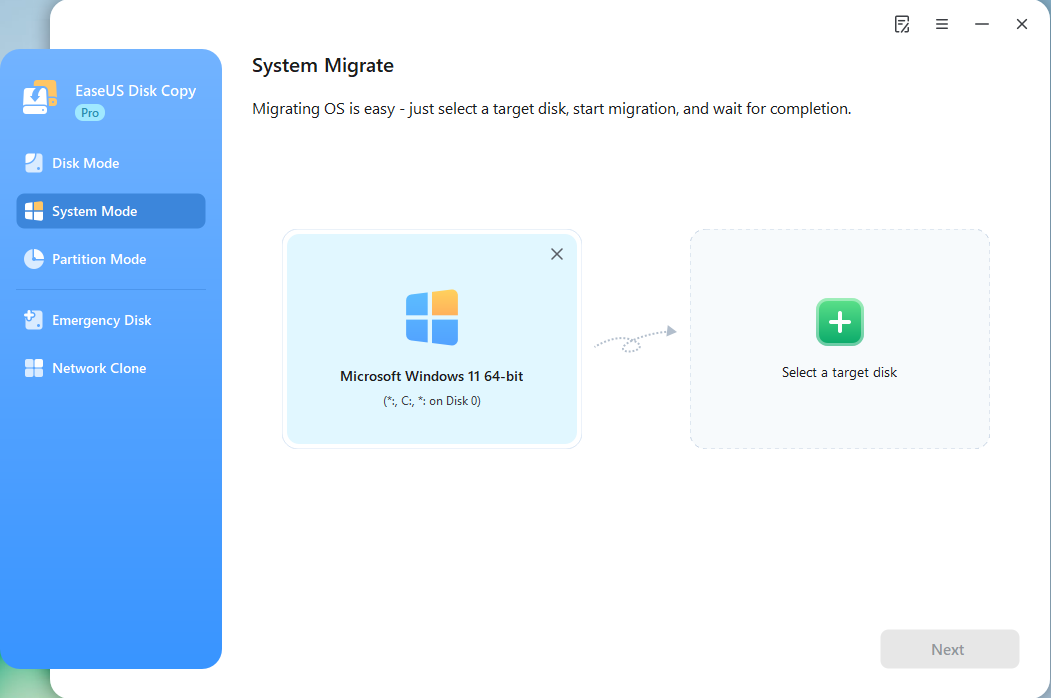
*If you apply dual-boot system, you can select another system by yourself.
Step 2. Select the target HDD/SSD.
Choose the destination HDD/SSD that you want to move OS to.
Step 3. Adjust target disk layout.
Specify the target layout as your preference. You can choose among:
- Autofit the disk: makes some changes by default on the destination disk layout so that it can work at its best.
- Copy as the source: create a 1-to-1 copy of your source disk, the layout is the same as the source disk.
- Edit disk layout: allows you to manually resize/move the partition layout on this destination disk.
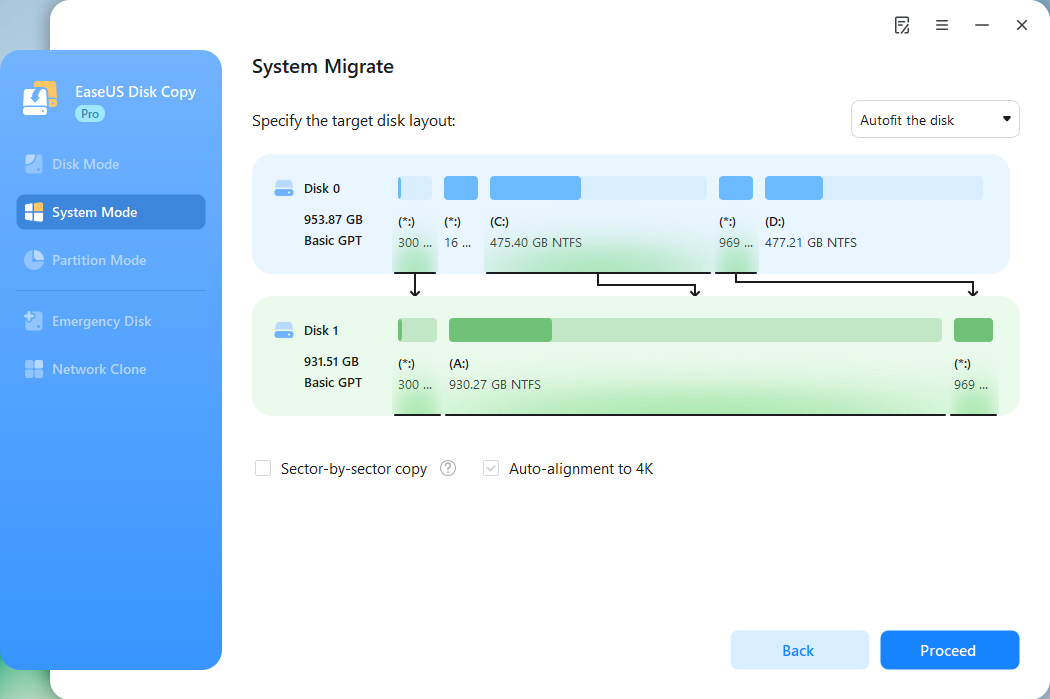
*The option Auto-alignment to 4K will be checked automatically to optimize the performance of your SSD.
Step 4. Start cloning OS.
Click Proceed, and a message will appear, warning you that data will be lost. Confirm the message by clicking Continue. Now, it will start cloning OS to the new disk.
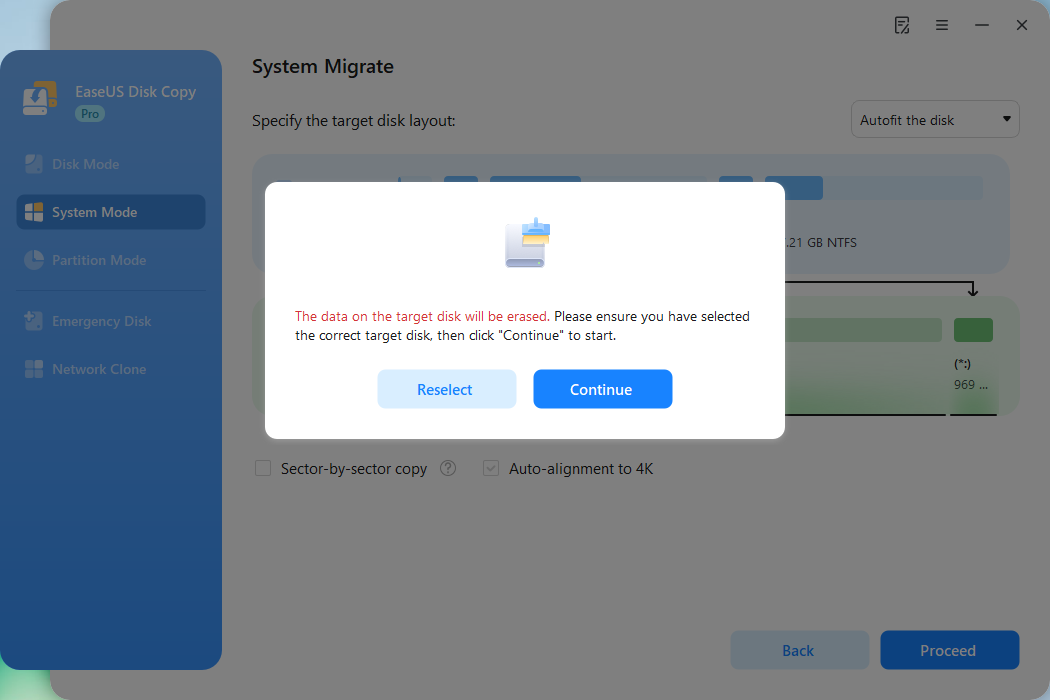
Now, it will start cloning OS to the new disk.
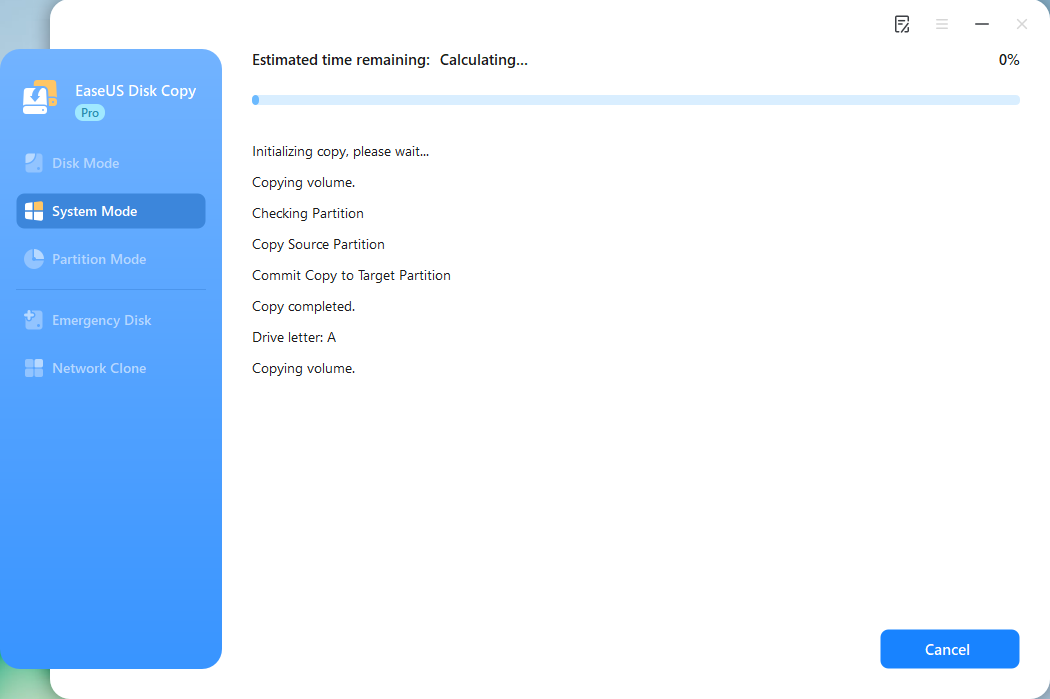
💡Notes:
- For most OS migrations (e.g., ~100 GB of data), the process typically takes 10-30 minutes with modern SSDs. Larger data sets or slower drives may extend this to over an hour.
- It is crucial to ensure your computer remains plugged into the power supply throughout the process to prevent unexpected interruptions or data corruption.
Part 3. Post-Execution Tasks after OS Migration
After migrating the operating system to the SSD, the remaining files on the original HDD will not be deleted or transferred to the SSD. Instead, these files will stay on the HDD, which can still be used as a secondary storage drive for non-system data.
Check for more information on how to manage the SSD drive and retain the original HDD.
⏩How to Manage the SSD Drive
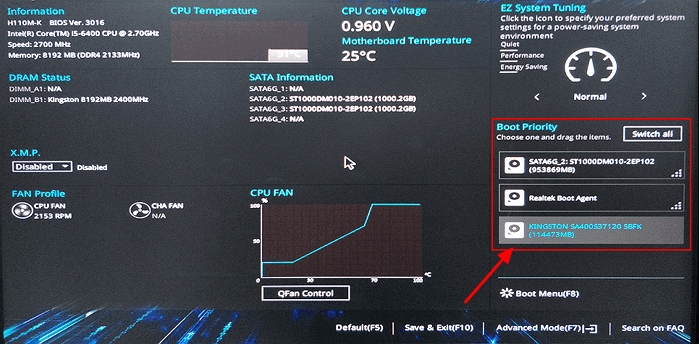
1. Set the SSD as the Boot Drive
Step 1. Restart your computer and enter the BIOS/UEFI by pressing the appropriate key (e.g., F2, F12, Del, or Esc) during boot.
Step 2. Navigate to the boot order settings and set the SSD as the primary boot device.
Step 3. Save the changes and exit the BIOS.
2. Test the Cloned OS
Boot into Windows from the SSD and verify that the OS runs smoothly. Check if all applications and settings are intact.
3. Optimize SSD Performance
Enable TRIM to improve SSD longevity and performance. TRIM is usually enabled by default.
4. Check for SSD Firmware Updates
Visit the SSD manufacturer's website to check for any available firmware updates to enhance performance and compatibility.
⏩How to Use the HDD
1. Delete Old System Files
After confirming the SSD is booting properly, you can delete system files on the HDD, such as the Windows folder, Program Files, and Program Files (x86) folders.
2. Set the HDD as a Storage Drive
Reorganize the HDD to store large files and less frequently used applications. Create folders such as Documents, Media (for videos, music, and photos), Games, or Archives.
3. Update File Paths
Redirect default folders (e.g., Documents, Downloads, Pictures) to the HDD to save space on the SSD.
To do so, right-click on the folder (e.g., Documents) > Properties > Location > Move, and choose a folder on the HDD.
Part 4. Troubleshooting Tips
1. Cloned SSD Won't Boot
Double-check the boot order in the BIOS and ensure the SSD is connected properly.
- Read also: Cloned Hard Drive Won't Boot?
2. Insufficient Space on SSD
Use space free-up tools to clean up unnecessary files or resize partitions.
- Read also: How to Free Up Space on SSD in Windows 11/10/8/7
3. Performance Issues
Run a disk optimization tool or check for driver updates.
- Read also: How to Improve SSD Read and Write Speed
-
Updated by
>Jean is recognized as one of the most professional writers in EaseUS. She has kept improving her writing skills over the past 10 years and helped millions of her readers solve their tech problems on PC, Mac, and iOS devices. …Read full bio