
Why Restore a Server to VMWare
Virtualization is an effective way to increase IT agility, flexibility, and scalability, while also saving costs. It allows you to create virtual applications, servers, storage, networks, desktops, and more without the need to reinstall the operating system or applications.
This article will show you how to restore a Server system to VMware Workstation in an efficient manner. 
Backup and Restore with EaseUS Todo Backup
EaseUS Todo Backup is a highly comprehensive and user-friendly tool that provides a reliable backup solution for both personal and enterprise customers.
Kindly refer to the detailed steps below with accompanying screenshots.
1. Use Todo Backup to take a system backup of the physical computer. 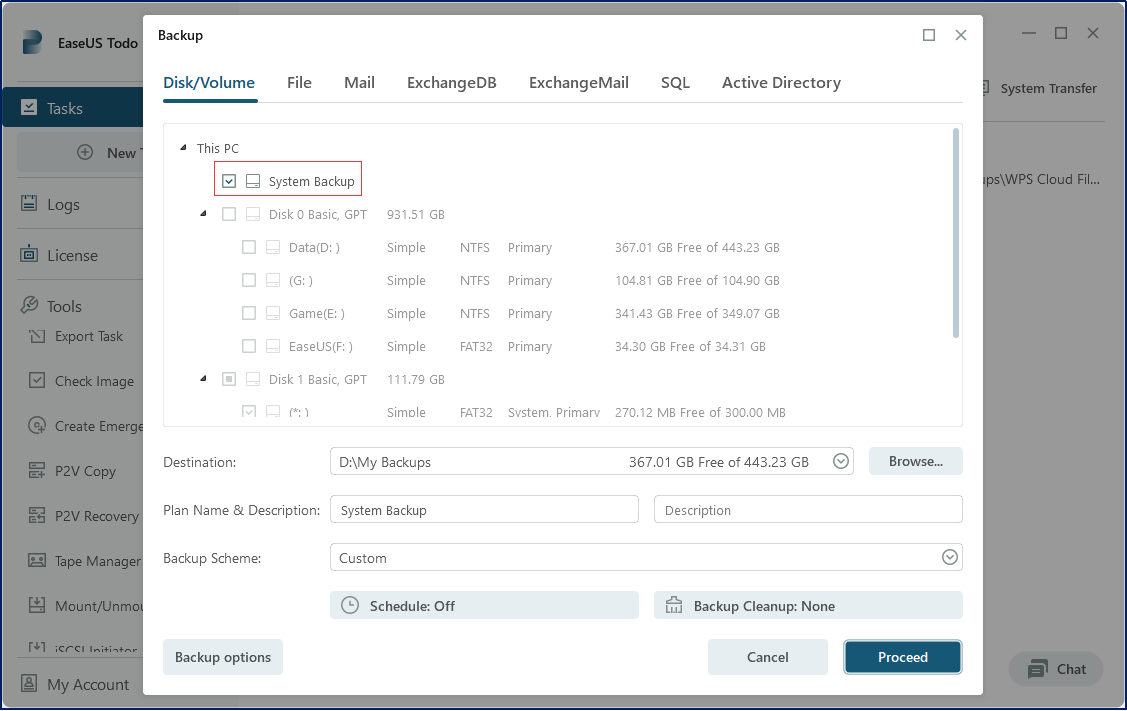 2. Create an emergency disk and save the ISO file on the physical machine.
 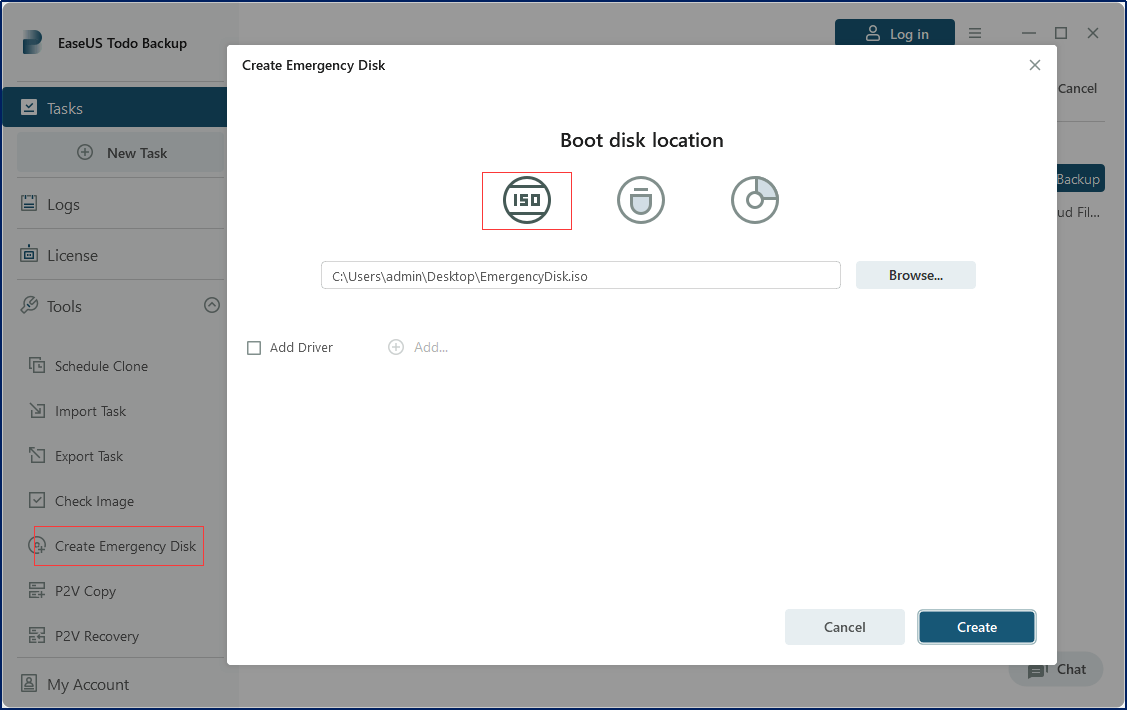 3. Open VMware Workstation and create a new virtual machine using the Typical Configuration option and a blank hard drive.
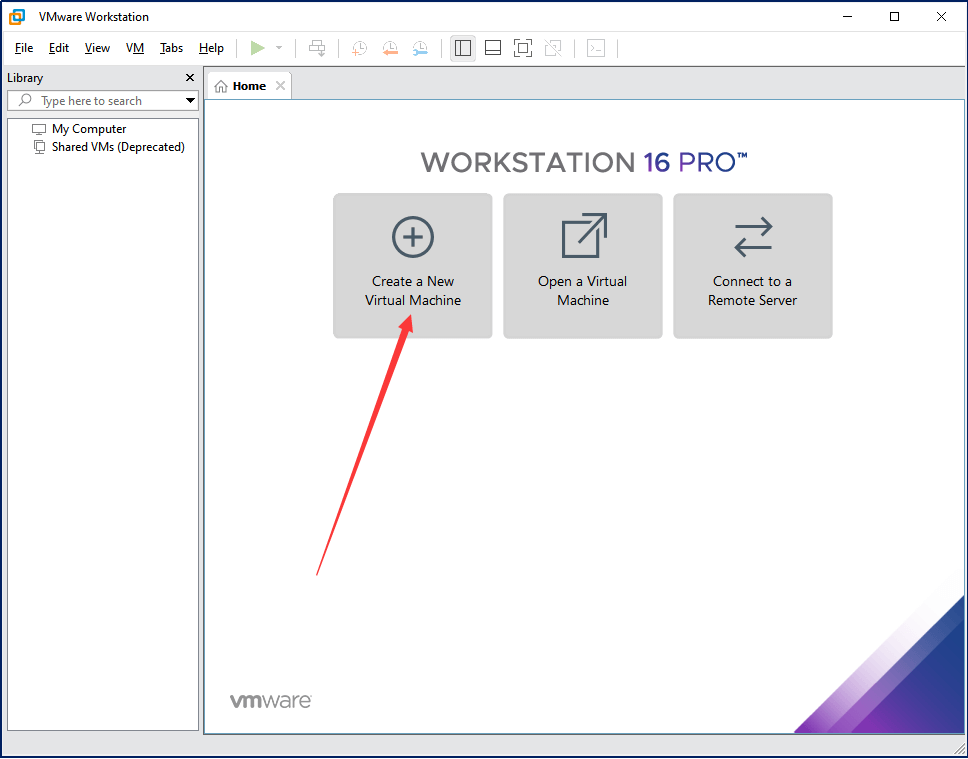
 4. Choose the operating system, version, name, file location, and disk size for the new virtual machine.
 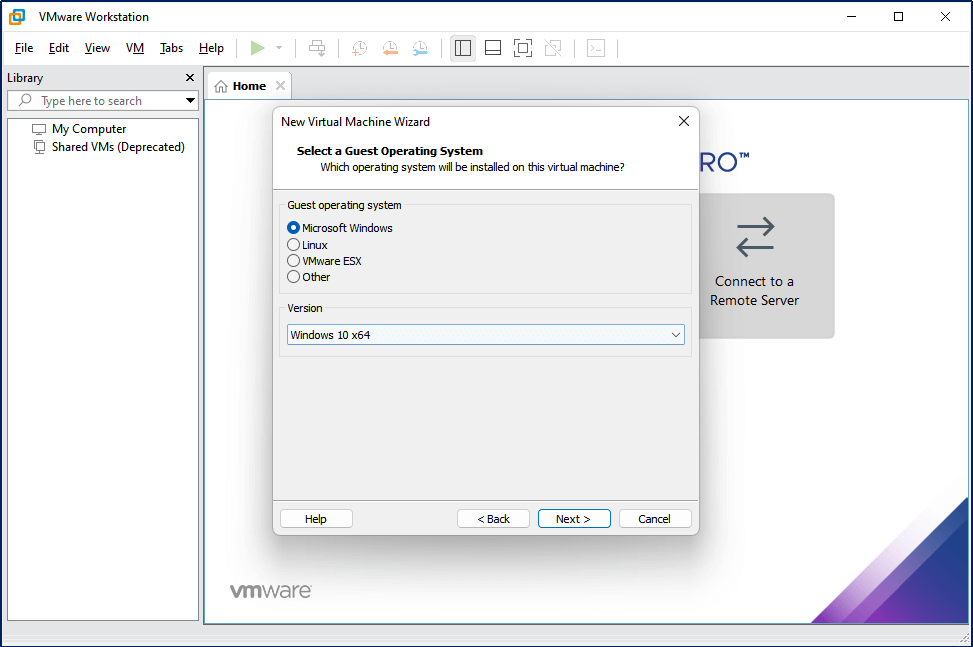 5. Once the virtual machine is created, go to Settings and set the computer to boot from the ISO image created by Todo Backup.
 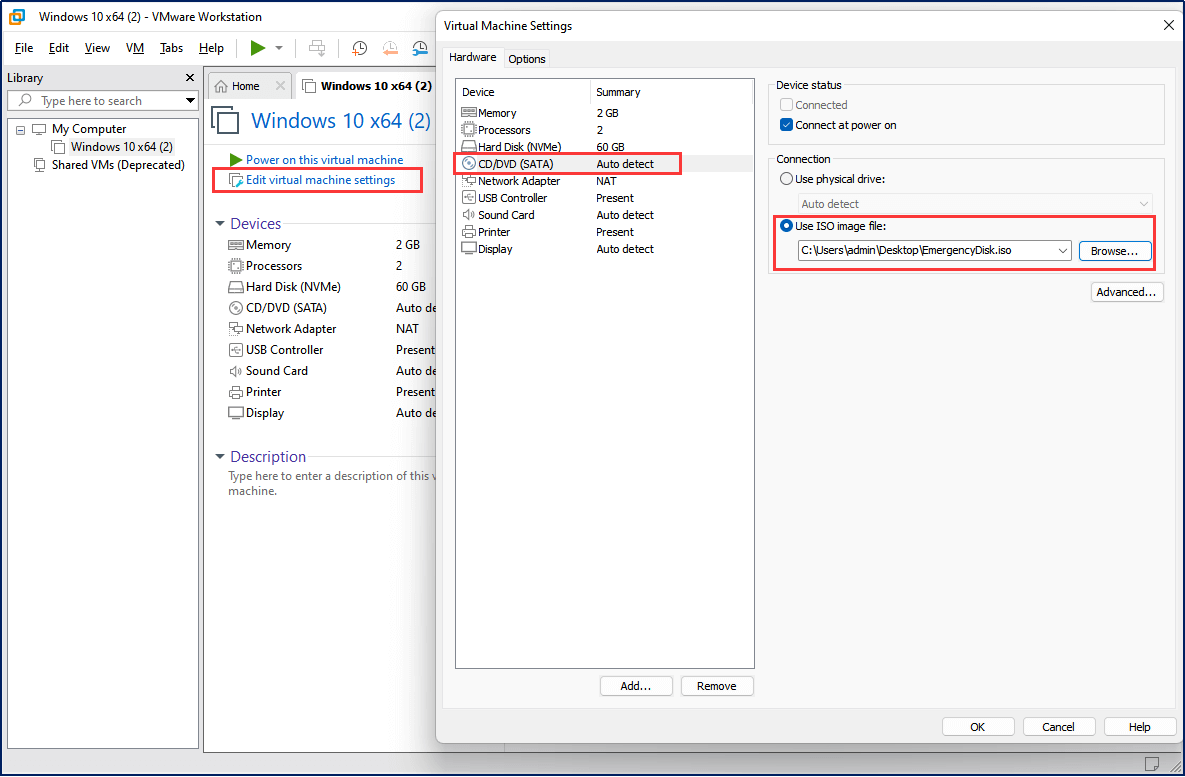 6. Power on the virtual machine and press any key to boot from the CD or DVD in the first few seconds.
 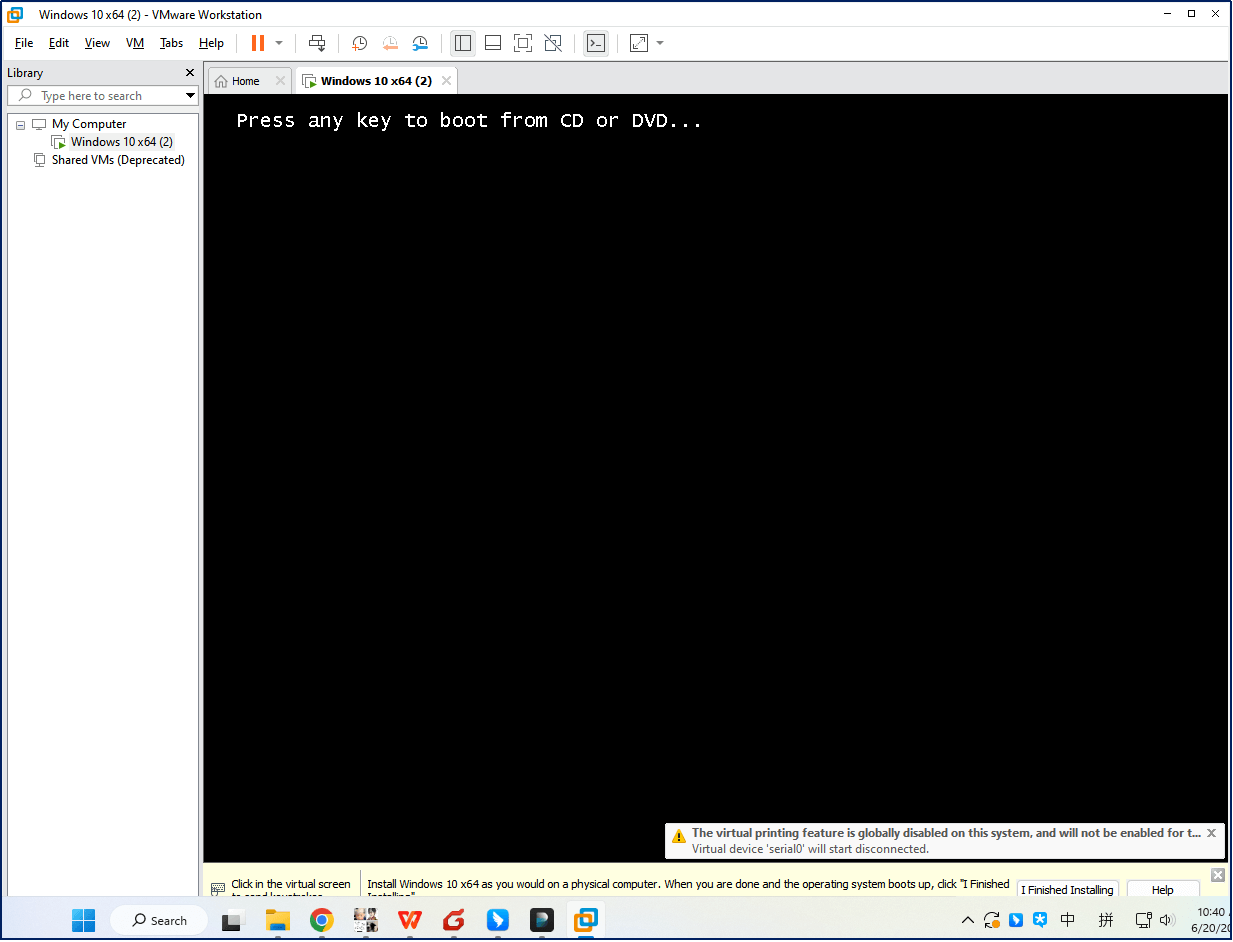 7. The virtual machine will boot into the WinPE environment of Todo Backup. Click on System Transfer in the right corner to start the restoration process.
 8. Browse to find the system backup image which can be saved in the USB drive, external disk, Network drive or even EaseUS Cloud.
 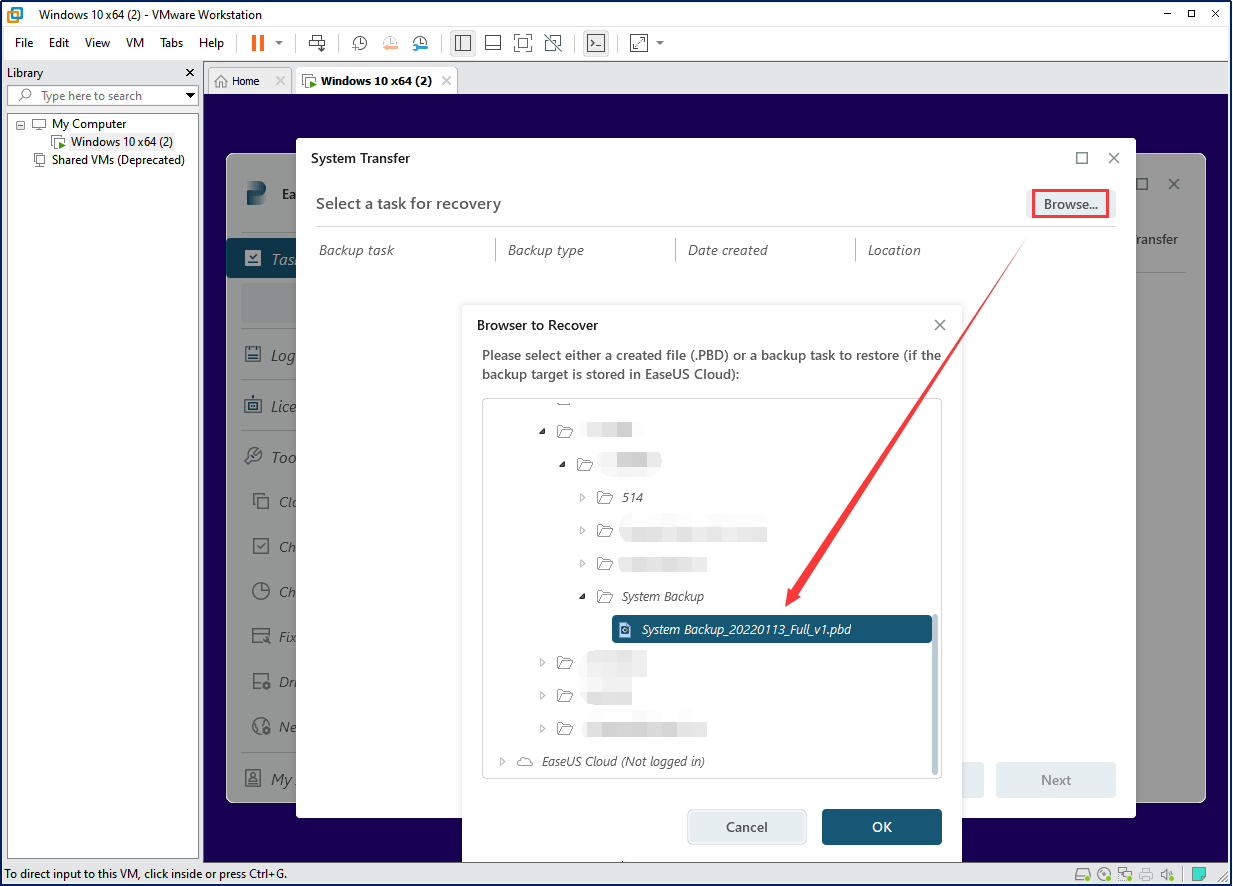 9. Select the target disk, and proceed with the restoration process.
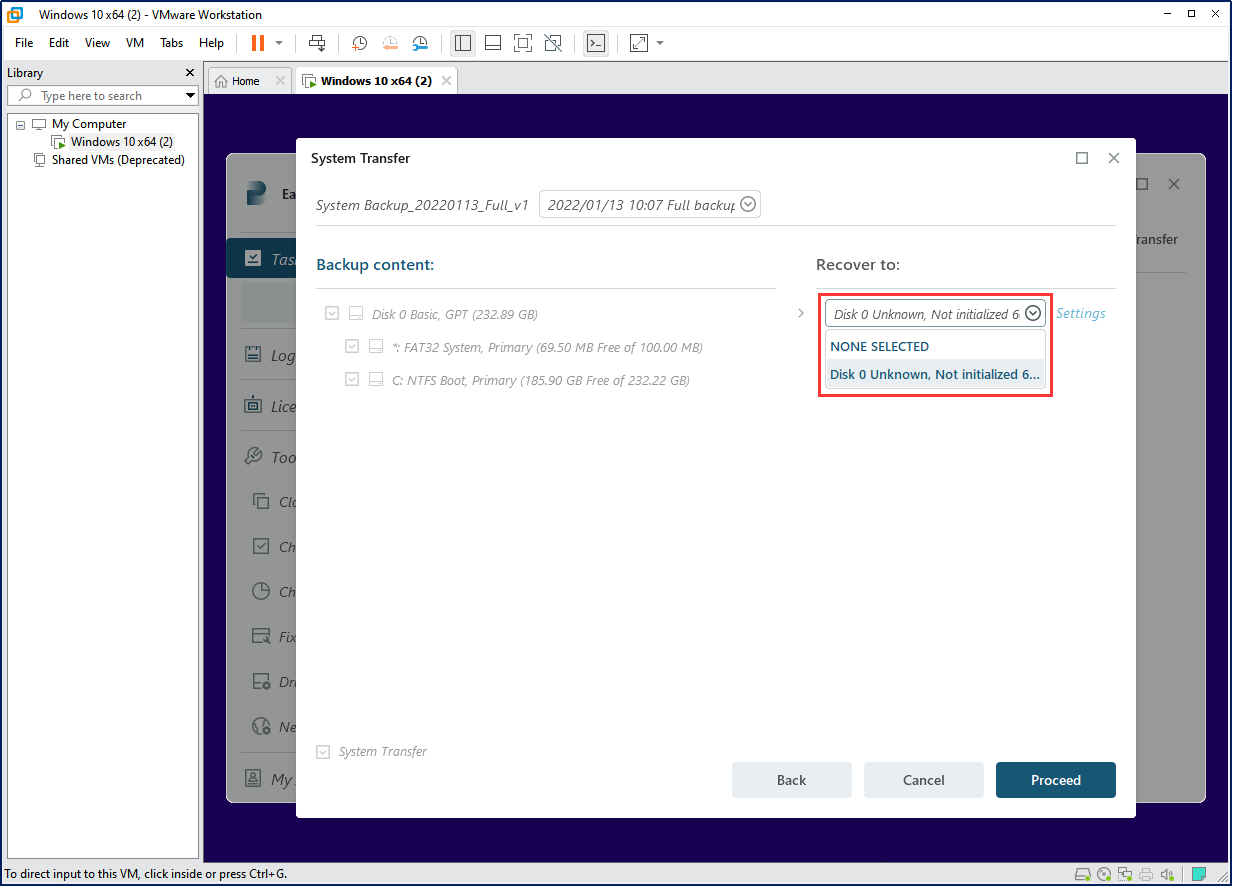
Create a Virtual Machine from a Physical Machine in VMware
When you virtualize a physical machine, you capture all of the applications, documents, and settings on the physical machine in a new virtual machine. Workstation Pro must be running on a Windows host system to use this feature. Here is the guide.
1. Power on the physical machine that you want to virtualize.
2. On the Windows host system, in Workstation Pro, select File > Virtualize a Physical Machine.
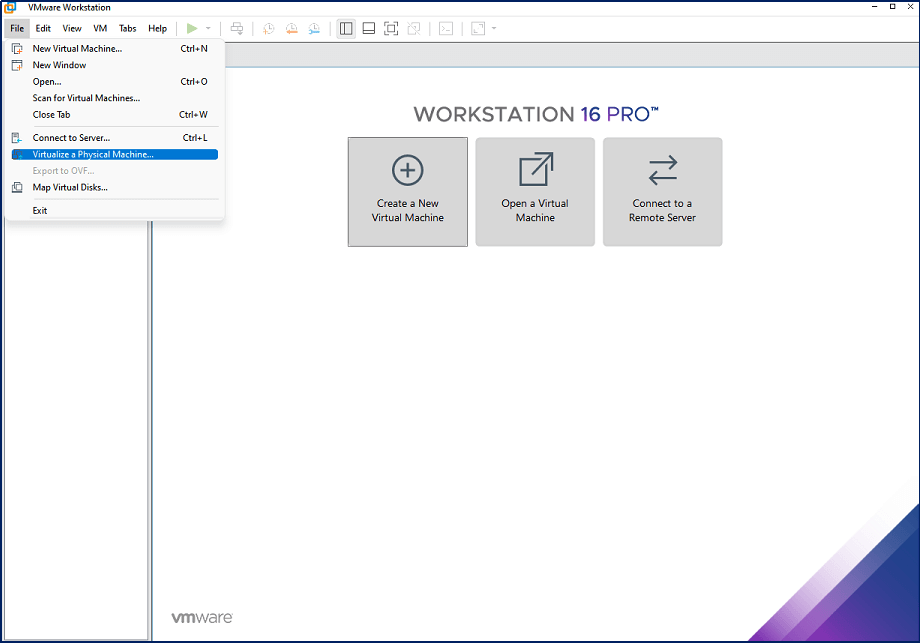 If you have never virtualized a physical machine in Workstation Pro, you need to download and install VMware vCenter Converter Standalone. After the VMware vCenter Converter Standalone installation is finished, you must restart the virtualization wizard.
3. Type the hostname or IP address, user name, and password for the physical machine that you want to virtualize.
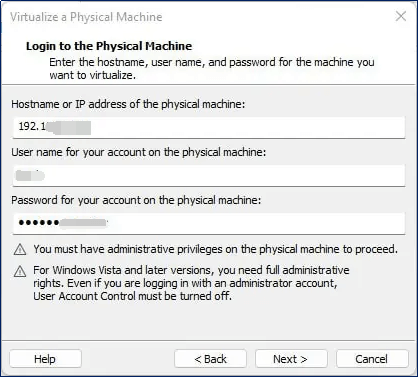 You must use the Administrator account or a user account that is a member of the local Administrators group.
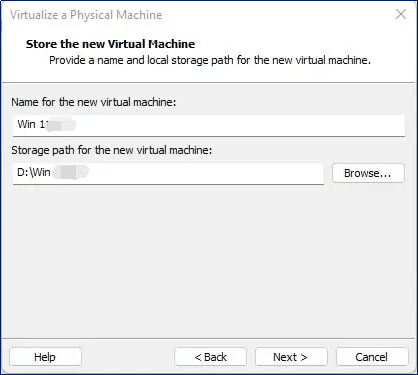
4. Type a name for the new virtual machine and specify a location on the host system in which to store the virtual machine files.
 5. Type the user name and password for your user account on the host system.
6. Click Finish to create a virtual machine from the physical machine.
The amount of time required to create the virtual machine depends on the size of the hard disk on the physical machine.
Virtualize a Server With vCenter Converter
As stated, you can virtualize a physical Windows, Mac, or Linux machine with vCenter Converter Standalone. With all that said, here are the necessary steps:
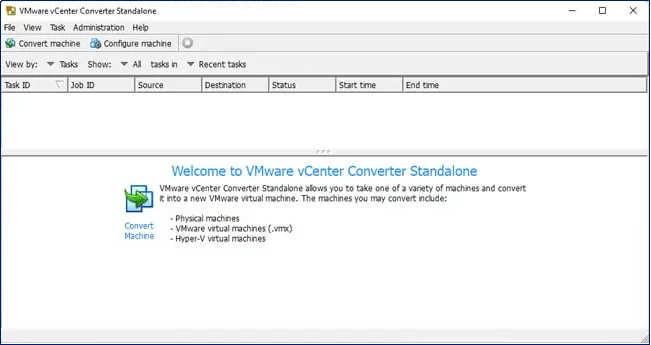
1. Launch vCenter Converter Standalone and click on Convert Machine. Alternatively, select File > New > Convert Machine.
 2. In the Select source type menu, pick Powered on. Powered off allows you to convert existing VMs to VMDK, but as we are trying to virtualize a physical machine, it is not relevant to us at the moment.
3. In the Specify the powered-on machine section, we'll select This Local Machine and press Next for this tutorial. The other options allow you to convert a remote machine by specifying its IP and credentials. 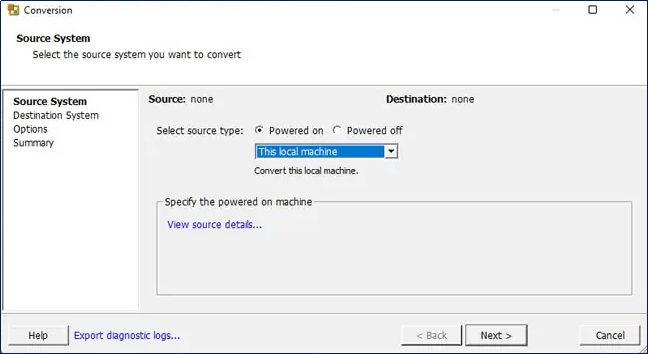 4. Select VMware Workstation or other VMware virtual machine from the Select Destination Type menu.
5. In the Select VMware product menu, pick the appropriate VMware version. 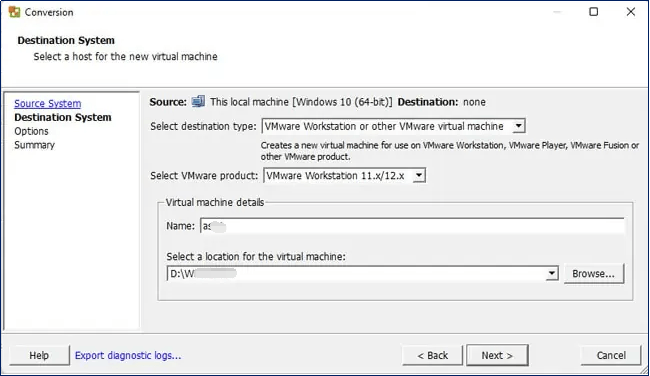 6. Name the VM, click on Browse, and select the location to save the VM to.
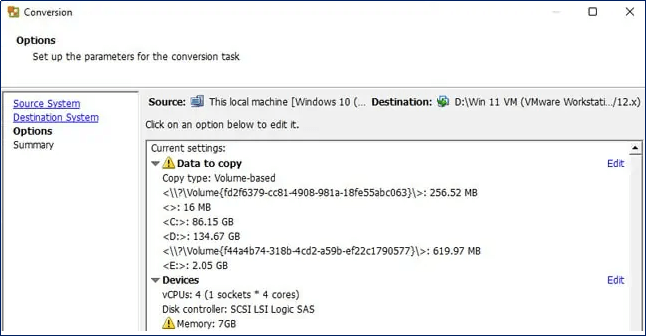
7. If you want to specify the partitions to convert, click on Edit in the Data to Copy. Otherwise, press Next.
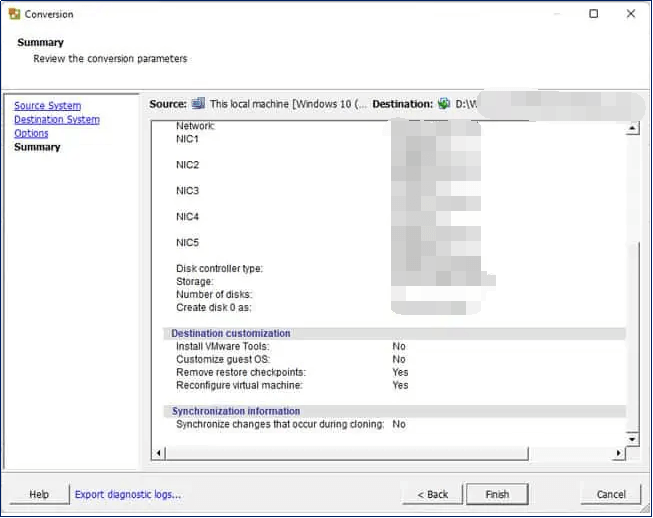
 8. Review the conversion parameters one last time, and if this is what you want, press Finish.
 9. vCenter Converter Standalone will now copy the machine's contents into a virtual disk file (.vmdk). After the VMDK is created, you can use it to create a virtual machine.
Conclusion
In short, it is easy and intuitive to virtualize a physical Windows Server and make the system bootable inside a virtual machine with the help of EaseUS Todo Backup.
How to Restore Server to VMware FAQs:
1. What are the advantages of virtualization over physical?
The benefits of server virtualization are:
Improved server reliability and availability.
Lower total operational cost.
More efficient utilization of physical servers.
More efficient utilization of power.
2. How do I restore a server using VMware snapshot?
Select Virtual Machine > Snapshots.
Select the snapshot to restore.
Click Restore.
Click either Save to save a snapshot of the current state before you restore the virtual machine to the selected snapshot state, or Don't Save a snapshot. The virtual machine will be restored to the state that the selected snapshot captured.
3. Can I restore a Todo Backup image to virtual machine?
You can directly restore an EaseUS disk/backup image to virtual machine with P2V Recovery. This option can be found in EaseUS Todo Backup.
Was This Page Helpful?
Updated by Gap
Gap has been working as an experienced data backup and security engineer at EaseUS for over 10 years, focusing on working with clients to assess needs and implemented procedures and tasks for appropriate backup solutions.
-
Taking everything into consideration, we can say that EaseUS Todo Backup Home can offer you a little extra sense of security with a set of advanced tools. The interface provides quick adaptation, every process guiding you all the way through so you don't get stuck or further damage your system rather than keeping it safe.
Read More -
EaseUS Todo Backup Free lets you create backups of your important files or your entire computer through its streamlined interface. Just choose the backup type you'd like to get started, and let the program do the reset.
Read More -
EaseUS includes all the features I expect from backup software like versioning, incremental backups, and scheduling. For more advanced users, EaseUS allows you to install a pre-boot environment onto your hard drive so you can use it to restore files without burning a CD or putting it on an external USB drive.
Read More
Related Articles
-
Two Methods to Backup SQL Server Database to Local Machine
![author icon]() Gap/2024/04/17
Gap/2024/04/17 -
Difference Between VM Snapshots vs Backups
![author icon]() Gap/2024/06/18
Gap/2024/06/18 -
How to Backup All Computers on Network
![author icon]() Gap/2023/07/20
Gap/2023/07/20 -
Securing Your Business with the Best Data Center Backup Software
![author icon]() Gap/2024/02/29
Gap/2024/02/29
![]()
EaseUS Todo Backup
Smart backup tool for your files and entire computer in Windows 10/8/7.
Install Windows on Multiple Computers at Once? No Problem!
Learn how to install Windows 11/10/7 and special programs/software on a batch of computers. Use 10 minutes to do the 10 hours work without making a single mistake!
Get Free Solution!