-
![]() Undo DiskPart Clean: Recover Data Lost by DiskPart Clean
Undo DiskPart Clean: Recover Data Lost by DiskPart Clean July 23,2026
 6 min read
 -
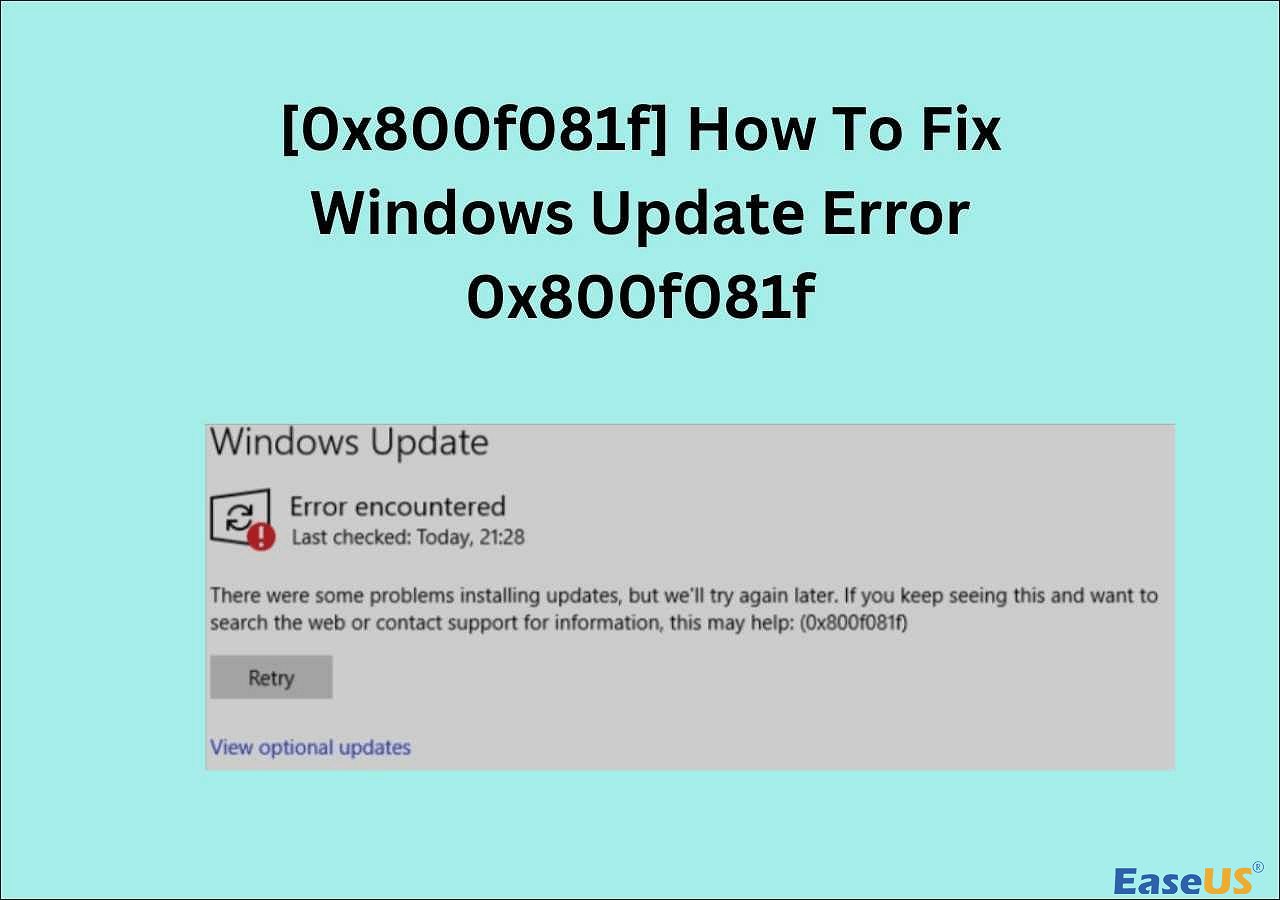
![]() Fix Windows Update Error 0x8007000d in Windows 10 [Easy & Secure]July 23,20266 min read
Fix Windows Update Error 0x8007000d in Windows 10 [Easy & Secure]July 23,20266 min read -
![]() Fix You Need to Format the Disk in Drive | No Data LossJuly 23,20266 min read
Fix You Need to Format the Disk in Drive | No Data LossJuly 23,20266 min read -
![]() BSOD After Installing SSD | Solved Without Losing DataJuly 23,20266 min read
BSOD After Installing SSD | Solved Without Losing DataJuly 23,20266 min read -
![]()
-
![]()
-
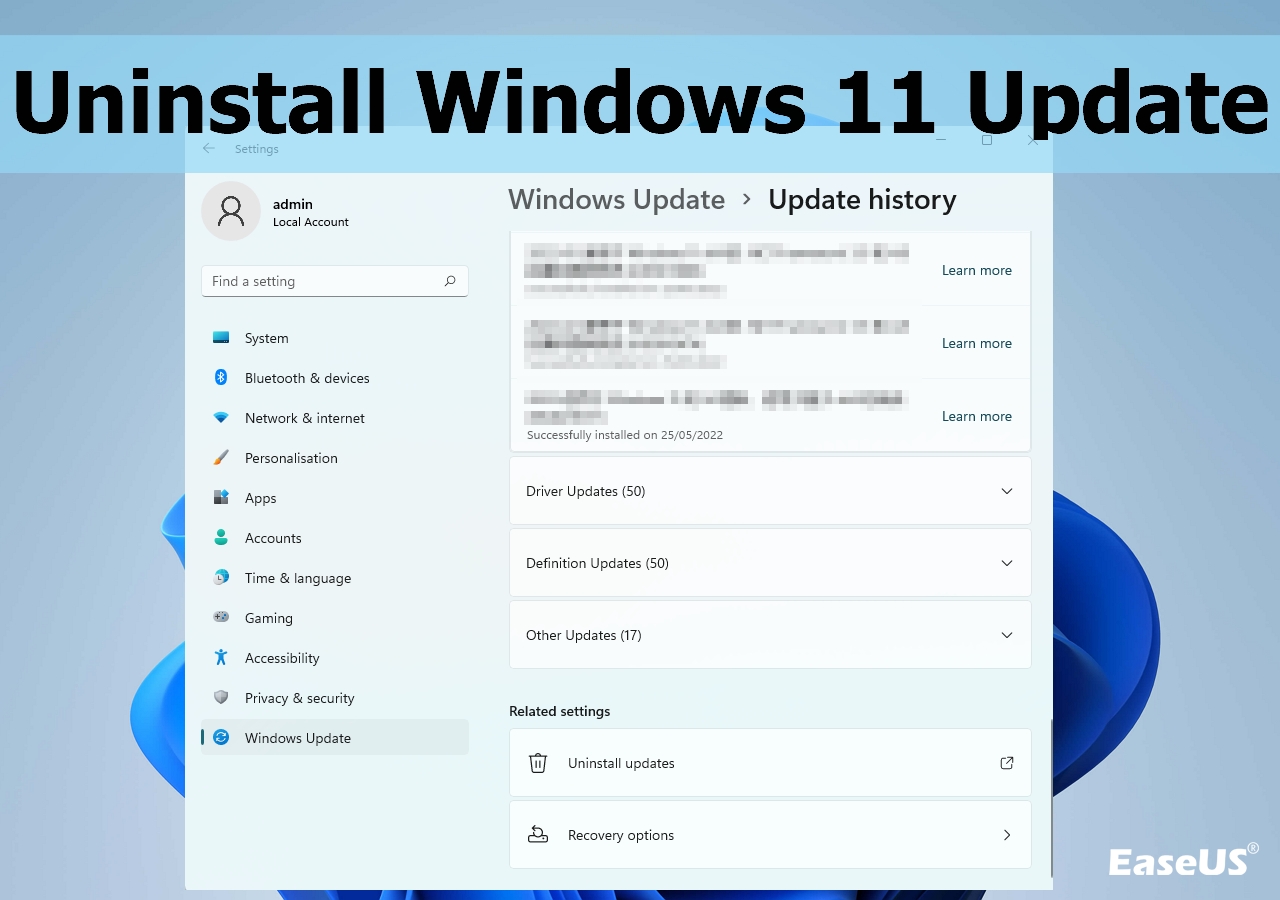
![]() How to Uninstall Windows 11 Update | Roll Back Windows 11 UpdatesJuly 23,20266 min read
How to Uninstall Windows 11 Update | Roll Back Windows 11 UpdatesJuly 23,20266 min read -
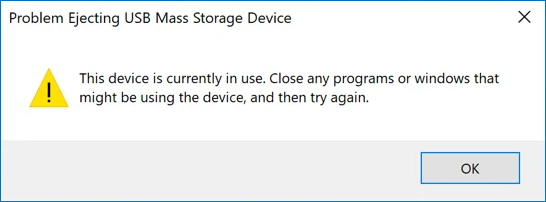
![]() Windows Has Problem Ejecting USB Mass Storage Device | 6 WaysJuly 23,20266 min read
Windows Has Problem Ejecting USB Mass Storage Device | 6 WaysJuly 23,20266 min read -
![]()
-
![]() The System Cannot Find the Path Specified | Solved NowJuly 23,20266 min read
The System Cannot Find the Path Specified | Solved NowJuly 23,20266 min read
Page Table of Contents
BitLocker in Windows 10
Bitlocker is not such an essential tool for most users, but a very powerful one to secure your data with a confidential password. It helps add an extra layer of security to your device, which can be an internal hard drive partition, a volume or an external HDD, or any removable storage drives. It's of great importance to turn on BitLocker protection in companies, or the workplace that connected to public networks! However, some of you may think it not necessary when you work at home and store data on your personal computer. Will you be able to disable BitLocker in Windows 10 once it's already on?

***Note that BitLocker is not available on Windows 10 Home edition. It's a device encryption feature built in Windows 10 Pro, Enterprise and Education.
***Note that BitLocker is designed to protect data by providing encryption for entire volumes. To encrypt only files or folders on your computer, you shall find a file encryption program.
How to Disable BitLocker Encryption on A Single Partition (6 Ways)
Windows 10 allows you to turn off the BitLocker and on a drive in many places, and the following paths are all effective to reach:
- 1. Control Panel
- 2. Settings
- 3. Command Prompt
- 4. PowerShell
- 5. Group Policy Editor
- 6. Windows Services
If you're a Windows 11 user, check out the following video to learn how to disable BitLocker encryption. We'll also mention how to recover data from BitLocker drives.
- 00:33 Open Manage BitLocker
- 01:52 Turn Off BitLocker
- 02:24 Run Command Line Tool
- 02:58 Access Data Without Recovery Key
Way 1. Turn off BitLocker via Windows 10 Control Panel
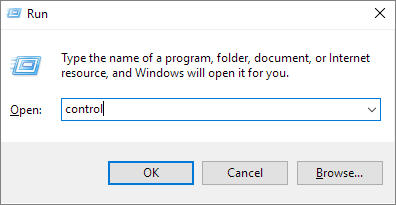
Step 1. Here use the most direct way to open Control Panel in Windows 10: Press Windows + R keys and type control/control panel in the Run box and hit OK.
Step 2. Click BitLocker Drive Encryption to open a new window.
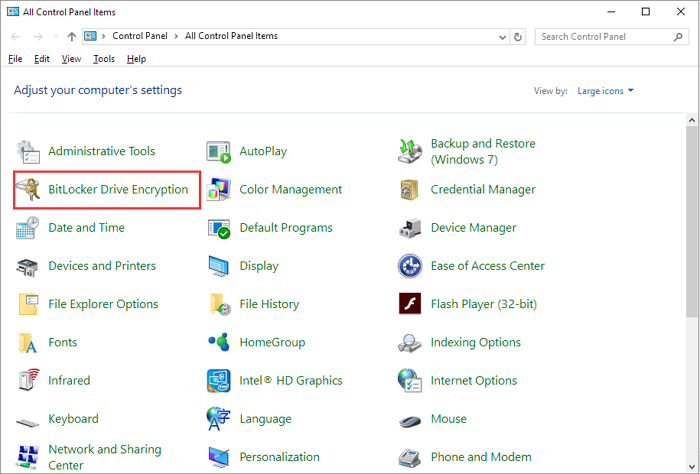
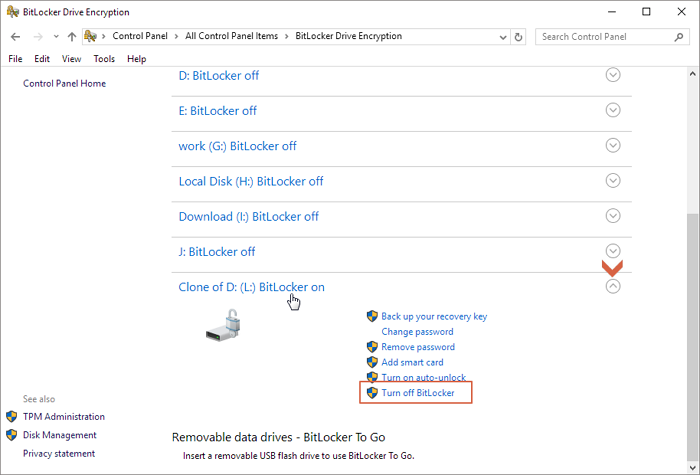
Step 3. There you will see all the drive partitions. Find the target partition where displays (X: BitLocker on) and click "Turn off BitLocker" by expanding the down-arrow area.
Way 2. Turn off BitLocker via Windows 10 Settings
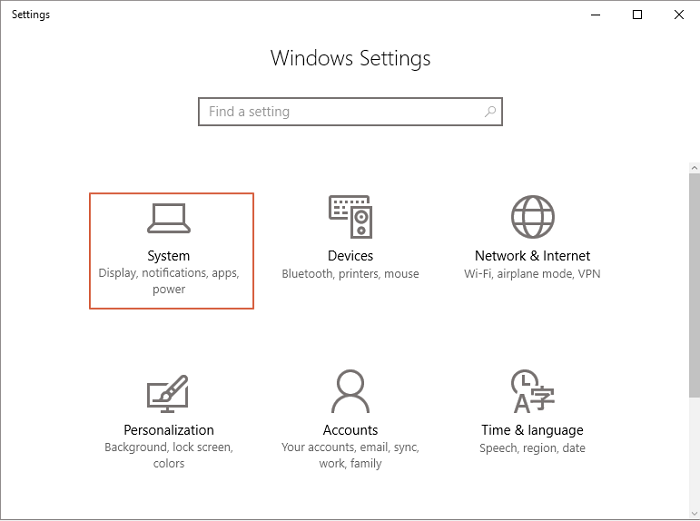
Step 1. Press Windows + I keys to open the Windows 10 Settings window.
Step 2. Click the System option.
Step 3. Go on with the About option at the bottom on the left and then BitLocker settings on the right.
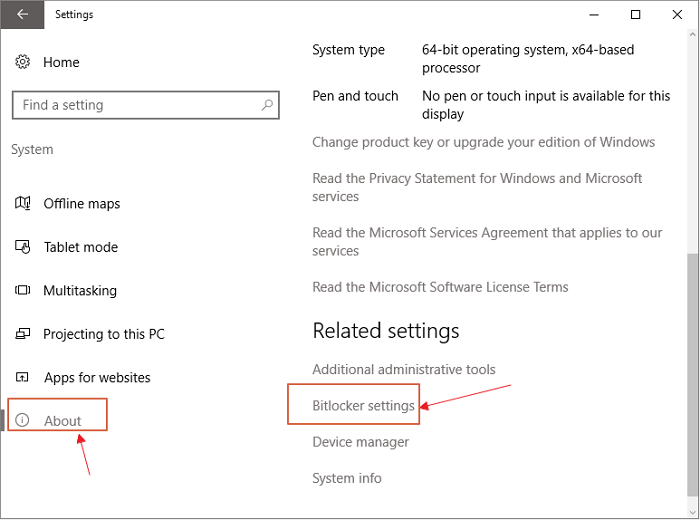
Step 4. This will open the same [BitLocker Drive Encryption] window, so follow the same procedure in #Way 1# to choose an encrypted drive to unlock it.
Way 3. Turn off BitLocker via Windows 10 Command Prompt
Anyway, the manual solution provided in the Windows 10 Control Panel and Settings does the same to help you suspend the BitLocker protection on a hard drive. For those who are used to tackling issues in Windows Command Prompt, we also provide you with a guide.
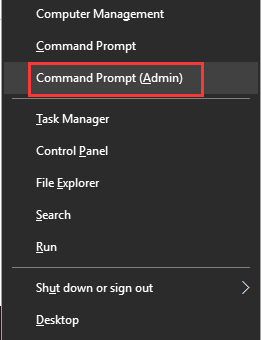
Step 1. Press Windows +X keys and click Command Prompt (Admin) from the menu.
Step 2. Enter the below command line and hit Enter. The X: refers to your own drive that is currently locked by BitLocker. So, replace X with the correct drive letter of yours.
manage-bde -off X:
Way 4. Turn off BitLocker via Windows 10 PowerShell
It's another command method to remove the BitLocker protection from your drive. Still, for people who are not familiar with the command thing, the former two ways are good to go.
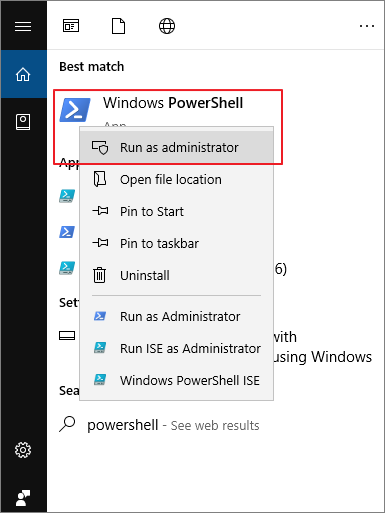
Step 1. Type powershell in Windows Search (Windows + S). Right-click on the result and select Run as administrator.
Step 2. Enter the below command line and hit Enter. X: represents a drive letter under BitLocker encryption. So, replace it with your own. Do not omit the quotation mark.
Disable-BitLocker -MountPoint "X:"
Step 3. (Optional) If it's to turn off BitLocker for multiple drives on your computer, you need to perform different command lines each by each:
$BLV = Get-BitLockerVolume
Disable-BitLocker -MountPoint $BLV
Way 5. Turn off BitLocker via Windows 10 Local Group Policy Editor
Though Windows Local Group Policy Editor is an option to manage BitLocker drives, it's the most complicated method compared with the other four we gave to you. In spite of the fact, we still feel responsible to offer all the possible solutions including the last one here.
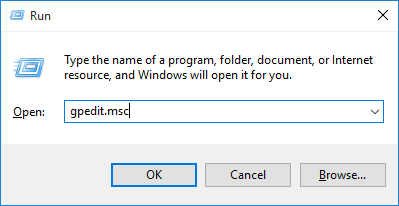
Step 1. Type group policy in Windows Search (Windows + S). If this is not a valid solution for you, open it in the Run box should be the easiest and quickest for everyone: Press Windows + R and type gpedit.msc in the Run box and hit Enter.
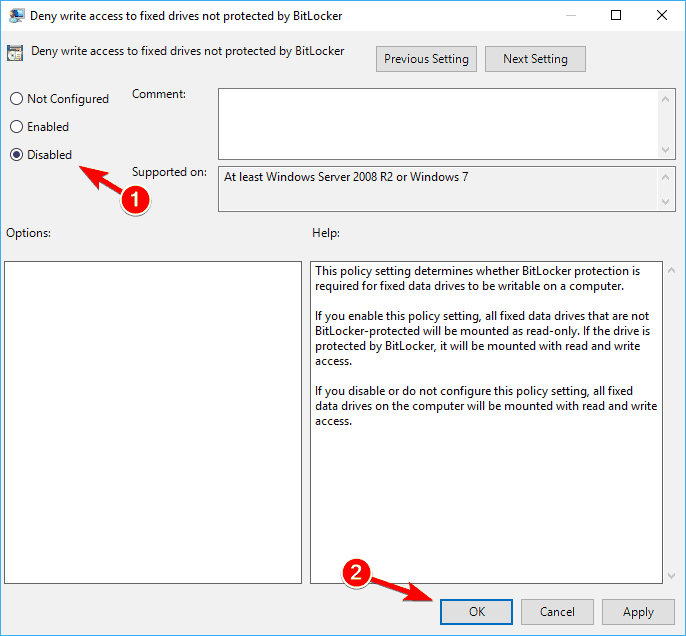
Step 2. After the Local Group Policy Editor is open, strictly follow the path to complete the whole process to disable BitLocker:
- Computer Configuration -> Administrative Templates -> Windows Components – > BitLocker Drive Encryption -> Fixed Data Drives
- Stay here and then select the Deny write access to fixed drives not protected by BitLocker option and double click on it
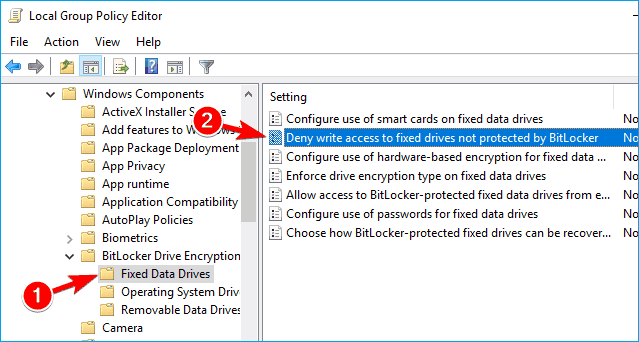
- Next, click either Not Configured or Disabled. Both are options to remove the BitLocker protection on the drive. Click Apply and OK to save changes.
Way 6. Turn off BitLocker via Windows Services
Windows Services are in charge of turning on or off all the services in Windows, including the BitLocker service. Here's how to disable BitLocker service permanently from the Services window.
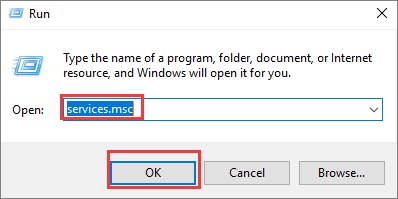
Step 1. Press Windows + R keys and type services.msc in the Run box and hit Enter.
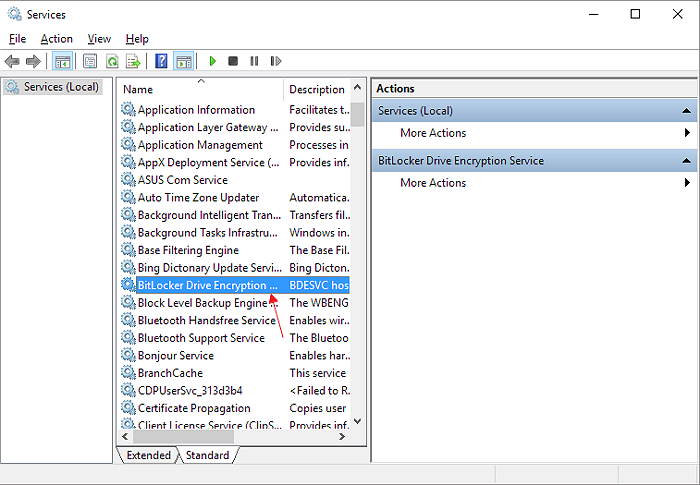
Step 2. Under the Name tab, locate and double click on the BitLocker Drive Encryption Service option.
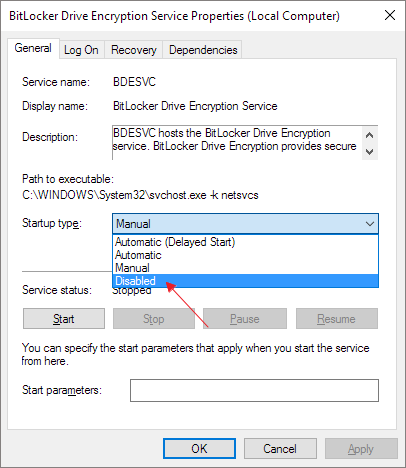
Step 3. Select Disabled from the Startup type lists and click Apply and then OK to save changes.
Bonus Tip#1: How to Recover Data from BitLocker Encrypted Hard Drive
BitLocker doubles the data protection on a hard drive, however, it cannot resist the outside damage that might remove or corrupt the encrypted data! The hard drive that is locked by a password is also likely to infect a virus or experience common hard drive problems like bad sectors, RAW file system, or unrecognized by a computer. In front of all the foreseen disasters, it's always the data that matters!
Is there any EaseUS Data Recovery Wizard we can adopt once the BitLocker encrypted hard drive had some issues? EaseUS Data Recovery Wizard can help. It fully supports encrypted data recovery from BitLocker protected hard drives, external HDDs and USB flash drives.
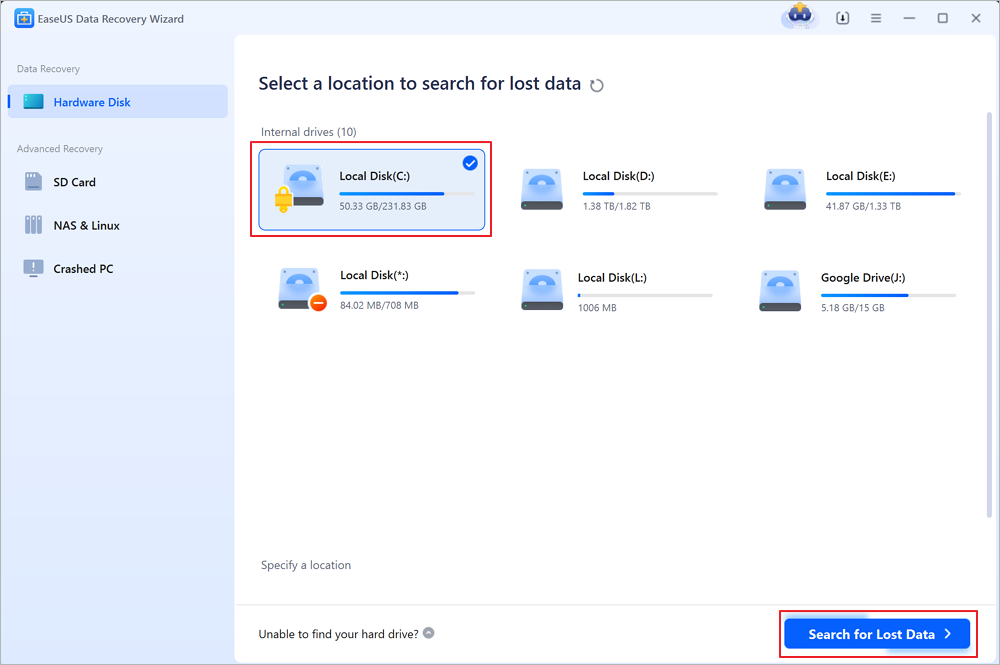
Step 1. Choose the encrypted drive to scan
Launch EaseUS Data Recovery Wizard, and you will see the BitLocker encrypted drive displayed there. Hover the mouse on the BitLocker partition or storage device from which you want to recover data. Then click "Search for Lost Data".
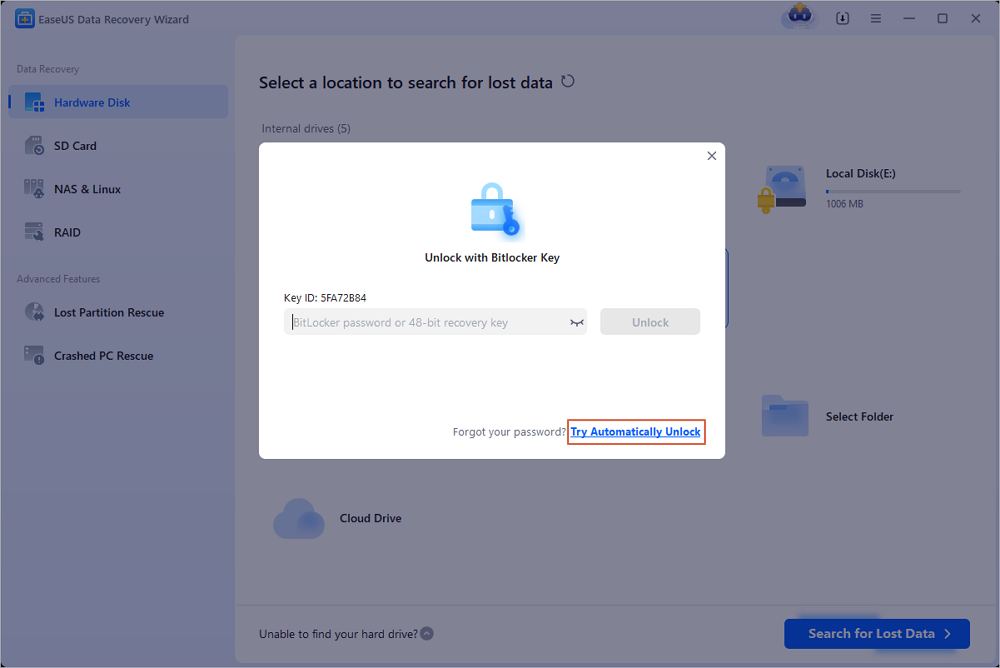
Note: If you don't have a key or password, you can use "Try Automatically Decrypt", which may help you scan your recovery key from your Microsoft account or your C drive, then decrypt the drive without providing your password.
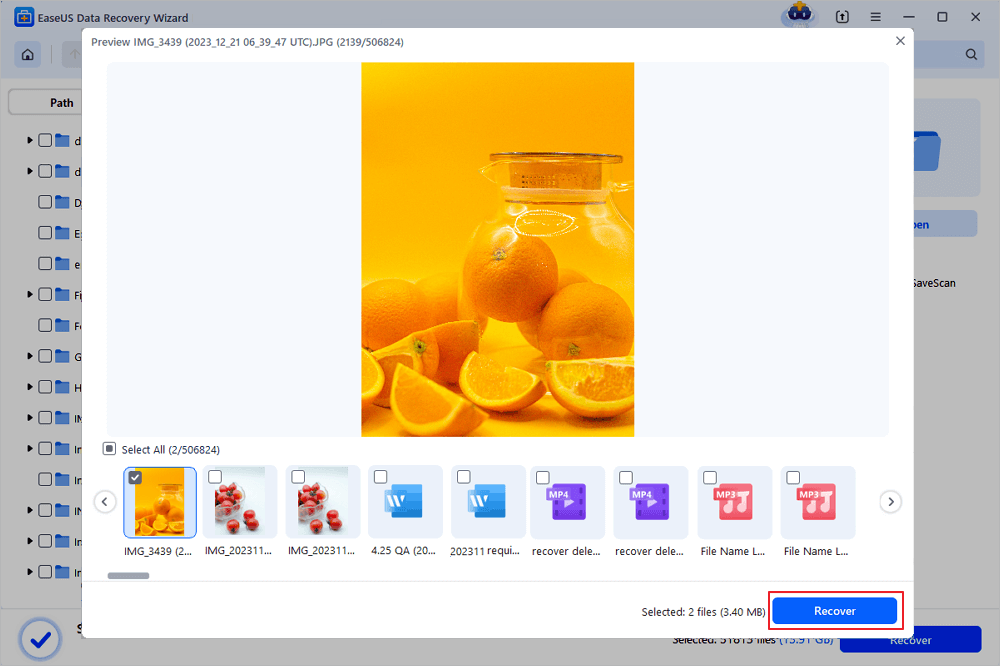
Step 2. Select and preview scanned files
The software will start a quick scan for deleted files and perform advanced scan for more lost files from the BitLocker device. When the process completes, you can apply the "Filter" feature or use the search feature to find the lost files in a short time.

Step 3. Recover lost files from BitLocker encrypted hard drive
After previewing the file, click the "Recover" button to restore deleted or lost files from BitLocker encrypted partition on Windows. You can choose a cloud storage, such as OneDrive, Google Drive, etc., and click "Save" to save your recovered files.
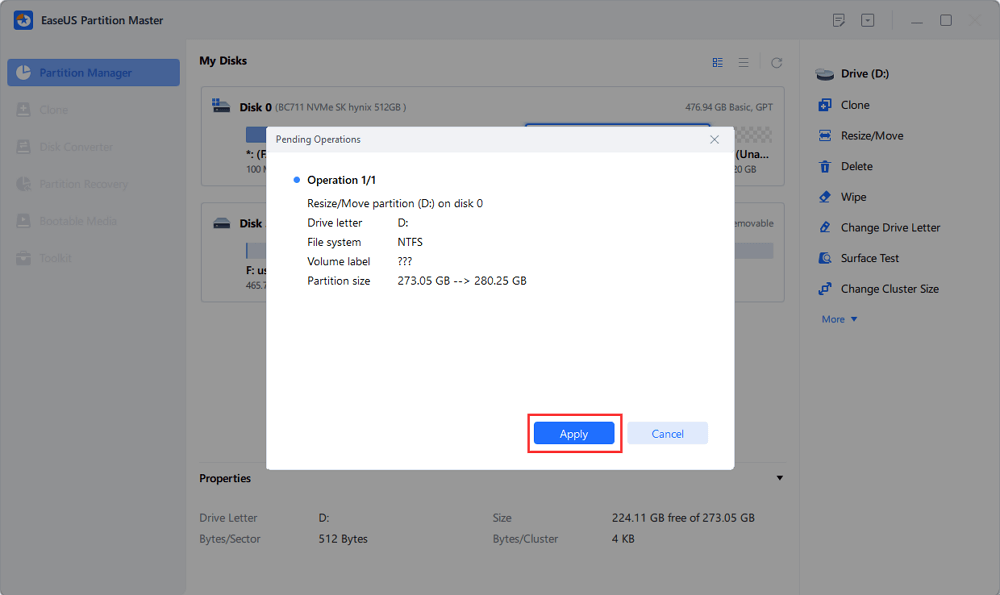
Bonus Tip #2. How to Manage BitLocker Partition by Resize/Move
At times, you may want a bigger BitLocker drive partition to store large multimedia files, and EaseUS Partition Master can facilitate the job by adding free space from other Partitions to the BitLocker one!
Step 1. Click "Partition Manager", select the Bitlocker partition and choose the "Unlock" option. Then, enter your password to unlock Bitlocker.

Step 2. Right-click the Bitlocker partition and select the "Resize/Move" option.
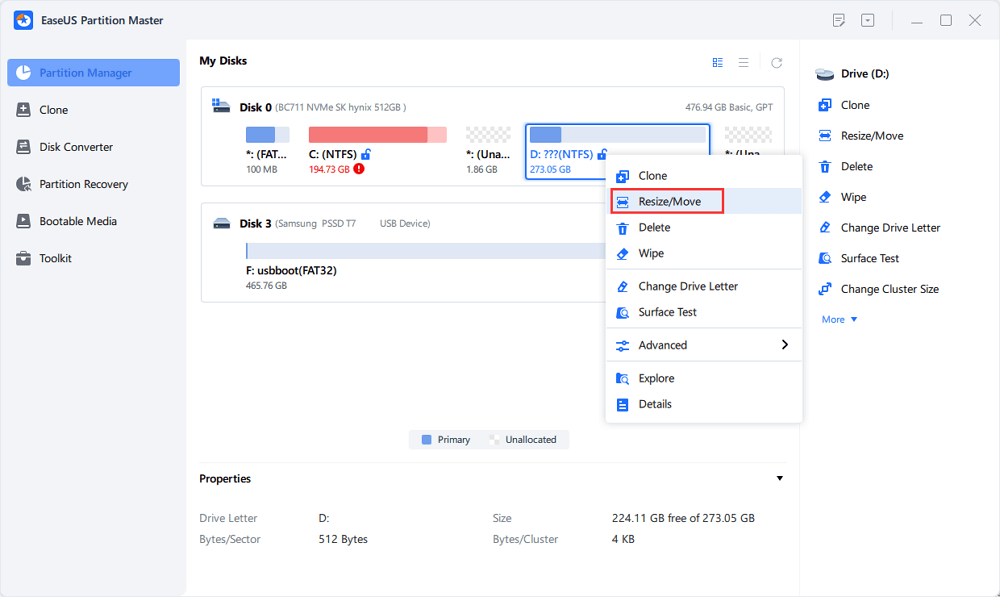
Step 3. Shrink or extend your Bitlocker by dragging your mouse towards the unallocated space. The "Fill in all unallocated" button can help you utilize all unallocated space immediately.

Step 4. Click Execute Operation and the "Apply" button to start partitioning or resizing the Bitlocker drive.
Learn More: Does BitLocker Slow Down SSD? Yes, up to 45%.
Was this page helpful?