-
![]() Windows Cannot Find Ms-Settings: How to Fix the File System Error
Windows Cannot Find Ms-Settings: How to Fix the File System Error July 23,2026
 6 min read
 -
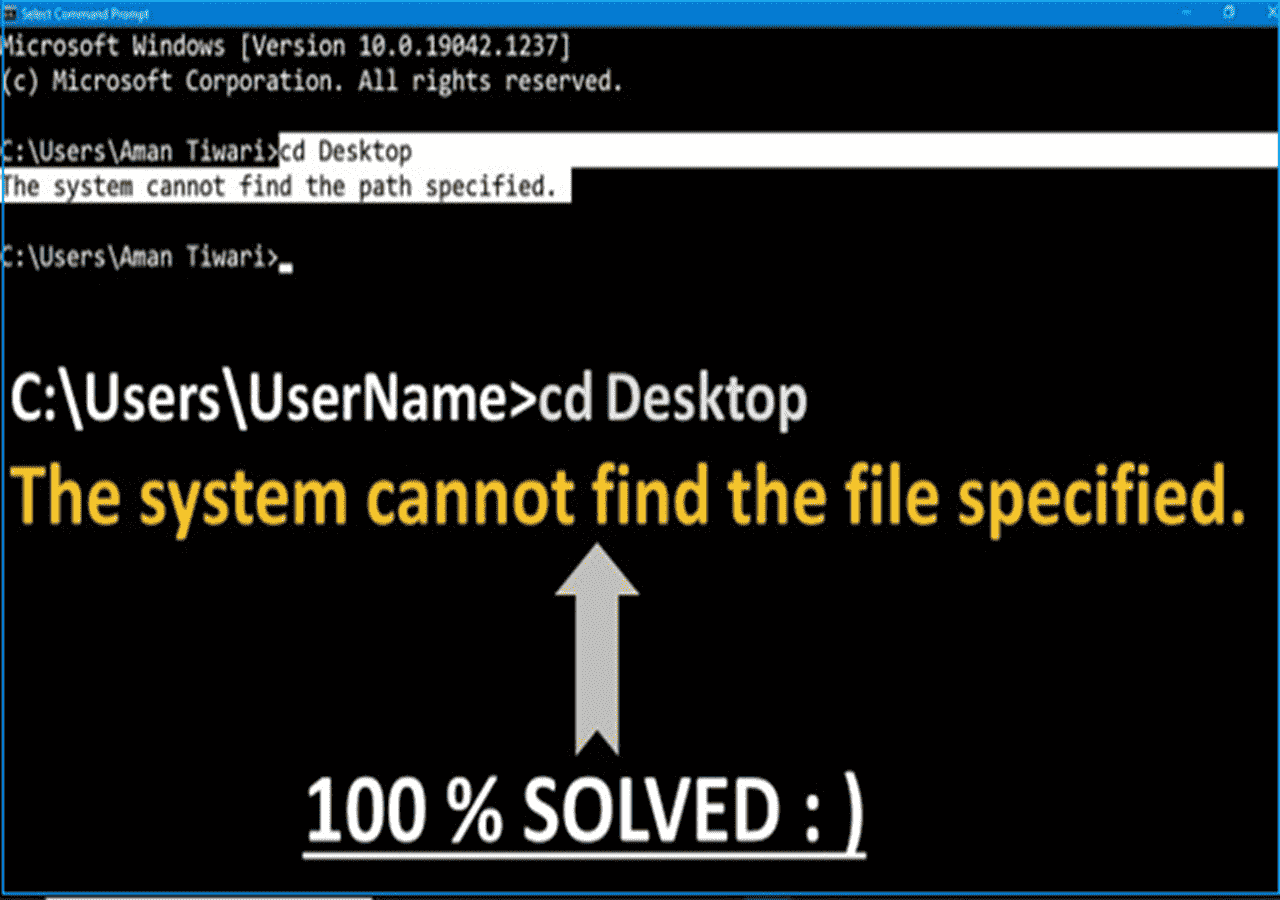
![]() The System Cannot Find the Path Specified | Solved NowJuly 23,20266 min read
The System Cannot Find the Path Specified | Solved NowJuly 23,20266 min read -
![]() How to Fix System_Service_Exception in Windows 10/11 Without Data LossJuly 23,20266 min read
How to Fix System_Service_Exception in Windows 10/11 Without Data LossJuly 23,20266 min read -
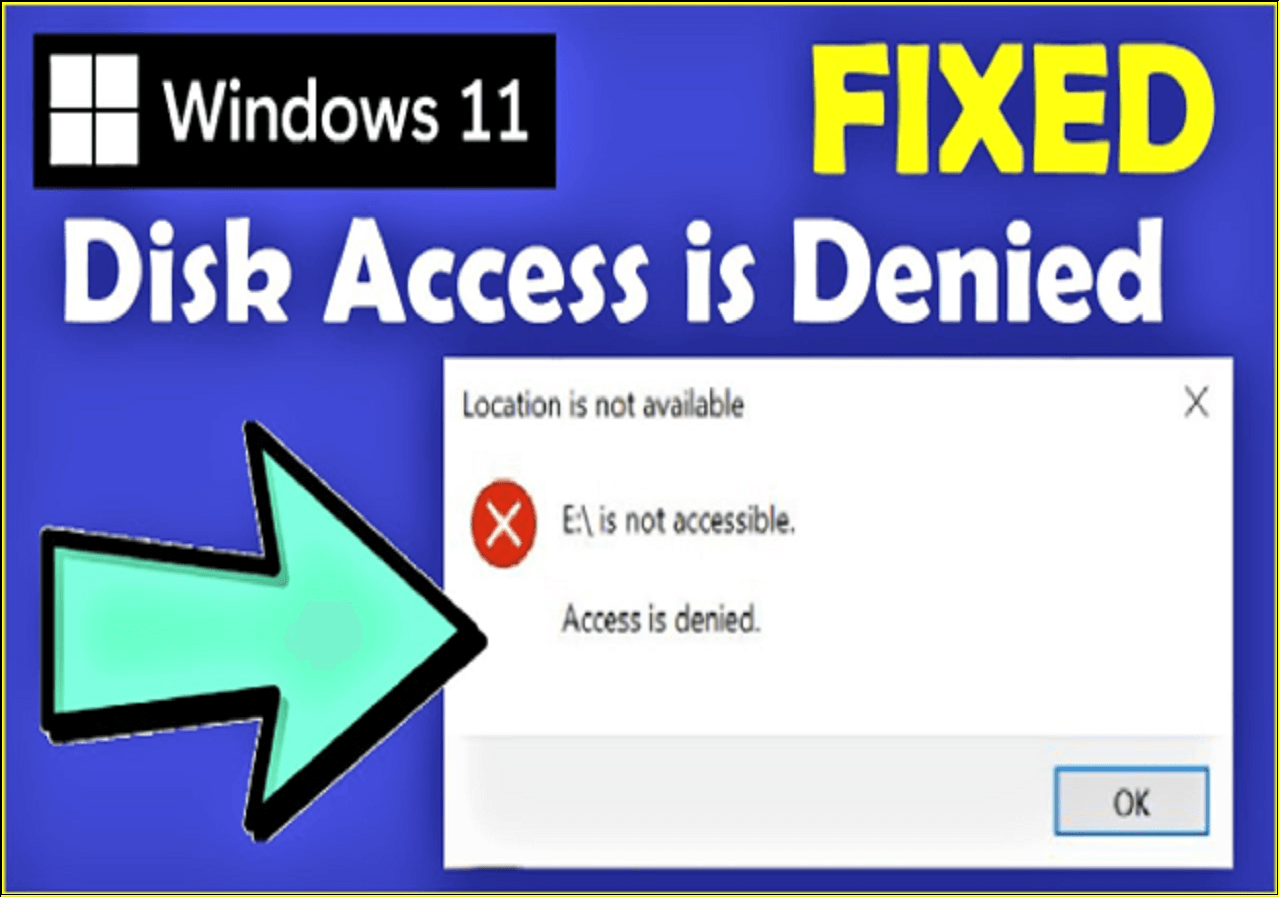
![]() How to Fix Drive Is Not Accessible Access Is Denied on Windows 11July 23,20266 min read
How to Fix Drive Is Not Accessible Access Is Denied on Windows 11July 23,20266 min read -
![]()
-
![]() Discord RTC Connecting Stuck? Troubleshoot This Error Now (7 Ways)July 23,20266 min read
Discord RTC Connecting Stuck? Troubleshoot This Error Now (7 Ways)July 23,20266 min read -
![]()
-
![]()
-
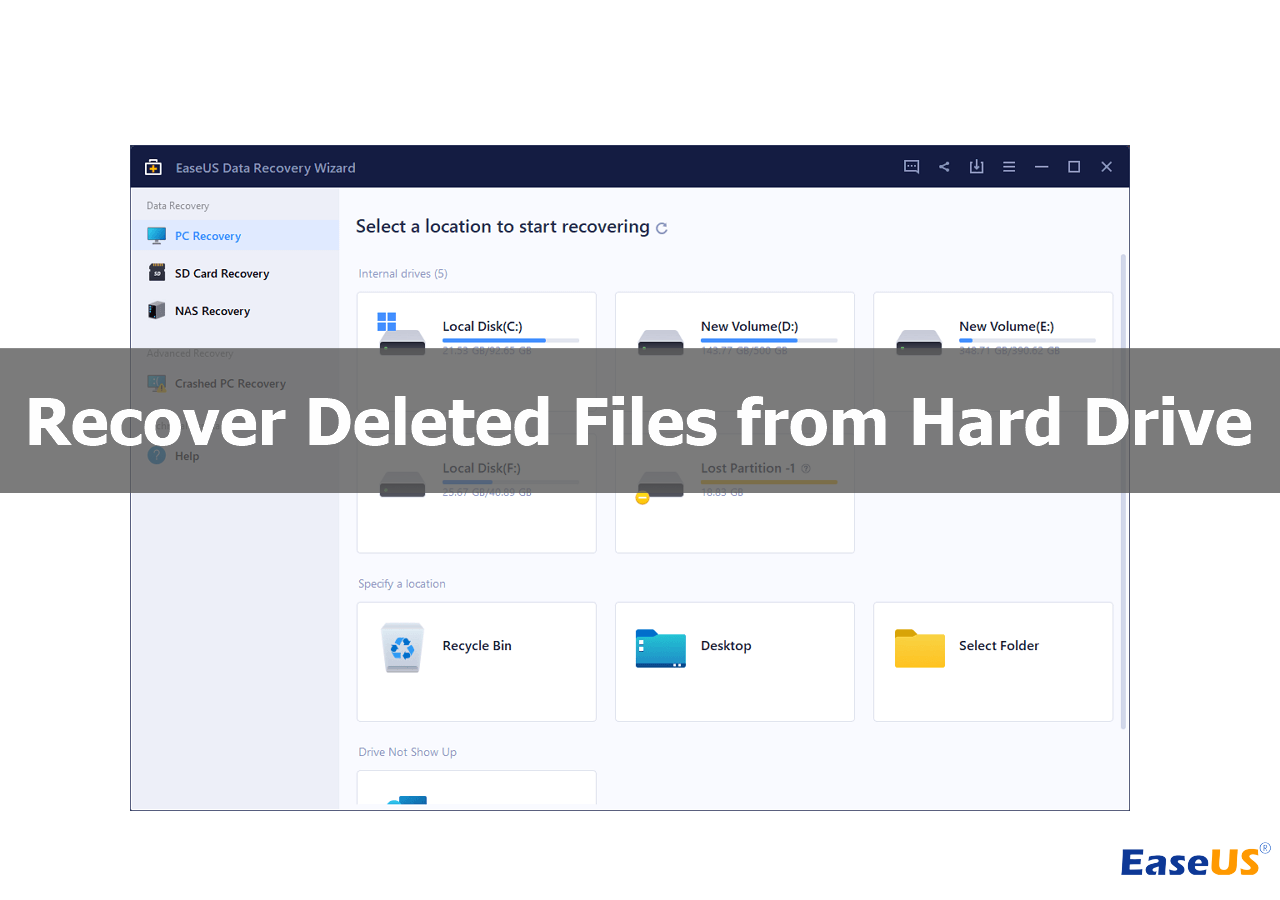
![]() How to Recover Deleted Files from Hard Drive in 5 Ways | 2026July 23,20266 min read
How to Recover Deleted Files from Hard Drive in 5 Ways | 2026July 23,20266 min read -
![]()
Page Table of Contents
If you are facing the 0x80072f8f - 0x20000 error, I have shared a few quick ways to get rid of it below. So here we go:
| Workable Solutions | Step-by-step Troubleshooting |
|---|---|
| Fix 1. Verify PC's Compatibility | Before you go ahead and upgrade your Windows, make sure your PC meets the requirements...Full steps |
| Fix 2. Stable Internet Environment | You should also make sure that your internet is working fine. If your internet isn't working, then...Full steps |
| Fix 3. Run Media Creation Tool | If you haven't run the Microsoft Creation tool as an admin yet, you should try it. There is a good chance...Full steps |
| Fix 4. Apply Windows Registry | You can also make changes to your Windows Registry to bypass the error. However, before you...Full steps |
| More Fixes | Next, You can try performing a clean boot on Windows 10 or 11. A clean boot is a state where...Full steps |
How to Fix Error Code 0x80072f8f - 0x20000 on Windows
Windows makes it super easy to upgrade or reset Windows using its media creation tool. The media creation tool is easy to use and doesn't face any issues often. However, some users have reported a media creation tool error code 0x80072f8f - 0x20000.
In several ways, one can get rid of the Windows update media creation tool error code 0x80072f8f - 0x20000. For instance, you can try modifying your registry settings, removing the software distribution folder, etc. However, these are 8 methods we are going to discuss in this article below.
For additional help, you can also refer to the following video:
- 00: 45 Unblock Media Creation Tool
- 01: 16 Delete Software Distribution Folder
- 02: 25 Enable Enable TLS 1.1 and TLS 1.2
1. Verify Your PC's Compatibility with the Windows Upgrade Requirements
Before you go ahead and upgrade your Windows, make sure your PC meets the requirements. You can download and launch the PC Health Check App to find this out. To get started, follow these steps:
Step 1. First, download the PC Health Check App.
Step 2. Double-click on the installer to install it, and then follow the onscreen steps.
Step 3. After installation, run the PC Health Check App and click the "Check Now" button. Then it will list the requirements marked as yellow that your PC doesn't have.
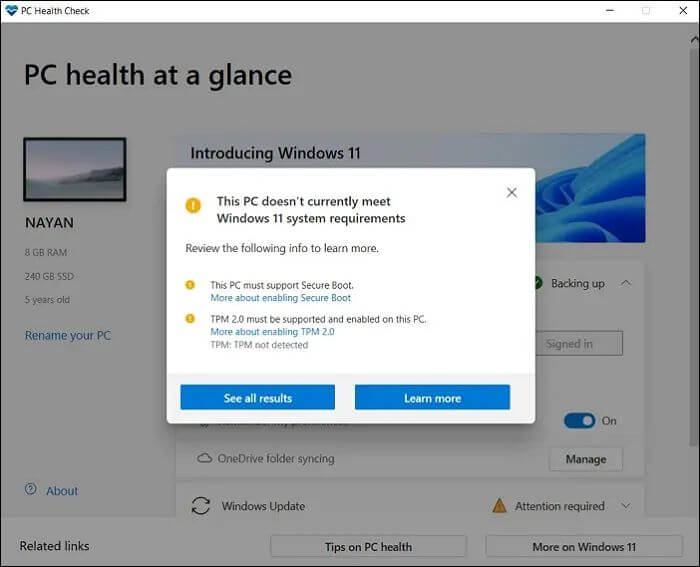
Step 4. Finally, check if you can meet the requirements, fix the issues, and rerun Windows Media Installer.
2. Make Sure You Are in a Stable Internet Environment
You should also make sure that your internet is working fine. If your internet isn't working, then Media Creation Tool won't be able to download the necessary updates, and it will lead to Windows 10 upgrade error.
So do check if your internet is working fine. If not, then try restarting your router or troubleshooting your network.
3. Run Microsoft Media Creation Tool as an Administrator
If you haven't run the Microsoft Creation tool as an admin yet, you should try it. There is a good chance that it lacks admin privileges. As a result, you are encountering an error.
So right-click on the Media Creation Tool, select Run as administrator, and then try to run the tool and see if it works.
4. Apply Modifications to the Windows Registry
You can also make changes to your Windows Registry to bypass the error. However, before you modify your registry settings, take a backup. So in case anything goes wrong, you can fix it quickly.
Once you are ready, follow the below steps:
Step 1. Press Windows Key + R to launch Run.
Step 2. Type regedit and press Enter.
Step 3. Go to the following path: Computer\HKEY_LOCAL_MACHINE\SOFTWARE\Microsoft\Windows\CurrentVersion\WindowsUpdate\Auto Update
Step 4. Now right-click the blank area, go for New > DWORD (32-bit) Value, and name it AllowOSUpgrade.
Step 5. Double-click on the AllowOSUpgrade and change the Value data to 1.
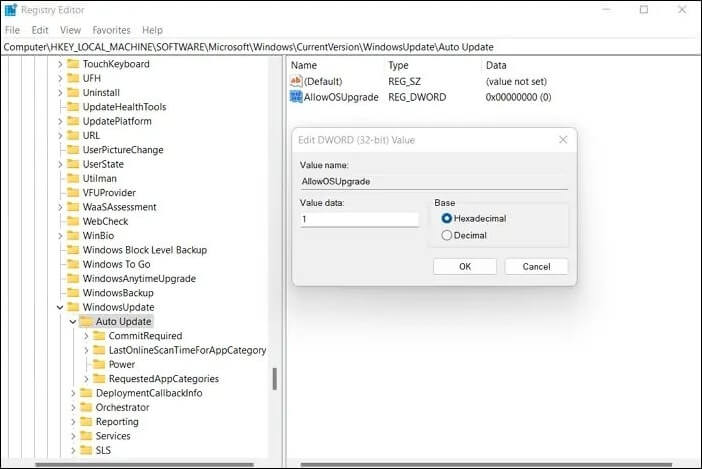
Step 6. Next, click on and close Registry Editor.
Step 7. Finally, restart your PC, launch Media Creation Tool, and see if it works.
5. Perform a Clean Boot on Windows 11/10
Next, You can try performing a clean boot on Windows 10 or 11. A clean boot is a state where Windows starts with a minimum set of drivers and startup programs. This is quite similar to starting Windows in safe mode. But you get more control over which services and programs you want to run at the startup.
To get started, follow these steps:
Step 1. Go to Windows search.
Step 2. Type msconfig and launch System Configuration.
Step 3. Go to the services tab and check to Hide all Microsoft services.
Step 4. Then click the "Disable All" button.
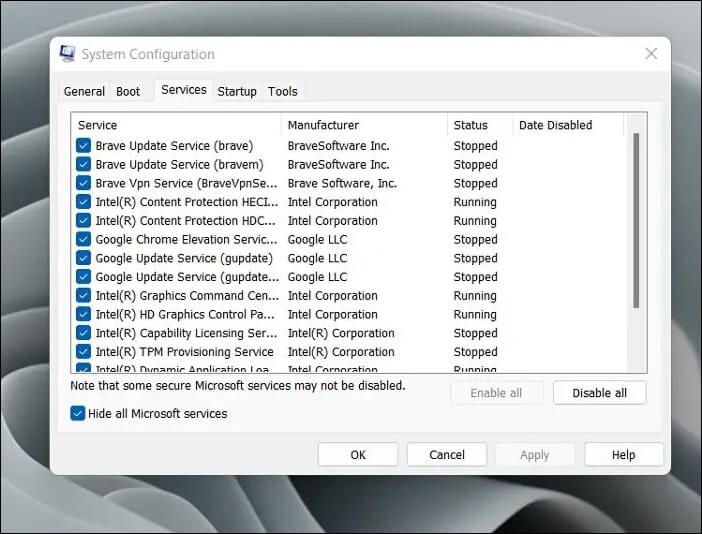
Step 5. Go to the Startup tab and click "Open Task Manager".
Step 6. Then right-click on all the items individually and select Disable.
Step 7. Once done, close Task Manager and return to System Configuration Windows.
Step 8. Select Apply > OK to save the changes.
Step 9. Finally, restart your PC.
After the clean boot, try running the Media Creation tool and see if you get the Windows update media creation tool error code 0x80072f8f - 0x20000 error. If you don't see the error, consider removing recently installed apps and running the media creation tool normally.
6. Enable TLS 1.1 and TLS 1.2 to Fix Error Code 0x80072f8f - 0x20000
One of the main reasons behind the Windows update media creation tool error code 0x80072f8f - 0x20000 is that your TLS is not enabled. If that's the case with you, then do follow the below steps:
Step 1. First, make sure to back up Windows registry.
Step 2. Next, open Notepad and paste the below code:
Windows Registry Editor Version 5.00 [HKEY_LOCAL_MACHINE\SOFTWARE\Microsoft\Windows\CurrentVersion\Internet Settings\WinHttp]"DefaultSecureProtocols"=dword:00000a00 [HKEY_LOCAL_MACHINE\SOFTWARE\Wow6432Node\Microsoft\Windows\CurrentVersion\Internet Settings\WinHttp]"DefaultSecureProtocols"=dword:00000a00 [HKEY_LOCAL_MACHINE\SYSTEM\CurrentControlSet\Control\SecurityProviders\SCHANNEL\Protocols\TLS 1.2\Client]"DisabledByDefault"=dword:00000000"Enabled"=dword:00000001[HKEY_LOCAL_MACHINE\SYSTEM\CurrentControlSet\Control\SecurityProviders\SCHANNEL\Protocols\TLS 1.2\Client]"DisabledByDefault"=dword:00000000"Enabled"=dword:00000001
Step 3. Save the file with the .reg extension.
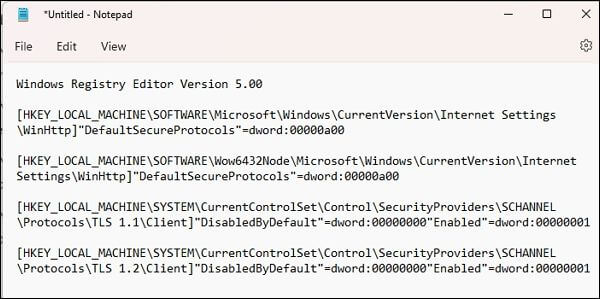
Step 4. Once done, double-click on the file to apply the settings in the Registry.
Step 5. After that, reboot your computer, try rerunning the Media creation tool, and see if it works.
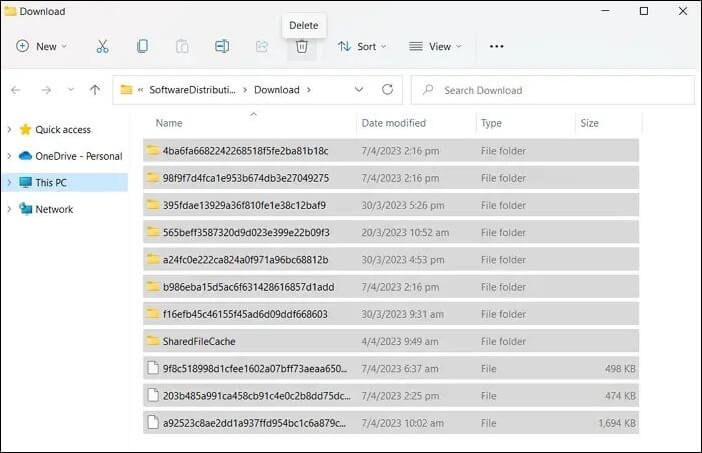
7. Remove the Software Distribution Folder's Content
Software distribution folder stores temporary files that might be required for installing Windows updates. However, sometimes Windows cannot access the Update files, which leads to a different error. Hence, cleaning up the software distribution folder for smoother Windows update installation is recommended. To do so, follow the below steps:
Step 1. Press Windows Key + R to launch Run.
Step 2. Type the following path and press Enter: C:\Windows\SoftwareDistribution\Download
Step 3. Now select all the files by pressing CTRL + A, right-click on the selected files, and click "Delete".
Step 4. Once done, press Windows + X to launch the quick menu and select Windows Terminal (Admin).
Step 5. In the Windows terminal, run the following command: wuauclt.exe /updatenow
Step 6. Once done, reboot your computer and check if the issue is resolved.
8. Reset Windows 11/10 to Fix Media Creation Tool Error
If none of the abovementioned methods works out for you, resetting your Windows would be the only solution. By resetting your PC, you will ensure no corrupted file or recently installed application conflicts with the Media Creation tool. However, before you reset your PC, please back up your important files to avoid data loss.
Once you are ready, follow these steps:
Step 1. Press Windows Key + I to launch Settings.
Step 2. Navigate to Windows Update > Advanced Options > Recovery.
Step 3. Click "Reset PC".
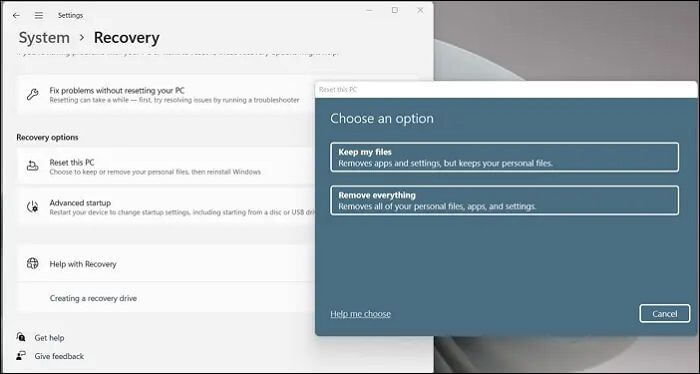
Step 4. Select Remove Everything and follow the onscreen steps.
Note: You can also perform a factory reset from BIOS on your computer if your computer cannot boot successfully.
Retrieve Lost Data After Fixing Error Code 0x80072f8f - 0x20000
After trying the above methods, the error may still exist. Or in some instances, your PC might get into an unrecoverable state, and resetting your PC would be the only solution.
After a factory reset, the computer will remove all applications, games or personal documents, pictures, music, or movies from the computer. As a result, some data will be overwritten, and the file system of the original lost file will be corrupted. But this doesn't mean you can not recover wanted files after a factory reset. In such a case, you can use data recovery solutions like EaseUS Data Recovery Wizard to regain your data.
- Recover deleted files or lost files, documents, photos, audio, music, and emails effectively.
- Recover files from formatted hard drives, memory cards, flash drives, digital cameras, etc.
- Support data recovery for sudden deletion, formatting, virus attack, and system crash under different situations.
EaseUS Data Recovery Wizard is a professional software in data recovery and has helped millions of customers successfully and efficiently recover lost data, and easy to use. Here are all the steps:
Note: To guarantee a high data recovery chance, install EaseUS data recovery software on another disk instead of the original disk where you lost files.
Step 1. Launch EaseUS Data Recovery Wizard on your Windows 11, Windows 10, Windows 8, or Windows 7 computer. Select the disk partition or storage location where you lost data and click "Search for Lost Data".

Step 2. This recovery software will start scanning the disk to find all lost and deleted files. When the scan process completes, click "Filter" > "Type" to specify lost file types. If you remember the file name, you can also search in the search box, which is the fastest way to find the target file.

Step 3. Preview and restore lost Windows files. You can double-click to preview the scanned files. Then, select the target data and click the "Recover" button to save them to another safe spot in the PC or Cloud drive.

Summary
So those were a few quick ways to fix the Media Creation Tool Error Code 0x80072f8f - 0x20000 error. You might want to reset your Windows if none of the methods works for you. In such a case, data loss is a serious concern. But you can always use EaseUS Data Recovery Wizard to recover your data quickly.
Error Code 0x80072f8f - 0x20000 FAQs
Now let's look at some of the commonly asked questions around media creation tool errors:
1. How to fix Windows 10 update not working?
You can run the Windows update troubleshooter to fix the Windows update not working. Alternatively, you can use a media creation tool to download and install the latest Windows version.
2. How do I fix Windows error code 0x80072F8F 0x20000?
There are several ways to fix error code 0x80072F8F 0x20000. You can try running the Media creation tool as administrator, delete the software distribution folder, modify registry settings, etc.
3. Why I can't run Media Creation Tool in Windows 7?
You can re-download the Media creation tool and run it as an administrator. As the media creation tool is compatible with Windows 7, you shouldn't have any problem running it.
4. How to retrieve lost data after fixing the Media Creation Tool error?
One can use data recovery applications like EaseUS Data Recovery Wizard to recover lost data quickly and in easy steps, as it can recover data from a formatted drive.
Was this page helpful?
-
Dany is an editor of EaseUS who lives and works in Chengdu, China. She focuses on writing articles about data recovery on Mac devices and PCs. She is devoted to improving her writing skills and enriching her professional knowledge. Dany also enjoys reading detective novels in her spare time. …


20+
Years of experience

160+
Countries and regions

72 Million+
Downloads

4.9 +
Trustpilot Score


