
Content
Page Table of Contents
About the Author
Hot Topics
- Important
- Microsoft has officially announced that Windows 10 support will end on October 14, 2025. After this date, the system will no longer receive security updates, bug fixes, or technical support.
To help you completely get rid of wsappx taking high disk and CPU usage on Windows 11/10, we collected the three most effective fixes for you.
| Workable Solutions | Step-by-step Troubleshooting |
|---|---|
| Fix 1. Disable Windows Store | Go to Local Computer Policy > Computer...Full steps |
| Fix 2. Extend Virtual Memory | Type performance in Search and high Enter...Full steps |
| Fix 3. Check/Clean Disk Internal Error | Download EaseUS free partition manager...Full steps |
| More Fixes | Open Registry Editor on your computer...Full steps |
What Is Wsappx
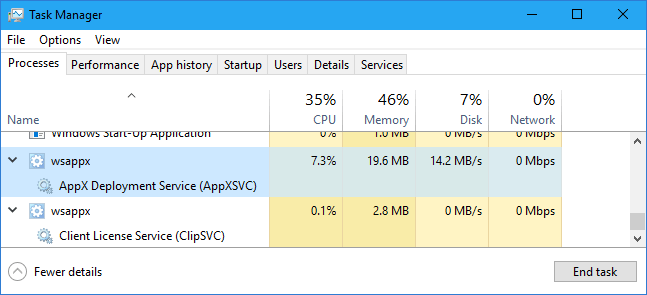
Wsappx is a process that runs in the background on your Windows 10/8 computer as a part of the Windows Store and the Universal app platform of Microsoft.
Mostly, wsappx includes two separate background services - AppX Deployment Service (AppXSVC) and Client License Service (ClipSVC) on Windows 10. If you are using Windows 8, you will see AppXSVC and WSService (Windows Store Service).
Wsappx is used for installations, updates, and uninstallation of Store apps, so once you are done installing all updates, you don't need it.
Wsappx High Disk and CPU Usage Issue
But at times you may face situations where you find that the wsappx is using high disk, CPU, and even memory in Task Manager as shown below.
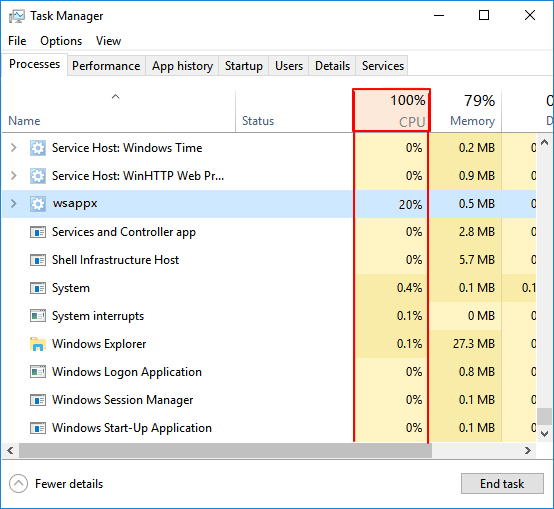
When you see wsappx hogging much of your CPU or Disk usage, in some cases, you will see wsappx (2) or wsappx (3) takes high disk usage, what would you do to fix wsappx taking the high disk and CPU usage on Windows 10 and speed up your PC? Let's learn the reasons that causes wsappx taking up high disk pace first.
Why Is Xappx Using So Much Disk or Space?
To find the correct resolution to resolve wxappx high disk or high CPU usage issue, you should first know why is wxappx taking so much space. Here are the reasons:
- Wsappx will activate and use CPU, disk, etc. resources when you're using Microsoft Store.
- Wsappx users more resources when you download an app or install an update as it needs them for the install process.
- When you install traditional desktop software, the installation process will take up resources, high CPU and disk uage.
- Apps updating in the background will also cause wsappx high CPU or high disk usage issue.
From what we know, this is a common problem in Windows. We have some effective solutions to help you get out of this situation.
Can I End Wsappx? Fixes for Wsappx High CPU/Disk Usage Available Here
So how to efficiently get rid of the Wsappx high CPU and high disk usage issue on your computer? Here we've collected 6 practical resolutions for you to follow and get rid of this issue from your PC immediately:
- #1. Disable Windows Store
- #2. Extend Virtual Memory
- #3. Check and Clean Disk Internal Error
- #4. Change Value of AppXSVC in Registry
- #5. Scan Your Computer to Check Virus
- #6. Troubleshoot in Clean Boot State
The provided methods work to fix this error on both Windows 10 and Windows 8.
Solution 1. Disable Windows Store to Fix wsappx High CPU Issue
Windows Store is one of the major causes of wsappx high CPU issue. And you can effectively disable Windows Store by using Local Group Policy and Registry Editor.
Follow to see how to disable Windows Store on your computer now:
#1. Use Local Group Policy
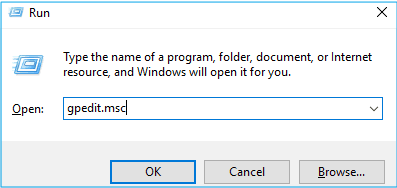
Step 1. Press the Windows logo key + R then type gpedit.msc and click "OK".
Step 2. Enter Local Computer Policy and go to Computer Configuration.
Select "Administrative Templates", expand Windows Components, and double-click to open "Store".
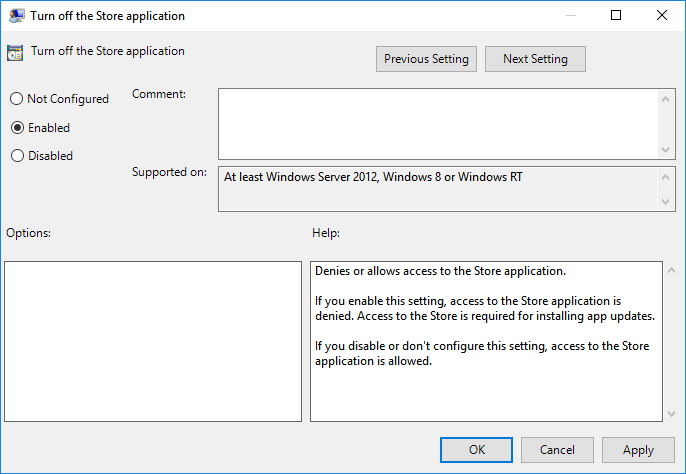
Step 3. Select "Turn off the Store application" and click "Edit policy setting".
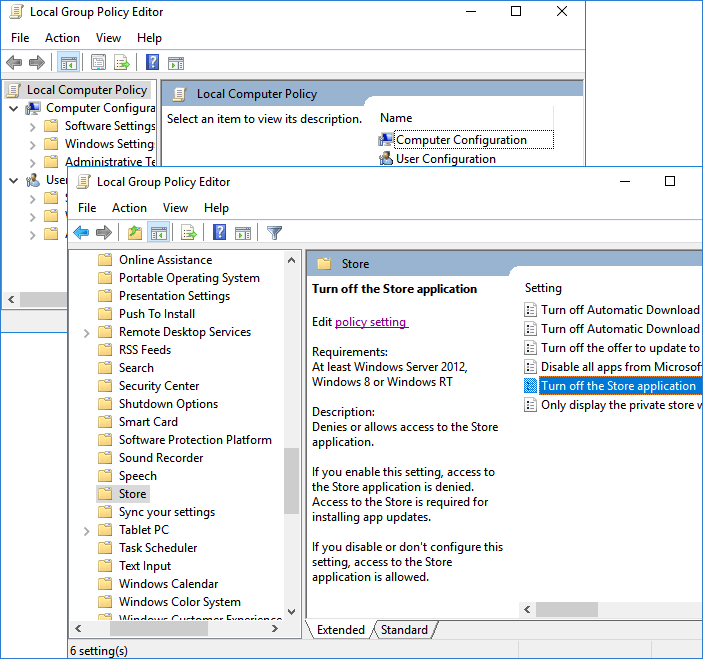
Step 4. Change the status to "Enabled". Click "Apply" and "OK" to save and exit.
After the above steps, you can start your PC to check whether this solution works or not. If this solution fails to fix the high disk usage problem, please move on solutions below.
#2. Use Registry Editor
Note that Windows Registry Editor is a non-beginner application, and it mainly works for administrators to control applications and change settings on Windows computer.
Any false operation may cause serious results. Therefore, we suggest you be very careful while following the steps to disable Windows Store so as to resolve the wsappx high disk usage issue.
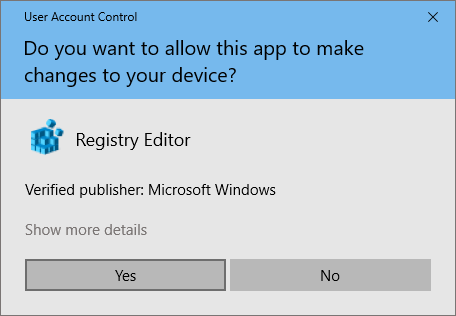
Step 1. Type regedit in Search and hit Enter to bring up Registry Editor. Click "Yes" to open it.
Step 2. Navigate to: HKEY_LOCAL_MACHINE\SOFTWARE\Policies\Microsoft\WindowsStore.
Step 3. Create a new DWORD value within the Widows Store keys and name it as "RemoveWindowsStore", set the value as "1".
Save the changes and exit Registry. Then you can restart Windows service.
Note that when you disable Windows Store, third-party Windows Store apps and programs won't be able to installed or updated. If you want to enable the installation and update, you'll need to enable Windows Store by using the above two recommended methods - disabling "Turn off the Store application" or change the value of RemoveWindowsStore to "0".
Solution 2. Extend Virtual Memory
Another efficient solution that can fix wsappx high disk usage or high CPU usage issue is to extend the virtual memory. And here are the steps:
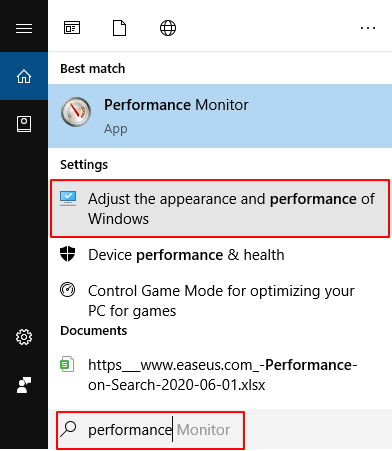
Step 1. Type performance in Search and high Enter, select "Adjust Appearance vs. Performance in Windows".
Step 2. Go to the Advanced tab, click "Change" under Virtual Memory section.

Step 3. Uncheck "Automatically manage paging file size for all drives", then select the OS drive and click "Custom size".

Step 4. Set the Initial Size equal to your RAM size in MB, and the Maximum size to double of the Initial Size.
Step 5. Click "Set" and "OK" to keep all the changes.
Then restart your computer. You can check if this helps to resolve the high CPU issue.
Solution 3. Check and Clean Disk Internal Error
For those who got this problem very recently, performing a disk check should be taken into account. Sometimes, when a disk captures internal error or unknown file system mistakes, the computer may not run properly, coming up with high disk usage or high CPU error.
In order to perfectly solve this case, you will a reliable tool for help - EaseUS free partition tool.
This professional tool can help get this work done, and here is the detail:
When you finish all the steps, reboot your Windows 10. Go to Task Manager to see if the disk usage of wsappx is normal.
Solution 4. Change Value of AppXSVC in Registry
According to some experienced administrators, it seems that changing the value of AppxSvs in Registry may also help to resolve the wsappx high CPU or high disk usage error.
Here are the steps:
Step 1. Open Registry Editor on your computer.
Step 2. Navigate to this path: HKEY_LOCAL_MACHINE\SYSTEM\ControlSet001\Services\AppXSvc.
Step 3. Locate the key and change the Start value on in the right panel to "4".
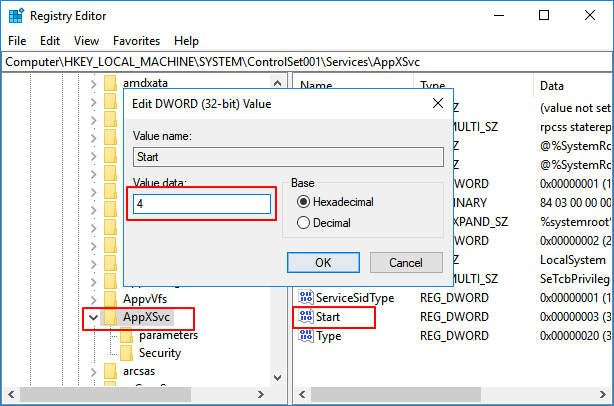
Step 4. Click "OK" to save the changes and exit Registry.
After this, restart your computer to see if the problem has been changed.
Solution 5. Scan Your Computer to Check Virus
Most people often ignore that in certain cases, this problem is caused by viruses or malware infection. If you haven't fully scanned your system with an antivirus program, do it now.
Step 1. Run anti-virus software on your PC and let it scan your whole computer disk.
Step 2. Once the antivirus software finds suspicious files, remove it from your PC.
Step 3. Restart your computer to see if there is any change.
Solution 6. Troubleshoot in Clean Boot State
The last way that you can try to resolve the wsappx high CPU usage issue is to perform a Clean Boot. It will make Windows run only on a few essential drivers for settings and startup programs.
This will help you manually resolve the wsappx high CPU or high disk usage issue from startup:
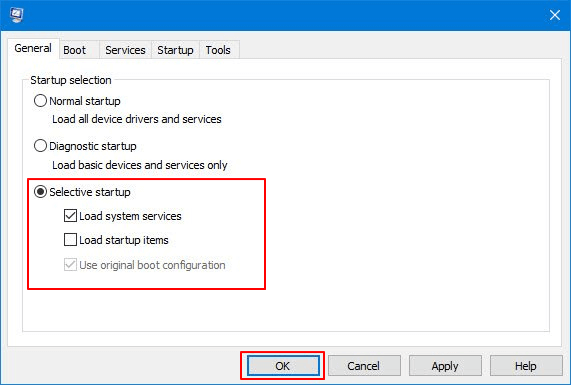
Step 1. Type MSConfig in Search and hit Enter to open System Configuration Utility.
Step 2. Go to the Genergal tab, click "Selective Startup", check "Load system services" and "Use original boot configuration".
Click "OK" to continue.
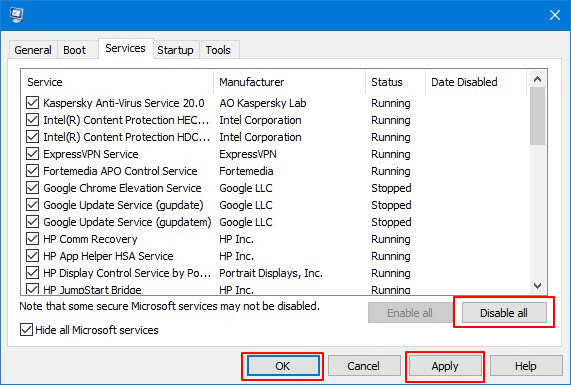
Step 3. Go to the Services tab, select "Hide All Microsoft Services" and click "Disable all".
Click "Apply" and "OK" to keep all the changes.
After this, restart your computer and Windows will execute a Clean Boot. It will help to resolve the issue. After this, you can repeat the above-listed steps and uncheck "Load System Services", save the changes and restart the computer.
Are the six solutions helpful? Share these ways to help more people facing similar issues.
Conclusion
On this page, we briefly introduced what is wsappx and explained why is wxappx taking so much CPU and disk memory on your computer. A lot of situations may cause wsappx taking high disk and CPU usage problem.
If you still haven't found effective solutions, try the presented methods on this page. Never hesitate to try and help yourself out.
How Can We Help You
About the Author
Sherly joined EaseUS in 2022 and she has always loved writing articles and enjoys the fun they bring. She receives professional training here, focusing on product performance and other relative knowledge. She has written over 200 articles to help people overcome computing issues.
Brithny is a technology enthusiast, aiming to make readers' tech lives easy and enjoyable. She loves exploring new technologies and writing technical how-to tips. In her spare time, she loves sharing things about her game experience on Facebook or Twitter.
Product Reviews
-
I love that the changes you make with EaseUS Partition Master Free aren't immediately applied to the disks. It makes it way easier to play out what will happen after you've made all the changes. I also think the overall look and feel of EaseUS Partition Master Free makes whatever you're doing with your computer's partitions easy.
Read More -
Partition Master Free can Resize, Move, Merge, Migrate, and Copy disks or partitions; convert to local, change label, defragment, check and explore partition; and much more. A premium upgrade adds free tech support and the ability to resize dynamic volumes.
Read More -
It won't hot image your drives or align them, but since it's coupled with a partition manager, it allows you do perform many tasks at once, instead of just cloning drives. You can move partitions around, resize them, defragment, and more, along with the other tools you'd expect from a cloning tool.
Read More
Related Articles
-
How to Format NVMe SSD in Windows 10/11 [Full Guide]
![author icon]() Tracy King/2026/06/17
Tracy King/2026/06/17 -
What Is the Lenovo Boot Menu Key? How to Boot Lenovo
![author icon]() Sherly/2026/06/29
Sherly/2026/06/29 -
How to Create a Bootable USB for Mac - Full guide
![author icon]() Cici/2026/06/17
Cici/2026/06/17 -
How to Bypass PIN Windows 11 (Simple Guide)
![author icon]() Oliver/2026/06/30
Oliver/2026/06/30


