
Content
Page Table of Contents
About the Author
Hot Topics
System and Compressed Memory High Disk Usage on Windows 11/10
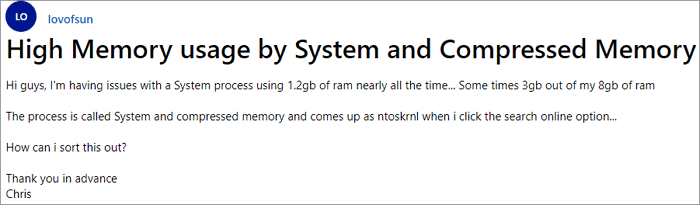
Hi guys, I'm having issues with a System process using 1.2gb of ram nearly all the time... Some times 3gb out of my 8gb of ram. The process is called System and compressed memory and comes up as full when I click the search online option... How can I sort this out? Thank you in advance.
System and compressed memory are responsible for the compression of files and folders and the management of RAM. If you messed up the virtual memory settings like changing the paging file size from Automatic to a set value, the System and compressed memory process start taking up 100% of the affected disk.
Windows 11/10 users have long been reporting to see this service occupies tons of memory, disk, and CPU usage when they check Task Manager. But there is no need for you to worry about this. If this amount of memory, CPU, and disk usage is really bothering you, here is something that you can do to fix the system and compressed memory high disk usage on Windows 11/10.
- Fix 1. End System and Compressed Memory Task in Task Manager
- Fix 2. Scan for Possible Virus/Malware
- Fix 3. Restart Your PC
- Fix 4. Disable the System and Compressed Memory
- Fix 5. Stop the Superfetch Service
- Fix 6. Check and Repair Corrupt System Files
- Fix 7. Reset Virtual Memory and Increase the Ram
Read Also: 100% Disk Usage in Windows 10
Fix 1. End System and Compressed Memory Task in Task Manager
When you are faced with memory compression high disk usage problem, you should try to end this task in Task Manager First. Here are the steps to end task in the task manager.
Step 1. Press Ctrl + Alt + Del and select Task Manager.
Step 2. Select System and compressed Memory that is taking high CPU or Disk usage.
Step 3. Click "End Task" to finish the process.
Fix 2. Scan for Possible Virus/Malware
Sometimes, viruses and malware can lead to the System and compressed memory high disk usage. To get rid of this problem, you can turn to Windows Defender or some reputable third-party antivirus software. Here is an example of using Norton.
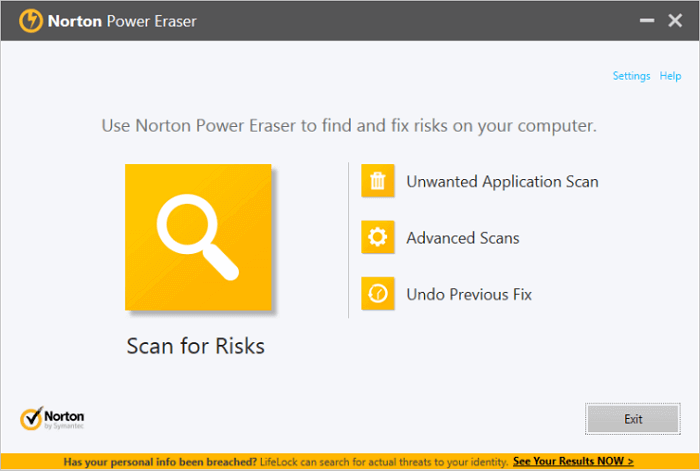
Step 1. Download and run Norton Power Eraser.
If a new version is available, Norton Power Eraser will check and download it.
Step 2. In the "Norton Power Eraser" window, click the "Scan for Risks" icon.
Step 3. Wait patiently during the process.
Step 4. After successfully removing the risk, click "Finish".
Fix 3. Restart Your PC to Fix System and Compressed Memory High Disk Usage
Usually, a restart solves most of the weird cases, and System and compressed memory high CPU issue is no exception. Steps to perform a restart:
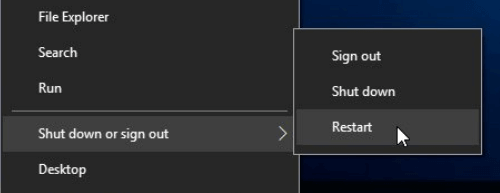
Step 1. Click the "Start" icon.
Step 2. Go to "Shut down or sign out" > "Restart".
Fix 4. Disable the System and Compressed Memory
If the solutions above don't work well, you can simply try this solution to get System and compressed memory high disk usage problem fixed with ease. Here are the details:
Step 1. Press Windows key + R at the same time to invoke the Run box. Type taskschd.msc and press Enter.
Step 2. Double-click on "Task Scheduler Library" > "Microsoft" > "Windows".
Step 3. In the Task Scheduler window, follow this path: "Task Schedule Library > Microsoft > Windows > MemoryDiagnostic".
Step 4. In the right pane, locate and right-click on RunFullMemoryDiagnosticEntry to choose Disable in the contextual menu.

Fix 5. Stop the Superfetch Service to Fix 100 Disk Usage
Superfetch is a Windows service aiming at improving system performance over time. But it can cause high CPU usage problems sometimes. You can stop this service to solve Windows System and compressed memory 100 disk usage error.
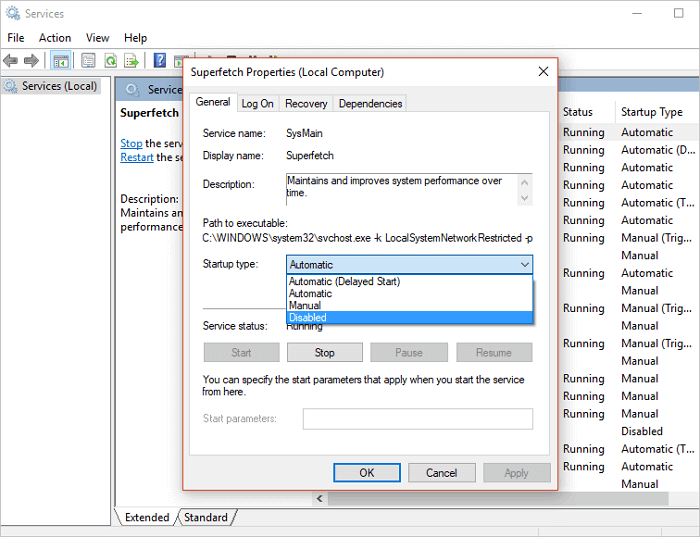
Step 1. Press Windows + R or type Run in the Windows 10 search box. Type services.msc into the "Open" box and click the "OK" button.
Step 2. Now find "Superfetch". Right-click it > select "Properties" > click "Stop" on the pop-up windows > click "Disabled" from the 'startup type' drop-down menu.
Fix 6. Check and Repair Corrupt System Files
Usually, when the System and compressed memory cause high disk usage, you need to do is to check your partition to find out the system error and fix it as soon as possible.
Here you may try a free but professional partition management tool that allows you to effortlessly check and fix system errors with ease. You can free download EaseUS Partition Master Free and follow the steps to fix system error now:
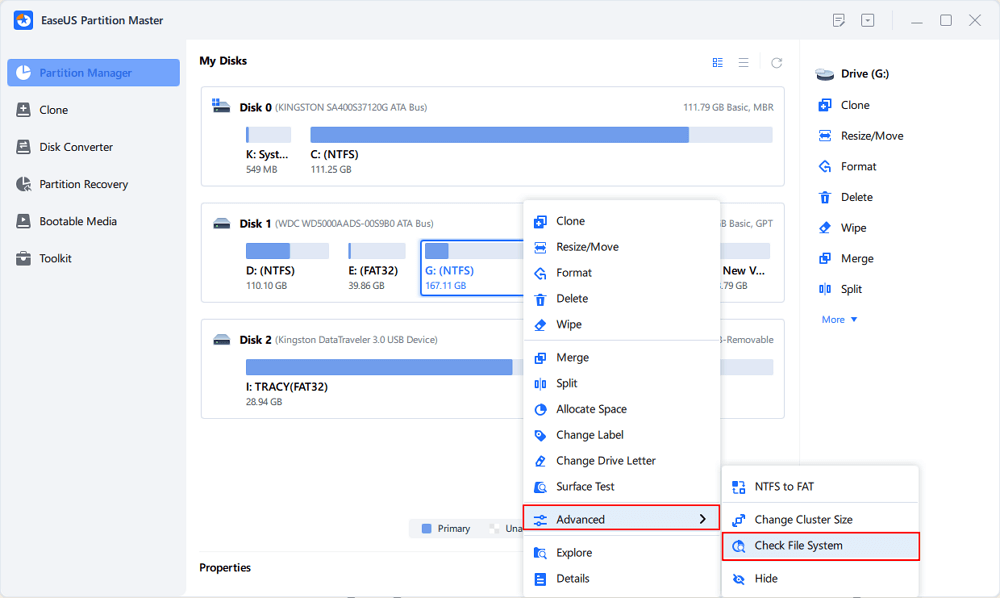
Step 1. Open EaseUS Partition Master on your computer. Then, locate the disk, right-click the partition you want to check, and choose "Advanced" > "Check File System".
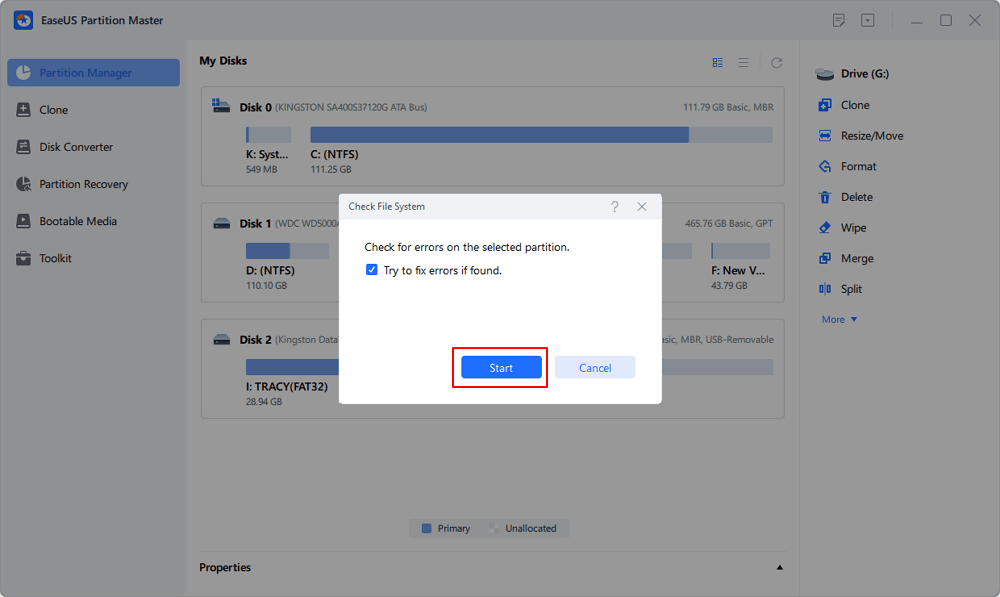
Step 2. In the Check File System window, keep the "Try to fix errors if found" option selected and click "Start".
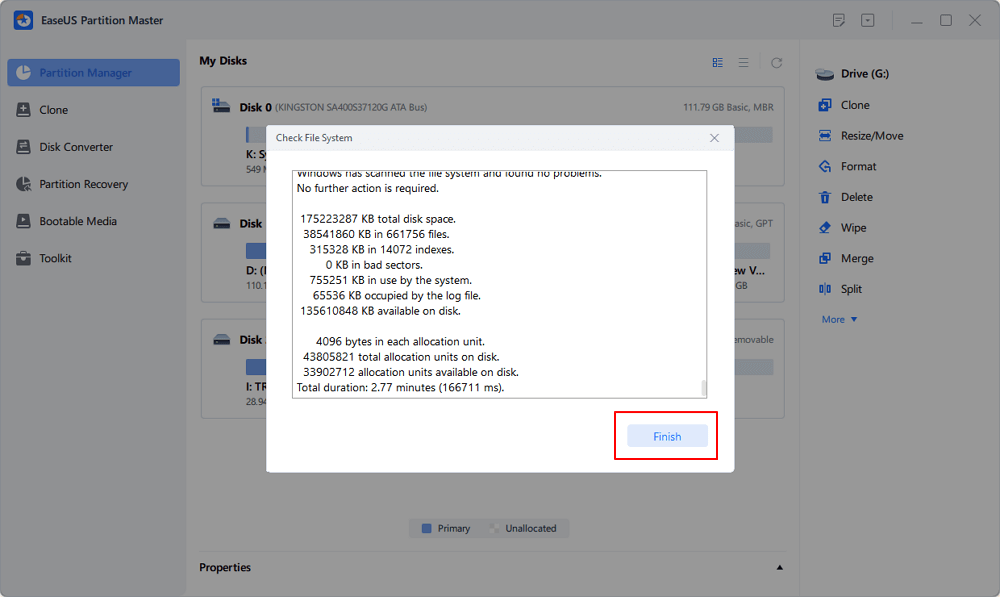
Step 3. The software will begin checking your partition file system on your disk. When it completes, click "Finish".
Fix 7. Reset Virtual Memory and Increase the Ram
At most times, this System and compressed memory disk usage is caused by failed or failing RAM. You can check and reset RAM to fix the System and compressed high CPU error.
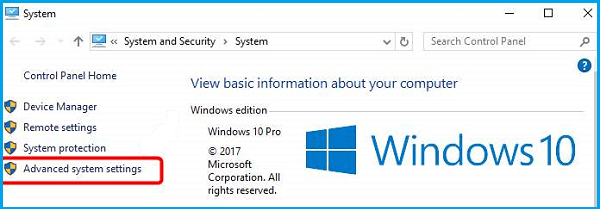
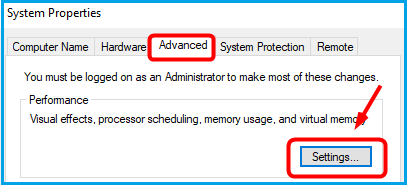
Step 1. Press Windows key + Pause/ Break key at the same time. Then choose Advanced System Settings on the left panel.
Step 2. Go to the "Advanced" tab, then click "Settings".
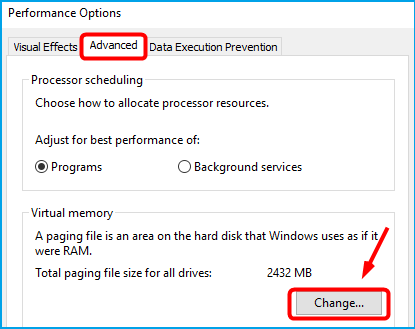
Step 3. Go to the "Advanced" tab again, and choose Change in the Virtual memory section.
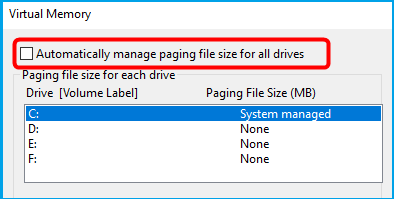
Step 4. Make sure that the Automatically manage paging file size for all drives checkbox is NOT ticked.
Step 5. Select your windows drive (the hard drive or partition that has Windows installed on it – usually C:), and enter an Initial size and Maximum size for your virtual memory:
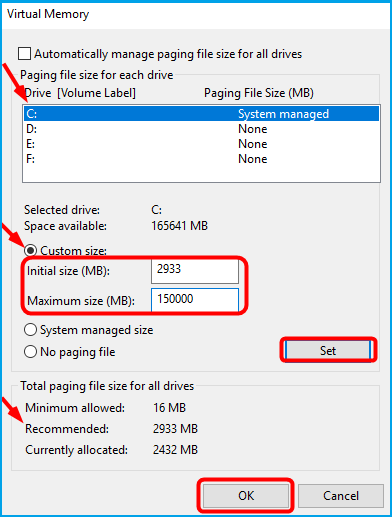
- Initial size: This value varies, depending on your computer. If you're not sure what value to use, enter whatever the number is in the Recommended category.
- Maximum size: Don't set this value too high. It should be about 1.5 times the size of your physical RAM. e.g., A PC with 4 GB (4096 MB) of RAM should have no more than about 6,144 MB virtual memory (4096 MB x 1.5).
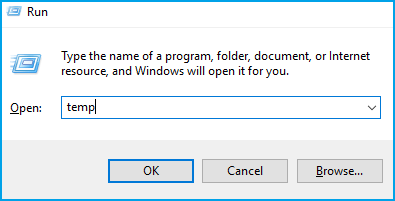
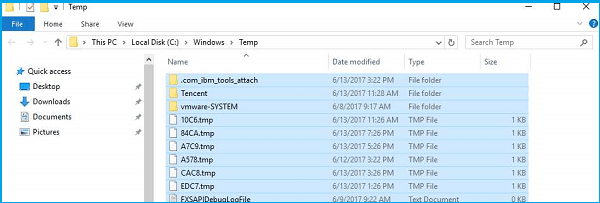
Step 6. Once you've entered your virtual memory values, click Set, then click "OK" to continue. Clear all your computer's 'temp' files. On your keyboard, press Windows key and R at the same time, then in the Run form, type temp and hit Enter. This will invoke Windows Explorer with your Temp folder open, showing you all the temp files on your computer.
Step 7. Select all the files in the Temp folder and delete them.
Conclusion
That's all about the solutions to the System and compressed memory high disk usage problem. You can choose any of the solutions above to fix the error. In addition to checking system file errors, you can also try EaseUS partition software to manage disk, increase C drive space, migrate OS to SSD.
How Can We Help You
About the Author
Sherly joined EaseUS in 2022 and she has always loved writing articles and enjoys the fun they bring. She receives professional training here, focusing on product performance and other relative knowledge. She has written over 200 articles to help people overcome computing issues.
Brithny is a technology enthusiast, aiming to make readers' tech lives easy and enjoyable. She loves exploring new technologies and writing technical how-to tips. In her spare time, she loves sharing things about her game experience on Facebook or Twitter.
Product Reviews
-
I love that the changes you make with EaseUS Partition Master Free aren't immediately applied to the disks. It makes it way easier to play out what will happen after you've made all the changes. I also think the overall look and feel of EaseUS Partition Master Free makes whatever you're doing with your computer's partitions easy.
Read More -
Partition Master Free can Resize, Move, Merge, Migrate, and Copy disks or partitions; convert to local, change label, defragment, check and explore partition; and much more. A premium upgrade adds free tech support and the ability to resize dynamic volumes.
Read More -
It won't hot image your drives or align them, but since it's coupled with a partition manager, it allows you do perform many tasks at once, instead of just cloning drives. You can move partitions around, resize them, defragment, and more, along with the other tools you'd expect from a cloning tool.
Read More
Related Articles
-
How to Wipe BitLocker Encrypted Drive (Quick Steps)
![author icon]() Oliver/2024/10/17
Oliver/2024/10/17 -
How to Format RAW SD Card/USB Drive in Windows 11/10/8/7 [Latest Tips]
![author icon]() Tracy King/2024/11/20
Tracy King/2024/11/20 -
How to Force Delete A File on Windows 11/10/8/7? [Can't Delete File Solutions]
![author icon]() Brithny/2024/10/17
Brithny/2024/10/17 -
Best Portable Partition Manager Software for Windows
![author icon]() Cici/2024/10/24
Cici/2024/10/24
Hot Topics in 2024


EaseUS Partition Master

Manage partitions and optimize disks efficiently