Page Table of Contents
About the Author
Hot Topics
Updated on Nov 18, 2024
Cloning a Mac involves creating an exact copy of the hard drive, including the macOS, applications, settings, and files. This process is invaluable for various scenarios, such as upgrading to a new device, backing up critical data, or restoring your system after a failure.
If you don't know how to perform the cloning, this guide from EaseUS will walk you through the preparations and detailed steps to clone a Mac to another Mac.
How to Clone a Mac to Another Mac - 4 Methods
Before cloning your Mac to a new Mac, there are a few necessary preparations that need to be done to ensure a smooth process. The specific preparation items depend on different cloning methods. Below are the details:
| Tool options | Preparations | Steps |
|---|---|---|
|
Automatic Cloning Software |
|
Step 1. Install and connect another new disk to Mac computer...Steps |
|
Disk Utility |
|
Step 1. Connect your external storage disk to your Mac...Steps |
|
Time Machine Backup |
|
Step 1. If you don't currently have a Time Machine backup...Steps |
|
Migration Assistant |
|
Step 1. On your new Mac, go to "Finder" > "Applications"...Steps |
Way 1. Using Automatic Cloning Software
Some users may not be familiar with disk cloning, especially on macOS. Therefore, I recommend an automatic cloning software that can save you time and energy - EaseUS Partition Master for Mac.
During the cloning process, it'll automatically proceed with the erase and other manual operations, which makes it super friendly to beginners.
Preparation:
- An external storage device (HDD/SSD/USB Drive…).
- Back up your data on the new Mac and external disk.
- Download EaseUS Partition Master for Mac.
Steps:
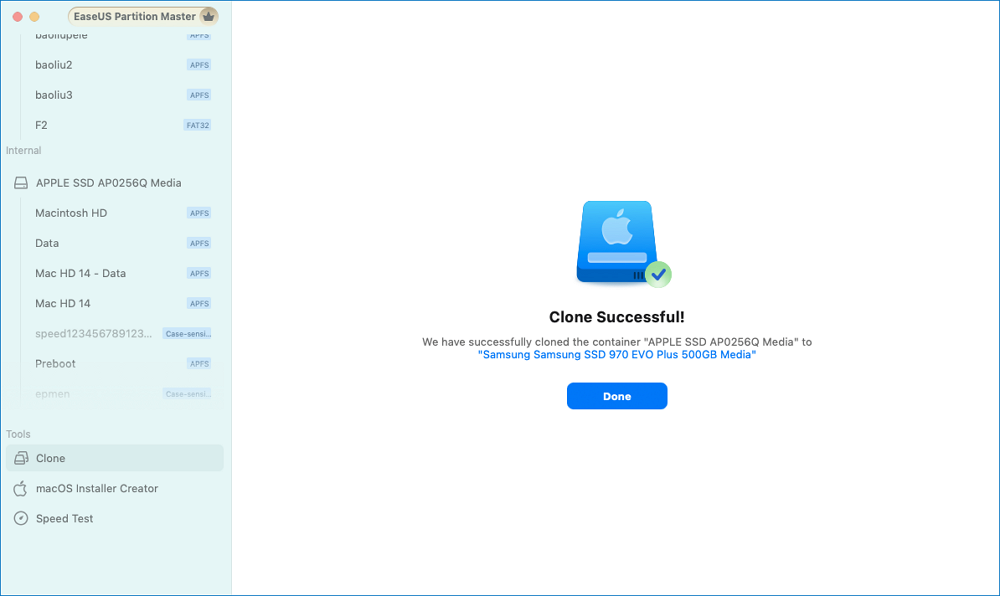
Step 1. Install and connect another new disk to Mac computer, run EaseUS Partition Master for Mac, then, click "Clone" under the Abilities section. Click the "+" icon to browse and locate the macOS disk and target new disk.
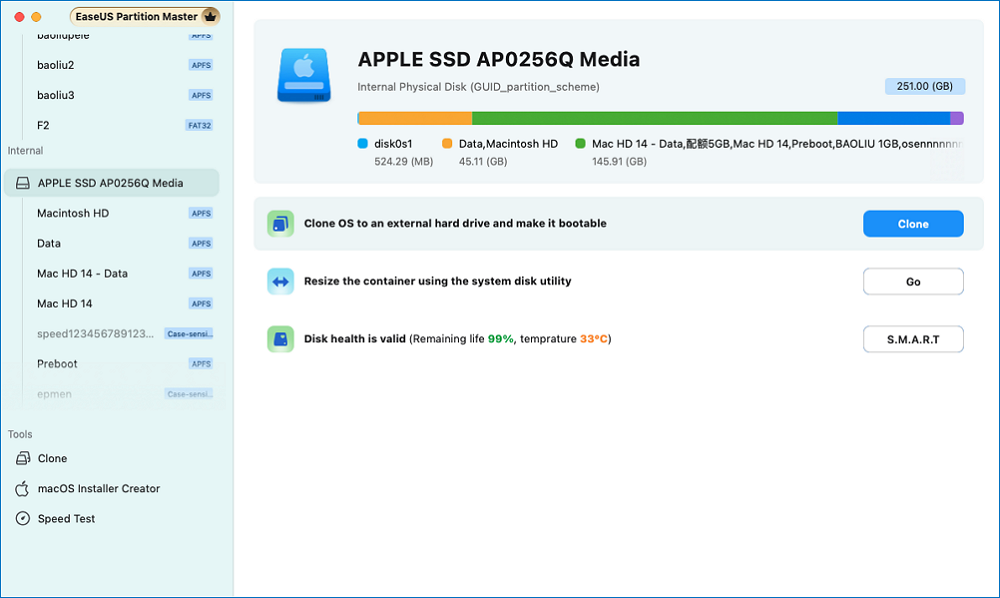
Step 2. Select the Source and the Destination disk and click "Select" to confirm.
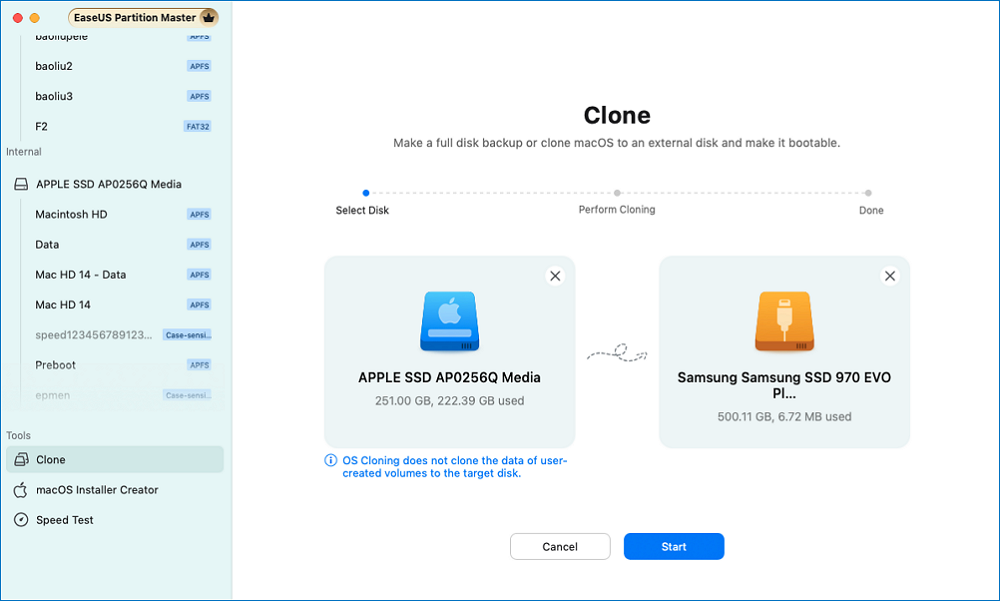
Step 3. Confirm if you've selected the correct macOS OS disk and the new target disk you'd like to clone and upgrade the macOS disk to. Then, click "Start" and click "Yes" to confirm if EaseUS Partition Master for Mac requests you to confirm the operation.
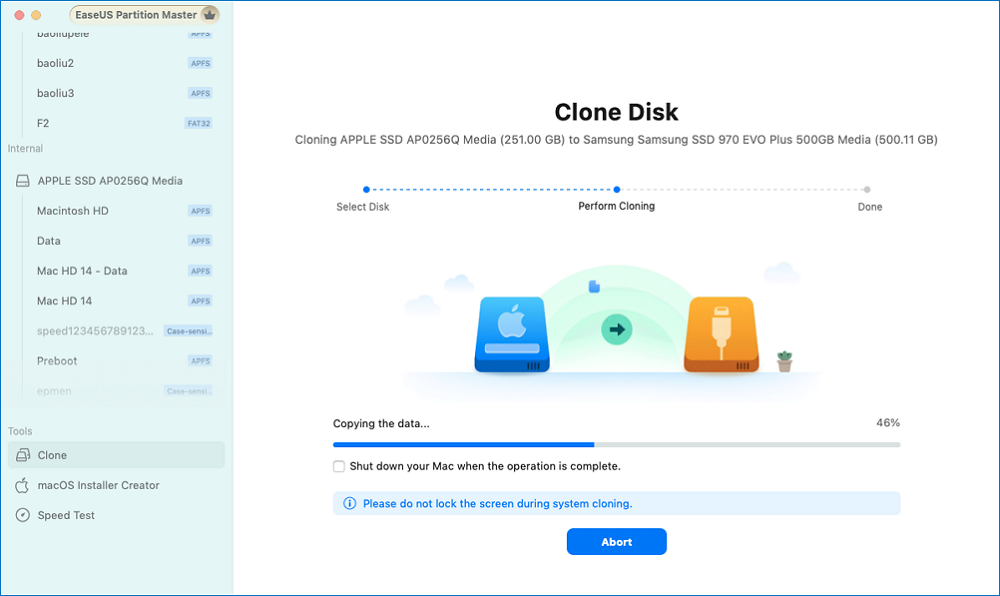
Step 4. Wait patiently and let EaseUS Partition Master for Mac to complete cloning the old macOS disk to the new target disk.
After making the full copy of your Mac hard drive to your external disk, it's time to restore all the items to the new Mac.
Step 1. Connect the external drive with the clone to your new Mac.
Step 2. Boot Mac into Recovery Mode:
- For Apple Silicon Macs: Hold the power button until you see the Apple logo or another icon.
- For Intel Macs: Restart and hold down Command (⌘) + R during boot.
Step 3. Then, choose "Options" and select "Disk Utility."

Step 4. Choose your Mac drive and click on "Restore."
Step 5. Select your external drive in the "Restore from" box and hit "Restore."
Step 6. The process may take some time, depending on the size of your data. So wait patiently.
It is an all-in-one disk manager that offers a wide range of features that meet mainstream needs. Such as cloning macOS to a new SSD, enabling read & write NTFS drives, opening Bitlocker-encrypted USB, etc.
Way 2. Using Disk Utility
There's a built-in tool in Mac devices called Disk Utility, which supports users in performing all the basic disk management tasks, including cloning your disk on Mac.
Preparation:
- An external storage device (HDD/SSD/USB Drive…).
- Back up your data on the new Mac and external disk.
- Download EaseUS Partition Master for Mac.
Steps:
Step 1. Connect your external storage disk to your Mac.
Step 2. Go to "Applications" > "Utilities" > "Disk Utility."
Step 3. Select your external disk from the list on the left.
Step 4. Click on the "Erase" button and then choose "Mac OS Extended (Journaled)" as the format and "GUID Partition Map" as the Scheme.
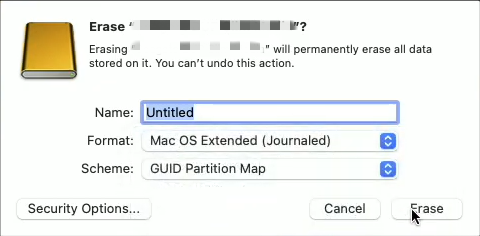
Step 5. Hit "Erase" to format your disk.
Step 6. Now, right-click on the external disk and choose "Restore."
Step 7. In the "Restore from" box, choose your Mac's internal drive and then hit "Restore" to clone your Mac hard drive to an external SSD or HDD.

Step 8. Wait patiently and click "Done" after it's completed.
After this, repeat the steps in Way 1 to restore your external disk to the new Mac.
Way 3. Using Time Machine Backup
If you have previously backed up your old Mac using Time Machine, you can restore this backup to your new Mac.
Preparation:
- An external storage device (HDD/SSD/USB Drive…).
- Back up your data on the new Mac and external disk.
- Download EaseUS Partition Master for Mac.
Step 1. If you don't currently have a Time Machine backup, create one by connecting an external drive and selecting it in "System Preferences" > "Time Machine."
Step 2. Click "Select Backup Disk," choose your external drive, and enable Time Machine to start backing up your data.
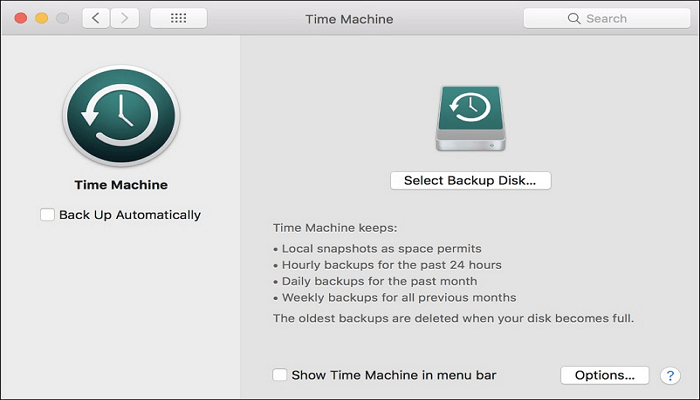
Step 3. After that, connect your external disk containing the Time Machine backup to the new Mac.
Step 4. On your new Mac, go to "Applications" > "Utilities" > "Migration Assistant."
Step 5. Click "Continue" when prompted and choose "From a Mac, Time Machine backup or Startup disk." Then, click "Continue."

Step 6. Select the Time Machine backup you just connected and click "Continue."
Step 7. Choose the latest backup and select the data you want to transfer. Click "Continue" to start the process.

Way 4. Using Migration Assistant
If you prefer to complete the cloning online, macOS also provides a Migration Assistant that can help you. This tool allows you to migrate all your files, apps, user accounts, and settings.
Preparation:
- Connect both Macs to the same Wi-Fi network or make a direct connection using Thunderbolt, USB-C, or Ethernet cables.
- Have the administrator password of your old Mac ready.
- Connect both Macs to a power source (prevent interruptions during the transfer).
Steps:
Step 1. On your new Mac, go to "Finder" > "Applications" > "Utilities" and open Migration Assistant.
Step 2. Click "Continue" when prompted. Then, choose "From a Mac, Time Machine backup, or Startup disk" as how you want to transfer your information and click "Continue."

Step 3. On your old Mac, repeat the steps above to open Migration Assistant.
Step 4. Click "Continue," then select "To another Mac" and click "Continue" again.
Step 5. On your new Mac, you will see the icon of your old Mac. Select it and click "Continue."

Step 6. A six-digit code will appear on both Macs. Ensure they match and click "Continue" on your old Mac.
Step 7. On your new Mac, you will see a list of data available for transfer (Applications, Files & Folders, System & Network). Confirm the items you want to transfer and click "Continue."

Step 8. You may be prompted to create a password for your user account on the new Mac. Follow the instructions and set it up.
Step 9. After the process, your Mac will restart automatically.
You can then log into your new Mac using the password you just set up and verify if everything is migrated successfully.
Are these instructions helpful to you? Don't forget to share this page with other users who may also need it.
Conclusion
This article provides a comprehensive tutorial on cloning a Mac to a new Mac for users. It covers multiple different ways of disk cloning and the steps of restoring the external disk to the new Mac. Whether you have experience using macOS or not, this tutorial ensures that you can easily complete this task, especially with the help of EaseUS Partition Master for Mac.
Clone a Mac to Another Mac FAQs
If you still have relevant questions to this topic, this part might help.
- How do I clone my Macbook to another Macbook?
To clone your Macbook to another one, you can:
- Connect two Mac devices using a USB-C or Thunderbolt.
- Boot into Target Disk Mode.
- Power on your old Mac while holding the "T" key until the logo appears.
- On your new Mac, you can view the old Mac's drive as an external disk.
- Drag and drop the files you want.
- What is the best way to transfer data between 2 Macs?
The best way to transfer data between two Macs is to use Migration Assistant for a comprehensive transfer of files and settings, or AirDrop for quick file sharing.
- Can you clone a MacBook Pro?
Yes, you can clone a MacBook Pro using tools like Disk Utility or third-party software such as Carbon Copy Cloner or EaseUS Partition Master for Mac to create an exact copy of Mac hard drive.
How Can We Help You
About the Author
Oliver is an EaseUS professional writer who dares explore new areas. With a passion for solving tech issues with straightforward guides for common users, Oliver keeps honing his writing craft by developing in-depth solutions for disk and partition management, computer boot-up issues, file transfer, etc.
Product Reviews
-
I love that the changes you make with EaseUS Partition Master Free aren't immediately applied to the disks. It makes it way easier to play out what will happen after you've made all the changes. I also think the overall look and feel of EaseUS Partition Master Free makes whatever you're doing with your computer's partitions easy.
Read More -
Partition Master Free can Resize, Move, Merge, Migrate, and Copy disks or partitions; convert to local, change label, defragment, check and explore partition; and much more. A premium upgrade adds free tech support and the ability to resize dynamic volumes.
Read More -
It won't hot image your drives or align them, but since it's coupled with a partition manager, it allows you do perform many tasks at once, instead of just cloning drives. You can move partitions around, resize them, defragment, and more, along with the other tools you'd expect from a cloning tool.
Read More
Related Articles
-
How to Merge or Combine Partitions in Windows 11
![author icon]() Tracy King/2024/08/26
Tracy King/2024/08/26 -
How to Reformat Windows 11/10 PC/Laptop | In-Depth Tutorial
![author icon]() Tracy King/2024/06/17
Tracy King/2024/06/17 -
How to Fix Windows 10 Won't Boot After Update 2016 [Effective]
![author icon]() Roxanne/2024/08/21
Roxanne/2024/08/21 -
Windows Password Unlocker - Download for Windows🔥
![author icon]() Cici/2024/10/08
Cici/2024/10/08
Hot Topics in 2024
EaseUS Partition Master

Manage partitions and optimize disks efficiently


