-
![]() How to Use TestDisk to Recover Data on Windows/Mac
How to Use TestDisk to Recover Data on Windows/Mac June 30,2026
 6 min read
 -
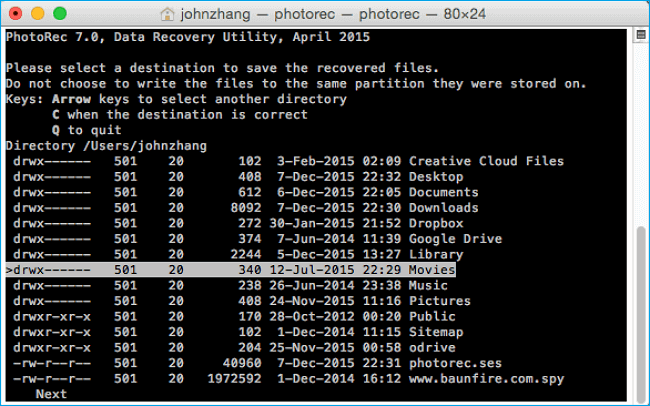
![]() Top 10 Photo Recovery Software for Free [Easily & Safely]June 30,20266 min read
Top 10 Photo Recovery Software for Free [Easily & Safely]June 30,20266 min read -
![]() 10 Best Data Recovery Software for Windows 7 Free DownloadJune 17,20266 min read
10 Best Data Recovery Software for Windows 7 Free DownloadJune 17,20266 min read -
![]() EaseUS Data Recovery Wizard 20.1 Review: Major UpdatesJune 16,20266 min read
EaseUS Data Recovery Wizard 20.1 Review: Major UpdatesJune 16,20266 min read -
![]() Disk Doctor: Freeware to Recover Lost Data [2026 Tips]June 30,20266 min read
Disk Doctor: Freeware to Recover Lost Data [2026 Tips]June 30,20266 min read -
![]() Data Recovery Software Review Hub | Tests, VS & Top PicksJune 17,20266 min read
Data Recovery Software Review Hub | Tests, VS & Top PicksJune 17,20266 min read -
![]() 6 Best Free Disk Drill Alternatives for Mac Data Recovery in 2026June 30,20266 min read
6 Best Free Disk Drill Alternatives for Mac Data Recovery in 2026June 30,20266 min read -
![]() EaseUS Data Recovery Wizard VS. DMDE: 2026 Full ReviewJune 16,20266 min read
EaseUS Data Recovery Wizard VS. DMDE: 2026 Full ReviewJune 16,20266 min read -
![]()
-
![]() PhotoRec vs EaseUS Data Recovery: Full Comparison & 2026 ReviewJune 30,20266 min read
PhotoRec vs EaseUS Data Recovery: Full Comparison & 2026 ReviewJune 30,20266 min read
Page Table of Contents
PAGE CONTENT:
Proper storage of data is crucial for your work, which may force you to try a recovery. Therefore, instead of counting on backups that you have taken to safeguard your system, there are several data retrieval tools available to help fix the issue. TestDisk for Mac is one of the leading data restoration software available online and for free.
Regardless of how compact and effective Mac's storage devices become, they're susceptible to malfunction, which might result in data loss. But with the help of TestDisk for Mac, you can efficiently restore essential files from corrupted drives of your MacBook.
Being an entirely open-source tool, TestDisk is thoroughly updated and modified to function better. However, this open-source data recovery software for Mac is not easy to use if you have no experience with data recovery and command lines. In this case, we will introduce the alternative of TestDisk for Mac, EaseUS Data Recovery Wizard for Mac, as a replacement for TestDisk for those who find it difficult to use.
You Can Trust EaseUS Data Recovery Software
EaseUS Data Recovery Wizard has acquired an extensive technical base in data recovery and trusted by billions of users since 2005. Check out reviews on G2.
Why Choose TestDisk for Mac Alternatives
Even though TestDisk for Mac is a free and open-source tool, using it can be difficult for novice users. Complex and time-consuming techniques may delay data recovery, especially in emergency situations. According to the data recovery software review, another option is the trusted EaseUS Mac data recovery tool, a simple program for all skill levels that allows users to recover permanently deleted files on Mac.
Here are the main reasons you should choose TestDisk for Mac alternatives:
EaseUS Data Recovery Wizard for Mac vs. TestDisk for Mac
Expert's Rating of EaseUS software:
![]() EaseUS Data Recovery Wizard for Mac
EaseUS Data Recovery Wizard for Mac
- An intuitive GUI disentangles the data retrieval procedure and makes the tool highly beneficial for existing Mac users.
- Users can easily retrieve deleted files and emails on Mac with a few simple clicks by following the instructions.
- The versatile file restoration EaseUS software can restore data from different data loss situations, including accidental deletion, system crashes, HDD damage, virus attacks, partition loss, and more.
- Both free and paid versions are available, the free version of EaseUS sofwtare supports data recovery up to 2GB, the paid version has no capacity limit.
![]() TestDisk for Mac
TestDisk for Mac
- It is a command-line tool that isn't precisely suited to users who crave a more graphical user experience. It's meant to be utilized by individuals with different degrees of PC skills and knowledge.
- New users might be restricted to using the tool to accumulate data for tech support to evaluate.
In Summary:
If you are good at using the command line and have plenty of time and a spirit of discovery, then you can use TestDisk to recover your lost files. In this article, we also tell you how to download TestDisk on your Mac for free.

TestDisk Review, Is TestDisk Safe to Use
TestDisk is a file data recovery software designed to recover lost files, including video, documents, and archives, from hard disks and lost pictures. Read more >>
Free Download TestDisk for Mac [Full Steps]
TestDisk is distinct from other applications, which you may have tried to restore lost data mainly because it doesn't have a graphical interface. Prior to downloading TestDisk for Mac, these are the pointers to keep in mind:
- Subscribe to testdisk-announce to stay informed of the new release.
- PhotoRec and TestDisk are portable apps that extract the apps and files that are ready to be used. Therefore, you don't have to run an installer.
- These applications can also be found on LiveCD.
✅TestDisk 7.2 (Feb 22, 2024) Data Recovery
For the TestDisk 7.2 release, you must choose your OS, which is macOS, to download the current version of the TestDisk recovery tool. These are the steps to install TestDisk on macOS:
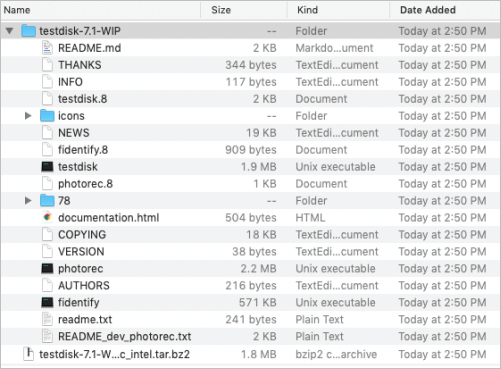
Step 1. Get TestDisk for your macOS. Hitting the big green button providing "TestDisk 7.1" resulted in a file named "testdisk-7.1-WIP.mac_intel.tar.bz2" being saved to the "Download" folder of your Mac.
Step 2. Tap the file to uncompress it that made a folder named "testdisk-7.1-WIP". Broadening the folder disclosed a wide array of files, including executables for Mac PhotoRec and TestDisk.
If you are pressed for time and have no prior data recovery experience, consider using the clearer and more intuitive EaseUS software to avoid missing the golden opportunity to recover lost data.
Share this article on social media to help others learn how to download TestDisk for Mac to recover lost files.
How to Use TestDisk for Mac to Recover Lost Partitions
You will see the "testdisk" folder after downloading and extracting TestDisk for Mac. To use the software, simply navigate to the folder and double-click on it. There will be no such additional step for installation. Follow the steps below:
Step 1. TestDisk can't be launched since it's from an unauthorized developer. Hence, you navigate to the "System Preferences" to let your Mac run TestDisk.
Step 2. Hit the Apple menu > "System Preferences > Privacy & Security".
Step 3. Scroll down to find the "Security" tab, turn on "App Store and identified developers", and check the "Always" option in the right conner.

Allow Complete Disk Access for TestDisk
In order to let TestDisk spot every disk on your Mac, you must enable complete Disk Access for TestDisk. Otherwise, it will not conduct lost partition restoration. The steps are the following:
Step 1. Hit the Apple menu > "System Preferences > Privacy & Security".
Step 2. Scroll down to find the "Full Disk Access".

Step 3. Hit the lock and type your admin password to make the required changes.
Step 4. Hit the add button "+" to insert testdisk.
Start TestDisk Partition Recovery
Once you're done with the preparations, you may start the TestDisk partition recovery. Go through the steps below:
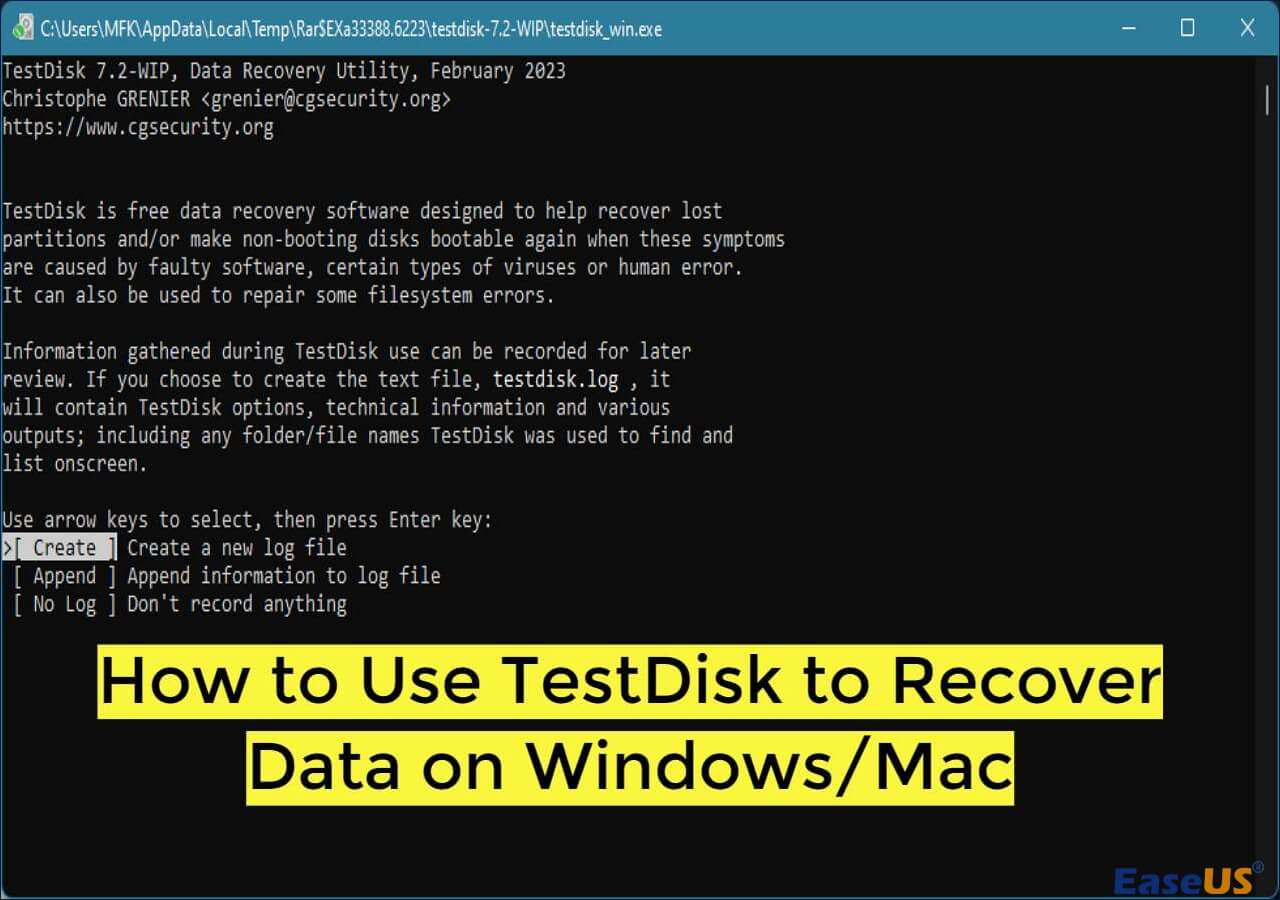
Step 1. Open the "TestDisk" program in the folder.
Step 2. Opt for "[Create] Create a new log file" and hit the "Enter" button to allow data to be appended to the log. After that, TestDisk will generate a file named "testdisk.log" in the latest directory.

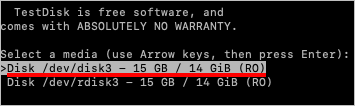
Step 3. Employ the "Up or down" arrow keys on your keyboard to choose the HDD containing the missing portion. Finally, hit the "Enter" button to proceed.
If TestDisk doesn't spot and list the HDDs, such as macOS FAT32, APFS, and exFAT formatted ones, and the macOS you're using is 10.05 or later. The disk partition map isn't the Apple one; you need to move to the top-notch alternative of TestDisk, which is the EaseUS Data Recovery Wizard for Mac.
Step 4. Opt for the type of partition table of the recent HDD that TestDisk lists by default, and hit the "Enter" button.
Step 5. Select "Analyze" and hit the "Enter" button to let TestDisk spot and list the recent partition table.
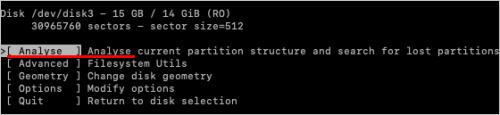
In case a partition on the chosen HDD is corrupted or the partition entry is damaged, you may notice in-depth information about the issue.
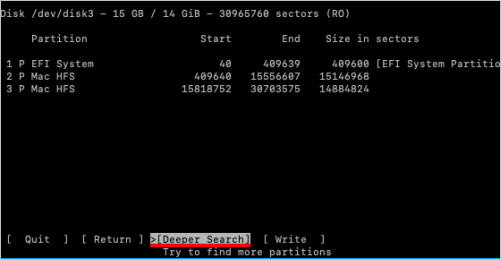
Step 6. TestDisk will list every partition that it has analyzed on the chosen HDD.
In case your desired partition still can't be found, opt for "Deeper Search". It might take a long time, even hours, to search for the misplaced partition. You need to ensure that your Mac won't go to sleep during the process when the display remains on.
Step 7. Hit the arrow keys to opt for the misplaced partition for recovery.
Don't forget to notice the size of the partition and list the file contents for confirmation. For the partitions that can't be retrieved, you must check if the misplaced partition is marked as non-deleted.
Analyze the partitions now. After looking over the partitions, make sure they have been assigned in the partition table by writing them down and using Enter, Y, and OK.
Restart your Mac, and assess if the deleted partition is back. Suppose the TestDisk for Mac can't recover your lost partitions; consider install and launch the EaseUS data recovery software to rescue your lost data:
Step 1. Search for lost files
Select the disk location to search for lost files (it can be an internal HDD/SSD or an external hard drive) where you lost data and files. Click the "Search for lost files" button.

Step 2. Go through the scanning results
This software will immediately scan your selected disk volume and display pictures, documents, audio, videos, and emails on the left pane.

Step 3. Select the file(s) and recover
Click the data to preview, and click the "Recover" button to have them back.

Conclusion
As we've seen, Testdisk can assist you in getting your deleted information back, and best of all, it costs nothing. That is subject to certain limitations, though. A GUI isn't included with Testdisk. With choices that might appear confusing to amateurs and a completely nonexistent "presentation", this tool is mostly intended for medium to experienced users.
To cut a long tale short, TestDisk can perform the task. Most users, nevertheless, would benefit more from a more contemporary and user-friendly solution, such as EaseUS Data Recovery Wizard for Mac.
TestDisk for Mac FAQs
These are the best FAQs to consider:
1. How do I download TestDisk on my Mac?
In order to install TestDisk, you must run the following command in the macOS terminal sudo port and install TestDisk copy. Next, to check the files that TestDisk installed, you need to run the following: port content TestDisk copy. Finally, to later upgrade the tool, you need to run: sudo port seflupdate && sudo port upgrade testdisk copy.
2. Is TestDisk completely free?
TestDisk is a complimentary, open-source data retrieval utility that helps users restore lost partitions or repair damaged file systems.
3. How do I run TestDisk from the terminal?
In your Terminal, all you need to do is enter the command testdisk to let the utility run, and you will get a prompt. After that, you may opt for the disk drive on which you would like to retrieve files. In case it's initial time to run this utility, it will give you an option to generate a log file on the welcome screen.
Was this page helpful?


20+
Years of experience

160+
Countries and regions

72 Million+
Downloads

4.9 +
Trustpilot Score


