Many users report photos disappearing after a macOS update, a distressing issue that can stem from software glitches, library corruption, syncing errors, or changes in system permissions. But before you panic, take a breath - your photos are likely not gone forever.
You may have upgraded your Mac from Ventura to the latest macOS Sonoma (macOS Sonoma vs. Ventura) or from Monterey to Ventura.
However, unexpected errors may occur after a macOS version update, most commonly when photos disappear from Mac after an update. Don't panic; we offer you 6 solutions to recover disappeared Mac photos.
Before learning how to fix the photos that disappear from your Mac after an update, we will explain the possible reasons why photos disappear from your Mac after an update. Keep reading!
Why My Photos Disappeared from Mac After Update
First, you need to ensure that the photos disappeared after upgrading to macOS 14 or other versions, but not that you didn't find them on the right path.
There are many reasons for missing photos on your Mac after Sonoma updating; here are the possible reasons why your photos may have disappeared from your Mac:
- 😓System crashing while updating to the latest macOS
- ⚠️Data loss due to conflict between macOS and apps on your Mac
- ❎Not enough space for macOS Sonoma and data is overwritten
- ❌Accidentally deleted photos on your Mac
- 🚫Photos cannot be iCloud synchronized and lost due to abnormal settings
- 😰Malware or virus attack on macOS system makes photos disappear
How to Fix Photos Disappeared from Mac After Update
As a first aid to recover disappeared photos after a Mac update, you can enable iCloud synchronization, scan and remove malware, etc. We will introduce 6 effective methods in the next part to fix photos that disappeared from your Mac after an update.
- Fix 1. Recover Photos After macOS Sonoma Update Using Software💎
- Fix 2. Recover Photos Disappeared from Mac via Recently Deleted
- Fix 3. Repair Photos Library on Mac to Find Disappearing Photos
- Fix 4. Unhide Hidden Photos on Mac After Update macOS
- Fix 5. Restore Disappeared Photos After the Update from iCloud
- Fix 6. Retrieve Photos Disappeared After Update from Time Machine
Fix 1. Recover Photos After macOS Sonoma Update Using Software
Due to the uncertainty of the new update, you may face data loss. In this case, consider installing a powerful data recovery tool on your Mac to recover files that suddenly disappeared from your Mac.
EaseUS Data Recovery Wizard for Mac is an all-in-one data recovery and backup software that can back up your Mac data and recover permanently deleted files on Mac. It can recover photos that disappeared from your Mac after updating macOS.
As a professional photo recovery software, the EaseUS software can recover lost photos after a macOS update with only three steps! Check out:
Step 1. Select the location
Select the disk where you lost data after updating to macOS Sonoma/Ventura/Monterey/Big Sur. Then, click "Search for lost files".

Step 2. Find lost data after the scan
EaseUS Data Recovery Wizard for Mac will immediately scan your selected disk volume and display the scanning results on the left pane. Use the file type and file path to find wanted data on Mac.

Step 3. Recover data after macOS update
Select the target files that were unknowingly lost during or after the update and click the "Recover" button to get them all back.

If you find this information helpful, please share it with others on social media to assist them in overcoming this common challenge.
Fix 2. Recover Photos Disappeared from Mac via Recently Deleted
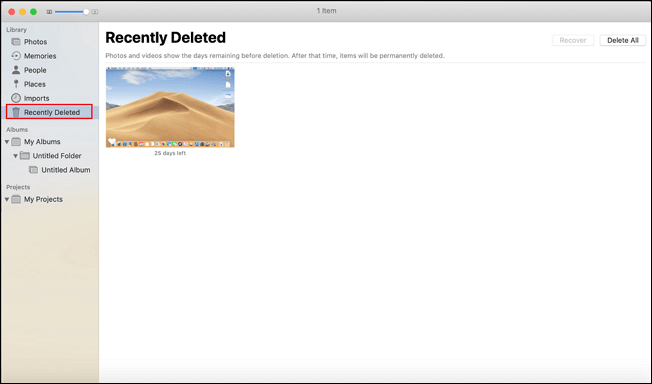
Photos can also disappear because you accidentally deleted them. Where do deleted photos go on Mac? The answer is the "Recently Deleted" album.
You can also use the powerful recovery software mentioned in the first method to recover deleted photos on Mac. Or you can find photos deleted within 30 days in the Recently Deleted folder and click "Restore" to get the deleted photos back to their original location.
If the Recently Deleted photos on Mac not showing, install EaseUS Data Recovery Wizard for Mac Pro to recover the missing photos in only three steps!
While this fix is straightforward, it only works if the photos were moved - not permanently deleted or lost due to library corruption. If nothing appears here, don't lose hope - let's move to more advanced solutions.
Share this article on social media to help other Mac users learn how to fix the photos that disappeared after a macOS update.
Fix 3. Repair Photos Library on Mac to Find Disappearing Photos
Let's assume you don't have a library folder for photos after updating to macOS Sonoma. It might be corrupted due to incompatibility. The good news is that macOS allows users to repair Photo Library on Mac. Check out the following steps:
Step 1. Open the Photos app and press "Option + Command".
Step 2. Click the "Repair" option in the new window on your Mac.
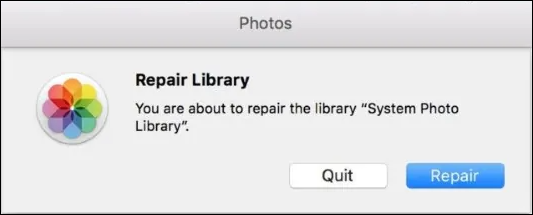
Step 3. Wait for the repair process to finish, and check if the disappeared photos show up.
Note: Repair mode rebuilds the library's SQLite database, which stores references to every photo. This is why even if the actual image files are intact, they may not appear until the database is fixed.
Fix 4. Unhide Hidden Photos on Mac After Update macOS
If your photos have disappeared from your Mac and you're sure you haven't deleted them, you may have accidentally hidden the disappeared photos. You probably have a lot of hidden photos on your Mac that you can't access directly.
Have iCloud Photos enabled, you can hide your photos on one device and have the changes reflected on all devices signed into the same iCloud account. To unhide Mac folders that store hidden photos, you should follow the steps below:
Step1. Launch "Photos" from "Finder > Applications" on your Mac.
Step 2. Click "View" and select "Show Hidden Photo Album".

Step 3. Choose the hidden photo album once it appears in the left sidebar.
Step 4. Right-click on the photos you want to restore, and click "Unhide" to make them appear normally.
If your photos aren't hidden or in Recently Deleted, the issue may be broader—related to cloud syncing or system backups.
Fix 5. Restore Disappeared Photos After the Update from iCloud
This method is very simple and straightforward; as long as you have iCloud enabled to back up those photos that suddenly disappeared after the update, then all you need to do is visit your iCloud Drive, find the photos you want, and download them to your Mac.
In addition to iCloud, EaseUS Data Recovery Wizard for Mac Pro, which we mentioned earlier, also has the ability to back up your photos, which is a powerful program that can go a long way in helping you keep your data safe!
Fix 6. Retrieve Photos Disappeared After Update from Time Machine
Time Machine is a built-in backup program for macOS that can backup your data to a specified internal or external drive. Refer to the following steps to recover your disappeared photos from Time Machine after the update:
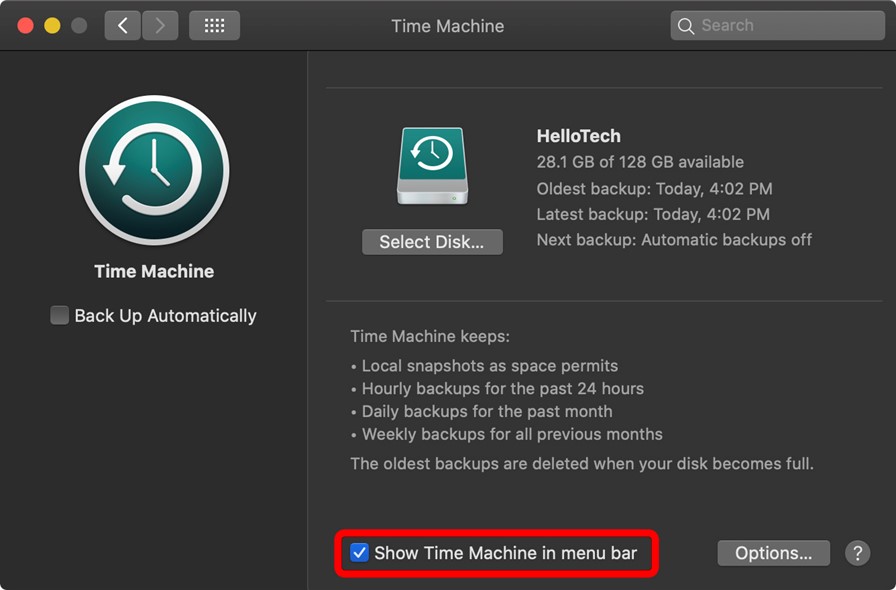
Step 1. Open "Time Machine" and check the "Show Time Machine in menu bar" option.
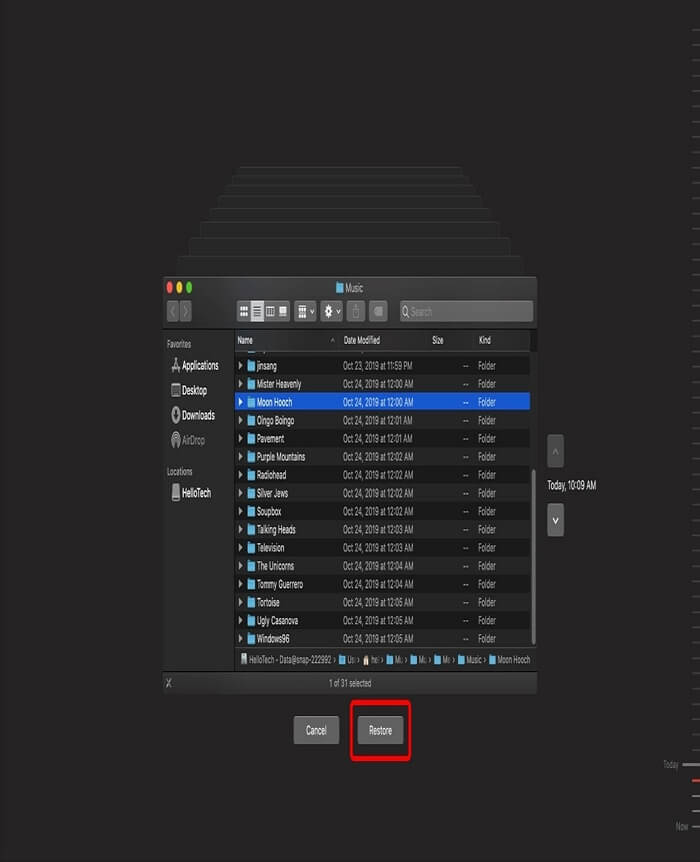
Step 2. Click the Time Machine icon at the top menu and select "Enter Time Machine" to show all the previous Time Machine backups.

Step 3. Click "Restore" to get the disappeared photos back in their original location.
Time Machine keeps hourly backups for the past 24 hours, daily backups for a month, and weekly backups beyond that. This means you can pinpoint the exact moment before the photos disappeared.
Conclusion
This article introduces 6 effective ways to recover photos that disappeared from your Mac after an update. In this case, consider installing EaseUS Data Recovery Wizard for Mac Pro to recover your lost photos in only three steps!
Photos Disappeared from Mac After Update FAQs
Here are questions that people frequently ask when they search for how to recover photos that disappeared from Mac after an update; take a look!
1. Where did my photos go on my Mac after the update?
Check your iCloud Drive for the disappeared photos after the macOS update if you are using iCloud Drive to back up your Mac photos across Apple devices.
2. Why did all my photos disappear after an update?
After updating macOS, you may get logged out of your iCloud account. In this case, iCloud photos will disappear from your Mac. To get your lost photos back, just log back into iCloud and restore them.
3. How do I get my photos back on my Mac?
Whether your photos are lost or deleted, you can recover them with this solution; check out the following steps:
Step 1. Install and launch EaseUS Data Recovery Wizard for Mac Pro.
Step 2. Choose the hard drive that stores the disappeared or deleted photos on your Mac, and click "Search for lost files".
Step 3. After the scanning, select the "Picture" tab in the left panel and find the photos you want. If you are not sure which one to restore, click "Preview" to view its content.
Step 4. Select the Photos, and click "Recover" to get them back.
Was This Page Helpful?
Dany is an editor of EaseUS who lives and works in Chengdu, China. She focuses on writing articles about data recovery on Mac devices and PCs. She is devoted to improving her writing skills and enriching her professional knowledge. Dany also enjoys reading detective novels in her spare time.
Brithny is a technology enthusiast, aiming to make readers' tech lives easy and enjoyable. She loves exploring new technologies and writing technical how-to tips. In her spare time, she loves sharing things about her game experience on Facebook or Twitter.
-
EaseUS Data Recovery Wizard is a powerful system recovery software, designed to enable you to recover files you’ve deleted accidentally, potentially lost to malware or an entire hard drive partition.
Read More -
EaseUS Data Recovery Wizard is the best we have seen. It's far from perfect, partly because today's advanced disk technology makes data-recovery more difficult than it was with the simpler technology of the past.
Read More -
EaseUS Data Recovery Wizard Pro has a reputation as one of the best data recovery software programs on the market. It comes with a selection of advanced features, including partition recovery, formatted drive restoration, and corrupted file repair.
Read More
Related Articles
-
Mac TextEdit Recovery: Recover Deleted/Unsaved TextEdit Files
![author icon]() Tracy King/Jun 17, 2026
Tracy King/Jun 17, 2026 -
Recover Data from SanDisk on Mac | All SanDisk Storage Devices
![author icon]() Dany/Jun 30, 2026
Dany/Jun 30, 2026 -
Firefox Bookmarks Location on Mac: Where Firefox Stores Your Bookmarks
![author icon]() Brithny/Jun 12, 2026
Brithny/Jun 12, 2026 -
How to Recover Files Deleted by RM on Mac
![author icon]() Tracy King/Jun 30, 2026
Tracy King/Jun 30, 2026