-
![]() Synology Data Recovery: How to Recover Deleted Files from Synology NAS Device
Synology Data Recovery: How to Recover Deleted Files from Synology NAS Device July 23,2026
 6 min read
 -
![]() 3 Ways to Recover Monster Hunter World/Rise Save Game Data on PC/Steam/SwitchJuly 23,20266 min read
3 Ways to Recover Monster Hunter World/Rise Save Game Data on PC/Steam/SwitchJuly 23,20266 min read -
![]()
-
![]() How to Recover Data from 2TB External Hard Drive in Windows 11/10/8/7July 23,20266 min read
How to Recover Data from 2TB External Hard Drive in Windows 11/10/8/7July 23,20266 min read -
![]()
-
![]()
-
![]()
-
![]()
-
![]() SnowRunner Lost Save Files on Steam/PS/Xbox | SnowRunner RecoveryJuly 23,20266 min read
SnowRunner Lost Save Files on Steam/PS/Xbox | SnowRunner RecoveryJuly 23,20266 min read -
![]()
Page Table of Contents
PAGE CONTENT:
User case: "I'm using the Synology NAS device, and everything goes well on my computer with such a NAS device. My Synology NAS storage space is nearly run out, which has a rather huge impact on my PC. I have attempted to empty the recycle bin to spare more storage space for other important files and documents, but it seems to be not working and no space has been cleared. Even worse, after the recycle bin has been successfully cleared, some important files may be accidentally deleted during the emptying process. What am I supposed to do to clear space storage and recover those accidentally lost NAS files and documents? "
Why Does Emptying the Recycle Bin Not Work
You may choose to free up your NAS storage space by emptying the recycle bin. It does offer an effective way to help you clear your disk storage to restore more important data. But sometimes you are likely to run into a problem where the recycle bin refuses to erase your files. There are several factors that may prevent the recycle bin from being emptied.
- Software Program
- Corrupted Recycle Bin
- Third-party Application
- No Administrator Rights
4 Solutions to the NAS Emptying Recycle Bin Not Working Problem
When you find that you cannot empty Synology recycle bin, the following methods may offer help.
1. Wait Until the Retention Period to Expire
Sometimes, after the Synology recycle bin has been emptied, there may be a retention time, which means storage space will not show up right away. When this happens, you can try to wait for a while and then refresh the interface.
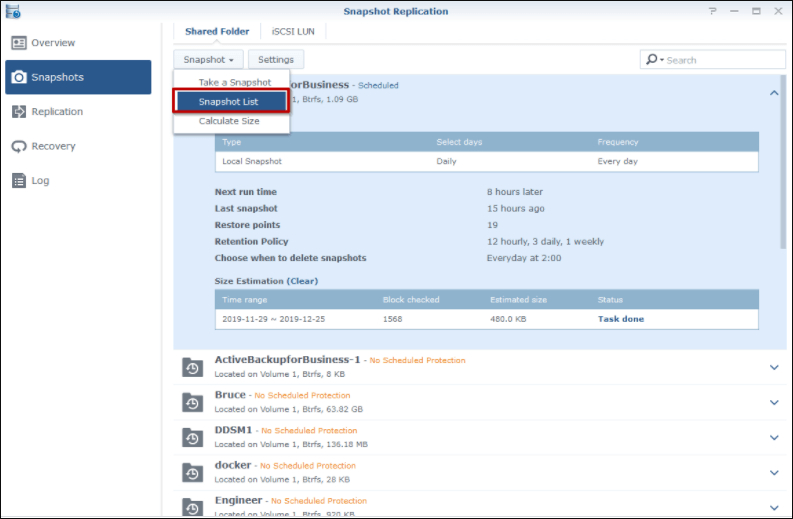
2. Delete Synology Snapshots and Btrfs
If it still doesn't work after waiting for a while, you can try to delete the Synology snapshots directly. The retention time may be caused by the Synology snapshots and Btrfs file systems because they allow files and folders to existing on the hard disk somewhere to be restored. Deleting snapshots and Btrfs may be easy and quick, but you will not have any snapshots remaining. In that case, you can turn to EaseUS NAS data recovery software for help if you wish to recover deleted snapshots and Btrfs data.
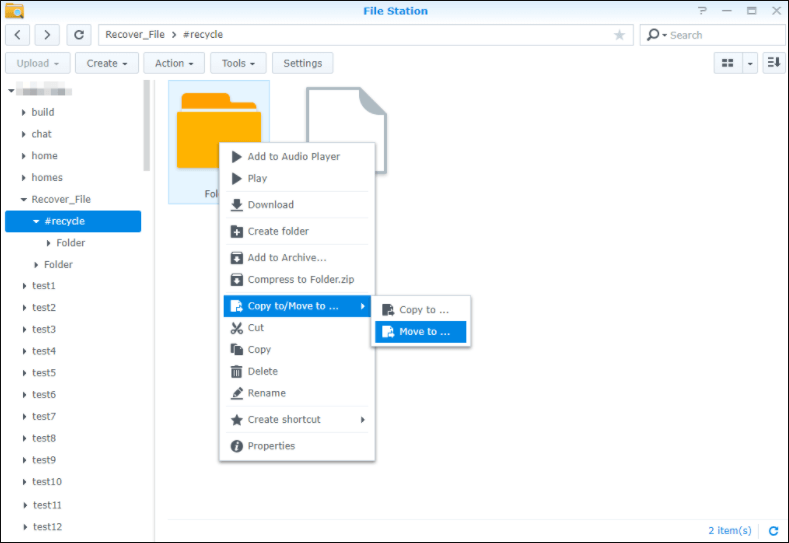
3. Deleted Files Stored on the Shared Folders
You can also free up more storage space on your Synology NAS device by deleting files stored in the shared folders. First, you should open the Control Panel and then click Privilege Settings to find shared folders. Then tick Remove Data since the previously protected Network Recycle Bin has been converted to normal shared folders.
4. Empty Synology Drive Recycle Bins Automatically
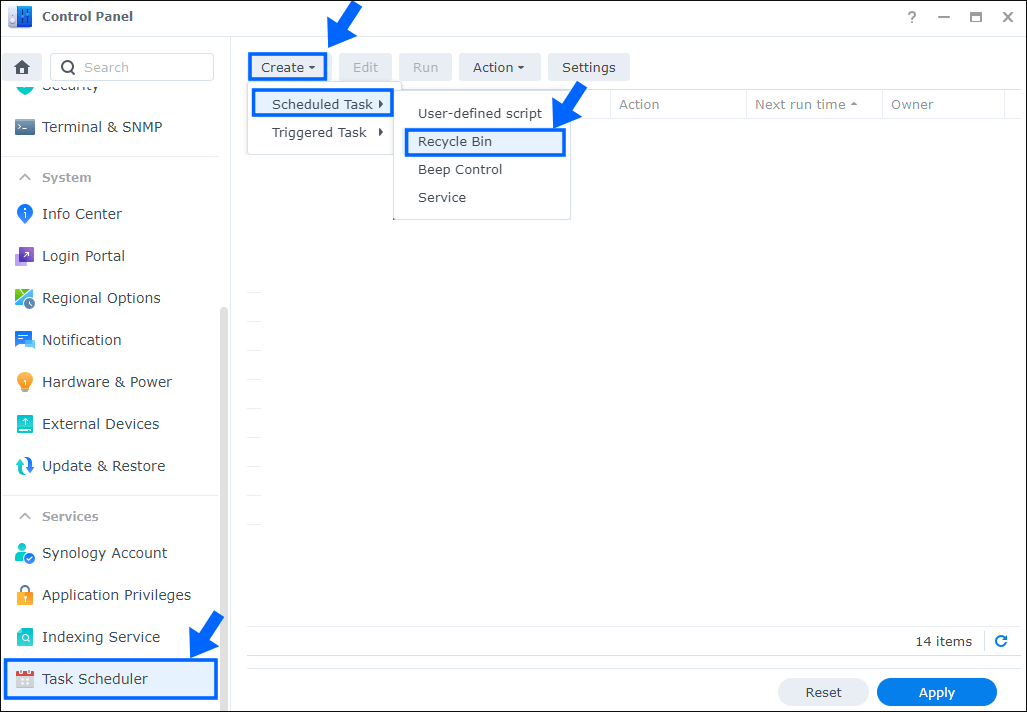
In case you run into the same problem next time you wish to empty the Synology recycle bin. You can make the Synology Drive empty recycle bins automatically. To periodically Synology empty recycle bins, you can go to Control Panel > Task Scheduler > Create >Recycle bin to enjoy this function.
NAS Data Recovery After Emptying the Recycle Bin
However, when you have successfully emptied the Synology recycle bin according to the above solutions, you may also find that some important files and documents are accidentally or mistakenly deleted during the emptying process.
Method 1. Use NAS Data Recovery Software
Fortunately, with the reliable NAS data recovery software provided by EaseUS, you can empty the Synology recycle bin any time without worrying about the NAS data recovery problem. It is very easy to find and recover those lost or deleted files with EaseUS NAS data recovery software.
EaseUS Data Recovery Wizard is not only good at dealing with Synology data recovery problems but also supports other commonly used NAS brands, including QNAP, Western Digital, and Buffalo, to name just a few. Even better, it works well in restoring lost NAS data caused by various situations without pulling out the disk.
You can refer to the following step-by-step tutorial to recover lost or deleted files and documents after you have emptied the Synology recycle bin.
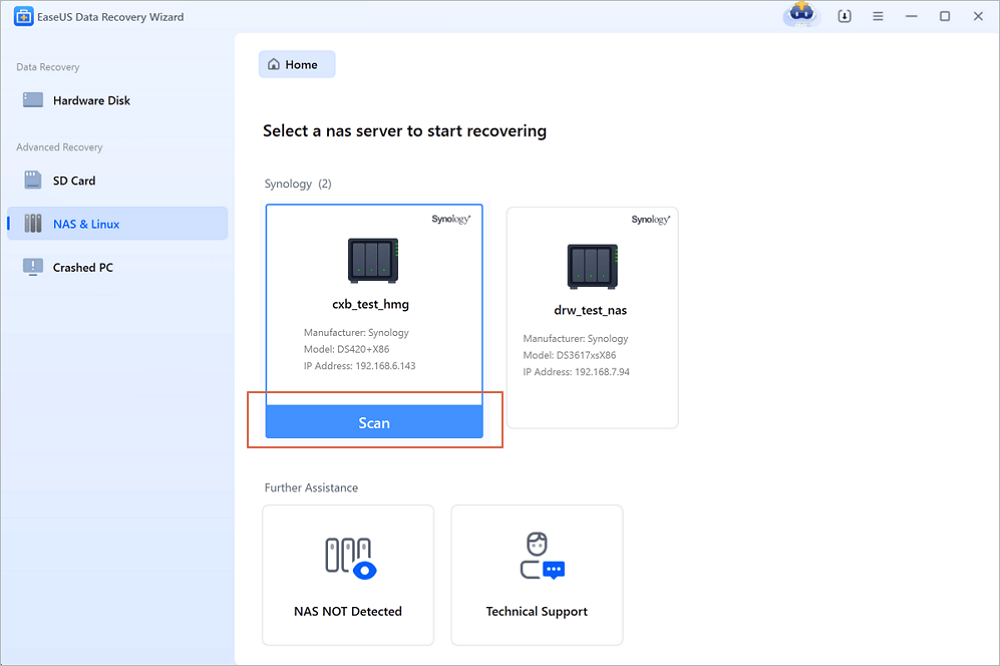
Step 1. Select a NAS server and start recovering.
Download and install EaseUS Data Recovery Wizard on your Windows 11/10 64-bit computer. When you open this software, select "NAS&Linux" and choose "NAS Recovery". All the NAS servers will be automatically listed, choose your target NAS device and click "Scan".
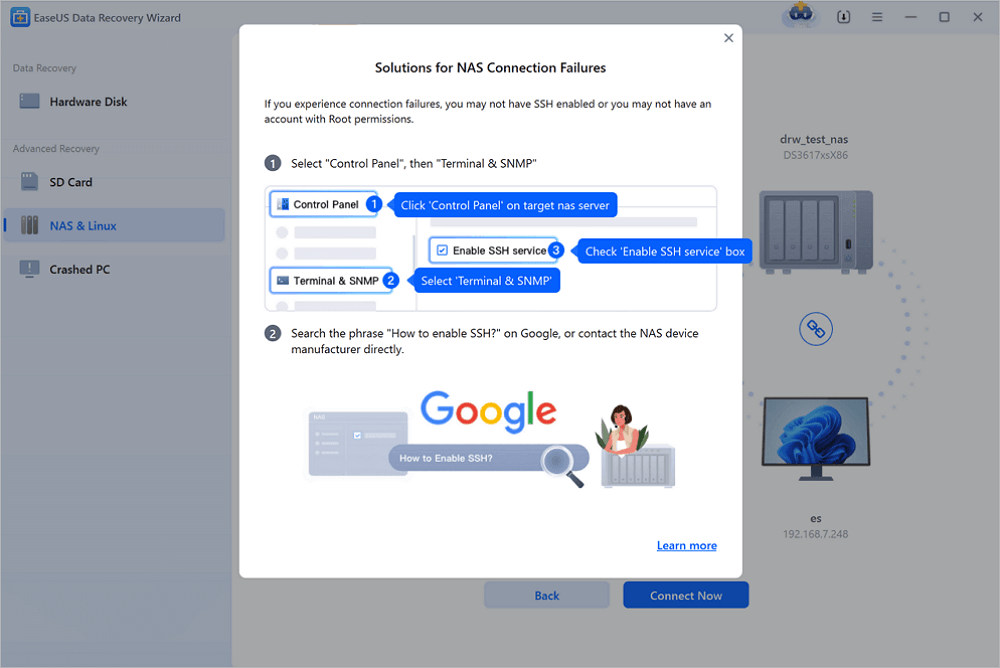
Step 2. Enable SSH service on the NAS server.
Go to "Control Panel > Terminal & SNMP" to check the "Enable SSH service" box. Then view and remember the port for remote access open EaseUS Data Recovery Wizard and click "Next".
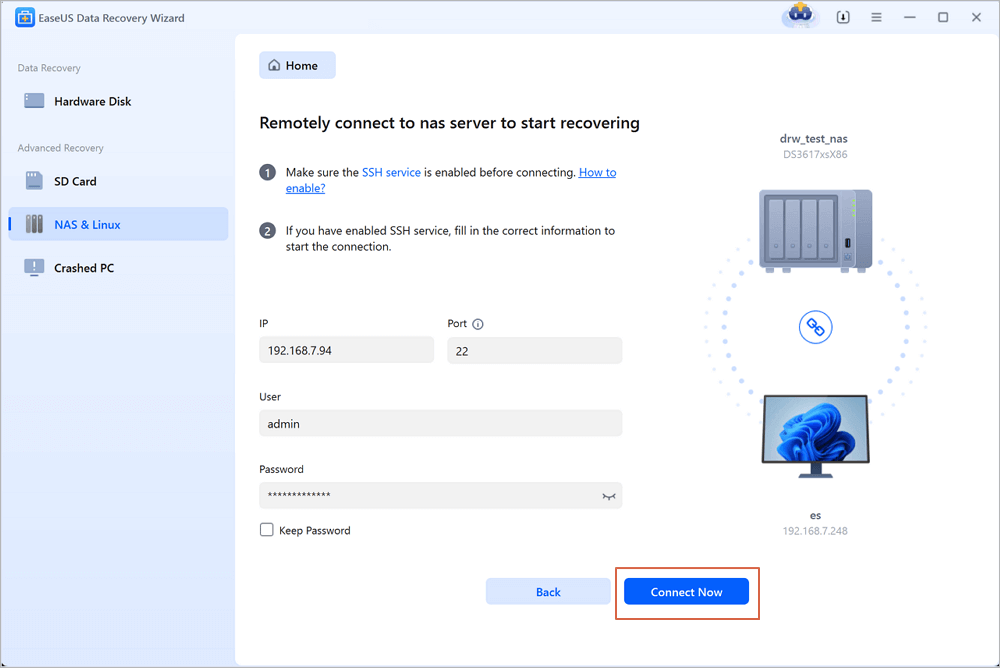
Step 3. Connect to the NAS server remotely.
This software will detect your IP and Port automatically. All you need to do is input the user name and password. If the IP address or Port is not right, you can correct it manually. Then, click "Connect Now".
Step 4. Recover lost/deleted NAS data
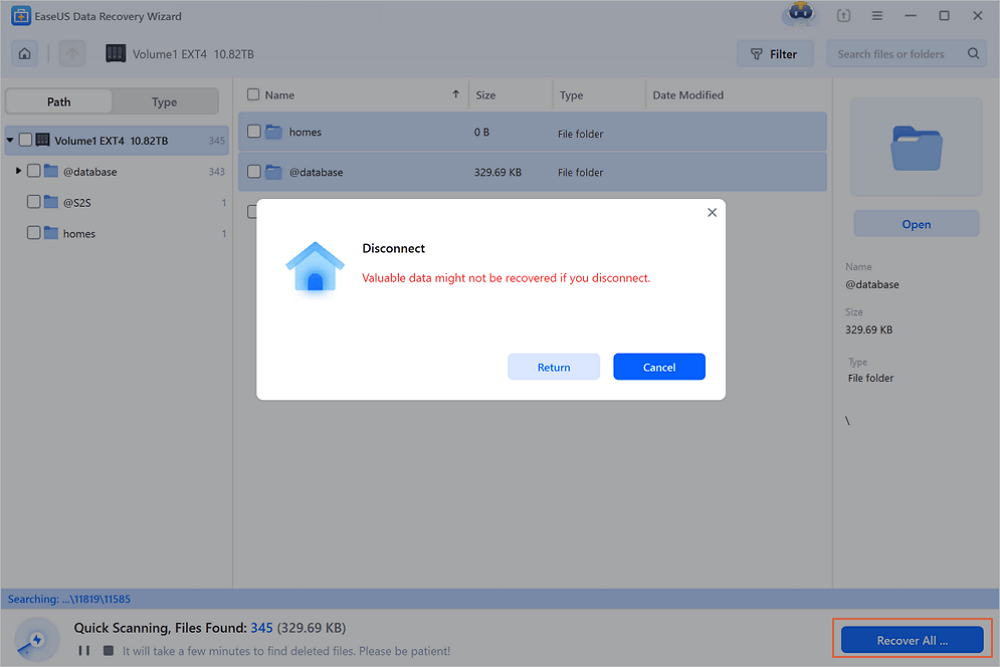
Then, EaseUS data recovery software will connect to your NAS and start a NAS device scanning. After the scan, you will see all the deleted, lost, or existing files on your NAS server.
You can apply the "Filter" feature or click the "Search files or folders" option to find the lost files on the hard drive. Select wanted NAS files that you lost on the server and click "Recover" to save them to another location.
Click the "Recover" button to restore deleted NAS files.
💡Tip: You can restore data on the local disks, external hard drives, and also the cloud storage.
Method 2. Turn to NAS/RAID Data Recovery Experts
EaseUS engineers have a vast knowledge of all storage technology and can successfully recover data from the oldest to the most recent DAS, RAID, NAS and SDS configurations on the market. We support all vendors, media formats, and operating systems.
Consult with EaseUS data recovery experts for one-on-one manual recovery service. We could offer the following services after FREE diagnosis. Our decades-experienced engineers are knowledgeable and can repair the damaged RAID structure and restore data from all RAID levels.
- Restore data from all RAID levels, including RAID 0, RAID 1, RAID 5, RAID 6, RAID 10, etc.
- Recover data from enterprise RAIDs such as QNAP, Synology, WD, Buffalo, etc.
- Retrieve lost RAID data caused by any issues
- Fix disks that become GPT protected partitions
- Recover data from RAID remotely, no need to ship
Conclusion
With no downtime required, you can turn to EaseUS NAS data recovery software for help whenever you find that those important files and documents are gone after the recycle bin has been emptied. It will not let you down when it comes to recovering various files and documents stored on NAS devices.
Was this page helpful?