Are you eager to install macOS Monterey and try out its new features? It's exciting to explore what Apple offers when an update rolls out. However, several users have reported that even after trying several times, macOS Monterey won't install.
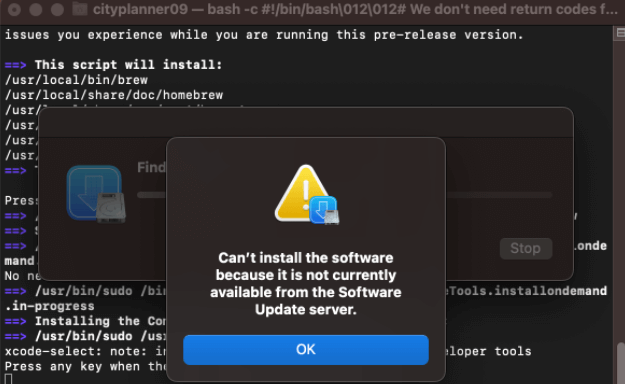
You may get several messages such as – "Can't download macOS Monterey", "An error occurred while preparing the installation", etc. How to fix the error? Here are several solutions.
| Workable Solutions | Step-by-step Troubleshooting |
|---|---|
| Fix 1. Check the Internet | The easiest solution to fixing the macOS Monterey installation problem is...Full steps |
| Fix 2. Check for Compatibility | Another reason for the macOS Monterey installation issue is compatibility...Full steps |
| Fix 3. Check the Storage Space | Check out the storage space if you encounter issues with the macOS Monterey...Full steps |
| Fix 4. Perform First Aid | You can run First Aid and repair errors that might interfere with installation...Full steps |
| More Fixes | The other 4 fixes are available here for you to follow, and fix macOS Monterey won't install...Full steps |
When you can't install macOS Monterey, knowing more about the reasons is vital. That way, you can apply the right solutions. In fact, installing macOS Monterey is easy; if you can't, investigating the reasons is critical.
Take a look at the reasons -
💾Reason 1. Low Storage Space
If upgrading your system from macOS Sierra, or the later versions, you must have 26 GB of space. However, you will need more space if the system has older macOS versions. It is advisable to ensure you have enough storage space to download and install macOS Monterey. Lack of space can stop the installation process.
🌐Reason 2. Problematic Internet Connectivity
You must have an internet connection to download and install macOS Monterey. Besides, the connectivity has to be stable and robust. Otherwise, you won't be able to.
❌Reason 3. Software Incompatibility
Keep in mind that all Macs are not compatible with macOS Monterey. The older systems are most likely to be incompatible. You need to check the models that have compatibility with this macOS before installing it.
🍏Reason 4. An issue with the Apple Server
Lastly, the reason might be the Apple server. If nothing is wrong with your system and you are still facing the issue, Apple is at fault. Sometimes, Apple servers are down. So, you need to visit the System Status page of Apple and check.
If you are a Ventura user, it doesn't matter because the reasons why can't install Ventura are generally the same. So you can read this page to learn how to fix the Ventura won't install problem.
Can't Install macOS Ventura? Here Are the 9 Best Solutions
When you install macOS 13 and receive this error message - can't install macOS Ventura, what can you do? Don't worry, you will learn at least nine ways to fix macOS installation errors.
Fix macOS Monterey Won't Install in 8 Ways
Are you eager to fix the macOS Monterey installation problem? Don't worry! We have several solutions to help users resolve the issue. Make sure to back up your data to prevent its loss.
Before learning the solutions, watch a video about fixing macOS Monterey not installing, which contains more details.
- 00:00 - What Problems people Face
- 00:21 - Things to Make Sure to Fix macOS not Updating
- 00:49 - Update MacOS Monterey on M1 Mac mini
Check these out -
Fix 1. Check the Internet or Cable Connection
The easiest solution to fixing the macOS Monterey installation problem is checking the net connection. Make sure you have strong and stable internet connectivity. If the connection is spotty, talk to the service provider. You can also change the Wi-Fi connection and check if the issue is resolved.
Fix 2. Check for Compatibility
Another reason for the macOS Monterey installation issue is compatibility between the OS and the system. The older the system is, the harder it will become for you to download and install Monterey. The primary reason is that the latest versions come with features that the hardware of the older systems cannot support.
Here are the systems that are compatible with macOS Monterey –
- Mac Pro (late 2013 and later)
- Mac Mini (late 2014 and later)
- iMac (late 2015 and later)
- MacBook Air (early 2015 and later)
- MacBook Pro (early 2015 and later)
- MacBook (early 2016 and later)
- iMac Pro (2017 and later)
Fix 3. Check the Storage Space of Your Mac
Check out the storage space if you encounter issues with the macOS Monterey installation. Most often, lack of free space is the main reason. Keep in mind that the installer needs 405 GB of space. And if you are upgrading, you will need much more space.
For instance, upgrading to macOS Sierra or later versions, you will need free space of 26 GB. But, for the older systems, you must have 44 GB of free storage.
To check storage space –
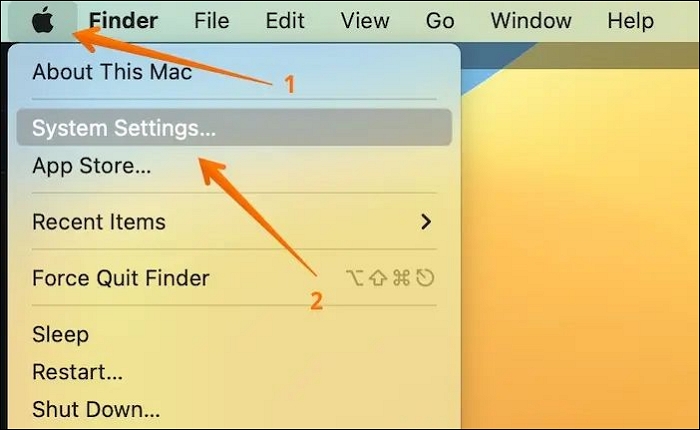
Step 1. Go to the Apple menu. Click on "System Settings" from the drop-down menu.
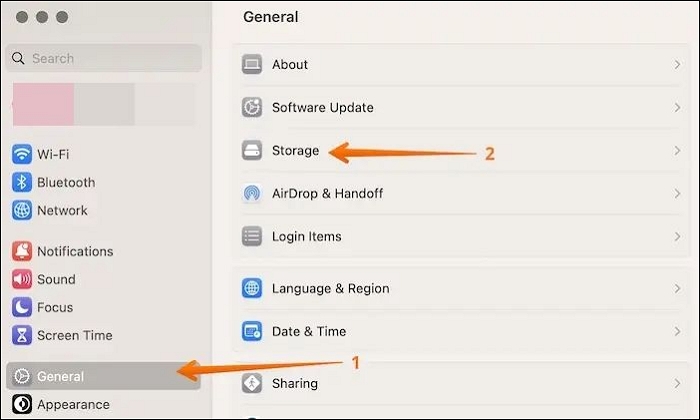
Step 2. Click on "General" from the sidebar, followed by Storage on the right hand.
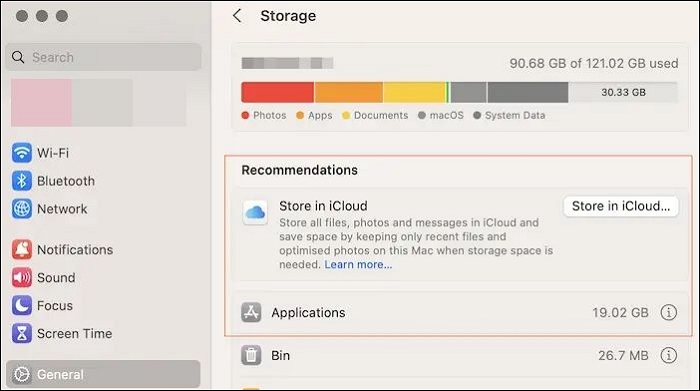
Step 3. You will see a bar on the top showing the space left.
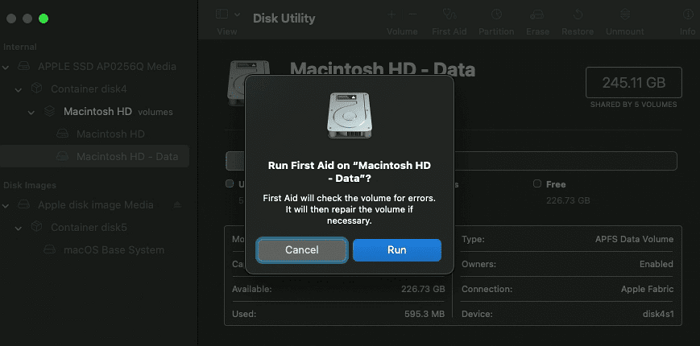
Fix 4. Perform First Aid in Recovery Mode
You can run First Aid and repair errors that might interfere with installation.
Take a look at the steps –
Step 1. Restart the system.
Step 2. At the same time, press and hold Command and R keys.
Step 3. Select "Disk Utility".

Step 4. Choose "Continue".
Step 5. Select the drive.
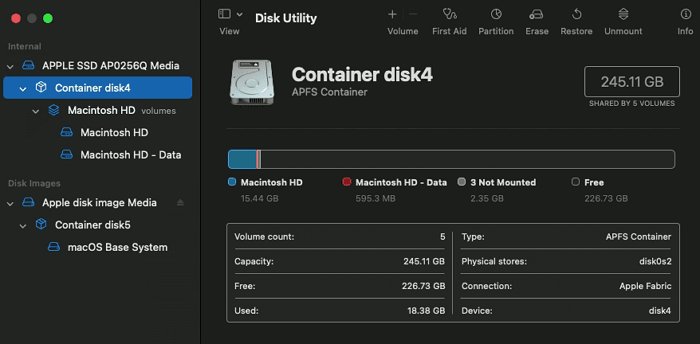
Step 6. Choose "First Aid".
Step 7. Click on "Done".
Step 8. Restart the system again.
Now, you can try to reinstall macOS Monterey.
If one of the methods is helpful in resolving the macOS Monterey won't install issue, share it on Facebook, Twitter, Instagram, and other social media platforms!
Fix 5. Check the Format of the USB Drive
Another solution to fix the macOS Monterey installation issue is to check the USB drive format. This solution is critical if you are trying to create a bootable USB drive. Remember that the correct format is Mac OS Extended (Journaled). It is also known as HFS+.
Here are the steps you need to follow –
Step 1. Connect the drive to Mac.
Step 2. Go to "Disk Utility".
Step 3. Choose the drive.
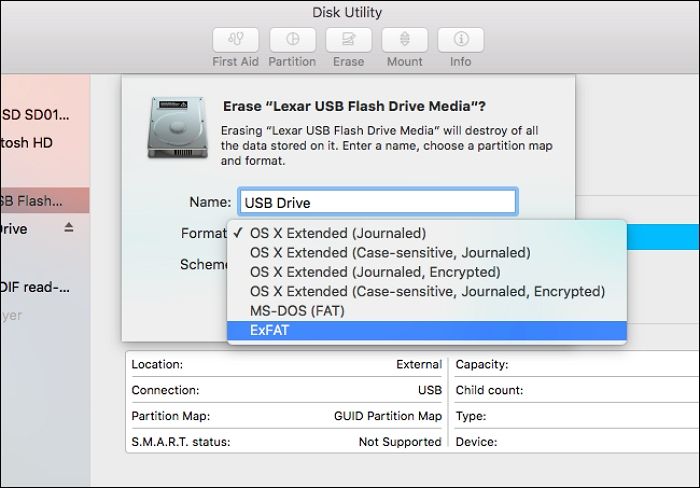
Step 4. Check the format.
Step 5. If the format doesn't match, backup files and reformat them.
Fix 6. Clean reinstall macOS
Another solution is to clean install macOS on the system. EaseUS Data Recovery Wizard for Mac provides a free macOS installation feature to help users who are not familiar with the macOS installation process. Download this trusted software on your Mac, and follow the steps below to clean reinstall macOS:
Step 1. Select a macOS version
Select a macOS version from the list, or click the "Refresh" option to get the downloaded macOS version. Or you can add a macOS installer from your disk by clicking the "Add" button. Insert a USB flash drive larger than 16 GB to save the macOS installer.
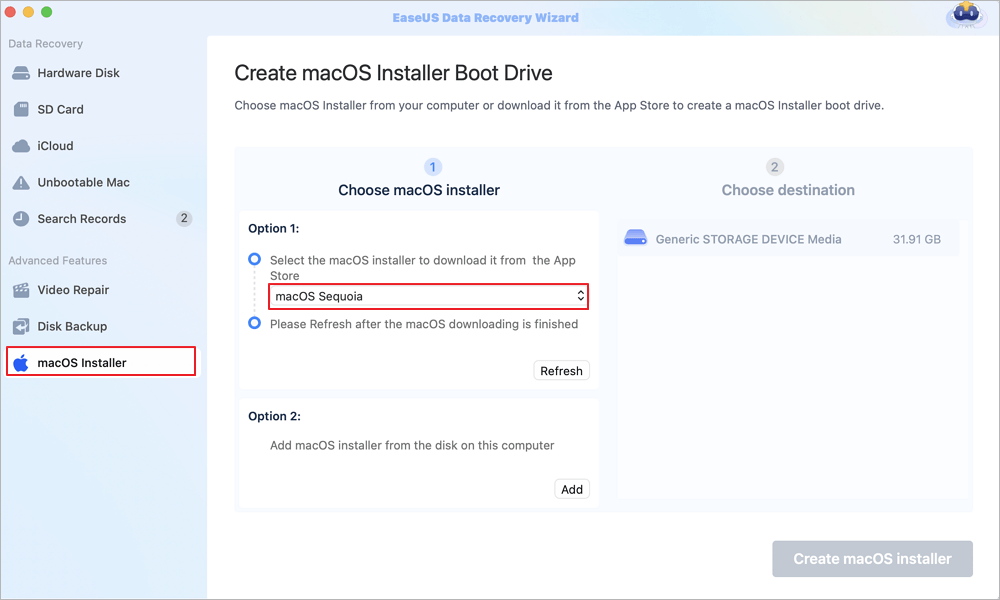
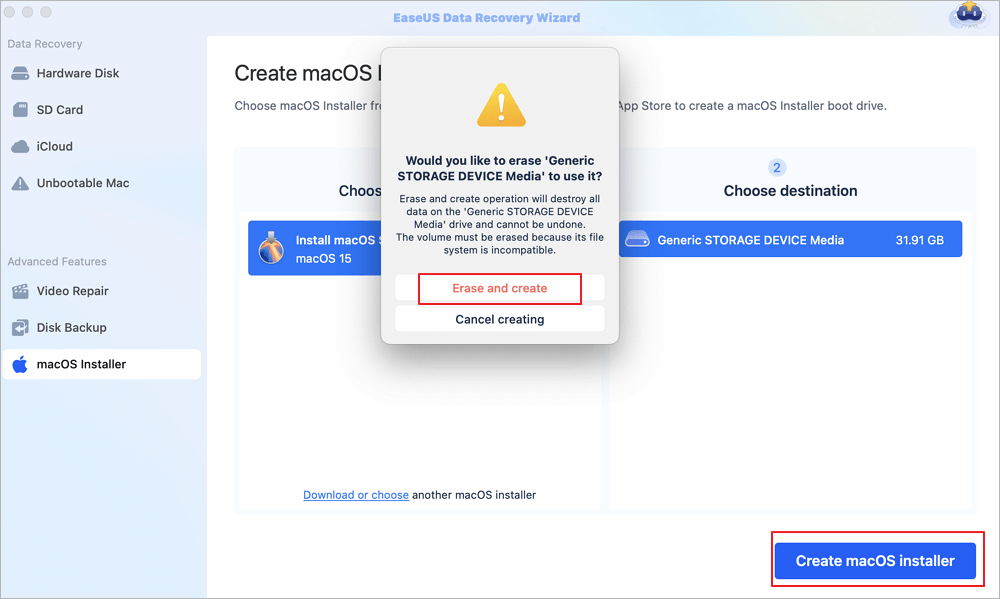
Step 2. Erase the USB flash drive
After choosing the USB flash drive, click the "Erase and create" option in the pop-up window to format your USB flash drive quickly, and then click the "Create macOS installer" button to continue.
- Note: This operation will delete all data on your USB flash drive, please back up important data in advance, or use EaseUS data recovery software to recover your data.
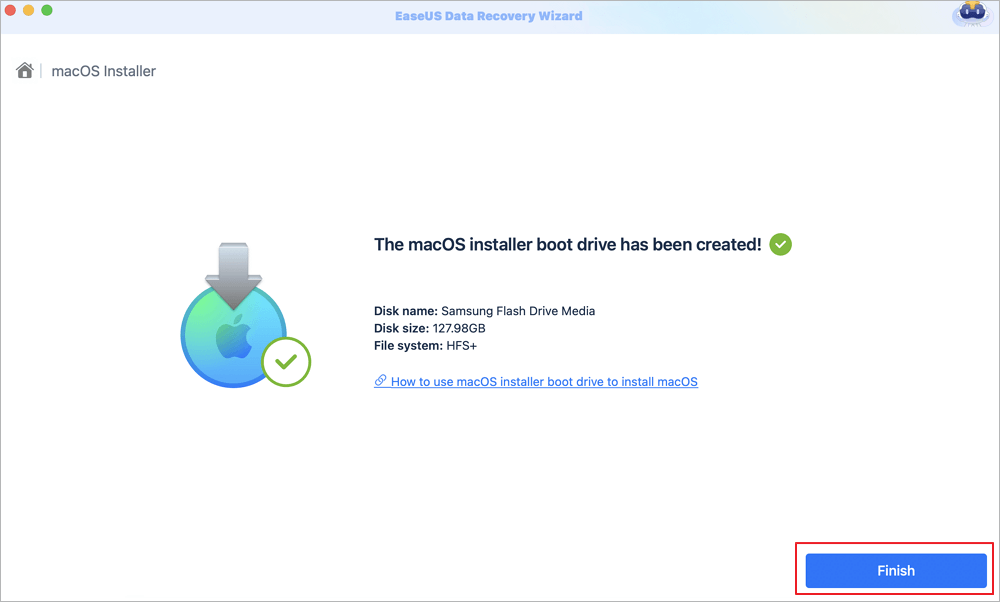
Step 3. Create the macOS installer boot drive
Wait for the process to complete, and click the "Finish" button. Your macOS installer boot drive has been successfully created!
If you don't want to install any third-party tool on your Mac. Here are steps to clean install macOS by yourself. The steps vary based on the model.
For Silicon Macs –
Step 1. Turn off the system.
Step 2. Press and hold the power button till you come across the Startup options.
Step 3. Select "Options".
Step 4. Click "Continue".
Step 5. Opt for "Disk Utility".
Step 6. Go to "Macintosh HD".
Step 7. Select "Erase".
Step 8. Give a name and choose the format (APFS).
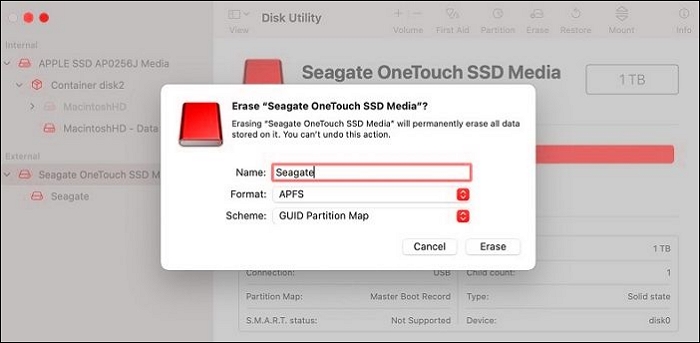
Step 9. Click "Erase Volume Group".
Step 10. Go back to the main recovery mode screen.
Step 11. Choose "Reinstall macOS Monterey".
For Intel-based Macs –
Step 1. Reboot the system.
Step 2. Enter the recovery mode.
Step 3. Choose "Disk Utility".
Step 4. Right-click "Macintosh HD" - "data".
Step 5. Choose to "Delete APFS volume".
Step 6. Click on the "Macintosh HD volume".
Step 7. Select "Erase".
Step 8. Go back to the macOS Utilities window.
Step 9. Select "Reinstall macOS".
Fix 7. Restart Mac and Check Again
Sometimes, something as simple as restarting the system can resolve your problem. If temporary errors are the reason for the installation issue, this is the ideal solution. Hard restart Mac and check if the issue is resolved.
For that, go to the Apple icon and select Restart. However, if the system is unresponsive, hold the Power button. After a few seconds, press the Power button again to restart it. Now, visit the App Store to download macOS Monterey.
Fix 8. Try Installing it from the Mac App Store
If you have tried installing from System Preferences or a USB drive and failed, you can visit the App Store. Try downloading the operating system directly.
Here are the steps –
Step 1. Go to the Apple menu.
Step 2. Select App Store.
Step 3. Look for macOS Monterey in the search bar. Click on View.
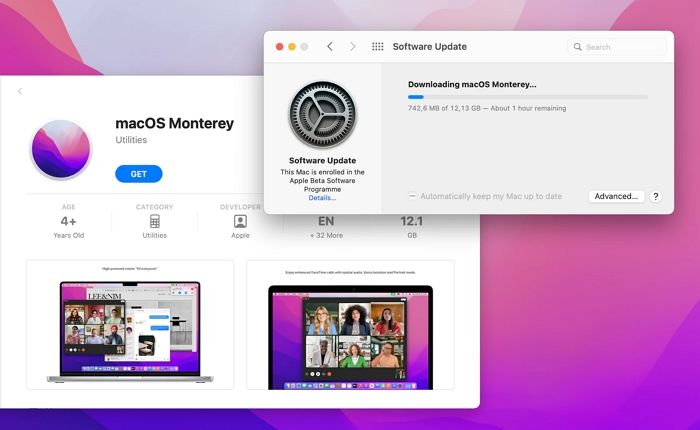
Step 4. Select Get.
Step 6. Wait for the download to complete.
Step 7. Select Monterey Installer.
Step 8. Follow the instructions given on the screen.
Downgrade macOS Ventura to Monterey
If the solutions mentioned above don't work, the best action is to downgrade your operating system. To ensure you have a fully functional system, let's take a look at the steps you can follow –
Step 1. Connect Time Machine drive to your system.
Step 2. Restart your Mac.
Step 3. If you have Intel-based Mac, you need to press and hold Command and R keys. Wait for the Apple logo to come on the screen.
For Silicon Macs, you must press and hold the Power button till you see the startup screen. After that, choose Options and Continue.
Step 4. From the macOS utility window, choose the "Restore from Time Machine Backup" option.
Step 5. Select the drive.
Step 6. Follow on-screen instructions to complete the installation process.
Note: There are other ways to downgrade your macOS too. If this doesn't work, you can try –
- Using macOS Recovery
- Using a Bootable Installer
Recover Data When macOS Installation Failed
Several users reinstall macOS when installation problems occur. In that scenario, critical data loss might occur. The best solution is to have a backup of all valuable data. But if that is not done, all hope is not lost.
You can still get back your lost data with the help of a professional data recovery tool. The EaseUS Data Recovery Wizard for Mac is a specialized data recovery tool designed to help users recover data. It has a user-friendly interface and comes with a vast array of features.
Highlights:
- Retrieve music files, videos, photos, documents, etc., efficiently.
- Hassle-free restoration of data from different Mac-based devices.
- Deep and quick scan to aid in faster file loading.
- File filter and file preview options to recover deleted files on Mac quickly.
Here are the steps:
Step 1. Select the drive to be scanned
In the main EaseUS Data Recovery Wizard window, there will be a list of the drives connected to your Mac. Select the drive you need to recover lost/deleted files from, and click the "Search for lost files" button.

Step 2. Select your lost data/files
EaseUS Data Recovery Wizard for Mac will immediately scan your selected disk volume and display the scanning results on the left pane. You can sort the results to find the wanted files if you are looking for certain files.

Step 3. Recover lost/deleted data
Once you have found the desired files, preview the files and then click "Recover" to begin the recovery of your deleted/lost Mac files.

Apart from that, you can always contact the remote IT support team's data recovery service if you have any issues.
Final Words
Are you frustrated that the macOS Monterey won't install? Well, several reasons could explain the problem. For instance, it could be weak internet or compatibility issues. However, there are multiple solutions one can try to resolve the installation problem.
Start with checking the internet connection, storage space, and compatibility. After that, you can restart your system and check again. If that doesn't resolve the issue, try downgrading the macOS. Amidst trying all these solutions, you can lose critical data.
In that case, you must choose an efficient data recovery tool - EaseUS Data Recovery Wizard for Mac. It is a powerful yet user-friendly data recovery software enabling users to restore data without hassle. Install EaseUS Data Recovery Wizard for Mac today!
macOS Monterey Won't Install FAQs
There are multiple solutions to fix macOS Monterey won't Install. To know more, take a look at the questions and answers listed below -
1. Why can't I install macOS Monterey on Macintosh HD?
There are multiple reasons due to why you can't install macOS Monterey on Macintosh HD. It could be due to low free space on your drive, incompatibility issues, etc.
2. How do I force my Mac to update to Monterey?
To force your Mac to update to Monterey, you can follow these steps –
- Go to the Apple menu.
- Choose System Preferences.
- Select Software Update.
- If you see any updates, download and install them.
3. Why won't my Mac let me install macOS?
Several reasons explain why your Mac won't let you install macOS. It could be due to a lack of free space on the system, a corrupted macOS installer file, issues with the startup disk, etc.
4. Can I downgrade from Monterey to Big Sur?
Yes, you can downgrade from Monterey to Big Sur. However, it also depends on the mode. If you have Silicon Macs, you will be limited to Big Sur. But, for the recent M1 Pro and M1 Max, it is impossible to downgrade from Monterey.
Was This Page Helpful?
Brithny is a technology enthusiast, aiming to make readers' tech lives easy and enjoyable. She loves exploring new technologies and writing technical how-to tips. In her spare time, she loves sharing things about her game experience on Facebook or Twitter.
Jaden is one of the editors of EaseUS, who focuses on topics concerning PCs and Mac data recovery. Jaden is committed to enhancing professional IT knowledge and writing abilities. She is always keen on new and intelligent products.
Related Articles
-
The Disk Macintosh HD Can't Be Unlocked? Here Are Solutions
![author icon]() Jaden/2026-06-30
Jaden/2026-06-30 -
How to Reset PS5 Without Losing Data [2 Tested Methods]
![author icon]() Dany/2025-12-12
Dany/2025-12-12 -
How to Format SD Card for Camera [Step-by-Step Instructions]
![author icon]() Tracy King/2026-02-12
Tracy King/2026-02-12 -
How to Uninstall Sonoma Without Losing Data
![author icon]() Brithny/2026-06-30
Brithny/2026-06-30
EaseUS Data Recovery Services
EaseUS data recovery experts have uneaqualed expertise to repair disks/systems and salvage data from all devices like RAID, HDD, SSD, USB, etc.