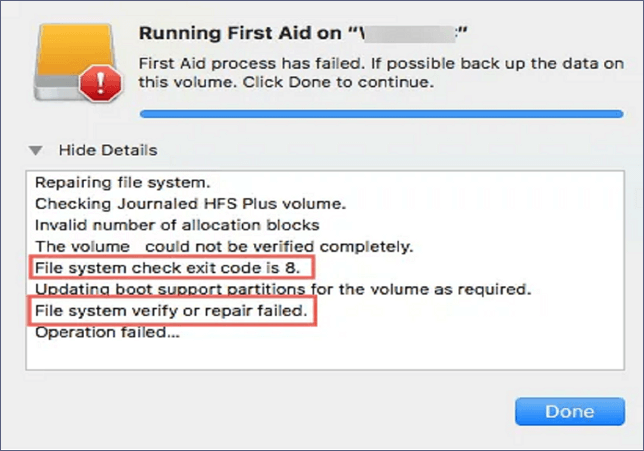
Why Encounter 'File System Verify or Repair Failed. : (-69845)'
A utility program called Mac Disk Utility is made to assist users in identifying and fixing directory system faults on their personal computers. It is a vital tool that may assist users in locating and resolving file system difficulties, including damaged data, missing files, and other difficulties.
When users are repairing hard drives with Disk Utility, they may encounter file system verify or repair failed. : (-69845). Are you worried about the reasons for this error to happen? The primary reasons are listed below:
- It occurs when conducting First Aid to fix an external disk, including an ExFAT disk or a Time Machine backup.
- This error can happen on the external or internal hard drive, SD card, and USB flash drive on a Mac operating any macOS version. It can usually be discovered in the file system corruption on the drive. If any sudden power failure, invalid volume header, ransom attacks, and catalog file corruption occurs, it will give rise to file system verify or repair failed. : (-69845) error.
- This error might also be attended by details, including "error: Unable to conduct postponed repairs without complete space verification."
Thinking about how to fix error 'file system verify or repair failed. : (-69845)'? This article has listed different fixing methods for your ease. So, let's get started!
Recover Lost Files When Encounter 'File System Verify or Repair Failed. : (-69845)'
Data loss is expected if you encounter file system verify or repair failed. : (-69845). But with the help of professional data retrieval software, you can recover every type of file in a jiffy. Are you thinking of which tool we're talking about? It's none other than EaseUS Data Recovery Wizard for Mac! This tool can help you retrieve lost data when you encounter unexpected disk errors.
Moreover, with the aid of EaseUS Data Recovery Wizard for Mac, difficult data loss situations can be resolved:
- 🛠️Recover data from corrupted hard drives. When you encounter hard drive corruption, this recovery tool can help you recover data before repairing corrupted hard drives on Mac.
- ❌Recover data from formatted Mac hard drive. You have an additional chance to recover data from your formatted Mac hard drive with the EaseUS recovery tool.
- 🔖Recover lost files after macOS Ventura update. This powerful tool can be very helpful when you lose essential data after a macOS upgrade.
- 🗑️Support Mac Trash recovery. If you accidentally deleted important data and emptied the Trash, you will need EaseUS Data Recovery Wizard for Mac.
Now, you can follow the leads to recover lost files:
Step 1. Search for lost files
Select the disk location to search for lost files (it can be an internal HDD/SSD or a removable storage device) on macOS Sierra, High Sierra, Mojave, Catalina, Big Sur, Monterey, Ventura, and the latest Sonoma. Click the "Search for lost files" button.

Step 2. Go through the scanning results
EaseUS Data Recovery Wizard for Mac will immediately scan your selected disk volume and display the scanning results.

Step 3. Select the file(s) and recover
In the scan results, select the file(s) to preview and click the "Recover" button to have them back.

How to Fix 'File System Verify or Repair Failed. : (-69845)' on Internal Drive
You can resolve the File System Verify or Repair Failed. : (-69845)' error with plenty of tools developed into Mac. But specific solutions, for example, reformatting drives, will erase your data. Follow the steps below to fix this error:
1. Troubleshoot the Error by Booting Mac into Safe Mode
In case you're operating macOS Catalina 10.15, follow the steps below to boot your Mac in Safe Mode:
Step 1. Shut down your Mac by pressing the Power button or hitting the Apple menu.
Step 2. Keep it shut down for approximately 10 seconds.
Step 3. Hold the power button.
Step 4. Once it starts, quickly press & hold the Shift key.
Step 5. Release the Shift key after watching the grey Apple logo and the progress indicator on its screen.
2. Run FSCK to Fix 'File System Verify or Repair Failed. : (-69845)'
File system consistency check, or FSCK, is a beneficial program for detecting and fixing drive errors. It's necessary to boot into macOS single-user mode to conduct FSCK. Follow the steps below:
Step 1. Switch off your Mac.
Step 2. Switch it on, and hit the Command + S keys to get that boot sound.
Step 3. Enter the /sbin/fsck -fy command in single-user mode, and hit the Enter button.
Step 4. At this stage, two messages can be seen: The volume [name] appears OK - everything is perfect. File system modifications were made; problems were found and resolved.
Step 5. In case you see the second text, do enter the /sbin/fsck -fy command again until you notice the message "The volume [name] appears to be OK".
Step 6. Restart your MacBook.
3. Run First-Aid in macOS Disk Utility to Fix the Issue
You can diagnose your partitions and disks fastest with the First Aid application. It can rummage and resolve disk formatting and directory structure errors. Initially, you must open Disk Utility in Recovery mode. Follow the steps below to run first-aid in the macOS disk utility to fix the issue:
For M1-based Mac:
Step 1. Restart your MacBook.
Step 2. Until the Loading Startup options pop up, keep holding the power button.

Step 3. Opt for the Gear symbol.
Step 4. Open the Disk Utility.
For Intel-based Mac:
Step 1. Restart your MacBook.
Step 2. Hold down the Command + R keys.

Step 3. When the macOS utility window opens, launch the Disk Utility.
The disc that displays the "File system verify or repair failed" error should then be repaired using First Aid:
Step 1. Select View on the menu bar in the Disk Utility.
Step 2. Opt for Show All Devices.
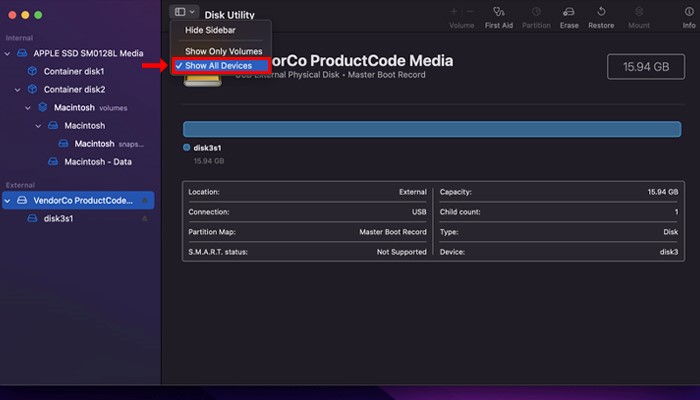
Step 3. Opt for the required partition or disk > select the First Aid button > Select Run.
Step 4. Restart your MacBook to finish the error fix.
If you have fixed this "file system verification or repair failed. : (-69845)" error, don't forget to share the methods with more users!
4. Factory Reset and Reinstall macOS on Mac
If nothing works, it's time to factory reset MacBook Air/Mac and reinstall macOS on Mac/MacBook. Follow the steps below to factory reset macOS on Mac:
Step 1. Open System Preferences. Hit the Apple logo and opt for System Preferences from the drop-down menu.
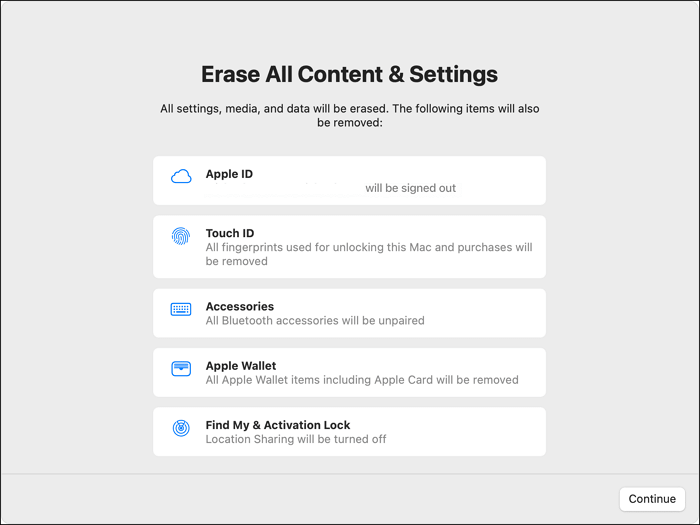
Step 2. Open erase assistant. Open "Erase All Contents and Settings" from system preferences.
Step 3. Go through the Erase Assistant prompts. You can follow Erase Assistant's instructions to perform a factory reset, but you must log out of iCloud before it's finished.
You may use a bootable USB installer to reinstall macOS. Follow the steps below:
Step 1. Download macOS Ventura or other versions.
Step 2. Build a bootable USB using the Terminal.
Step 3. Employ a Bootable Installer.
For Intel-based Mac
- You need to plug in the installer and check the compatibility and connectivity.
- Long-pressing the Option key will bring a list of volumes on the screen.
- Opt for the volume with a bootable installer, and hit the Return key.
For Apple Silicon
- If you want to reinstall macOS, plug in the bootable USB.
- Crosscheck its internet connectivity and its compatibility with the installed macOS version.
- Long-press the power button until the Utility window pops up.
- Opt for the volume containing the OS, and select Continue.
How to Fix 'File System Verify or Repair Failed. : (-69845)' on External Drive
After verifying your data is protected, you may proceed with File System Verify or Repair Failed. : (-69845) on external drives without the hassles of losing data. If Disc Utility reports exit codes like "File system check exit code is 1," "File system check exit code is 65," "File system check exit code is 8," etc., it is recommended to continue with the following simple fixes.
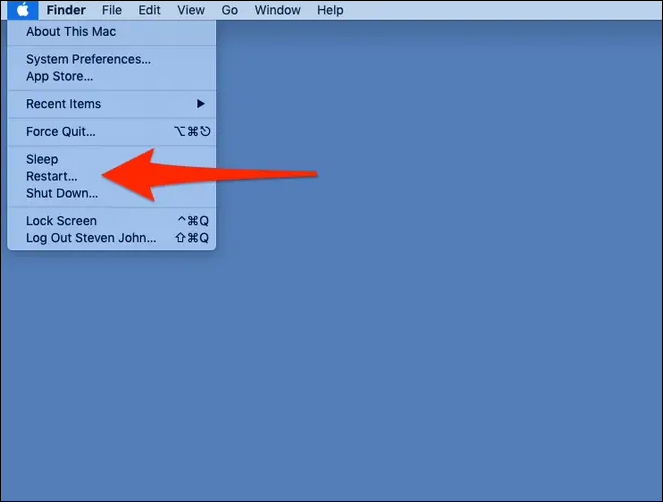
1. Reboot Mac to Fix 'File System Verify or Repair Failed. : (-69845)'
A straightforward reboot can help solve several issues on Mac, including File System Verify or Repair Failed. : (-69845). So, follow the steps below to reboot your Mac:
Step 1. Hold the Power button of your Mac to turn it off.
Step 2. Wait 10 seconds, and turn it on again to operate First Aid. In case it still shows this error, check the next solution.
2. Reformat the External Drive with Mac Disk Utility
Reformatting is one of the flexible ways to resolve disk errors while facing File System Verify or Repair Failed. : (-69845) on an external drive. To make it work again, you can reformat the hard drives. These are the significant steps to follow:
Step 1. Head over to Disk Utility.
Step 2. Select the drive from the left sidebar that is experiencing problem 69845.
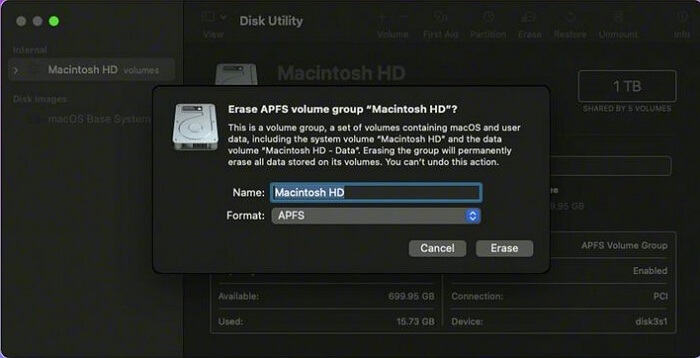
Step 3. Hit the Erase button located on the top of the Window.
Step 4. Hit the Erase again after providing a name and format. The whole deletion process will take some time.
Step 5. Select Done when it's over.
3. Send Your Damaged External Hard Drive for Repairing
Sadly, if none of the aforementioned fixes can fix the "File system verify or repair failed.: (-69845)" issue, the drive is probably physically destroyed. It must be swapped out for an alternate one or taken to a nearby drive repair facility.
Ideally, you have resolved the issue causing external discs to display the error message "File system verify or repair failed.: (-69845)". If so, kindly show the steps above to assist more individuals.
Conclusion
It is awful to see this error notification, such as "File system verify, or repair failed. : (-69845)", You can find helpful techniques in this article to repair Mac's internal or external hard disc that has been damaged. However, please use EaseUS Data Recovery Wizard for Mac to retrieve lost data from damaged drives first to ensure the confidentiality of your data.
File System Verify or Repair Failed. : (-69845) FAQs
Go through the FAQs below to understand the topic better:
1. How to fix corrupted hard drives on Mac?
You can fix a corrupted hard drive on Mac by initiating the FSCK command or by repairing the corrupted hard drive using the disk utility. If you encounter data loss because of corruption on Mac hard drives, you can download EaseUS Data Recovery Wizard for Mac to retrieve lost data.
2. Why my Mac says 'file system verify or repair failed. : (-69845)'?
Any macOS version functioning on a computer can experience 'File system verify or repair failed.: (-69845)' on an internal or external hard disc, USB flash drive, or SD card. It likely originates in the file system instability on the disc, which abrupt power outages, damaged catalog files, erroneous volume headers, malware attacks, etc., can bring on.
3. How to fix 'file system verify or repair failed. : (-69845)' in Disk Utility?
You can reformat the external drive in Disk Utility to fix the 'file system verify or repair failed. : (-69845).' Consider the steps below to fix the error:
- 1. Activate Disc Utility.
- 2. From the left sidebar, select the drive that is experiencing problem 69845.
- 3. On the screen, click Erase.
- 4. Give a Name and Format, and then hit Erase. The erasing process will take some time to complete.
- 5. When it's finished, click Done.
4. How do I fix code 8 on my Mac?
Follow the steps below to fix code 8 on your Mac:
- 1. Make a backup of the stored Mac data.
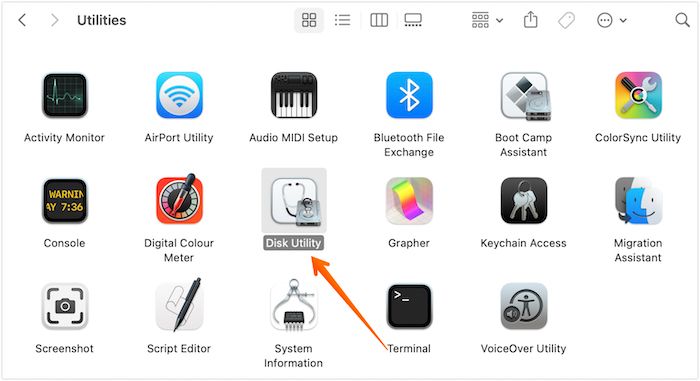
- 2. Head over to Applications > Utilities > Disk Utility.
- 3. Opt for the corrupted drive, and hit First Aid on the menu bar located at the top.
- 4. Hit Done, and restart your MacBook.
Was This Page Helpful?
Jaden is one of the editors of EaseUS, who focuses on topics concerning PCs and Mac data recovery. Jaden is committed to enhancing professional IT knowledge and writing abilities. She is always keen on new and intelligent products.
Dany is an editor of EaseUS who lives and works in Chengdu, China. She focuses on writing articles about data recovery on Mac devices and PCs. She is devoted to improving her writing skills and enriching her professional knowledge. Dany also enjoys reading detective novels in her spare time.
Related Articles
-
MacBook Password Not Working! 6 Proven Solutions to Fix It
![author icon]() Jaden/2026-06-30
Jaden/2026-06-30 -
Quick Solutions to SanDisk SSD Not Showing up in Windows 11/10/8/7
![author icon]() Jerry/2025-07-04
Jerry/2025-07-04 -
You May Not Install to This Volume Because It Is Currently Being Encrypted
![author icon]() Jaden/2026-06-30
Jaden/2026-06-30 -
Solved: Screen Black But Still Running Issue
![author icon]() Sherly/2026-06-17
Sherly/2026-06-17
EaseUS Data Recovery Services
EaseUS data recovery experts have uneaqualed expertise to repair disks/systems and salvage data from all devices like RAID, HDD, SSD, USB, etc.