What Does Erase All Content and Settings Do
Erase All Content and Settings on Mac is a powerful option also known as the Erase Assistant. This helpful option can help Mac users erase Mac devices and restore them to factory settings. Erase Assistant will guide you to erase all the settings, data, and Apps safely and efficiently when you want to erase and reinstall Mac. You should know that Erase All Content and Settings can only be used on macOS newer than macOS Ventura and Monterey.
If you are going to factory reset macOS Ventura and Monterey, choosing Erase Assistant will be a wise choice. We will show you how to erase data on Mac by using the Erase Assistant with a written tutorial and a video guide. Let us start with this four-mins video, and you can preview the import points below:
- 00:00 Introduce Erase Assistant Mac
- 02:05 How to use Erase Assistant Mac
- 03:28 Final thoughts about Erase All Content and Settings on Mac
How to Erase All Content and Settings on macOS
In this part, you will learn the total steps of how to erase all content and settings on Mac with the Erase Assistant. This option's position on macOS Ventura and Monterey is a little different, and we will lead you to find Erase All Content and Settings Mac with a step-by-step guide.
How to Find Erase All Content and Settings [macOS Ventura]
Can't find the Erase All Content and Settings on Mac? Don't worry! It is a tutorial with pictures that can make you understand and find the target button easily.
Step 1. Open the Apple menu and choose "System Settings".

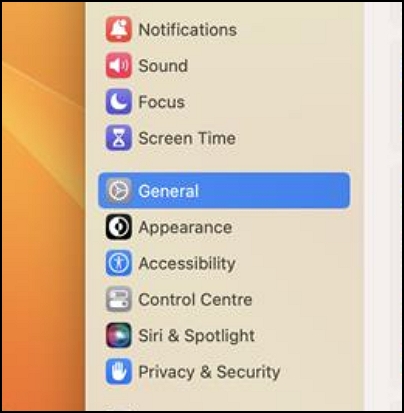
Step 2. After that, you should click "General".
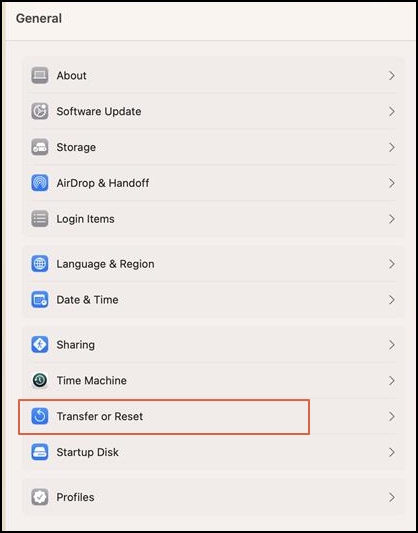
Step 3. Click "Transfer or Reset".
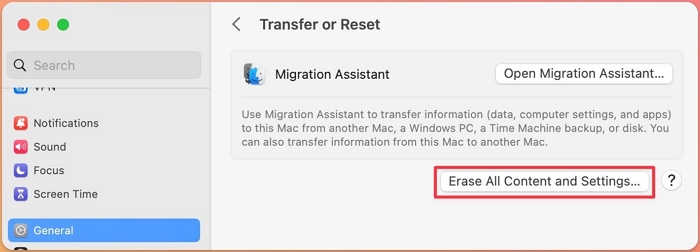
Step 4. You will see two buttons in this window, and choose "Erase All Content and Settings".
How to Find Erase All Content and Settings [macOS Monterey]
It is easier to find Erase Assistant on macOS Monterey than on macOS Ventura. You just need a few clicks, and this button will show up.
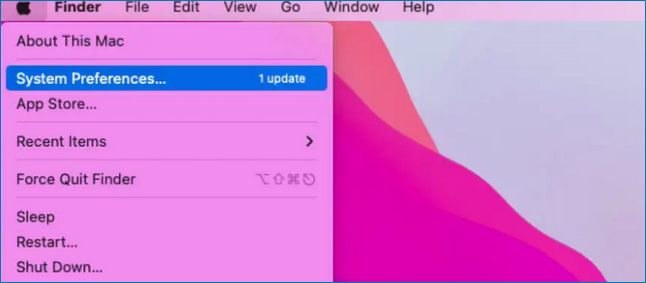
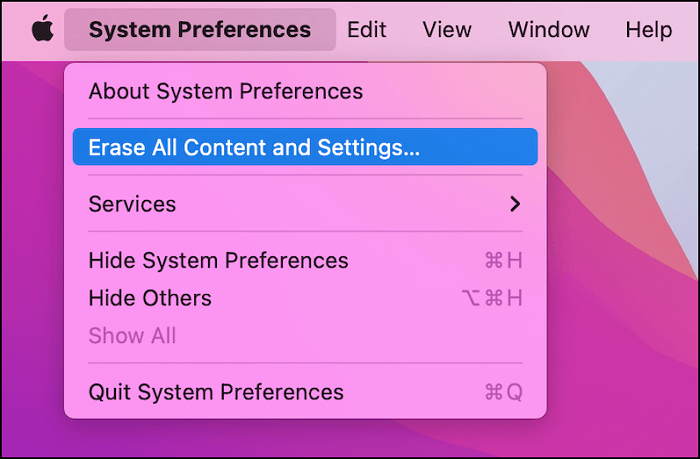
Step 1. Open the Apple menu and click "System Preferences".
Step 2. Now you can see the Erase Assistant and click "Erase All Content and Settings".
Erase All Content and Settings on Mac [macOS Ventura/Monterey]
After learning how to find the Erase Assistant, it is time to learn more about how to format the MacBook Pro or Mac with this option.
Step 1. Find the "Erase All Content and Settings" button and click it.
Step 2. You will need to enter the admin password to ensure your operation.
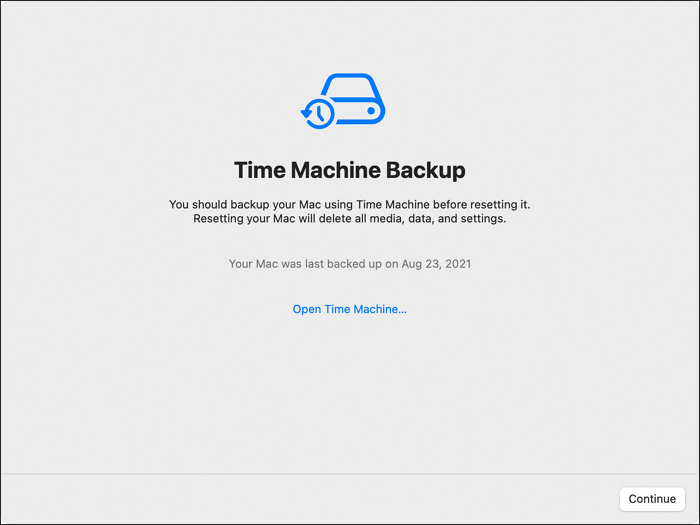
Step 3. Back up your Mac with Time Machine. It is an optional step, and you can skip this part by clicking "Continue".
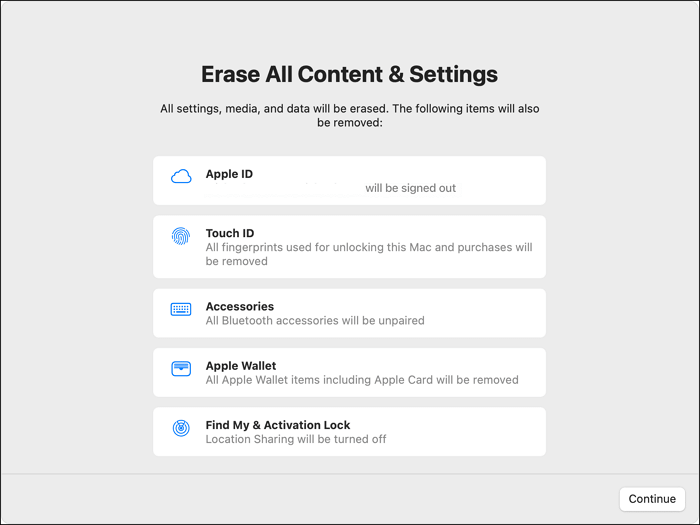
Step 4. All the settings, media, and data will be erased. Click "Continue" to confirm erasing.
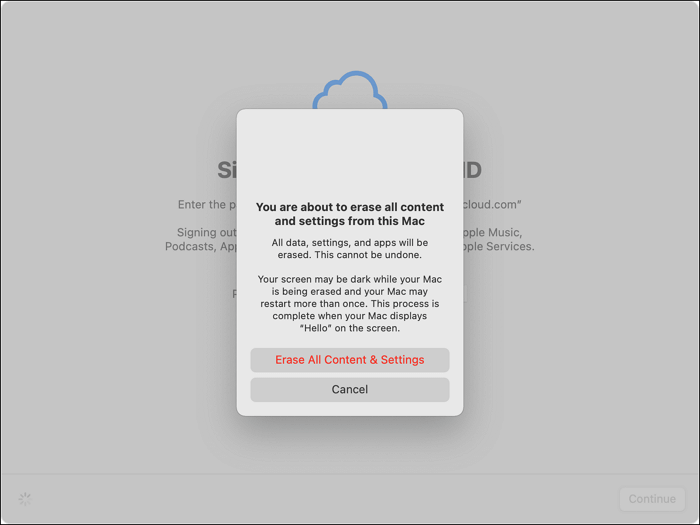
Step 5. Sign out of your Apple ID by entering the password.
Step 6. Click the button with red words, and your Mac will start to reset.
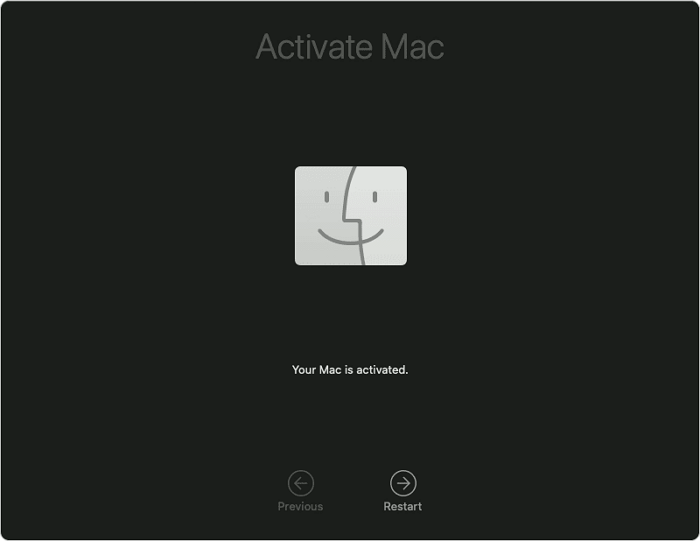
Step 7. Wait until the process bar is at the end. Click "Restart", and you can adjust the settings and use your Mac.
Factory Reset when Erase All Content and Settings Doesn't Work
Sometimes you may find Erase All Content and Settings doesn't work on your Mac, or your Mac does not support Erase All Content and Settings, or you forget Mac password and cannot use the Erase Assistant. Using Erase All Content and Settings is not the only way to factory reset your Mac. You can factory reset Mac without password in the Recovery Mode with Disk Utility and Reinstall macOS.
Step 1. Enter the Recovery Mode on Mac. (Hold the power button on Apple Silicon Macs, and hold both the Command and R keys on Intel Macs.)
Note: Click the link to fix Mac won't boot into Recovery Mode.
Step 2. After entering the Recovery Mode, choose "Disk Utility".
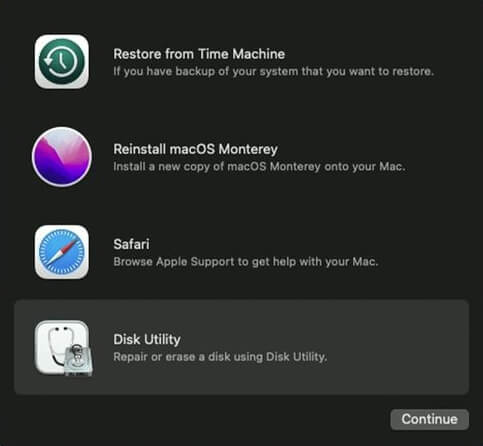
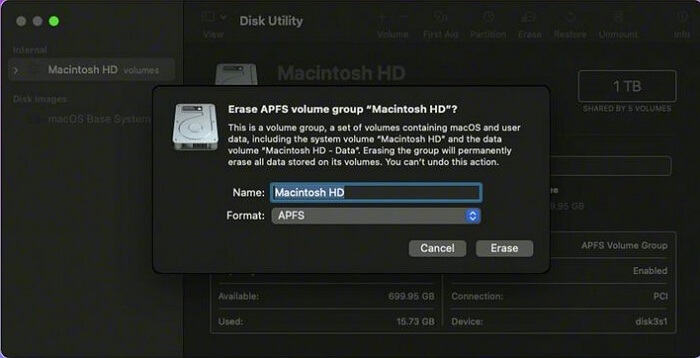
Step 3. Erase the startup disk, and the disk name should be Macintosh HD.
Step 4. Erase the startup disk by choosing "Erase".
Step 5. After that, you can quit the Disk Utility.
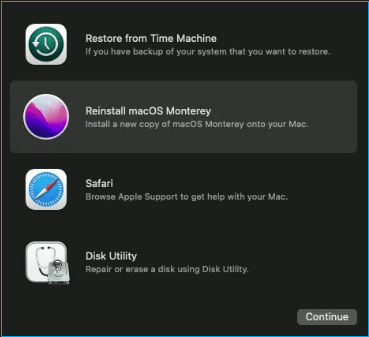
Step 6. You can click "Reinstall macOS" and follow the prompts to reinstall macOS.
Recover Lost Data After Erase All Content and Settings
It is not easy to avoid data loss when erasing all content and settings on Mac. Don't feel frustrated when you lose some important files. With a professional Mac data recovery tool called EaseUS Data Recovery Wizard for Mac can retrieve lost data on Mac with one click.
EaseUS Data Recovery Wizard for Mac can help you with Mac data recovery in many aspects:
- It can help you recover deleted files Mac. Mac users are allowed to recover deleted pictures Mac, lost videos, audio, music, documents, etc.
- It is powerful enough to help you recover Mac USB drives, MacBook/iMac, cameras, camcorders, SD cards, or MP3/4 safely and quickly.
- It supports different file systems, including APFS, HFS+, HFS X, exFAT, NTFS, FAT (FAT16, FAT32), etc.
You should have a brief idea of the EaseUS Data Recovery Wizard for Mac after the introduction. We give a detailed guide here in case you don't know how to recover lost files:
Step 1. Select the drive to be scanned
In the main EaseUS Data Recovery Wizard window, there will be a list of the drives connected to your Mac. Select the drive you need to recover lost/deleted files from, and click the "Search for lost files" button.

Step 2. Select your lost data/files
EaseUS Data Recovery Wizard for Mac will immediately scan your selected disk volume and display the scanning results on the left pane. You can sort the results to find the wanted files if you are looking for certain files.

Step 3. Recover lost/deleted data
Once you have found the desired files, preview the files and then click "Recover" to begin the recovery of your deleted/lost Mac files.

Bottom Line
When you are going to trade or replace your old Mac with a new one, you can use the Erase Assistant to erase all content and settings on your Mac. When the Erase All Content and Settings doesn't work on your Mac, you should try the factory reset Mac in the Recovery Mode.
Don't hesitate to download and install EaseUS Data Recovery Wizard for Mac, and you'll need this tool to recover deleted data after erasing all content and settings on Mac.
Erase All Content and Settings FAQs
We hope you can learn more about Erase All Content and Settings in this part.
How to fix Erase All Content and Settings Greyed Out on iPhone 14/iPad Pro?
The Erase All Content and Settings button greyed out is a common problem on iPhones and iPads. You can fix the problem in four ways:
- 1. Force restart your iPhone/iPad
- 2. Reset all settings
- 3. Sign out of iCloud
- 4. Update iOS
What should I do if Erase All Content and Settings not working on MacBook Air?
It is not the only way to erase data on your Mac, you can enter the Recovery Mode, and factory reset your Mac.
- 1. Enter the Recovery Mode on Mac. (Hold the power button on Apple Silicon Macs, and press the Command and R keys on Intel Macs.)
- 2. After entering the Recovery Mode, choose "Disk Utility".
- 3. Erase the startup disk, and the disk name should be Macintosh HD.
- 4. Erase the startup disk by choosing "Erase".
- 5. After that, you can quit the Disk Utility.
- 6. You can click "Reinstall macOS" and follow the prompts to reinstall macOS.
Reset vs Erase All Content and Settings. Which one is easier?
It is easier to apply the Erase All Content and Settings button on Mac. You just need to use the Erase Assistant and follow the prompts.
- 1. Find the "Erase All Content and Settings" button and click it.
- 2. You will need to enter the admin password to ensure your operation.
- 3. Back up your Mac with Time Machine. It is an optional step, and you can skip this part by clicking "Continue".
- 4. All the settings, media, and data will be erased. Click "Continue" to confirm erasing.
- 5. Sign out of your Apple ID by entering the password.
- 6. Click the button with red words, and your Mac will start to reset.
- 7. Wait until the process bar is at the end. Click "Restart", and you can adjust the settings and use your Mac.
What to do if I can't find Erase All Content and Settings MacBook Pro?
The Erase Assistant is not in the same place on macOS Ventura and Monterey.
For macOS Ventura:
- 1. Open the Apple menu and choose "System Settings".
- 2. After that, you should click "General".
- 3. Click "Transfer or Reset".
For macOS Monterey:
- 1. Open the Apple menu and click "System Preferences".
- 2. Now you can see the Erase Assistant and click "Erase All Content and Settings".
Was This Page Helpful?
Dany is an editor of EaseUS who lives and works in Chengdu, China. She focuses on writing articles about data recovery on Mac devices and PCs. She is devoted to improving her writing skills and enriching her professional knowledge. Dany also enjoys reading detective novels in her spare time.
Related Articles
-
Where Is The Hard Drive on A Laptop?
![author icon]() Daisy/2025-07-04
Daisy/2025-07-04 -
Windows 7 Black Screen with Cursor - 7 Quick Solutions
![author icon]() Larissa/2026-06-30
Larissa/2026-06-30 -
There Was an Error Connecting to the Apple ID Server on MacBook [Fixed👍]
![author icon]() Brithny/2026-06-17
Brithny/2026-06-17 -
[Fix] A required device isn't connected or can't be accessed with error
![author icon]() Jean/2025-07-04
Jean/2025-07-04
EaseUS Data Recovery Services
EaseUS data recovery experts have uneaqualed expertise to repair disks/systems and salvage data from all devices like RAID, HDD, SSD, USB, etc.