Why You Need to Delete Everything on MacBook
Do you want to know how to delete everything on MacBook Pro? Multiple reasons can lead users to reset their MacBook. For starters, you might want to give your device or even sell it to another person. In that case, it becomes imperative to wipe out all data and make it as new as the original version.
Other reasons for wanting to know how to delete everything on MacBook Air include a computer virus attack. If your Mac suffers from a virus attack, it is advisable to delete everything and start anew. You can also increase the performance of the system by resetting the device.
There are different ways you can erase everything on MacBook. You can use Disk Utility or the Erase Assistant to delete and factory reset your MacBook. However, it is vital to understand that using the erase all contents and settings on MacBook will delete everything present on the system.
To make things easier, we have included a video explaining the same.
- 00:46 Press and hold the Command+R keys and turn on the system. Keep holding the keys till you view the loading bar.
- 01:08 Choose the language you want.
- 01:14 macOS Utilities window comes on the screen.
- 01:59 Click on Reinstall macOS from the macOS Utilities window
- 02:41 Select Agree when a pop-up comes asking for confirmation for the software license agreement
Solution 1. How to Delete Everything on MacBook Manually
To know how to delete everything on your MacBook manually, take a look at the steps you need to follow:
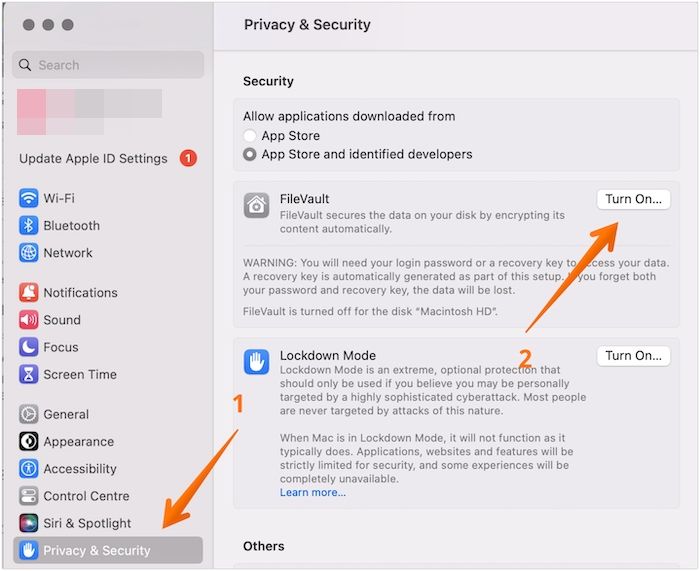
A. Turn Off FileVault on MacBook
FileVault is one of the most vital in-built features of MacBook. It encrypts the hard drive and offers protection to the files stored inside. The feature asks for authentication when anyone attempts to access the storage option. However, it can interfere with deleting everything when it is turned on. You need to turn it off before starting the resetting process. Here are the steps you need to follow:
Step 1. Go to Finder. Click on Apple Menu. Click on System Settings from the drop-down menu.

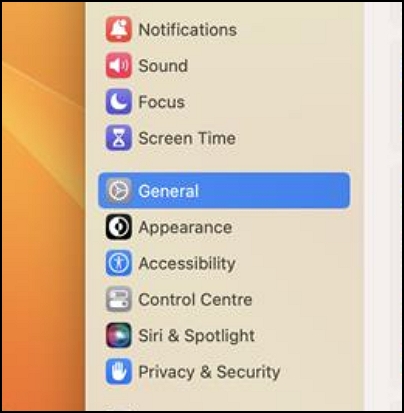
Step 2. Select Privacy & Security.
Step 3. Scroll down to the FileVault tab.
Step 4. Click on the Turn Off FileVault option if its own. It may ask for the password that you need to put in.
B. Sign Out of iCloud, iTunes, and iMessage on MacBook
After that, you should sign out of iTunes, iCloud, and iMessage on your MacBook. To disable iTunes on your Mac. Check out the steps:
Step 1. Go to Music App.
Step 2. Select "Account" from the menu.
Step 3. A drop-down will appear. Click on Authorizations.
Step 4. Select Deauthorize This Computer.
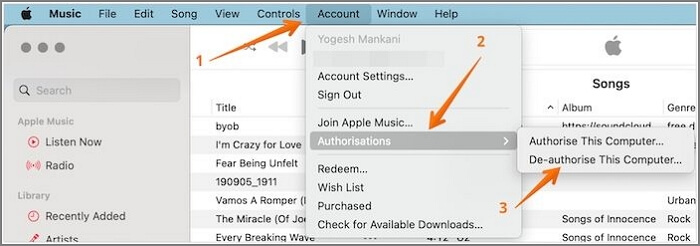
Step 5. Enter the password.
Step 6. Click Deauthorize.
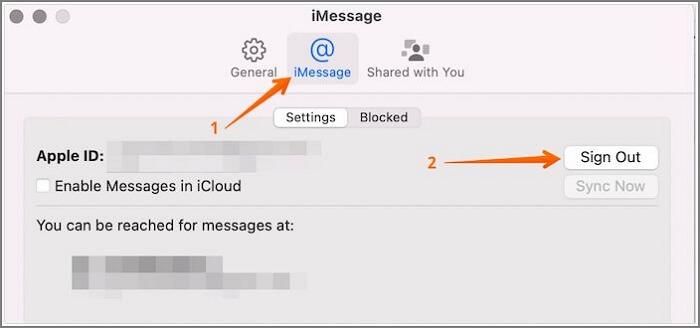
To sign out of iMessage on Mac, here are the steps:
Step 1. Open Messages.
Step 2. Go to Settings.
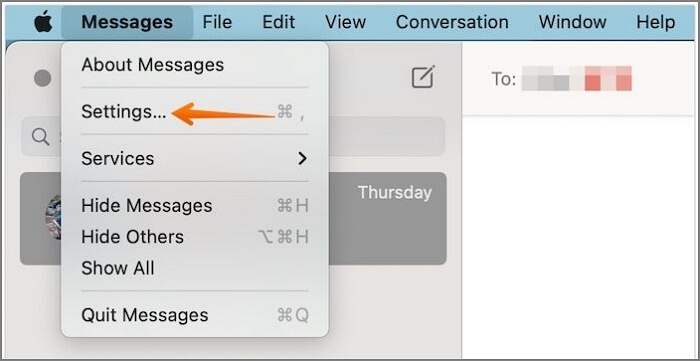
Step 3. Select the iMessage tab, followed by the Settings tab.
Step 4. Tap on Sign Out.
To log out of the iCloud account, take a look at the steps:
Step 1. Go to System Settings. Click on the Profile Name on the top.
Step 2. Scroll down and click on the Sign-out button.
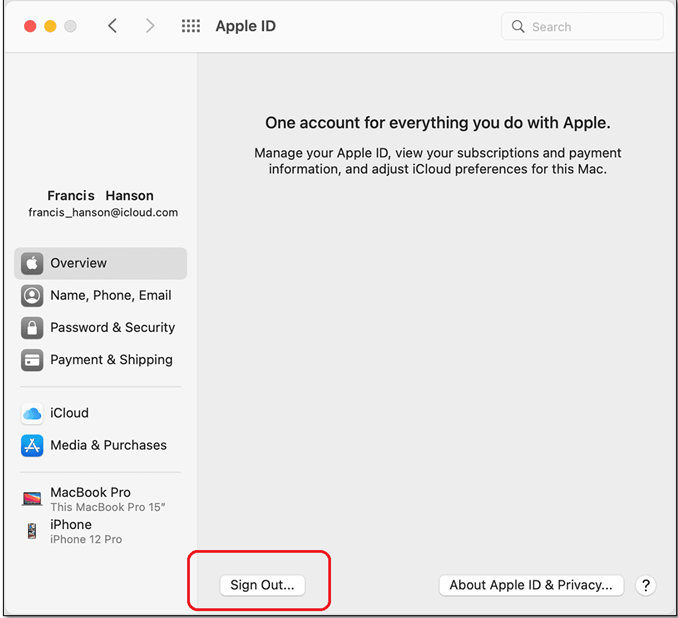
Step 3. You will see a pop-up asking if you want a copy of the iCloud data.
Step 4. Deselect everything and press Continue.
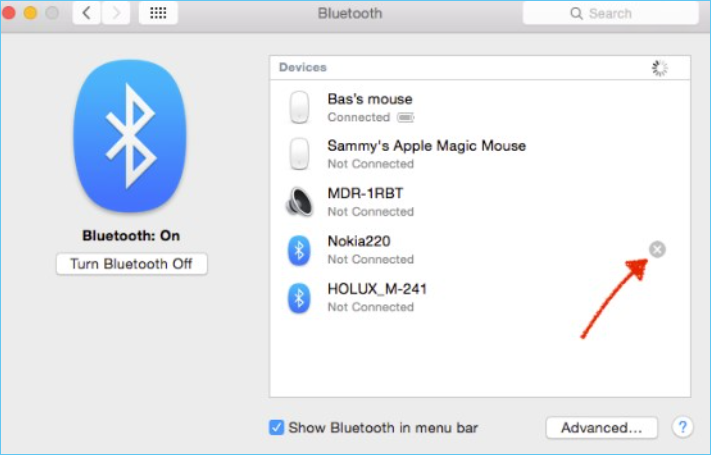
C. Unpair Bluetooth Devices on MacBook
Another thing you need to consider before deleting everything is the unpairing of Bluetooth devices. For that, you need to follow the below steps:
Step 1. Go to the Apple Menu. Click on System Settings.
Step 2. Select Bluetooth. Go to the device list and hover on the "i" icon to disconnect to remove the devices.
D. Erase MacBook Disk with Disk Utility
Before boot Mac into Disk Utility to erase Mac or MacBook, you must turn off the system. After that, press the Command and R keys and hold them while pressing the power button. Keep the keys pressed till you come across the Apple logo. Check out the steps listed here:
Step 1. Click on Mac Disk Utility from the macOS Utilities window.
Step 2. Choose the disk you want to delete. To get rid of everything on your system, choose the Macintosh HD drive.
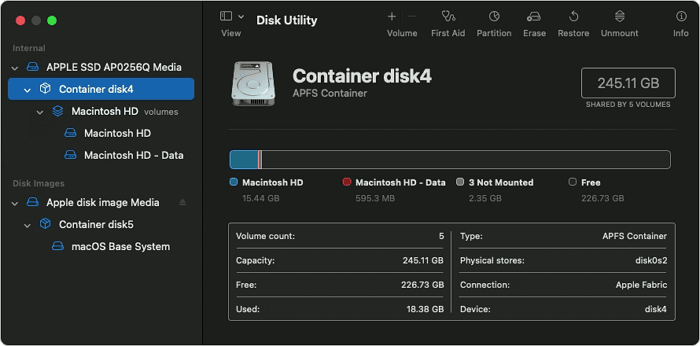
Step 3. Tap on the Erase button.
Step 4. Enter the name, format, and scheme of the drive.
Step 5. Press "Erase" to delete everything from the system.
E. Reinstall macOS After Erasing the Hard Disk on MacBook
Now that everything is deleted on your Mac, you can reinstall macOS. For that, here are the steps you need to follow to learn how to reinstall macOS:
Step 1. Go to the macOS Utilities window.
Step 2. Now, choose the Reinstall macOS option.
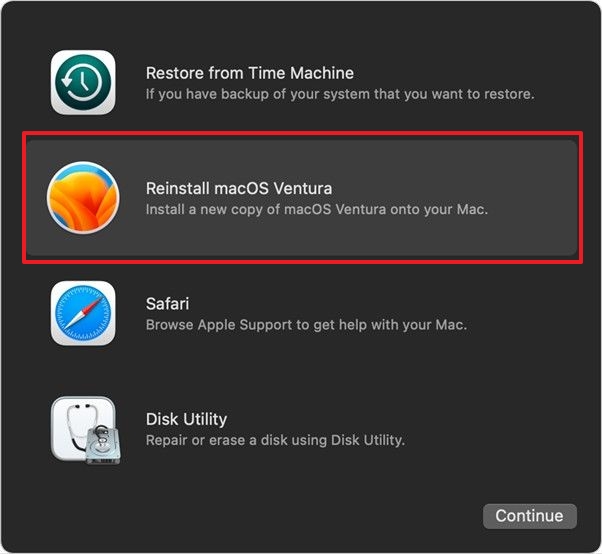
Step 3. Follow the instructions available on the screen.
Note: Keep in mind that it will take time to reinstall the operating system on your Mac.
Solution 2. Delete Everything on MacBook with Erase Assistant
Another way to delete everything on MacBook is to opt for Erase Assistant. With the Erase All Content and Settings option, Mac users can easily wipe out everything on the device. It also aids in seamless factory resetting of the system. You can now erase everything safely.
Take a look at the steps:
Step 1. Go to the Apple menu. Click on System Settings.
Step 2. Select General from the left-hand. Click on the Transfer or Reset option from the right-hand side.
Step 3. Select the "Erase All Content and Settings" option. Enter the admin password. Mac will ask you to back up Mac using Mac Time Machine Backup.

Step 4. Select "Continue" to move ahead. You will come across the things that Mac lists will be deleted.
Step 5. Select "Continue". Sign out of the Apple ID.
Step 6. Click on the Erase All Content and Settings option. Now, select Restart.
How to Recover Mistakenly Deleted Files on MacBook with Software
Have you deleted important files by mistake? Have you forgotten to back up files before deleting everything on MacBook? Don't worry!
EaseUS Data Recovery Wizard for Mac is a professional, reliable, and user-friendly recovery tool. It is easy to use and is the perfect software for various scenarios.
- The software aids in the recovery of data from a wide range of situations. These include virus attacks, format during macOS Ventura upgrade failed, hardware failures, system crashes, deletion without backup, manual mistakes, sudden shutdowns, etc. With this excellent data recovery program, you can retrieve data with ease.
- This tool can recover deleted pictures, videos, audio files, emails, and more. Moreover, you can restore data from various Mac-based devices. These include HDD SSD, fusion drive, memory card, camera, and USB drive, and this tool can recover Time Machine backups.
- EaseUS Data Recovery Wizard for Mac is beginner-friendly. You can use the tool without hassle, whether an expert or an amateur. It scans the files you want to restore and conducts the process quickly. It also offers the file filter option to look for the data you want to recover soon.
Apart from that, EaseUS Data Recovery Wizard for Mac also offers users the opportunity to send recovered files to Cloud storage. You can also get remote IT support in case you face any problems. Here's the tutorial, and you can follow the steps to recover deleted data on Mac:
Note: You can create a backup by clicking the "Disk Backup" on the left first. The software will recover the deleted files from the backup image. It can prevent further damage to your disk and data, making it safer and more reliable.
Step 1. Scan for deleted files
Select the hard drive, external drive, or SSD where your important data & files were deleted and click "Search for lost files".

Step 2. Filter the lost files
The software will run quick and deep scans and work hard to find as many deleted files as possible on the selected volume. Filter wanted files through the "Type" and "Path" options.

Step 3. Recover deleted files
Double-click the deleted files to preview. Then, click the "Recover" button to get them back.

Bottom Line
Knowing how to delete everything on MacBook is necessary, and the information can be pretty handy in many situations. For instance, if you want to sell the device or protect the system from a vicious virus attack. Erasing everything on the system will protect sensitive data from falling into the wrong hands.
There are two distinct ways you can delete everything on the system. You can either go with Erase Assistant or opt for Disk Utility. However, sometimes, you might forget to back up the data or delete something you didn't want to. In that case, you need the assistance of the best Mac data recovery software.
The EaseUS Data Recovery Wizard for Mac is an efficient and user-friendly data recovery program. You can use this software to retrieve any data you want. Use this remarkable data recovery program right away!
How to Delete Everything on MacBook FAQs
There are different ways you can delete everything on your MacBook. To gain more knowledge, check out the questions and answers listed below:
How to factory reset MacBook Pro and Air?
To factory reset MacBook Pro and Air, go to the Apple Menu. Choose System Settings and press General on macOS Ventura. Now, select the Transfer or Reset option. Click on Erase All Content and Settings to factory reset the devices. Using macOS Monterey, you can easily find the Erase Assistant from the System Preferences.
How to recover the files I accidentally deleted on my MacBook?
Go to the Trash Can option to recover the files you accidentally deleted on your MacBook. Here, you will come across the files you have deleted. Choose the file you want to restore and drag it to the desktop. Opt for professional data recovery software if you have permanently deleted files without a backup, and EaseUS Data Recovery Wizard for Mac will be a wise choice.
When and why do you want to delete everything on your MacBook?
If you want to sell your MacBook, improve its performance, or protect the system from a virus tack, you must delete everything on the device. It is done primarily to protect sensitive data.
How to wipe a MacBook automatically?
If you are running macOS Big Sur or earlier macOS versions on your MacBook, you will need to erase your Mac in Disk Utility. A new feature was published with macOS Monterey, and you can wipe a MacBook automatically with macOS Erase Assistant.
Was This Page Helpful?
Cedric Grantham is a senior editor and data recovery specialist of EaseUS. He mainly writes articles and how-to tips about data recovery on PC and Mac. He has handled 10,000+ data recovery cases and is good at data recovery of NTFS, FAT (FAT32 and ExFAT) file systems, and RAID structure reorganization.
Dany is an editor of EaseUS who lives and works in Chengdu, China. She focuses on writing articles about data recovery on Mac devices and PCs. She is devoted to improving her writing skills and enriching her professional knowledge. Dany also enjoys reading detective novels in her spare time.
Related Articles
-
How to Fix 'Switch User' Option Missing in Windows 10/11
![author icon]() Daisy/2024-01-11
Daisy/2024-01-11 -
How to Change Your IP Address on Computer
![author icon]() Daisy/2024-07-01
Daisy/2024-07-01 -
NTFS VS Share Permissions, What's the Difference and How to Set Them?
![author icon]() Sherly/2024-07-01
Sherly/2024-07-01 -
Solved: Dell Boot Loop Error on Windows 10 - With Pictures
![author icon]() Sherly/2024-01-11
Sherly/2024-01-11

EaseUS Data Recovery Services
EaseUS data recovery experts have uneaqualed expertise to repair disks/systems and salvage data from all devices like RAID, HDD, SSD, USB, etc.