You can find various hands-on features in Windows OS regarding utility, and "Switch User" also comes under this bucket. It helps share the same PC among multiple users by creating multiple user accounts. It allows different persons to log in through their accounts, enabling the accessibility of apps or files. It also curbs any intrusion or interference with apps or personal information of other users working on PCs.
Sometimes, you need help seamlessly using this feature on your PC. For example, it requires you to fix the "Switch User" option missing in Windows 10/11 to enable you to use this option again. Instead, we suggest the three most effective solutions to solve your issue instantly and provide multiple login facilities.
What Does the "Switch User" Option Missing in Windows 10/11 Mean?
Sometimes, you create multiple user accounts for a separate login utility to provide freedom of working on apps and files. But one day, you try to switch your user account only to find that there is no existence for other users.
So, when the "Switch User" option goes missing in Windows 10/11, you can no longer switch to that particular account or to the files or apps you saved, particularly for that account. So, it is quite a common issue; you can fix the "Switch User" option missing in Windows 10/11 without seeking professional help.
- Solution 1: Enabling the Option of Fast User Switching
- Solution 2: Configuration of Windows Group Policy
- Solution 3: Enabling the Account for Built-in Administrator
Solution 1: Enabling the Option of Fast User Switching
Sometimes, you may have to fix the "Switch User" option missing in Windows 10/11. The issue occurs because of the misconfiguration of specific settings on your PC. To counter this problem, you have to make changes related to administrative levels that enable the option of fast user switching using the Windows Registry. It is recommended to take a registry backup before proceeding with the steps. Also, ensure you enter as an administrator on your PC to access the Registry.
Useful Steps:
Step 1: Start by tapping the Windows and R keys to open Run.
Step 2: Move ahead by typing "regedit" in the given space and tap "Enter."
Step 3: Tap on the "Yes" option as soon as a prompt for User Account Control appears.
Step 4: As soon as you are in the Registry Editor, reach the location as:
HKEY_CURRENT_USER\Software\Microsoft\Windows\CurrentVersion\Policies\System
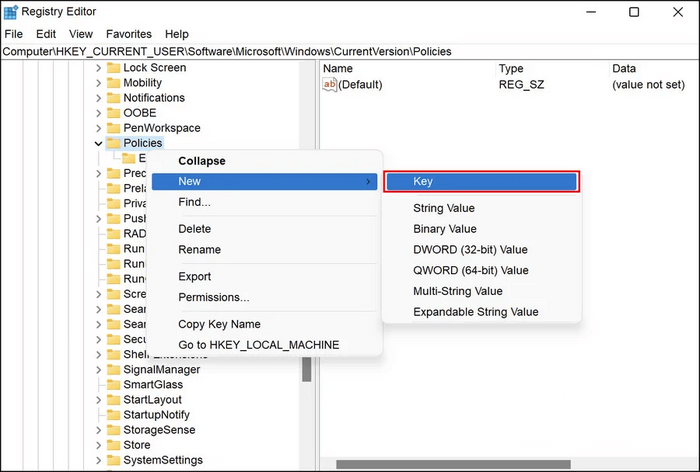
Step 5: If you cannot get the "System key," right-tap on the 'Policy key,' then choose the "New" and "Key" options.
Step 6: Go ahead by renaming the key as "System."
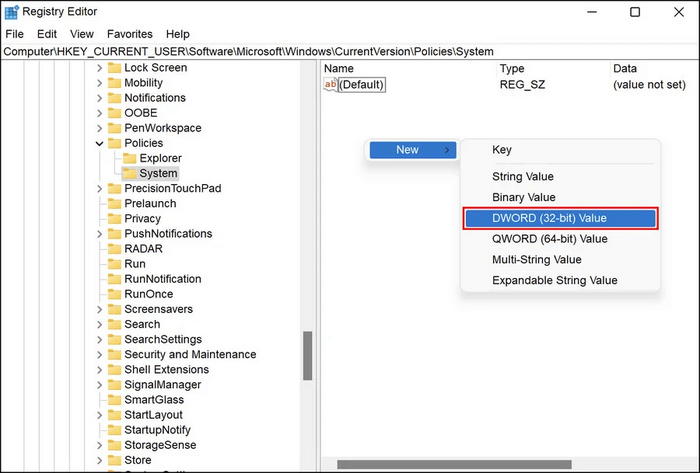
Step 7: Then, by choosing "System Key," go to the right pane.
Step 8: Then make a right tap anywhere in the right pane and move ahead by choosing "New" and then the 'DWORD (32-bit) Value' option.
Step 9: Now give a new name to the key as: "HidefastUserSwitching."
Step 10: Tap twice on "HidefastUserSwitching" and then move ahead by typing "0" in Value data.
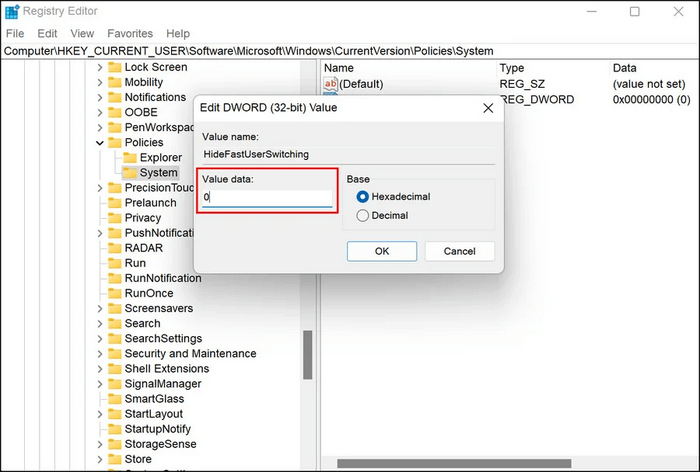
Step 11: Tap the "OK" option to save the changes.
Step 12: As a final step, exit the Registry Editor, then finish by restarting your PC.
Solution 2: Configuration of Windows Group Policy
Windows Group Policy encompasses all the OS controlling the working environment of user accounts. It also provides management in a centralized way wherein operations can be handled while applying security settings. For example, you can configure Windows Group Policy to fix the "Switch User" option missing in the Windows issue.
Useful Steps:
Step 1: Press Winkey + R (that will open the Run window), type 'gpedit.msc' and press enter
Step 2: You will see a window for Local Group Policy on the next screen. After that, you have to follow the path;
Computer Configuration -> Administrative Templates -> System -> Logon
Step 3: Now double-tap the "Hide Entry Points for Fast User Switch" option and open it.
Step 4: Select "Disabled" to turn on the option.
Step 5: Tap on "Apply" and then on the "OK" option.
Step 6: Now exit from the Local Group Editor Policy window, then verify if you can fix the "Switch User" option missing in Windows 10/11.
If you had no luck with this one, try the following option and fix the issue.
Solution 3: Enabling the Account for Built-in Administrator
Sometimes, to fix the "Switch User" option missing in Windows 10/11, you can troubleshoot using the current user account. For this, you must run DISM and SFC utilities using the menu for recovery. Then, run them using the Command prompt, wherein you can know about potential issues by scanning the PC. However, if it does not work for you, enabling an account for the built-in administrator in Windows is recommended, and creating a new user account is recommended.
Useful Steps:
Step 1: Start by opening the screen for signing in and then pressing and holding the "Shift key." Then restart your PC.
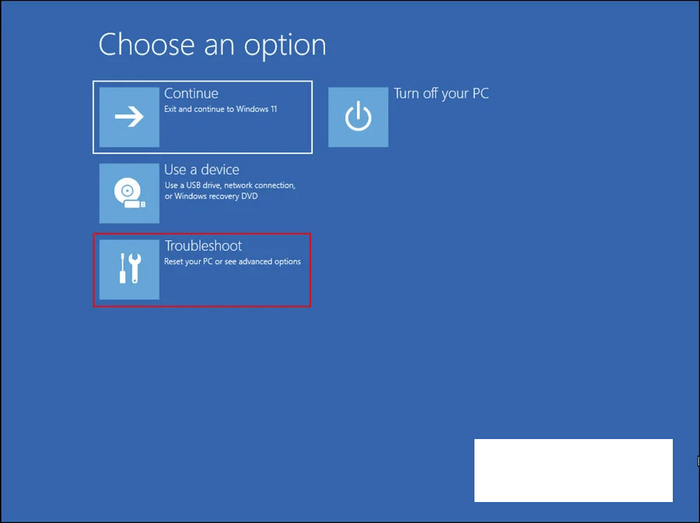
Step 2: You will find that Windows has started booting into the "Recovery menu." From the list of available options, choose "Troubleshoot."
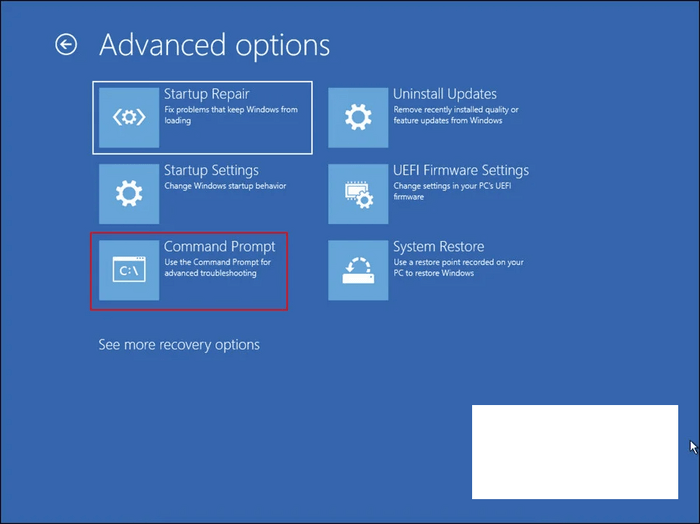
Step 3: Make your way toward "Advanced Options" and then "Command Prompt."
Step 4: Once you find the Command prompt launching, Type the given command and tap on "Enter" to execute it.
net user administrator /active: yes
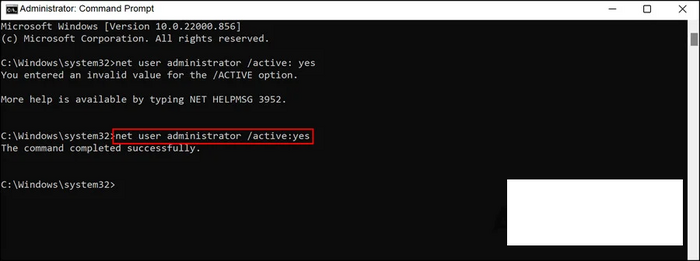
Step 5: As soon as your command gets executed, you must restart your PC. Then, make a login by making use of the built-in administrator account.
Step 6: Now press the "Win + I" keys to open Windows settings.
Step 7: Refer to the left pane and choose the "Accounts" option.

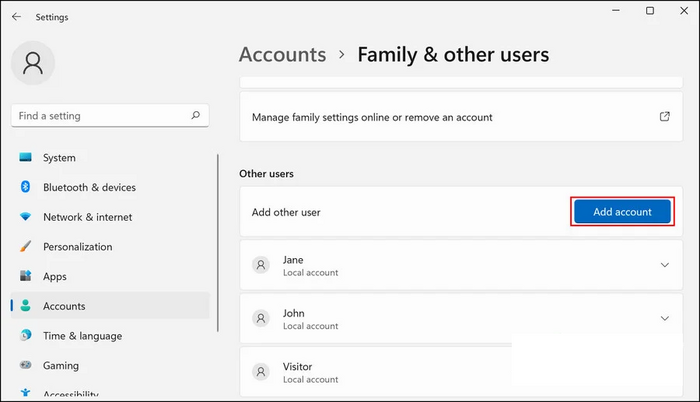
Step 8: Tap on the "Family and Other Users" option.
Step 9: From the section of other users, tap on the "Add Account" option. It will be associated with the "Add other user" option.
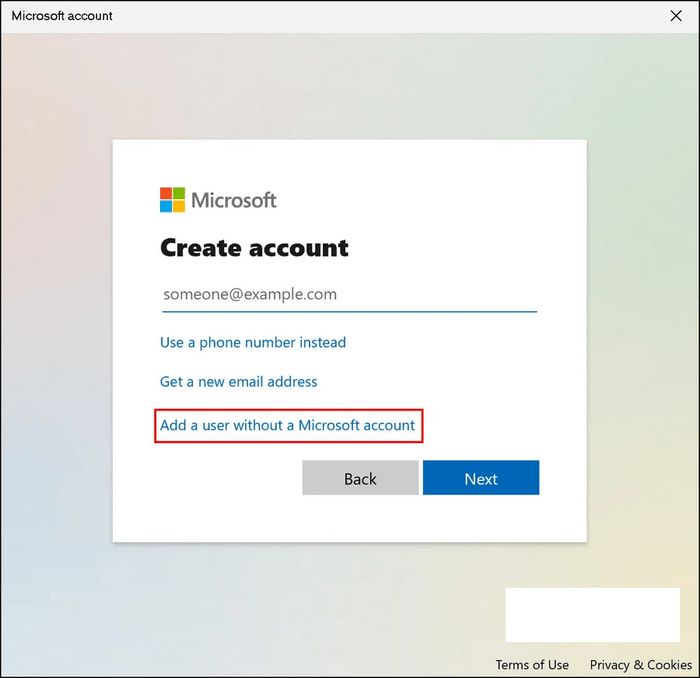
Step 10: Now you can see a dialog wherein you have to tap on the "I don't have this person's sign-in information" option.
Step 11: Then, tap the hyperlink stating the "Add a user without a Microsoft account" option. Make an entry for all the fields that are required.
Step 12: There will be some instructions on the screen that you need to follow.
Step 13: As soon as your new user account gets created, make a login and see if the issue got fixed.
Conclusion
The Switch User option in Windows is advantageous when multiple users work on different niches. It provides privacy and safety for their work. However, sometimes the Switch User option disappears or gets removed, hampers the labor saved by that user. But by using specific methods, you can fix this issue. We hope by using our above-initiated methods, you will be able to fix the "Switch User" option missing in the Windows problem seamlessly.
Was This Page Helpful?
Daisy is the Senior editor of the writing team for EaseUS. She has been working at EaseUS for over ten years, starting as a technical writer and moving on to being a team leader of the content group. As a professional author for over ten years, she writes a lot to help people overcome their tech troubles.
Related Articles
-
How to Fix Windows 11 24H2 Update Stuck error ✔️
![author icon]() Sherly/2025-07-04
Sherly/2025-07-04 -
Break Windows 10 Roll Back Limit - Roll Back to Windows 7/8 after 30 Days
![author icon]() Jean/2025-07-04
Jean/2025-07-04 -
How to Recover Unsaved/Lost/Corrupted Adobe Acrobat Files on Windows PC
![author icon]() Cedric/2026-02-06
Cedric/2026-02-06 -
Time Machine Not Working on Mac: Possible Causes and Proven Solutions
![author icon]() Brithny/2026-06-17
Brithny/2026-06-17
EaseUS Data Recovery Services
EaseUS data recovery experts have uneaqualed expertise to repair disks/systems and salvage data from all devices like RAID, HDD, SSD, USB, etc.