Why Need to Boot Mac from USB
Before you understand how to boot Mac from a USB, it's essential to understand the reasons behind it. Sometimes updates aren't clean, so users may want to install a fresh macOS Ventura. Or, they could be looking to remove viruses or errors from their Mac device.
Now, it's essential to understand that a fresh macOS installation also leads to an error-free experience in more than one way. For instance, if an app isn't working, a fresh macOS installation will fix that problem. But let's answer the question with a few reasons:
To avoid any errors or issues with apps
- To dual boot macOS Ventura and Monterey
- To make your mac device run faster and smoother
- To run apps that aren't compatible with your current macOS
- To install a new version without upgrading—hence, testing it first
These are some of the most common reasons behind a user deciding to use a boot mac from USB. Therefore, it's a necessary process to do it right. However, besides being a matter of choice, there are times when you have no other choice but to do a fresh macOS installation. Here's why:
- Corrupted OS files
- To find a quick solution
- macOS is not booting at all
- Access internal drives if the main boot drive isn't booting
Thus, learning how to boot Mac from a USB cab saves you from the hassle of taking your mac device to the shop. Besides that, booting from any USB will allow you to test out multiple macOS versions before settling down on the one you like the most.
And last but not least, no Mac devices support disk drives anymore. So, to boot, mac USB is the only option left.
Necessary Preparations Before Boot Mac from USB
Before starting the process, it's essential to get the precautions right. So, you need to tend to the necessary preparations before booting Mac from USB. While we'll talk about two main methods, we'll also show you a video.
In this video, you can find the necessary information at various points, such as:
- 04:15 Why it's essential to avoid upgrading from the Apple store if you're using a USB.
- 05:30 Find the macOS Ventura file after downloading it from Apple Store (not installing it).
- 06:22 How to view installation packages and copy them to USB.
Therefore, if you view the video, you'll understand the steps better. Once done, here are the two steps you need to take to create the necessary preparations for booting your Mac from USB:
1. How to Prepare and Format a USB Drive on Mac
It's imperative that your USB drive doesn't have any data on it before you get started. Therefore, you need to make sure your USB is properly formatted. So, one of the first things you need to prepare is the USB device in the correct format. Here's how:
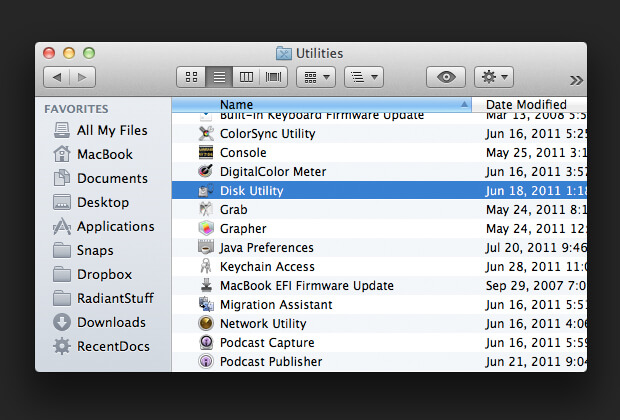
Step 1. Open Finder from your mac desktop.
Step 2. Then head into Applications.
Step 3. Then select "Utilities."
Step 4. Under Utilities, find and click on the "Disk Utility" option.
Step 5. Inside Disk Utility, pick your USB drive.
Step 6. Once the USB drive is selected, click "Erase" in the top bar.
Step 7. In the next prompt, rename the USB device according to your liking.
Step 8. And pick the "APFS format" to make it bootable.
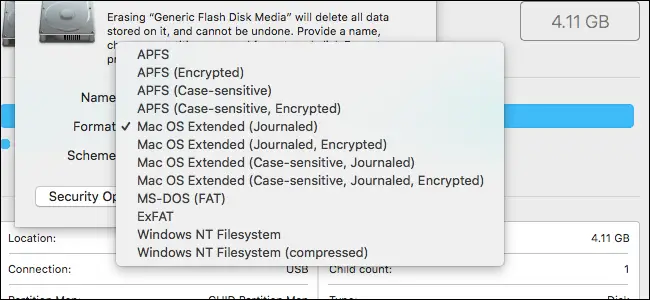
Step 9. Press Done to begin formatting.
Step 10. Press Done when complete.
This will format your USB drive into APFS format, which is the right one you need to create a bootable mac USB. Therefore, move on to the next step.
2. How to Create a Bootable USB Drive with Terminal on Mac
The next step is to create a macOS Ventura bootable USB with a Mac Terminal. Therefore, you will need to use the Terminal on your Mac device and the recently formatted USB. Once you have it plugged in, here's how you're going to use the Terminal:
Step 1. Open Terminal from Other apps.
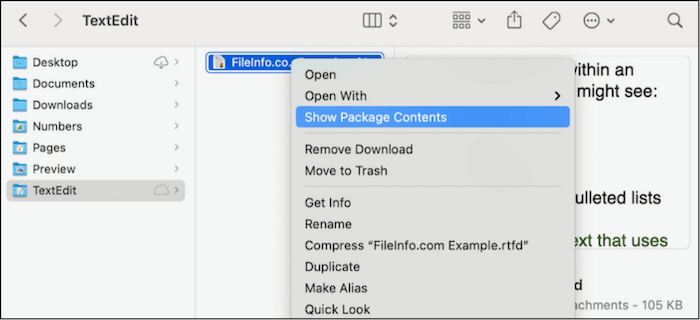
Step 2. Open the folder where your macOS Ventura is downloaded.
Step 3. Right-click on the "macOS package" and click on "Show Package Contents."
Step 4. Inside the package, find and select the "createinstallmedia" file.
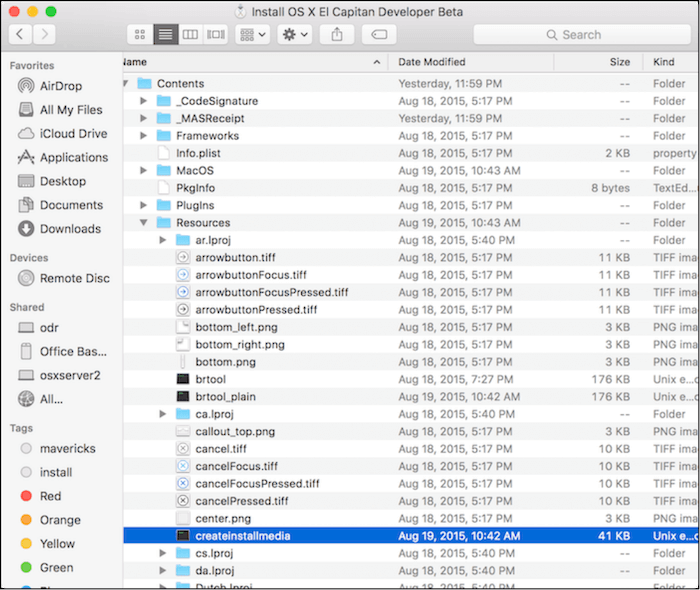
Step 5. Switch to Terminal and type "Sudo" to give space, then switch back to the folder.
Step 6. Click, then drag and drop the createinstallmedia file into the Terminal.
Step 7. Let the Terminal detect it, then type "—volume".
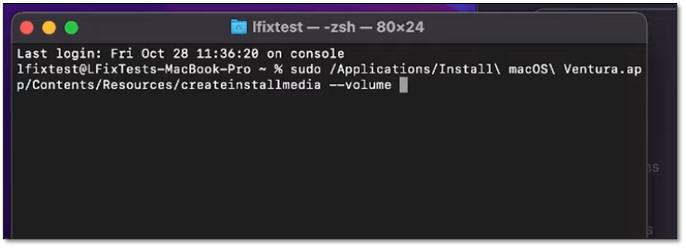
Step 8. Then drag and drop the macOS Ventura/Monterey file from your desktop into the Terminal.
Step 9. Press Enter/Return and enter your password if prompted.
Step 10. When the "Ready to start" prompt appears, press Y and Return.

Step 11. Wait for it to finish making your disk bootable.
This will turn your USB device into a bootable disk. And, since it's in APFS format, it'll be ready for mac device boot once you restart your Mac. So, let's keep moving.
How to Boot Mac from USB Installer
Now that you've created a bootable USB for Mac, you will have to turn off your mac device to proceed with the installation. However, back up important data before you start, as it'll wipe everything from your primary drive.
Once you're ready, here's what you'll do:
Step 1. Press the Power button on your Mac and press & hold the Option button on your keyboard right away.
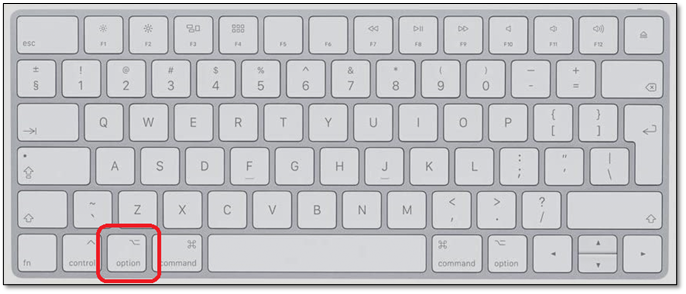
Step 2. Wait for the options to pop up.
Step 3. Select "Install macOS Ventura/Monterey" in the bootable options.
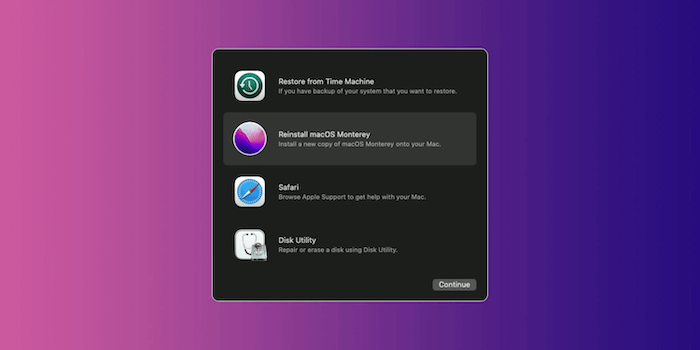
Step 4. Pick "macOS Ventura" again in the following menu.
This will begin the installation of macOS Ventura or Monterey on your device. Now, it's essential to understand that if you're looking for a fresh installation, head into options and select "Disk Utility." From there, erase your primary boot drive before proceeding with the installation.
Rescue Data from an Unbootable Mac with Software
Before using the newly installed macOS, you might want to recover the lost data. Now, this isn't only because you formatted the primary drive. Instead, data loss could be caused by a bad installation or an unbootable mac device.
So, if you're looking to rescue data from an unbootable Mac device, you will need a professional tool called EaseUS Data Recovery Wizard for Mac.
So, here's why it's the best choice you have today to recover your data from an unbootable mac device:
- It's trusted by thousands of mac users around the globe.
- It can recover data from hard drive damage or recover Mac formatted partitions.
- It can restore data lost in formatting or virus attacks.
- It'll help restore data when you wrongly restore macOS or when the macOS Ventura installation failed.
- It'll restore data lost in a system crash or operation error.
Therefore, this software is not only the best choice you have to recover your data but to rescue it from being lost forever. That's why you're going to use this tool to rescue data from an unbootable mac like this:
First, you need to enter the Recovery Mode on Mac:
|
For Apple Silicon Macs:
|
|
For Intel-based Macs:
|
Step 1. Launch EaseUS Software in Recovery Mode
Select "Utilities > Terminal" from the top menu, and enter the command sh <(curl https://d3.easeus.com/mac/boot.sh). Hit "Return". Wait for the application to open, and it will take several minutes.

Note: If the Terminal displays either "No such file or directory" or "Could not resolve host," you should verify that the command line you entered is correctly spelled, ensure your Mac has a stable internet connection, and confirm that your macOS version is not lower than macOS 10.15.
Step 2. Select the Volume on Your Mac Hard Drive
Select the volume where your lost data is stored, and click "Search for lost files". The EaseUS software will quickly locate all the recoverable data on the selected volume.

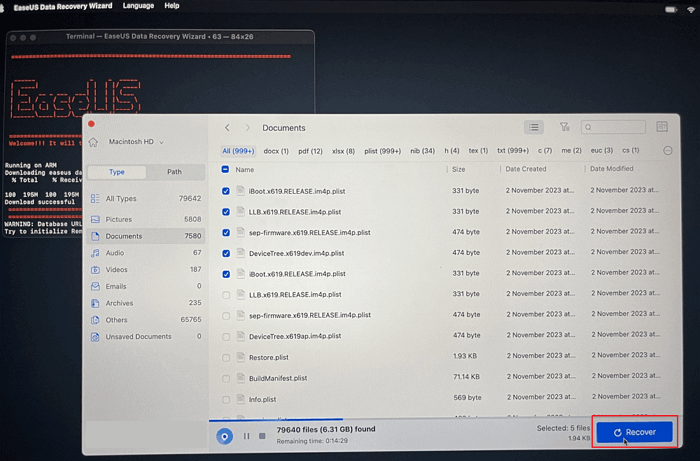
Step 3. Choose the Lost Data You Want
EaseUS software categorizes the scanned recoverable data by file type and storage path. Find the data you want by clicking "Type" or "Path" in the left panel. Then, check the boxes in front of the data you want to recover.

Step 4. Recover and Save Data on an External Disk
Click the "Recover" button, and a pop-up window will show up saying, "Please select a target location to save". Choose the external disk as the new storage location of your recovered data.
Conclusion
These are the few main things you need to know about booting your Mac from a USB flash drive. It's important to note that this method works on any macOS, even Big Sur. Therefore, make sure you download the file and do not upgrade it before you insert the USB.
Then, you can try to restore your files using the professional recovery tool, EaseUS Data Recovery Wizard for Mac. This way, you save yourself from a lot of hassle and ensure that your important data can be recovered easily and swiftly.
Boot Mac from USB FAQs
If you have further questions, this section will help answer them:
Can I install macOS Ventura from USB?
Yes, you can. You will have to download macOS Ventura file from Apple Store. However, you need to ensure you don't upgrade it immediately. When you start the process on Apple Store, it'll just download the file first. After that, quit installation to prevent it from upgrading automatically.
How do I boot a Mac from a USB drive?
When you start your Mac device, insert the bootable USB and press Option until the boot menu pops up. After that, you can go into Disk Utility if you wish to erase everything. If not, you can simply move forward with the installation.
How to create a macOS bootable USB?
You're going to need the bootable file for your desired macOS. Once you have it, insert your USB and format it in the APFS format. Then, open Terminal and type "Sudo", and drag and drop the createinstallmedia file from your macOS file into the Terminal.
Once done, type "-- volume" and, once again, drag and drop the entire macOS file into the Terminal. Then, let the Terminal turn your USB device into a bootable disk.
How do I start my Mac in boot mode?
When you press the power button, press and hold the Option key right away on your keyboard. After 4-5 seconds, you will see the Mac device start into Boot mode.
Was This Page Helpful?
Jaden is one of the editors of EaseUS, who focuses on topics concerning PCs and Mac data recovery. Jaden is committed to enhancing professional IT knowledge and writing abilities. She is always keen on new and intelligent products.
Dany is an editor of EaseUS who lives and works in Chengdu, China. She focuses on writing articles about data recovery on Mac devices and PCs. She is devoted to improving her writing skills and enriching her professional knowledge. Dany also enjoys reading detective novels in her spare time.
Related Articles
-
How to Format Seagate Hard Drive for Mac [Fast & Full Guide]
![author icon]() Sherly/2024-11-27
Sherly/2024-11-27 -
[3 Easy Ways] How to Backup Google Photos to Hard Drive
![author icon]() Jerry/2024-11-25
Jerry/2024-11-25 -
How to Fix It Looks Like Windows Didn't Load Correctly
![author icon]() Jean/2024-08-22
Jean/2024-08-22 -
Not Enough Free Space for macOS Ventura Update/Installing/Downloading macOS 13
![author icon]() Dany/2024-10-25
Dany/2024-10-25

EaseUS Data Recovery Services
EaseUS data recovery experts have uneaqualed expertise to repair disks/systems and salvage data from all devices like RAID, HDD, SSD, USB, etc.