Do you know how to backup Google Photos to hard drive? After the allowed storage set by Google ends, you can back up Google Photos to an external hard drive. Have you ever wondered how do I back up thousands of photos? Today, we will disclose three methods of downloading all the images and videos from Google Photos to your computer, freeing up space in your account.
Why Do You Backup Google Photos to Hard Drive
You need to back up Google Photos to external hard drives for various reasons. Maybe you want to keep your pictures in both locations to prevent photos loss from potential disaster because you may lose your Google account credentials. The other reason is that now Google does not offer unlimited storage. Furthermore, your photos may get lost when your computer is affected by a computer virus or malware attack.
So it may be time to back up your Google Photos to a hard drive. Still, the big hassle is downloading Google Photos one by one would be an excruciating process and time-consuming method, so how can you download all the photos at once that you have uploaded to Google Photos? Don't worry; you can download all your Google Photos by following the below-discussed methods. You just need to follow a few easy and simple steps.
🧩If you want to know how to backup Google Drive to hard drive, this post will give you a detailed instruction.
How to Move Photos from Google Photos to Hard Drive
To prevent you from losing photos and videos stored under your account registry, we will show you how it is possible to download all this content to your computer or hard drive to keep them safe and free up space in your account.
- Method 1. Using Google Takeout Feature
- Method 2. Manually Transferring Photos from Google Photos to Hard Drive
- Method 3. Sync Google Photos with Hard Drive
Method 1. Using Google Takeout Feature
Google Takeout is a feature that allows you to download and export the data of your Google account and gather them in one place. This feature allows you to create a backup by downloading all your stored data in your Google account, like photos, documents, videos, etc. Here is how you can do it smoothly:
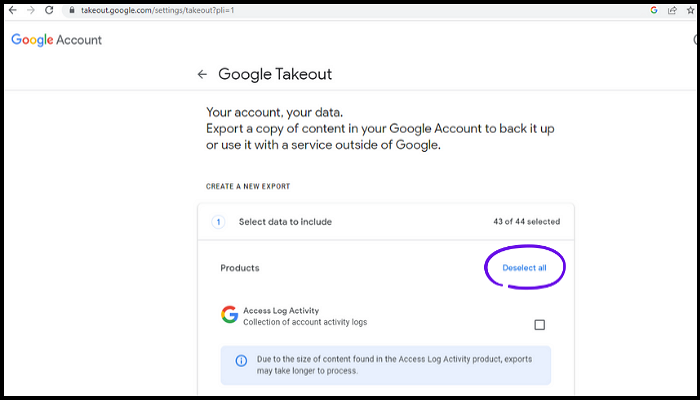
Step 1. Visit takeout.google.com and sign in to your account.
Step 2. Click "Deselect all".
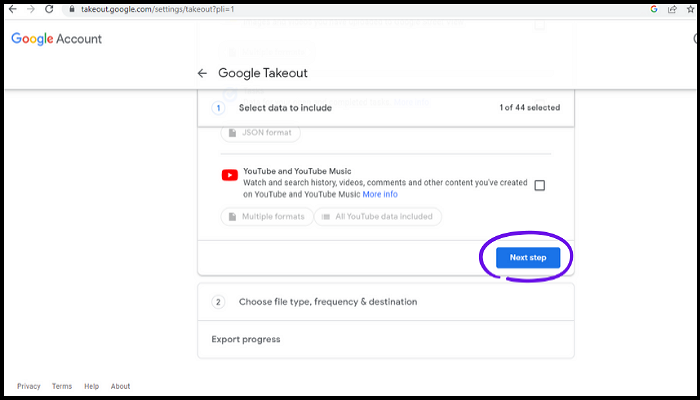
Step 3. Scroll down, find "Google Photos" on the checklist and select it.

Step 4. Scroll down and click "Next".
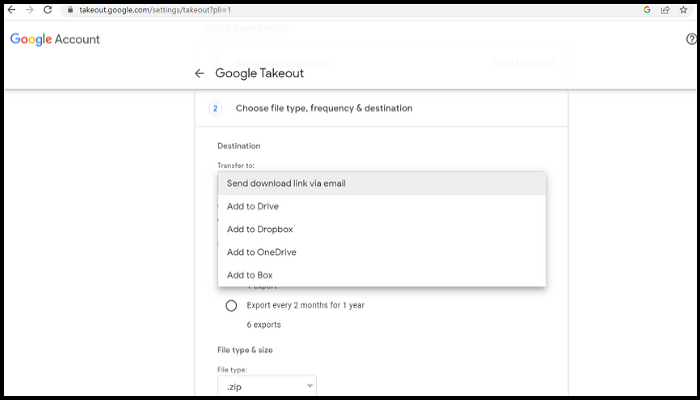
Step 5. Now you have several options to download, like file type, frequency, and destination. It's strongly recommended to keep everything as to as, or you can select options according to your needs. In my case, I'm choosing "Send download link via email", as it's selected by default, because I want to back up to my hard drive.
Step 6. Click "Create export" and wait a few minutes. It takes a few minutes to complete the processing.
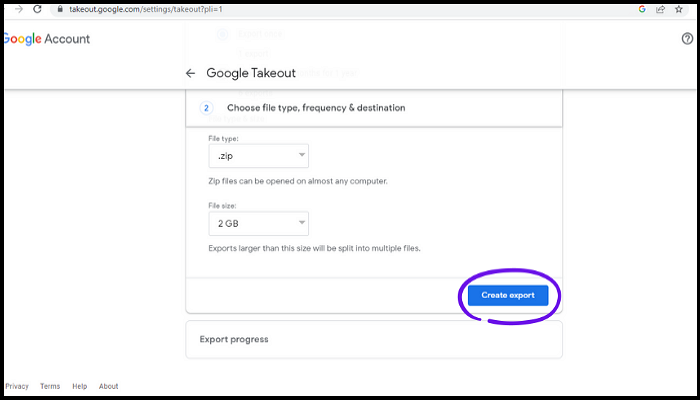
Step 7. Now download your Google Photos and save them on your hard drive.
Method 2. Manually Transferring Photos from Google Photos to Hard Drive
This is a simple process. You can download all your Google Photos manually and store them on a hard drive. Here is how to download and transfer all your Google Photos:
Step 1. Open Google Photos and select all photos.
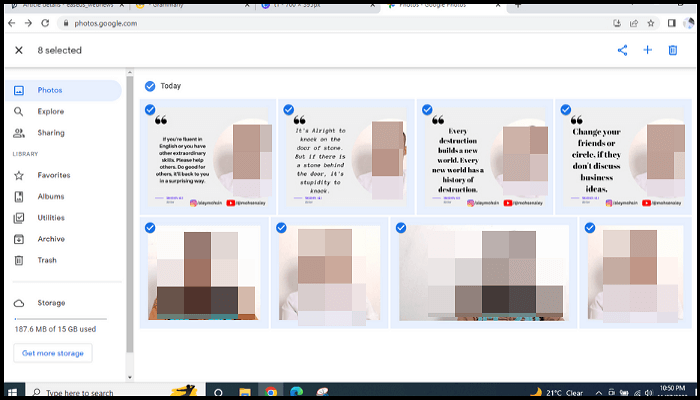
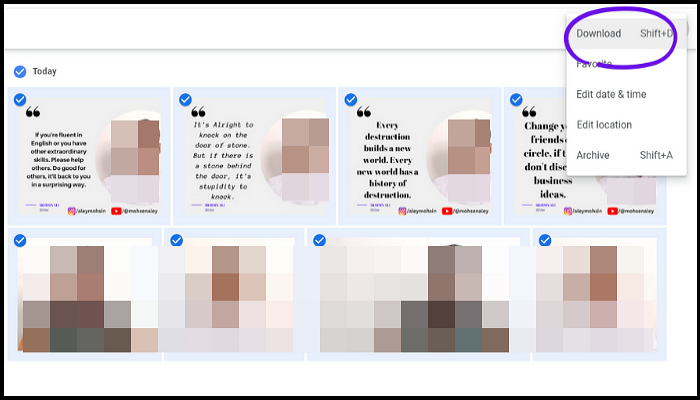
Step 2. Click on three little dots from the top-right.

Step 3. Click Download, wait for a few minutes, and all your selected photos will be downloaded in a zip file to your PC's download folder. You can unzip them and back up all downloaded photos on your hard drive.
Method 3. Sync Google Photos with Hard Drive
This method lets you automatically get all your Google Photos on your hard drive using the Google Drive desktop app. So, before doing it, download the Google Drive desktop application and sign in to your Google account. After downloading the app and logging in to your Google account, follow the below simple and easy steps:
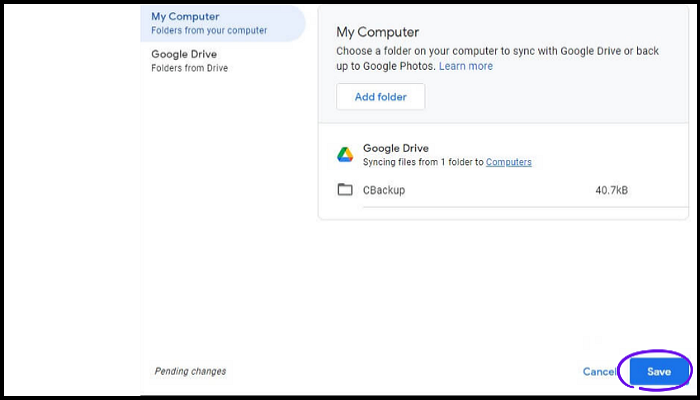
Step 1. Click "Add Folder", checkmark "Backup to Google Photos", and click "Done".

Step 2. Select the photos folder you like to backup and click "Save".
Step 3. Go to the Settings tab>Upload size tab and select "Upload size". Now your hard drive will be synced with Google Drive directly.
A Better Way: Backup Photos via Photo Backup Software
As we know, Google doesn't provide us unlimited storage free of cost; it only provides 15 GB of free storage space to each Google account user. And this 15 GB of free Google storage space is not only reserved for Google photos, but it goes and covers all services. In other words, it's shared across Google Drive, Gmail, Google Photos, etc. Also, your WhatsApp backup is stored on Google Drive. So, by keeping all your data on your Google account, you may consume your free allotted space quickly. If you run out of storage space, it will be a headache for you.
But don't worry. We will introduce one incredible photo backup software - EaseUS Todo Backup. You can utilize it to back up your photos and save memorable moments.
Secure Download
EaseUS Todo Backup Home is an incredible backup and recovery utility for Windows 11/10/8/7. It allows you automatically back up files, such as documents, pictures, videos, music, etc., and it also lets you back up your system, disk, partitions, etc. This backup software has much to offer you: it enables you to create various backups, such as a scheduled backup, incremental backup, and differential backup; it lets you create an iso image from the operating system and reinstall Windows without losing games; it provides 250G free cloud storage space, which allows you to store your valuable photos in the cloud.
The following are the detailed steps to back up your photos.
Step 1. To begin the backup process, click the Select backup contents button.

Step 2. Four data backup categories are listed: File, Disk, OS, and Mail.

Step 3. Lists of both local and network files are shown on the left-hand side of the screen. Expanding the directory so that you can choose the files to back up.

Step 4. Follow the guidance on the screen and choose the place where you want to store the back up.

Make sure that the backup is encrypted and set the backup schedule by clicking Options in Backup Options. You can also choose to start the backup at a certain time in Backup Scheme by clicking Options. There are many other customizable options that you can look into.

Step 5. You can store the backup file either on your computer, in EaseUS's cloud service, or on a network-attached storage device (NAS).

Step 6. EaseUS Todo Backup enables customers store backup copies of their files on a third-party cloud drive or on the company's own cloud storage.
If you want to back up your data on a third-party cloud drive, select Local Drive and scroll down to add Cloud Device. Then fill in your account information.

Click EaseUS Cloud, then sign up and log in with your EaseUS account if you wish to store backup files to EaseUS' own cloud storage service.

Step 7. Click on Backup Now to start a backup. When the backup process is done, it will display as a card on the left-hand side of the screen. A right-click will let you see more about how to handle the backup job in more depth.

Final Words
Throughout the entire article, we have discussed how to backup Google Photos to hard drive and described the importance of our Photos, the backup process and methods, and how we can back up securely in different locations, devices, and clouds. Therefore, tools like EaseUS Todo Backup allow us to protect our valuable and memorable photos and access them from anywhere. Besides, it can let you repair install Windows 10 and back up SSD to image. Now it's upon you to choose a method that you consider convenient to back up your Google photos.
Secure Download
FAQs
1. Where are Google Photos stored?
When you upload or sync your photos to your Google account, all your photos will be stored in photos.google.com, whether you uploaded manually or turned on backup and synced your pictures with Google Photos from your Android, Apple, or Windows device, etc. And if you download your Google photos for a hard drive backup, it's upon you. You can store your downloaded images wherever you want to keep them on your computer/laptop or hard drive.
2. What are the disadvantages of Google Photos?
Google Photos is a fantastic app for storing and organizing photos. However, we find two disadvantages:
- The first is Google doesn't allow backup of unlimited photos or other data. It only provides us with 15 GB of storage space free of cost, which can be consumed quickly if you have enormous photos, videos, and other data to store in Google.
- Another drawback is options for editing photos are very limited and basic.
3. What happens if I delete photos from Google Photos?
If you delete your photos from your Google photos, then your deleted photos will remain in the (Trash) for 60 days, so if you want to recover your deleted photos. You can recover or restore your photos within 60 days after deletion. But once this period is passed, your photos will be automatically permanently deleted even from (Trash), and you can't recover them.
4. Why is my Google storage full after deleting everything?
If you see your Google storage is still full even after the deletion of all data, check Trash folders because when you delete data, photos, videos, and other files from your Google account, they are not deleted forever. They remain in the trash folder for 30-60 days. And you need to empty Trash folders manually to clear storage. You'll find trash folders separately of different Google apps/services, like Google Photos, Google Drive, etc.
Was This Page Helpful?
Updated by Larissa
Larissa has rich experience in writing technical articles and is now a professional editor at EaseUS. She is good at writing articles about data recovery, disk cloning, disk partitioning, data backup, and other related knowledge. Her detailed and ultimate guides help users find effective solutions to their problems. She is fond of traveling, reading, and riding in her spare time.
Written by Jerry
"I hope my articles can help solve your technical problems. If you are interested in other articles, you can check the articles at the bottom of this page, and you can also check my Facebook to get additional help."
Related Articles
-
How to Fix User Profile Cannot Be Loaded in Windows?
![author icon]() Daisy/2025-07-04
Daisy/2025-07-04 -
A Complete Guide to macOS Big Sur Download and Install (Version 11)
![author icon]() Brithny/2025-07-08
Brithny/2025-07-08 -
How to Solve 'Can't Delete Partition on SD Card' [100% Working Solutions]
![author icon]() Cici/2025-07-06
Cici/2025-07-06 -
Locked Out of MacBook Pro, Air? You Can Reset MacBook Password Now
![author icon]() Dany/2025-07-04
Dany/2025-07-04
EaseUS Data Recovery Services
EaseUS data recovery experts have uneaqualed expertise to repair disks/systems and salvage data from all devices like RAID, HDD, SSD, USB, etc.