Do you know how to fix the 'Not enough space for macOS Ventura update' issue? The following methods can be used to fix this problem:
| Workable Solutions | Step-by-step Troubleshooting |
|---|---|
| Fix 1. Use macOS Storage Optimizer to Free Up Space for macOS Ventura | Click the Apple menu. Select "About This Mac". Select the "Storage" tab and click "Manage"...Full steps |
| Fix 2. Clean Up Junk Files to Free Up Space for macOS Ventura | Open Finder, select the "Go" tab, and click "Go to Finder". To open the cache folder, type...Full steps |
| Fix 3. Clean Up Mac Downloads Folder to Free Up Space | Open Finder and select the "Downloads" tab. Filter the contents to display the...Full steps |
| Fix 4. Uninstall Applications to Free Up Space for macOS Ventura | You can open the Applications folder from the "Go" menu or open Finder and select the...Full steps |
| Fix 5. Delete Some Time Machine Backups to Free Up Space | Click the Apple menu and select "System Preferences". Click "Time Machine"...Full steps |
Why Your Mac has no Enough Space for macOS Ventura Update
Storage space is one of those things you don't worry about until it is close to running out. You may have enough space on your computer to contain a lot of media content and yet not enough space for macOS Ventura update. The reason for this boils down to how heavy the installation file is and how much space your computer requires to install it.
For previous macOS versions, Apple provided a baseline recommended available storage. For example, that stood at 44.5 GB for Big Sur. That is not the case for Ventura.
However, a rule of thumb says you should have at least double the size of every installer file in extra storage space. Because the macOS Ventura installer takes up about 12 GB, your computer should have up to 36 GB of free space. To be safe, you can keep it higher to solve can't install macOS Ventura.
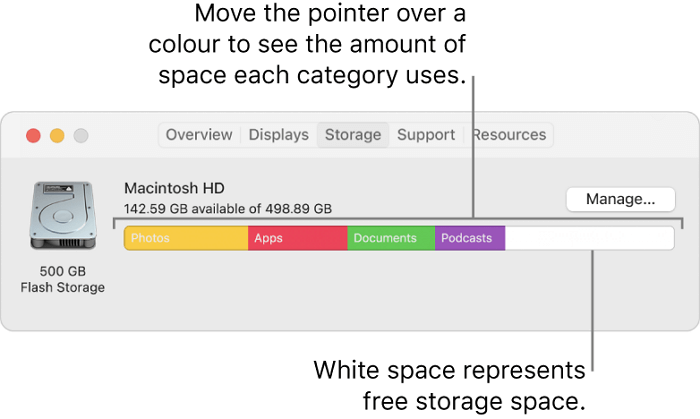
So, how do you check for free space on your Mac? It's pretty easy. Click the Apple logo and select "About This Mac". Next, click the "Storage" tab. The storage bar will show your available disk space in a few moments. If that space is not enough, continue reading to see how you can free up space for the macOS Ventura update.
Fix 1: Fix Not Enough Free Space for macOS Ventura Update with macOS Storage Optimizer
Below, we will discuss five methods you can use to fix the not having enough space to install macOS 13 issue. Any one of these may be enough to resolve the problem, but you are free to combine multiple to give you the extra gigabytes you need.
Apple introduced a native optimization feature in recent versions of macOS. Here's how to access the tool.
Step 1. Click the Apple menu. Select "About This Mac".
Step 2. Select the "Storage" tab and click "Manage".
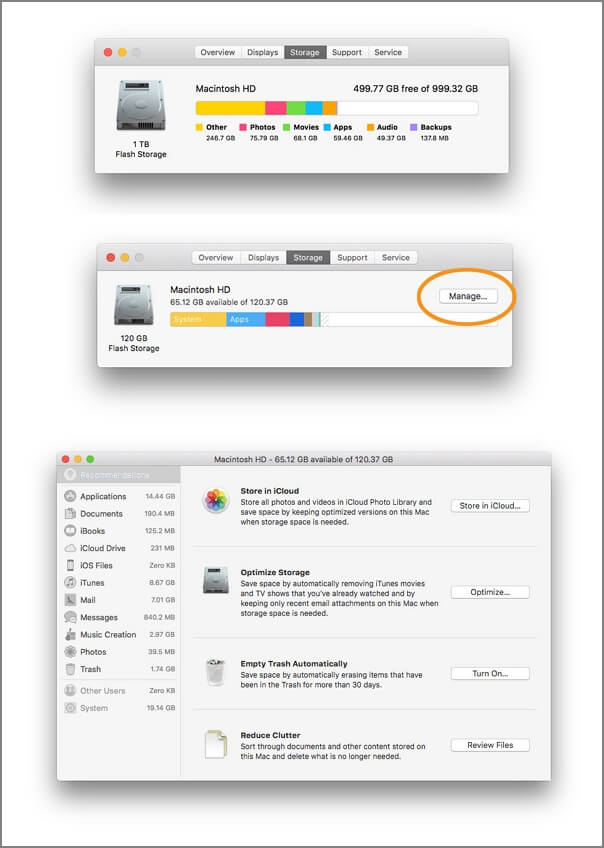
The Manage feature will display a list of recommendations for optimizing your storage space, each suggesting what you can get rid of. For instance, "Store in iCloud" recommends that you store most of your media and other files in iCloud, leaving only recent files on your computer.
Simply click the buttons beside each category to follow the instructions to free up your Mac storage space.
Fix 2: Clean Up Junk Files Without Software to Free Up Space for the macOS 13 Update
Do you know how many junk files are eating up space on your computer? If you are like most users, the answer is "too many". With regular use of your Mac comes the accumulation of all kinds of clutter - temporary and obsolete files that you may never need anymore. They include cache and log files created by your installed apps and system utilities.
While each might only be an insignificant size by itself, they can quickly add up to rob you of valuable space. Here's how to clear up junk files without third-party software.
Delete Cache Files:
Step 1. Open Finder, select the "Go" tab, and click "Go to Finder".
Step 2. To open the cache folder, type "~/Library/Caches" and hit return.

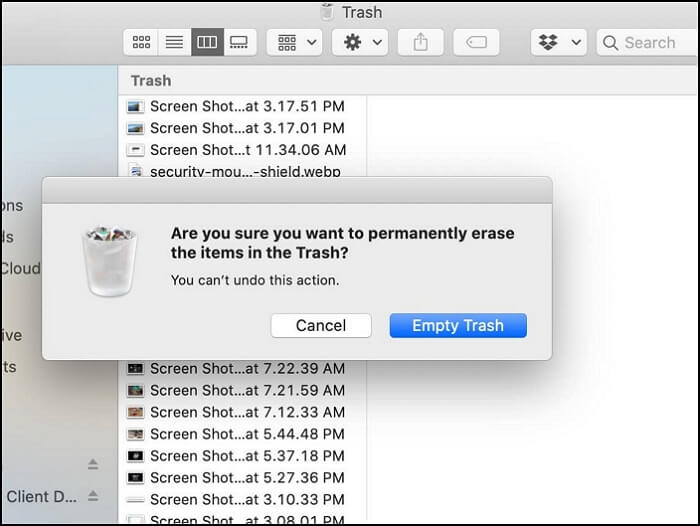
Step 3. Delete files in the cache folder. Press Control + A to select all files and drag them to Trash.
Step 4. Empty the Trash Mac.
Delete Log Files:
Step 1. Open Finder, select the "Go" tab, and click "Go to Finder".
Step 2. To open the cache folder, type "~/Library/Logs" and hit return.

Step 3. Delete files in the logs folder. Press Control + A to select all files and drag them to Trash.
Step 4. Empty the Trash bin.
Delete App Leftover Files:
Step 1. Open Finder and select the "Go" tab.
Step 2. Open the Library Folder. Simultaneously press the Option key and click "Library".
Step 3. Locate deleted app folders and delete all files.
Fix 3. Check and Clean Up Mac Downloads Folder to Fix Not Enough Free Space for macOS Ventura Update
Your Mac Downloads folder likely contains tons of files you won't need again. Ever so often, we download movies, photos, app installers, documents, and other files and only need them temporarily. Once done, they lie unused and clog up your disk space.
If there is still not enough space to download macOS Ventura on your computer, you need to clean up the Downloads folder. You can restore Downloads Folder on Mac if you accidentally deleted it.
Step 1. Open Finder and select the "Downloads" tab.
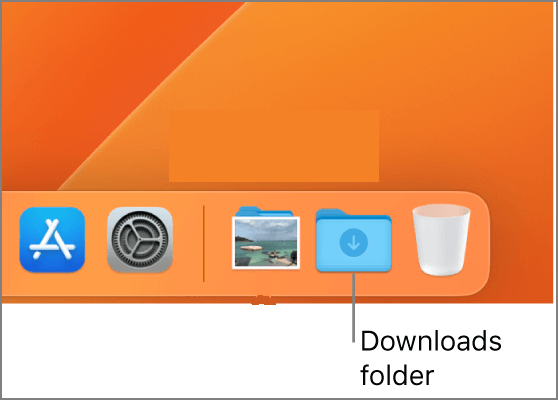
Step 2. Filter the contents to display the files by the date downloaded.
Step 3. Explore the folder, selecting the files you no longer need. Right-click and select "Move to Trash" or use Mac move to Trash shortcut.
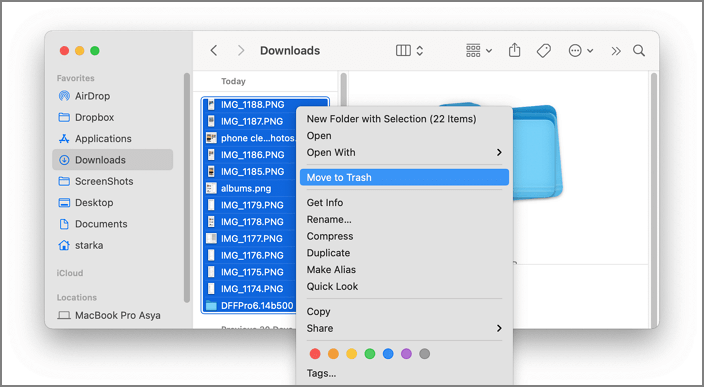
Step 4. Empty the Trash bin.
Fix 4. Uninstall Applications to Fix Not Enough Space for macOS Ventura Update
There are now tens of thousands of apps on the Mac App Store. With tons of options for work, fun, and connecting with friends, it is easy to clog up your computer with apps that you rarely use, if ever. Uninstalling these apps will help you fix the not enough space to download macOS Ventura issue. To uninstall applications on Mac:
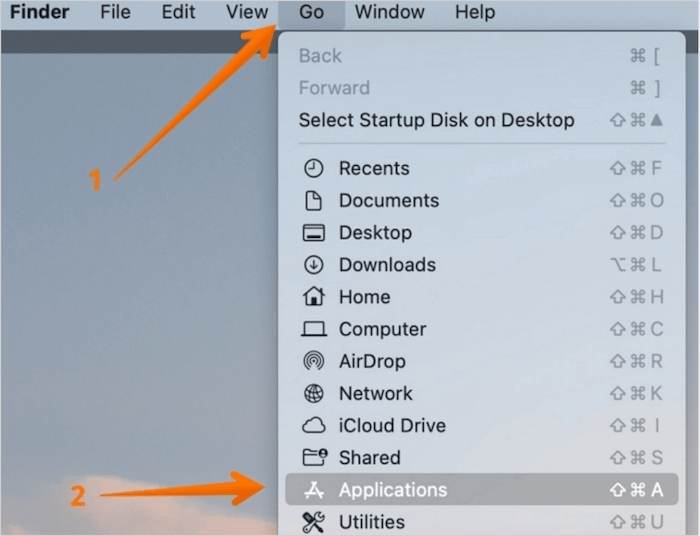
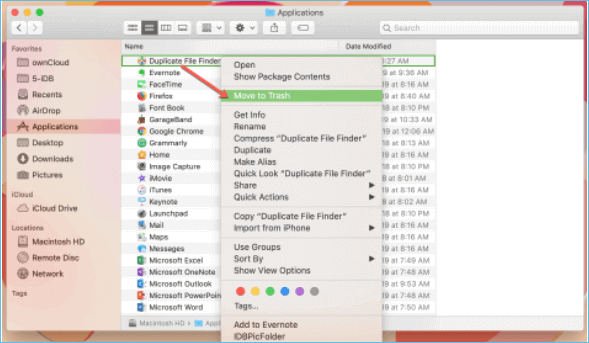
Step 1. You can open the Applications folder from the "Go" menu or open Finder and select the "Applications" tab on the left-hand sidebar.
Step 2. Navigate to an unwanted app and right-click it. Select "Move to Trash" to delete.
Don't forget to clear out the app's installer using the steps in "Fix 3" above, or it will become a junk file. App installers on Mac usually have DMG or PKG file extensions.
Fix 5. Delete Some Time Machine Backups to Free Up Space for macOS Ventura Update
If Time Machine on your Mac backs up your computer automatically, several old snapshots remain on the device. Granted, they don't take up much space individually. However, enough of them can eat into your storage, leaving insufficient space for macOS Ventura updates. Here's how to delete Time Machine backups on your Mac:
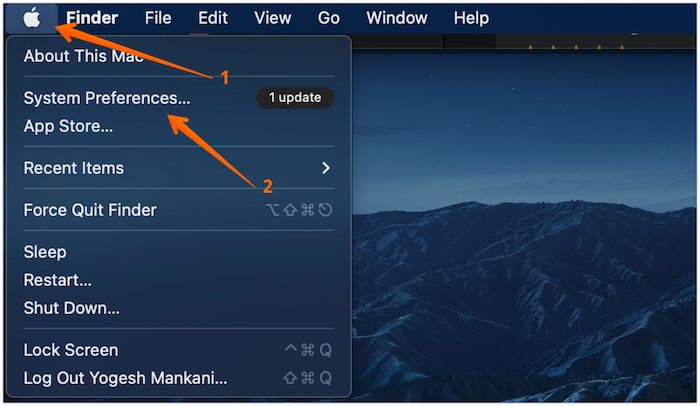
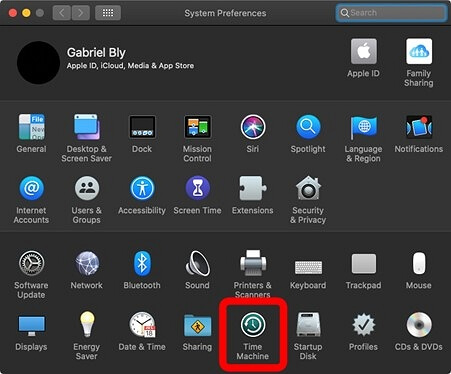
Step 1. Click the Apple menu and select "System Preferences".
Step 2. Click "Time Machine".
Step 3. If "Back Up Automatically" is checked, uncheck it.
Step 4. Launch Terminal and type in tmutil listlocalsnapshots in the terminal window.
Step 5. A list of Time Machine local snapshots sorted by date will display.
Step 6. Paste tmutil deletelocalsnapshots "date" in the terminal window (Replace "date" with the date of the snapshot to delete).
How to Retrieve Deleted Data on macOS Ventura with Software
As we've just discussed, removing useless files is the key to freeing up space for the macOS Ventura update. However, the satisfaction that comes with the extra storage space can quickly turn sour if you delete important files.
Luckily, there's a way out. With EaseUS Data Recovery Wizard for Mac, you can perform Mac Trash recovery to recover data lost while deleting files or emptying the Trash bin. It works with all kinds of files, from simple pictures to heavy videos. It does not matter the size, and this professional data recovery software can undelete them. EaseUS Data Recovery Wizard for Mac also handles data loss resulting from other issues, such as formatting, malware attacks, hard drive damage, partition loss, unmounted drives, operation errors, and system crashes.
When you encounter macOS Ventura issues like macOS Ventura upgrade failed, and the installation failed, EaseUS Data Recovery Wizard for Mac can help you retrieve the lost data. The freemium app offers support for macOS Ventura and older versions up to OS X Mavericks. Let us check the detailed tutorial and start recovering files:
Step 1. Select the location and scan
Launch EaseUS Data Recovery Wizard for Mac and choose the disk where you lost data. Then, click "Search for lost files" to start scanning.

Step 2. Filter and preview lost files
After the scan, use the file format filter on the left or upper right corner to find the deleted files you need.

Step 3. Recover lost data or files
You can double-click a file to preview its content, or choose multiple files to recover them at once. Click "Recover" to restore the lost data to a local or cloud drive.

Conclusion
The release of a new Mac update comes with excitement and anticipation. However, that can fall flat if you're unable to download and install it. If there's not enough free space for macOS Ventura update on your computer, this article offers all the ways and steps to fix the issue.
If you delete something important by mistake, don't fret. EaseUS Data Recovery Wizard for Mac is a tool that will recover your files, regardless of the format or size.
Not Enough Space for macOS Ventura Update FAQs
We have provided five solutions to fix this macOS Ventura update issue. You can check the following frequently asked questions to learn more:
1. Why does my MacBook not have enough space to download and install macOS Ventura?
About 12 GB is included in the macOS Ventura installation bundle. But to install it, you need more space. The newest version of macOS Ventura requires at least 35GB of free space if you upgrade from macOS Sierra or later. However, macOS Ventura needs up to 44GB of free storage if you're upgrading from a previous macOS version.
2. How to download and install macOS Ventura on my Mac?
If you want to download macOS Ventura and use it on your Mac, you should check if your Mac is available for macOS Ventura. You can download macOS 13 from App Store and create a macOS Ventura installer with your USB drive. Then you can install macOS 13 on other Mac devices.
Or you can choose "System Preferences" and update the macOS version in "Software Update".
3. How to clean macOS system data on my Mac?
You will have five methods to clear macOS system on Mac:
- 1. Empty the Mac Trash folder.
- 2. Delete Time Machine snapshots.
- 3. Clean some iOS backups.
- 4. Remove Cache files.
- 5. Update the macOS version.
4. How to free up space on Mac to offer enough space for macOS Ventura update?
The following five methods are available to fix the 'Not enough space for macOS Ventura update' issue:
- 1. Use macOS Storage Optimizer.
- 2. Clean up junk files on Mac.
- 3. Clean up the Mac Downloads folder.
- 4. Uninstall applications on Mac.
- 5. Delete Time Machine backups.
Was This Page Helpful?
Dany is an editor of EaseUS who lives and works in Chengdu, China. She focuses on writing articles about data recovery on Mac devices and PCs. She is devoted to improving her writing skills and enriching her professional knowledge. Dany also enjoys reading detective novels in her spare time.
Related Articles
-
外部组不删除 - SanDisk Extreme SSD Failure: Data Protection and Recovery Tips
![author icon]() Cedric/2025-07-04
Cedric/2025-07-04 -
[Fixed] Unable to Reset Your PC. A Required Drive Partition Is Missing
![author icon]() Jean/2025-08-14
Jean/2025-08-14 -
How to Fix STATUS_ACCESS_VIOLATION | Chrome/Edge
![author icon]() Dany/2025-07-04
Dany/2025-07-04 -
2025 Guide | How to Turn On Offline Sync Google Drive/Google Docs
![author icon]() Brithny/2025-07-04
Brithny/2025-07-04
EaseUS Data Recovery Services
EaseUS data recovery experts have uneaqualed expertise to repair disks/systems and salvage data from all devices like RAID, HDD, SSD, USB, etc.