
-
![]() Exception on Invalid Stack [Troubleshooting & Recover]
Exception on Invalid Stack [Troubleshooting & Recover] June 16,2026
 6 min read
 -
![]()
-
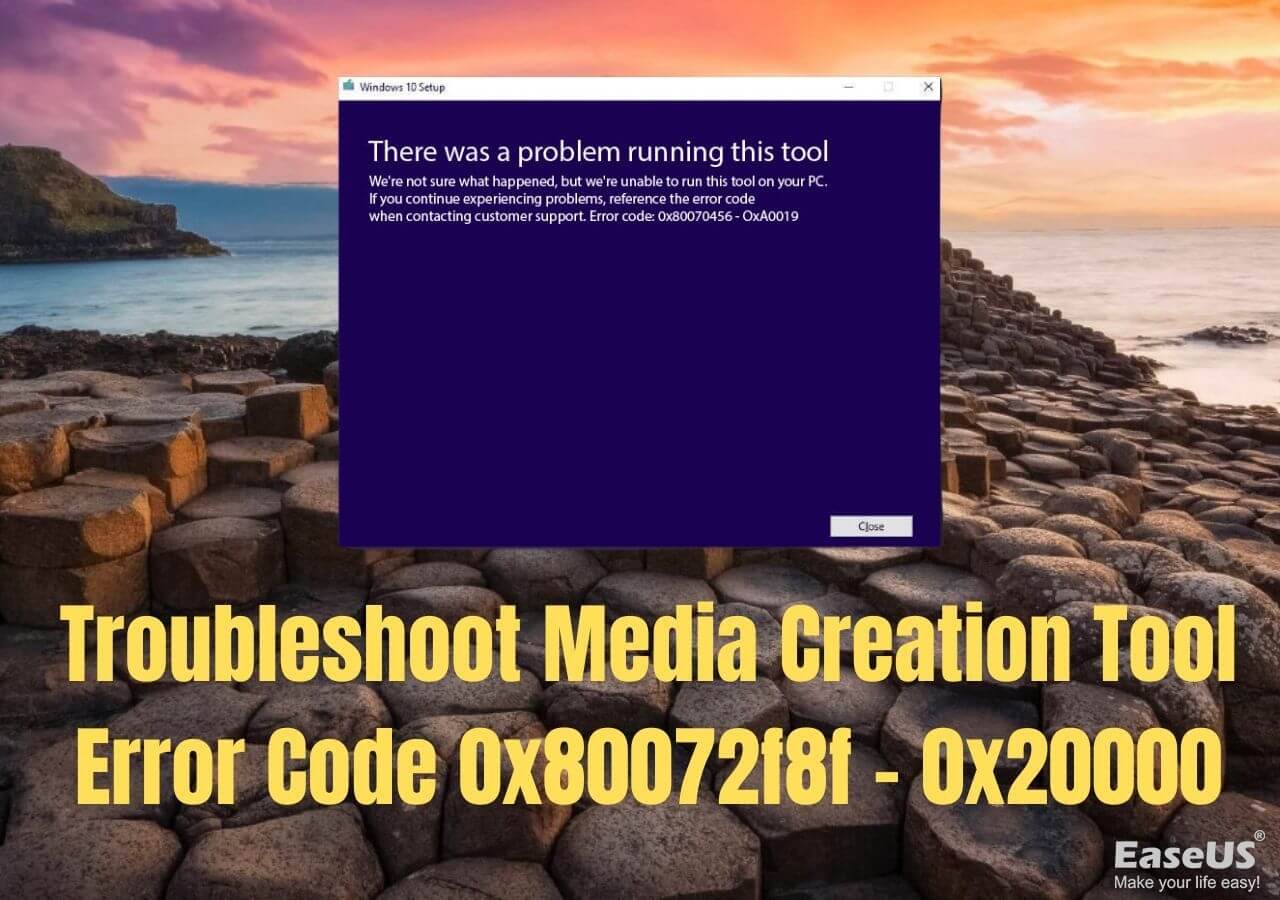
![]() How to Fix Media Creation Tool Error Code 0x80072f8f - 0x20000June 16,20266 min read
How to Fix Media Creation Tool Error Code 0x80072f8f - 0x20000June 16,20266 min read -
![]() Fix the Hypervisor Error in Windows 11 with 4 Easy WaysJune 16,20266 min read
Fix the Hypervisor Error in Windows 11 with 4 Easy WaysJune 16,20266 min read -
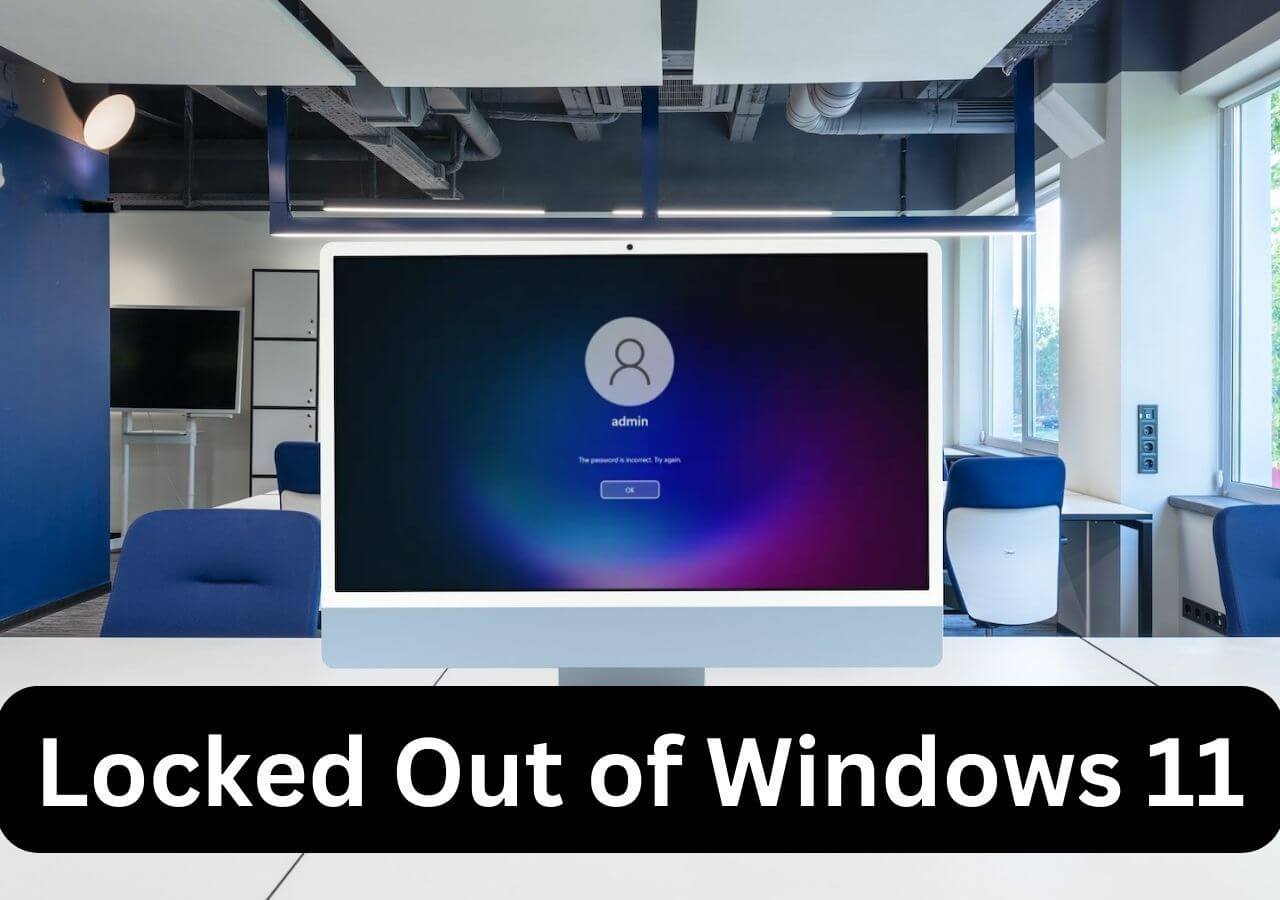
![]() Locked Out of Windows 11 | How to Unlock the Account in Windows 11June 30,20266 min read
Locked Out of Windows 11 | How to Unlock the Account in Windows 11June 30,20266 min read -
![]() [KB5063878] SSD/HDD Not Recognized After Windows 11 UpdateJune 30,20266 min read
[KB5063878] SSD/HDD Not Recognized After Windows 11 UpdateJune 30,20266 min read -
![]()
-
![]() 10 Quick Fixes for Windows 11 Randomly Restarts (2026)June 30,20266 min read
10 Quick Fixes for Windows 11 Randomly Restarts (2026)June 30,20266 min read -
![]() Word Experienced an Error Trying to Open the File [5 Proven Solutions]June 30,20266 min read
Word Experienced an Error Trying to Open the File [5 Proven Solutions]June 30,20266 min read -
![]()
Page Table of Contents
What's going on if the hard disk is not detected by your computer? There are many possible reasons, including connection issues, file system corruption, outdated drivers, or hardware damage. To fix a not-detected HDD, you can try to connect other PCs with different cables, update the driver, check the BIOS settings, etc. If you want to recover data, try professional data recovery software or contact experts.
PAGE CONTENT:
Why Is Hard Disk Not Detected | Quick Overview
A hard drive is a crucial piece of hardware in any computer/laptop. It stores all of the data and files that make up your operating system, as well as any programs and personal files you have. Without a hard drive, a computer would be nothing more than a blank slate. Unfortunately, hard drives are also susceptible to several errors and problems.
If your hard drive is not detected, you're not alone. Many users like the following Reddit user have encountered similar issues, such as a hard disk not being detected, not being recognized, or not showing in Windows.
I recently got a new pc, and i ran into a problem where the pc doesnt detect the hard drive at all. I already tried rescanning the disk and everything the indian guys say on youtube. Just to see if the HDD is working, i tested it with another pc, and it worked. I also tried this PC with a different HDD, and still nothing. I also tried to check it in the bios, but im a dummy when it comes to that. Can someone help? from Reddit
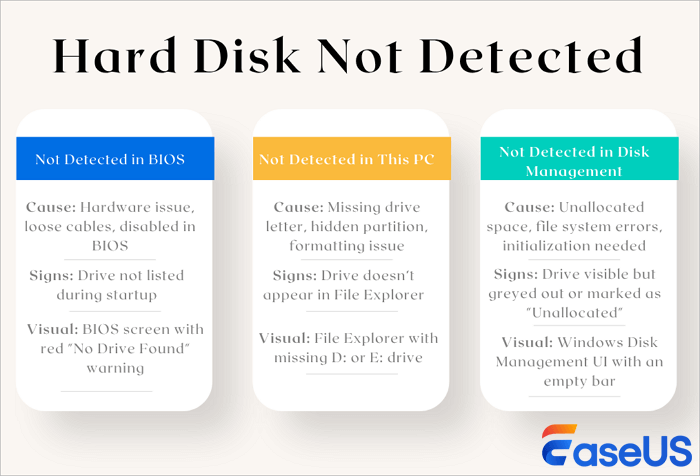
This issue can appear in different ways depending on where the problem lies. For example, if the hard drive is not detected in BIOS, it usually means a hardware or connection issue. If it's missing in Disk Management, the drive might be unallocated or corrupted. And if it doesn't show up in "This PC," it could be due to a missing drive letter or file system errors.
In the following sections, we'll break down these scenarios and show you how to troubleshoot and fix each one step by step. If your hard drive cannot be recognized because of any loose connection or a rat bite, check that all the connections of the hard drive are made properly. Make sure no cuts in the wires, and you can try some quick fixes:
- Try a different USB port on the computer.
- Connect the drive to a different computer.
- Switch to a new cable if the current one is damaged.
- Try a different power outlet. (Desktop Drives)
- Verify if the drive's light is on. (Light off indicates the power adapter is not connected to power.)
There's one more notice for users who have important data on the not-detected hard disk: create a disk copy of your hard drive, and perform data recovery in advance before trying any fixes to resolve the disk issues. If you have already lost some essential files on your hard drive, try EaseUS recovery tool now.
In the following sections, we'll dive into some common hard drive not detected situations and explain the reasons, symptoms, and fixes. Let's get started!
How to Fix Hard Disk Not Detected in BIOS
BIOS, which stands for Basic Input Output System, is software stored on a chip on your computer's motherboard. It is responsible for booting your computer and making sure all the hardware components are working properly. When you turn on your computer, the BIOS loads the operating system from the hard drive and then hands over control to it. It provides a set of utilities that let you configure your system settings, such as the time and date, and change the boot order of your drives.
In recent years, the role of the BIOS has been increasingly taken over by the UEFI (Unified Extensible Firmware Interface), which provides more advanced features and is easier to use. However, the BIOS is still an important part of your computer and you should be familiar with it in case you ever need to troubleshoot a problem. But there are times that your BIOS cannot recognize your hard disk or USB drive.
If your hard drive does not show up in BIOS boot options, it will not be visible to Windows either. You need to take up some manual solutions to fix the hard drive not detected in BIOS.
⚠️What Causes BIOS Not Detect the Hard Disk
If your hard disk is not showing up in BIOS or showing up in Windows, it's likely because of one of the following issues:
| Causes | Symptoms |
| The driveis not properly connected to the motherboard. | Hard disk completely missing in BIOS and Windows; no spinning or power-up sound. |
| Check your SATA cables and make sure they're plugged in securely. | Hard disk appears and disappears randomly; unstable connection during use. |
| The SATA mode is set to the wrong setting in BIOS. | BIOS may detect the disk, but Windows can't install or boot from it. |
| Check your BIOS settings and make sure the SATA mode is set to AHCI (not IDE). | Installation errors; Windows Setup can't find the drive; slow performance if booted. |
| There's a problem with the motherboard itself. | Hard drive not detected despite testing with other cables or ports; other drives may also fail. |
✅Method 1. Fix Hard Drive Not Detected in BIOS by Enabling It
| ⭐Expert Notice: Check if the hard drive is disabled in BIOS settings and enable the relevant SATA port. |
Your hard drive can't show up if it is disabled in BIOS. Thus, enabling the drive in BIOS might help.
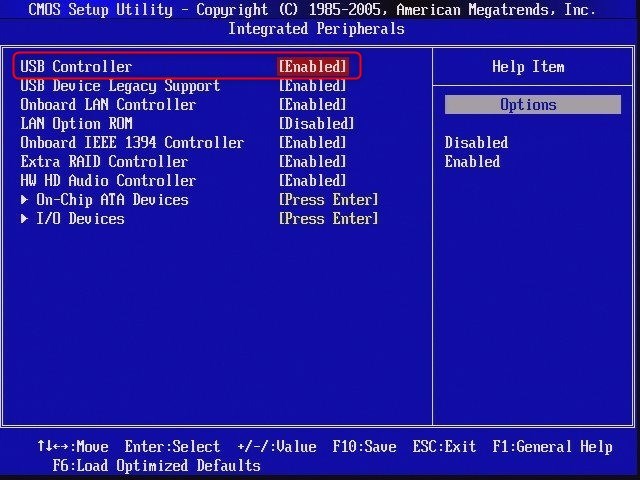
Step 1. Restart your computer and press F2 or Del until you enter BIOS.
Step 2. Use the arrow keys on your keyboard to choose "Integrated Peripherals" and hit "Enter".
Step 3. Use the arrow keys to select "USB Controller". Change the option to "Enabled".
✅Method 2. Configure Not Detected HDD in BIOS
| ⭐Expert Notice: Adjust SATA mode (e.g., switch from IDE to AHCI) or detect drives manually in BIOS. |
If you're having trouble getting your hard drive to show up in BIOS or Windows, you can try to configure it.
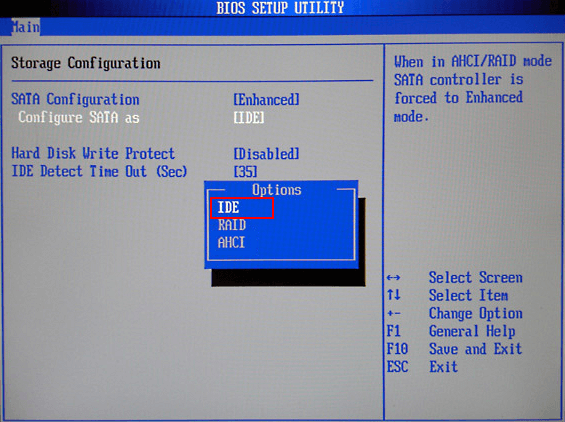
First, make sure the drive is properly installed in the motherboard. Restart the PC and press F2/Delete to access BIOS. Expand "SATA Configuration" and choose "Configure SATA Configuration as IDE". Then, save and exit.
You can try using a different drive or motherboard. The hard drive not showing up can be a frustrating problem, but there are ways to fix it.
You can share these fixes on social media to help more users fix the hard disk not detected by BIOS.

How to Fix Hard Drive Not Detected in This PC
This PC is a desktop shortcut that gives you quick access to your computer's main folders and drives. It allows you to view and manage your files, as well as create new ones. This PC can be found in the Windows Start menu or by searching for it in the search bar. By default, This PC includes your personal folders (such as Documents, Downloads, and Pictures), as well as the system folders (such as Program Files and Windows).
⚠️What Causes Hard Disk Not Detected in File Explorer
If the hard drive is recognized in BIOS but not Windows, it's time to get it fixed. In this section, you will learn how to troubleshoot the issue. Before you are going to learn the solutions, figure out the reasons and common symptoms.
| Causes | Symptoms |
| The drive has no assigned drive letter | The hard disk appears in Disk Management but is missing from File Explorer |
| The drive is unallocated or disk not initialized | Disk shows as "Unallocated" or "Not Initialized" in Disk Management |
| File system is unsupported or corrupted | Windows detects the disk but prompts to format it, or it shows as RAW |
| Drive is hidden or disabled in Disk Management | Disk is not visible in File Explorer, but can be re-enabled manually |
| Outdated, missing, or corrupted disk drivers | Disk doesn't show up in File Explorer; may show yellow exclamation mark in Device Manager |
✅Method 1. Change the Drive Letter to Fix Hard Disk Not Showing in This PC
| ⭐Expert Notice: Assign a unique drive letter via Disk Management if the drive is missing from File Explorer. |
If there is another drive in the system with the same letter, the hard drive will not be detected. Therefore, you can make the hard drive show up in Windows 10 by changing the drive letter in Windows 10.
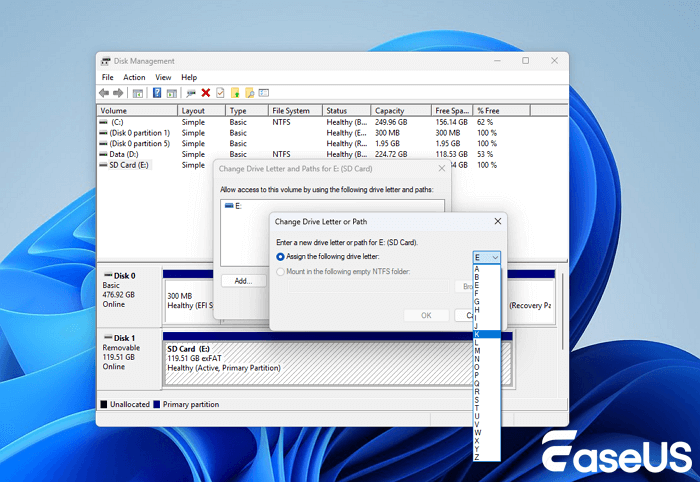
Step 1. Open Disk Management, right-click the hard drive marked as New Volume or the partition that doesn't have a drive letter.
Step 2. Select "Change Drive Letter and Paths". In the new window, click "Change".
Step 3. Assign a new drive letter to your external or internal hard drive and click "OK".
✅Method 2. Run CHKDSK to Fix Hard Disk Detection Error
| ⭐Expert Notice: Scan and fix file system errors that may prevent the drive from being recognized. |
File system errors or bad sectors may prevent a hard drive from showing up properly in File Explorer. Running CHKDSK can help detect and fix such errors to restore access, and it can be a good hard disk repair tool.
Step 1. Press Windows + S, type cmd, right-click Command Prompt, and choose Run as administrator.
Step 2. In the command window, type chkdsk C: /f /r /x and press Enter. Replace "C:" with your actual drive letter.
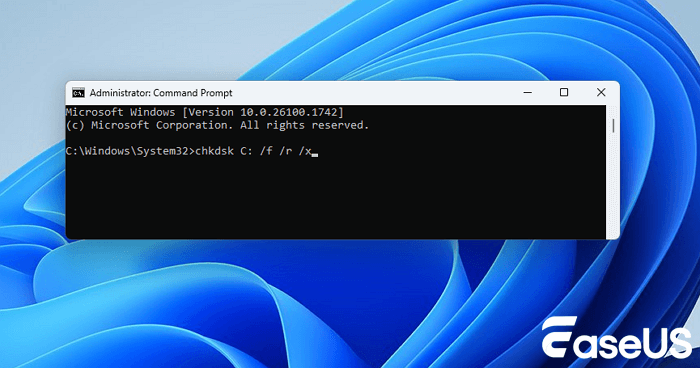
Step 3. Wait for CHKDSK to complete the scan and repair process. Once done, check if the hard disk now appears in "This PC".
✅Method 3. Initialize Disk to Fix Drive Not Detected in This PC
| ⭐Expert Notice: Use Disk Management to initialize unrecognized or new drives before use. |
When it comes to a brand new hard drive or an unallocated disk, try to initialize the disk and create a volume on a new hard drive.
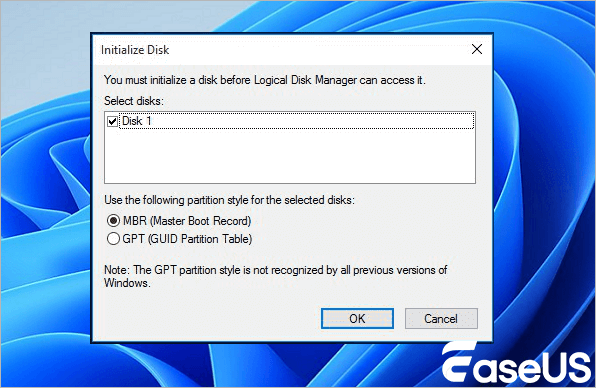
Step 1. Right-click "This PC" (in Windows 10) and choose "Manage".
Step 2. Go to "Disk Management", right-click your new hard disk, and choose "Initialize Disk".
Step 3. Select the disk and choose MBR or GPT as its partition style, click "OK" to start.
Then, follow the on-screen instructions. If you want to make sure initialize the disk without losing data, back up your disk in advance or apply professional hard drive recovery software like EaseUS Data Recovery Wizard.
✅Method 4. Format Hard Disk to Make It Recognizable
|
⭐Expert Notice: Formatting the hard drive will erase all data, so make sure to back up all important data before formatting.
|
If the hard drive not showing up error is caused by an unsupported, RAW, or corrupted file system, you can change the file system to NTFS to fix the error. Let's check on how to format hard drive to fix any logical errors that may be causing the WD external hard drive not detected error.
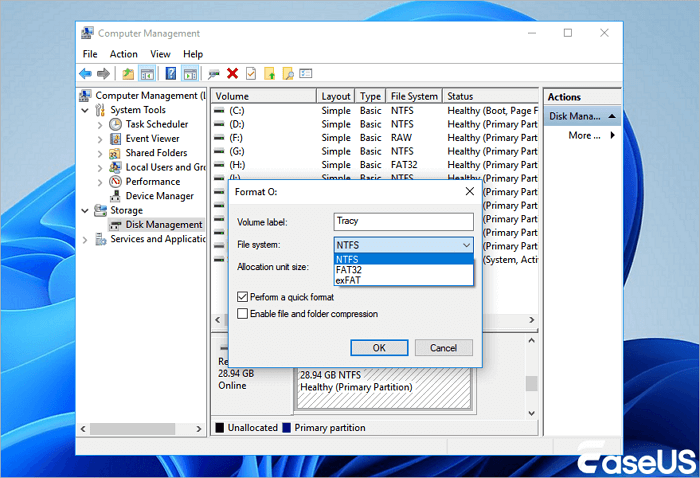
Step 1. In Windows 10/8, Press Windows + X keys, and click "Disk Management".
Step 2. Find and right-click on your hard drive, and select "Format".
Step 3. Set the file system as NTFS, tick "Perform a quick format", and click "OK" to start formatting the drive.
Remember to check the data recovery part to recover a formatted hard drive with EaseUS Data Recovery Wizard. Don't forget to share these tested methods with more friends!
How to Fix Hard Drive Not Detected in Disk Management
In addition to BIOS, the hard drive may not show up in Disk Management. Disk Management is a system utility in Windows that enables you to manage storage drives and partitions on your computer. With Disk Management, you can format drives, create and delete partitions, and assign drive letters. You can also use Disk Management to convert between different types of storage drives, such as from a hard disk drive to a solid-state drive. In addition, you can use Disk Management to resize partitions and change the file system on a storage drive.
To access Disk Management in Windows, type "disk management" into the search box on the taskbar and then select the "Create and format hard disk partitions" result. Then, you can check if your hard disk is recognized in Disk Management.
⚠️What Causes HDD Not Detected in Disk Management
If your hard drive doesn't show up in Disk Management, the issue is likely more serious than a simple drive letter conflict. Below are some common causes and their typical symptoms to help you identify the root of the problem:
| Causes | Symptoms |
| Loose or faulty data/power cable | HDD doesn't appear at all in Disk Management or Device Manager |
| Hard drive not receiving power | No spinning or vibration; completely invisible to the system |
| Outdated or missing storage controller drivers | HDD not showing in Disk Management, may appear as "Unknown device" in Device Manager |
| Hard drive failure | No detection in BIOS or Disk Management; drive is completely unresponsive |
✅Method 1. Run Troubleshooter to Solve Disk Not Detected in Disk Management
| ⭐Expert Notice: Use Windows built-in tools to detect and fix common hardware or driver issues. |
Windows has a hard drive troubleshooter that may do you a great favor.
Step 1. At the start search Command Prompt. Right-click the first result and click "Run as administrator".
Step 2. Type the command: msdt.exe -id DeviceDiagnostic.
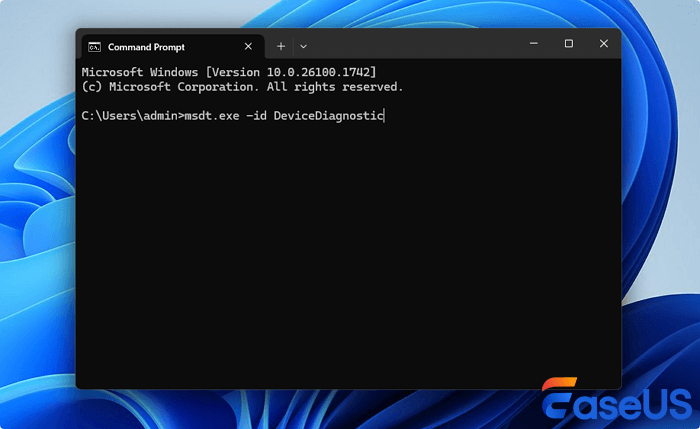
Step 3. Click "Advanced" and select "Apply repairs automatically".
Step 4. Click "View detailed information" to see an overview of the scan.
If you're still having trouble, try contacting the external hard drive's manufacturer for more support.
✅Method 2. Update the Driver to Fix Hard Disc Not Detected
| ⭐Expert Notice: Update or reinstall disk and storage controller drivers to ensure proper detection. |
This method applies to hard drives showing up in Disk Management but not in File Explorer.
Step 1. Right-click "This PC" and choose "Manage".
Step 2. Click "Device Manager" then expand "Disk drives".
Step 3. Find and right-click the problematic external or internal drive and select "Update driver".
Step 4. Click "Search automatically search for driver software online".
✅Method 3. Fix Hard Drive Not Detected with Data Recovery Services
| ⭐Expert Notice: You can use data recovery tools (like EaseUS Data Recovery Wizard) first. |
EaseUS data recovery services can provide a more comprehensive solution if you cannot fix hard disk issues by yourself, particularly when data loss is the result of physical damage to a storage devic. Additionally, it can also provide expert assistance in cases where data loss results from software corruption or a or virus infection. In short, a data recovery service can offer a more complete solution when data loss occurs, helping to minimize the frustration and expense associated with lost data.
Consult with EaseUS data recovery experts for one-on-one manual recovery service. We could offer the following services after FREE diagnosis
- Repair corrupted RAID structure, unbootable Windows OS, and corrupted virtual disk file
- Recover/repair lost partition and re-partitioned drive
- Unformat hard drive and repair raw drive (BitLocker encrypted drive)
- Repair corrupted hard drives without losing data
How to Recover Data When the Hard Disk Not Recognized
| ⭐Expert Notice: If your hard drive is not recognized because of file system corruption or becomes RAW and cannot be accessed, professional recovery software can be very helpful on data recovery. |
Believe it or not, it's often possible to recover lost data. This is because when a file is deleted, the computer doesn't actually remove the file from the hard drive. Instead, it simply marks the space as being available for new data. As a result, the original file is still present on the drive, albeit in a fragmented state.
With the right software, it's often possible to piece together these fragments and recover the lost data. In some cases, however, the file may be overwritten by new data and lost forever. However, if you act quickly after realizing a file is missing, there's a good chance you'll be able to recover it.
EaseUS Data Recovery Wizard makes it possible to recover data from a hard drive, external drive, SSD, USB, SD card, and more. With it, you can restore data from any device with simple clicks. Follow the steps below to recover data from a hard drive that's not showing up.
You Can Trust EaseUS Data Recovery Software
EaseUS Data Recovery Wizard has acquired an extensive technical base in data recovery and trusted by billions of users since 2005. Check out reviews on G2.
Step 1. Select the hard drive where you lose your data and click "Search for Lost Data".
Step 2. Use "Filter" or "Search" to find the lost files when the scan completes.
Step 3. Select all the HDD files you want and click "Recover". Then, browse another secure location to save them.
💡Tip: You can restore data on the local disks, external hard drives, and also the cloud storage.

EaseUS Data Recovery Wizard is a reliable tool, and you can check some real customer reviews here:
- ✅This company is a life saver, the software is so easy and fast to use. I managed to recover a load of files which I accidentally deleted. The support staff are also very efficient and helpful. - from Trustpilot
- ✅The only app that could recover my damaged ssd. Also Webber from the costumersupport, many many thanks for helping me and being kind and understanding in the proces of purchase. You guys really deserve all the support. from Trustpilot
Found this recovery tutorial helpful? Share it with your friends now!
How to Prevent HDD Not Detected Issues
If you don't keep an eye on your hard drive, it can fail without warning, leaving you without access to your files. Luckily, there are a few things you can do to monitor your hard drive's health and avoid data loss.
🔺Option 1. Run a Regular Scan
One of the most important things you can do is to run regular scans of your hard drive using an anti-virus program. This will help to identify any potential threats to your hard drive's health and allow you to remove them before they cause any damage.
🔺Option 2. Use the SMART Tool
SMART stands for Self-Monitoring, Analysis, and Reporting Technology, and it tracks things like disk temperature and error rates. If the SMART tool detects an issue with your hard drive, it will usually give you a warning so that you can take steps to back up your data before the hard drive fails.
🔺Option 3. Turn to the Manufacturer
The manufacturer will also give you an expected lifetime for the disk-based on how often it's used. If you're regularly copying large files or if you have a lot of small files that get added and deleted frequently, then your passes/fails count will decrease faster than normal.
🔺Option 4. Keep Your System Cool and Dust-Free
Overheating is one of the most common causes of hard drive failure. Make sure your computer has adequate airflow, especially if you're using a desktop. Regularly clean dust from fans and vents, and avoid placing laptops on soft surfaces that block ventilation. A cooler system helps extend your HDD’s lifespan and reduces the risk of detection errors.
🔺Option 5. Handle Your Drive Properly
Physical damage can also lead to the drive not being detected. Avoid moving your computer while it's running, especially if it has a traditional spinning hard drive. If you're using an external HDD, always eject it safely before disconnecting. Proper handling minimizes the chance of mechanical failure and ensures a stable connection with your system.
Conclusion
To sum up, there are several potential reasons why a computer might not detect a hard disk. It could be that the disk is not properly connected, the disk is damaged, or there is a problem with the computer's BIOS settings. In most cases, however, the problem can be resolved by simply restarting the computer. If the problem persists, however, it is recommended that you seek professional help.
HDD Not Detected by Windows FAQs
If you still have doubts about this hard disk issue, check the following frequently asked questions and learn more:
1. Why is my external hard disk not detected?
There are a few reasons why your internal or external hard disk might not be detected or recognized in Windows 10. We gather together the most common reasons that make hard drives not show up:
- Connection problems: First, make sure that the power supply and data cables are properly connected to the drive.
- Incompatible file system: Then, make sure that the hard drive file system is compatible with your computer or laptop.
- Drive letter conflict: Your HDD will not be recognized if the drive letter conflicts with other drives.
- Outdated hard drive driver: You can try updating the drivers from the Device Manager, or you may need to reinstall them.
- Unallocated or not initialized drive: Your drive can't show up if it is uninitialized or showing as unallocated.
- Damaged or corrupted hard drive: In some cases, the hard drive may be damaged or corrupted. This can be caused by a virus, physical damage, or a bad sector on the disk.
By troubleshooting each of these potential issues in turn, it should be possible to resolve the problem and access the contents of the hard disk.
2. How do I fix hard disk not detected in Windows 10?
If you're having trouble getting your hard drive to show up in Windows 10, there are a few potential solutions. First, check that the drive is properly connected - if it's not, fix the connection and try again. If the drive is connected but still not showing up, try formatting it to the NTFS file system. If that doesn't work, try changing the drive letter assigned to the hard drive. If you're still having trouble, try updating the disk driver. Finally, if none of these solutions work, you may need to initialize the hard drive. Read on to get more information.
- Change Disk Connection
- Format Hard Drive to NTFS
- Change Drive Letter
- Update Hard Disk Driver
- Initialize Hard Drive
- Enable Hard Drive in BIOS
3. How can I fix the external hard drive not showing up?
Symptom: The external hard drive is not detected in This PC, but it is showing up in Disk Management.
The below methods will guide you through making your external hard drive visible and accessible on your computer. Try each solution to ensure you don't miss any details.
Method 1. Connect to a Different Port
If you're having trouble connecting your external hard drive to a different port, there are a few things you can try.
- First, unplug the external hard drive from its current port and then plug it into the desired port.
- If the external hard drive still isn't being detected, try restarting your computer.
- Once your computer is back up and running, replug the external hard drive into the new port.
Method 2. Update the Driver
You may also need to update your external hard drive's drivers. You can usually do this through your computer's Device Manager.
4. How do I fix the WD External Hard Drive Not Recognized?
Symptom: WD external hard drive not showing up but the light is on.
WD external hard drive not recognized is a common problem that can be fixed with a few simple steps.
Step 1. Check the Connection
First, check to see if the WD external hard drive is properly plugged into the computer. If it is, then unplug it and plug it back in.
Step 2. Check the WD Hard Drive
Next, check the WD external hard drive for any physical damage. If there is physical damage, then the WD external hard drive will need to be replaced.
Step 3. Format the WD Hard Drive
5. How can I fix NVME drive not showing up?
NVME (Non-Volatile Memory Express) is a newer interface for connecting SSDs to computers. Compared to the older SATA interface, NVME offers several advantages, including lower latency, higher data transfer rates, and more efficient use of CPU resources.
However, due to its relatively new nature, NVME drives are not yet compatible with all computers. In some cases, an NVME drive may not be detected by the BIOS or may appear as a generic storage device. There are a few things that can be tried in order to fix NVME not showing up.
- First, make sure that the motherboard supports NVME and that the correct BIOS settings are enabled.
- Additionally, it may be necessary to install special drivers or firmware for the computer to properly detect and use an NVME drive.
With a little bit of effort, it is usually possible to get an NVME to drive up and running on most modern computers.
Was this page helpful?
-
Dany is an editor of EaseUS who lives and works in Chengdu, China. She focuses on writing articles about data recovery on Mac devices and PCs. She is devoted to improving her writing skills and enriching her professional knowledge. Dany also enjoys reading detective novels in her spare time. …


20+
Years of experience

160+
Countries and regions

72 Million+
Downloads

4.9 +
Trustpilot Score


