
-
![]()
-
![]()
-
![]()
-
![]() Fix the Fall Guys Missing Files Error [Game Files Recovery]
Fix the Fall Guys Missing Files Error [Game Files Recovery] July 23,2026
 6 min read
 -
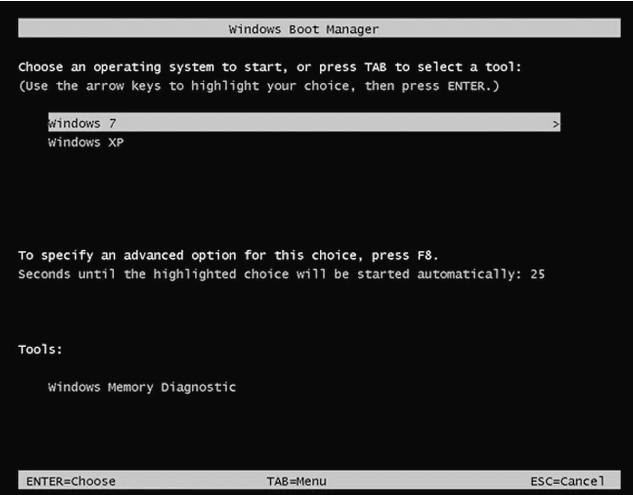
![]() How to Enable/Disable Windows Boot Manager in Windows 11/10July 23,20266 min read
How to Enable/Disable Windows Boot Manager in Windows 11/10July 23,20266 min read -
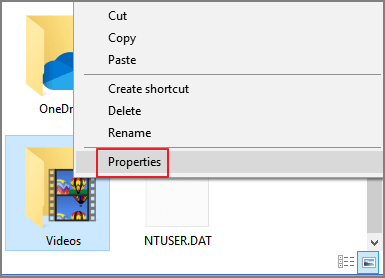
![]() How to Access User Folder on Old Hard Drive Windows 10/11July 23,20266 min read
How to Access User Folder on Old Hard Drive Windows 10/11July 23,20266 min read -
![]()
-
![]() How to Fix BitLocker Recovery Key Not Working | No Data LossJuly 23,20266 min read
How to Fix BitLocker Recovery Key Not Working | No Data LossJuly 23,20266 min read -
![]() Volume Information for This Disk Cannot Be Found [2026 Fixes]July 23,20266 min read
Volume Information for This Disk Cannot Be Found [2026 Fixes]July 23,20266 min read -
![]() Files/Folders Disappeared from Desktop Windows 11/10 [Restore Quickly]July 23,20266 min read
Files/Folders Disappeared from Desktop Windows 11/10 [Restore Quickly]July 23,20266 min read
Page Table of Contents
Use efficient solutions to fix NVME SSD not detected problem without data loss:
| Workable Solutions | Step-by-step Troubleshooting |
|---|---|
| Fix NVME SSD Not Detected in BIOS | Fix NVME SSD not detected in BIOS in 3 ways: Enable PCIE support and reinstall the NVME SSDs...Full steps |
| Fix NVME SSD Not Detected in Disk Management | Change NVME SSD drive letter; update NVME SSD drive letter; connect the NVME SSD to another PC; run Hardware and Device Troubleshooter...Full steps |
| Recover Data from NVME SSD in Windows 10 | If you fail to make NVME SSD detectable, you can at least try to retrieve data from the NVME SSD with EaseUS Data Recovery Wizard. It can scan your NVME drive fully and restore lost files...Full steps |
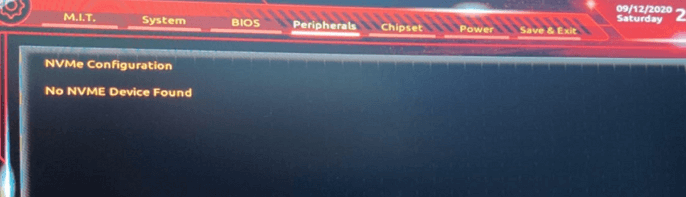
"Hello, I bought a Kingston a2000 NVME SSD, but my motherboard does not recognize SSD. I try all settings but no different. My BIOS version is the last version F15B."
What Is NVME SSD
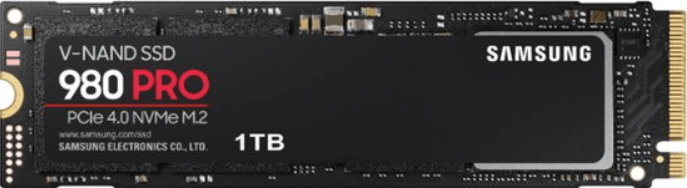
NVMe, Non-Volatile Memory Express, is a high-performance transport protocol for SSDs. It delivers the highest throughput and fastest response times for all enterprise workloads. It communicates between the storage interface and the System CPU using high-speed PCIe sockets. It supports tens of thousands of parallel command queues faster than traditional hard disks. NVMe is becoming the new standard for servers in the data center and client devices like laptops, desktop PCs, and more.
Why Does NVME SSD Not Detecting
Many reasons could lead to NVME SSD not detecting, and the reasons are listed as below:
- NVME SSD is not enabled
- NVME SSD is not properly connected to the computer
- The NVME SSD driver needs to update
- Your drive letter is missing
How to fix NVME SSD not detecting errors? Since you have learned the reasons, you can fix NVME SSD not detected error with the solutions below.
NVME SSD Not Detected in BIOS
If your NVME SSD is not detected by the BIOS, you can try the solutions below to make your NVME SSD detectable.
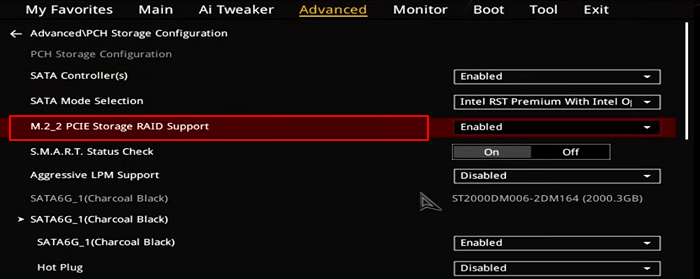
Solution 1 - Enable PCIE Support
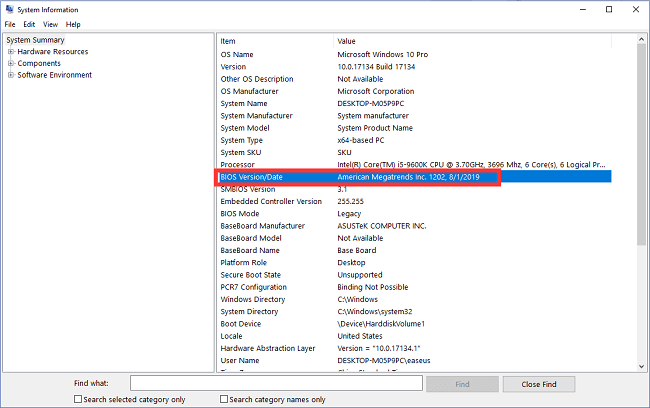
Step 1. Restart PC and press F2/Delete to access BIOS.
Step 2. Go to "Advanced > M.2_2 PCIE Storage RAID Support"
Make sure it's enabled, and save the changes.
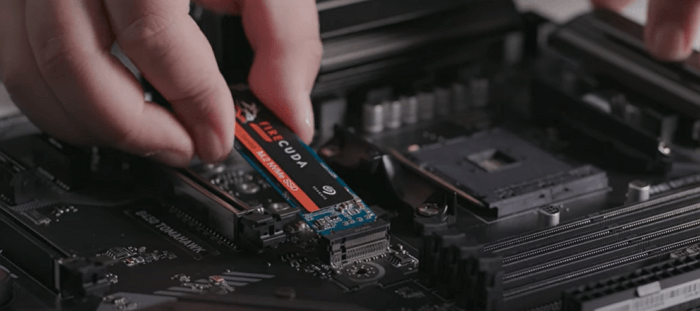
Solution 2 - Reinstall the NVME SSDs
Step 1. Disconnect Your PC's power supply and open the computer.
Step 2. You can see a horizontal slot labeled SATA or PCIE
Step 3. Remove the mounting screw opposite the slot, and reinstall the NVME SSD. (Restart your PC and follow the onscreen instruction.)
Solution 3. Turn to SSD Recovery/Repair Services
It may be physically damaged when the BIOS does not detect your NVME SSD. You should turn to manual SSD repair services to get help. EaseUS provides data recovery services and hard drive repair tips. It can repair hard drives and SSDs without losing data. If your NVME SSD is not detected, contact the experts to get help.
Consult with EaseUS data recovery experts for one-on-one manual recovery service. We could offer the following services after a FREE diagnosis
- Repair corrupted RAID structure, unbootable Windows OS, and corrupted virtual disk file
- Recover/repair lost partition and re-partitioned drive
- Unformat the hard drive and repair the RAW drive(Bitlocker encrypted drive)
- Fix disks that become GPT-protected partitions
NVME SSD Not Detected in Disk Management
If your BIOS can detect your drive but Windows does not, you can follow these solutions below to troubleshoot NVME SSD not detecting error.
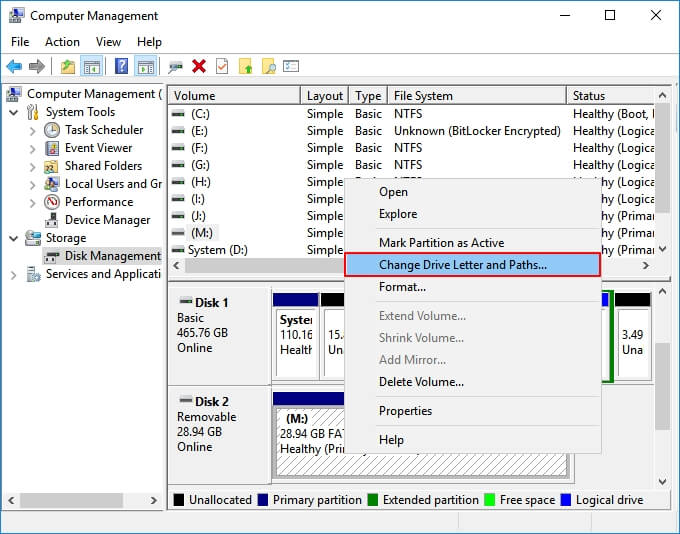
Method 1. Change NVME SSD Drive Letter
Step 1. Right-click "This PC" and select "Manage".
Step 2. Open Disk Management.
Step 3. Right-click your SSD and choose "Change Drive Letter and Paths..."
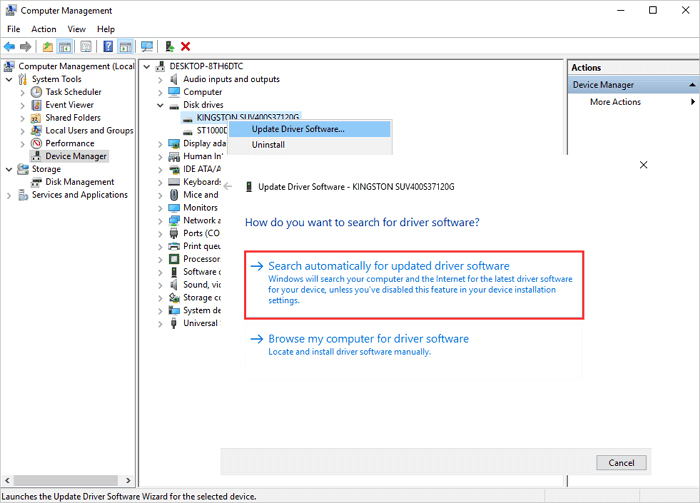
Method 2.Update NVME SSD Drive Letter
Step 1. Press Windows + X and click "Device Manager".
Step 2. Expand Disk Drives.
Step 3. Right-click the NVME SSD and choose "Update Driver Software".
Step 4. In the update driver software window, choose "Search automatically for updated driver software".
Method 3. Connect the NVME SSD to Another PC
When your NVME SSD neither shows up in File Explorer nor Disk Management, you can try to change the cable or PC to see if the drive can be recognized or not.
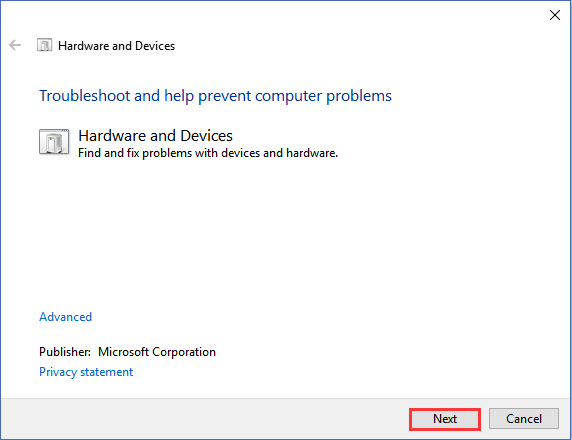
Method 4. Run Hardware and Device Troubleshooter
If the NVME SSD is still not detected, try to fix the problem with the hardware and devices troubleshooter.
Step 1. Type Hardware and Devices in the search box and click it to start.
Step 2. Click "Next" and wait for the scanning.
Step 3. It will find what problem you need to fix if your computer has.
How to Recover Data from NVME SSD in Windows 10
If you fail to make NVME SSD detectable, you can at least try to retrieve data from the NVME SSD. EaseUS Data Recovery Wizard is a robust hard disk data recovery tool that can get your data back from NVME SSD.
EaseUS Data Recovery Wizard
- Restore lost or deleted files, documents, photos, audio, music, emails effectively
- Recover files from SD card, emptied recycle bin, memory card, flash drive, digital camera, and camcorders
- Support data recovery for sudden deletion, formatting, hard drive corruption, virus attack, system crash under different situations
Here's a video tutorial about how to recover SSD data with EaseUS software and other methods:
- 00:25 Method 1. EaseUS Data Recovery Wizard
- 01:40 Method 2. Recovery Service
- 02:08 Method 3. Recycle Bin
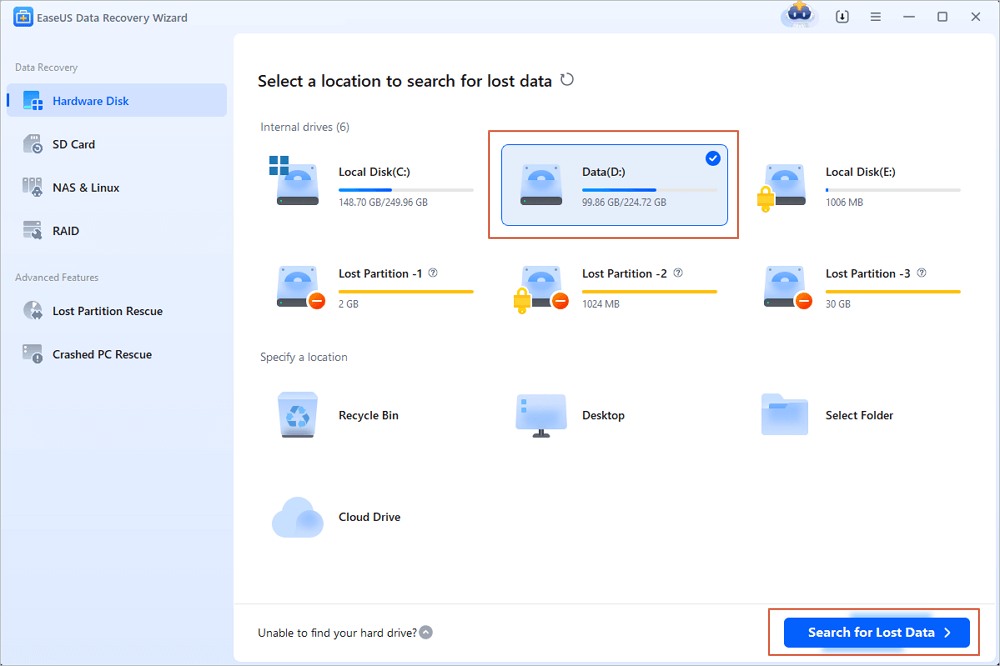
Step 1. Scan the SSD
Open EaseUS Data Recovery Wizard, select the SSD where you lost data, and click the "Search for Lost Data" button.
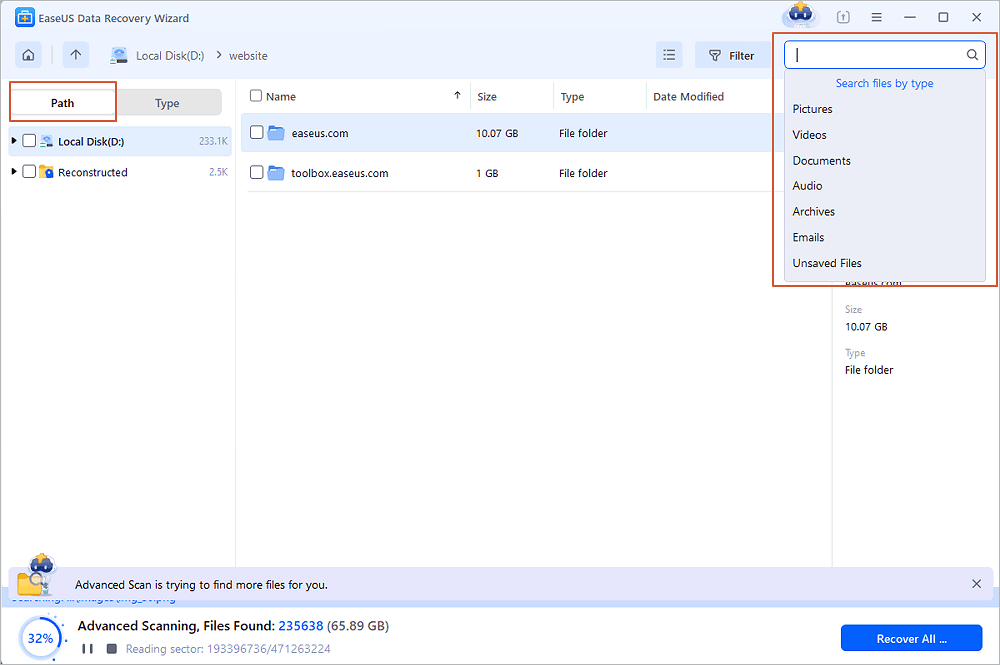
Step 2. View the results
When the scanning finishes, find lost SSD data by using the "Filter" and "Search" options after checking the "Deleted Files" and "Other Lost Files" folders.
Step 3. Recover SSD files
Select desired data and click the "Recover" button to get back lost SSD files.
💡Tip: You can restore data on the local disks, external hard drives, and also the cloud storage.

Conclusion
In this post, we explained why NVME SSD not showing up or detecting on Windows PC and provided practical fixes for you. If you lose data during the process, you can turn to EaseUS Data Recovery Wizard which enables you to get back data in three steps.
Was this page helpful?


20+
Years of experience

160+
Countries and regions

72 Million+
Downloads

4.9 +
Trustpilot Score


