Most people prefer hiding their photos due to privacy and security. However, you can hide your pictures and later fail to locate the hidden album or even forget the password. This post will guide you on how to show and Unhide hidden photos on Mac.
How to View and Recover Missing Photos on Mac
How to see hidden photos on Mac? The main aim of hiding photos is to avoid them from being seen by others besides you. Once you select the images to hide, they will move to the hidden album.
Now, the point is, can you view your hidden album? If not, here is how to view your hidden photos on a Mac.
Step 1. In the menu bar, click "View."
Step 2. Select "Show Hidden Photo Album."
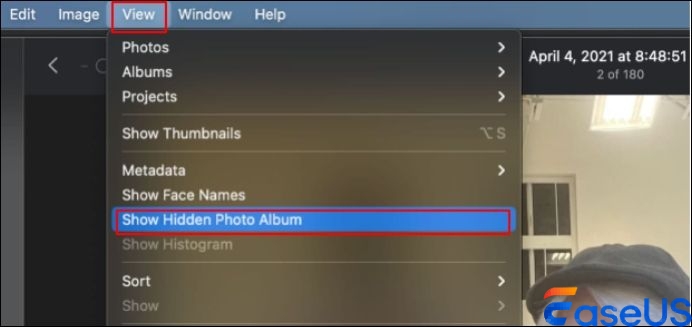
Step 3. On the sidebar, click "Hidden Album" to open it.
After following these steps, you can view the hidden photos. If some images are missing, you can use software to recover them.
The EaseUS Data Recovery Wizard for Mac is an outstanding and powerful software that comes in handy. It has reliable and secure advanced features to recover lost or accidentally deleted files on Mac.
This data recovery software tool for Mac repairs can recover deleted photos on Mac, videos, and even recover permanently deleted pictures. No matter the loss scenario - virus attacks, hardware failure, or a system failure; this outstanding software has you covered.
Follow the steps here to recover your lost photos with this powerful photo recovery software for Mac:
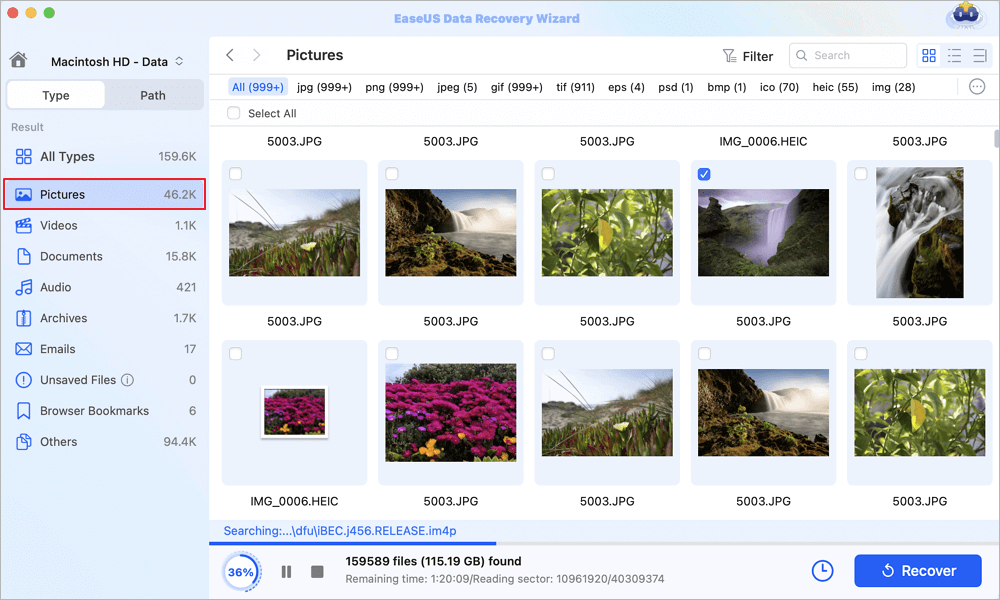
Step 1. Scan for lost photos
Select the location where your valuable photos were lost and click the "Search for lost files" button.

Step 2. Select wanted photos
EaseUS Data Recovery Wizard for Mac will immediately start a scan on your selected disk volume. Meanwhile, the scanning results will be presented in the left pane. By Path and Type, you can quickly filter the photos you've lost earlier.
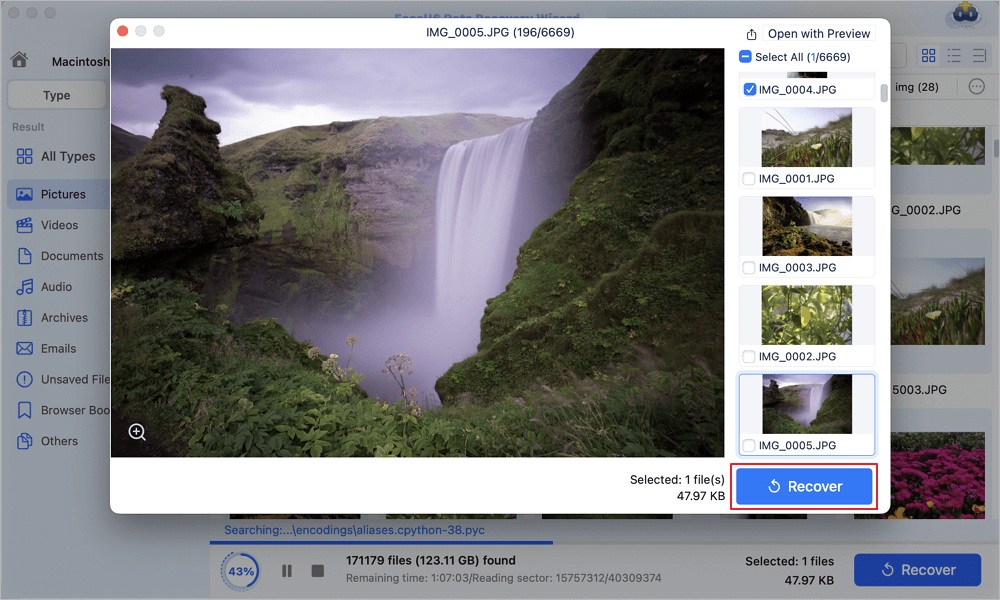
Step 3. Recover lost photos
Select the target photos and click the "Recover" button to get them back at once.
Now, share this post with your friends and colleagues to help them locate and view lost photos:
How to Show Hidden Photos on Mac
If navigating your Mac to find hidden photos is time-consuming, you are in the right place. This post will guide you through different methods for showing hidden images on Mac.
But remember that showing hidden photos on Mac means that anybody with your login credentials can access them.
Method 1. Show Hidden Photos by Making the Photo Files Visible
The main reason you are not seeing your photos is because they are not visible. Therefore, you need to make them visible first.
Step 1. Open the "Terminal" icon.
Step 2. Type the following command and click "Return":
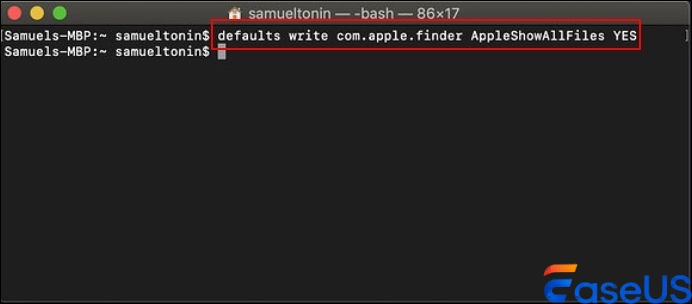
Step 3. Type killall Finder and click "Return."
After these steps, you can see the hidden folders and files in your Finder since you have made them visible.
Method 2. Use the Finder to Show Your Photos on Mac
How to access hidden photos on Mac? You can show your hidden photos by navigating through the Finder.
Here is how to go about it!
Step 1. Open your Mac device and go to "Finder."
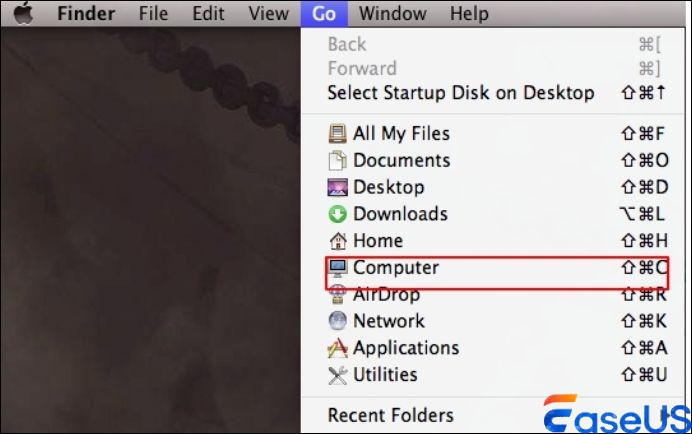
Step 2. Click "Go" to open a drop-down menu.
Step 3. On the drop-down menu, you select "Computer."
Step 4. Double-click on the "Macintosh HD" icon.
Step 5. Press "Shift + Command + period" simultaneously to show all hidden folders and files.
Method 3. Reveal Library Files and Folders to Show Hidden Photos
How to find hidden photos on Mac? You can reveal the files and folders in the Library to show the hidden photos.
Step 1. Go to "Finder" on your Mac.
Step 2. Hold down the option key and click "Go" to make the Library visible.
Step 3. Click on "Library" while holding down the option key to open it.

Doing this lets you see all folders and files in the library. To make the Library permanently visible, drag it to the sidebar.
How to Unhide Photos on Mac
After seeing your hidden photos on Mac, think about how to unhide them and make them visible again. Depending on your desire, you can unhide one photo or several of them.
If you unhide all the hidden photos, the hidden album will not appear on the sidebar. But if you hide a picture, it will reappear on the sidebar. Follow the steps here to unhide your folders on Mac:
Step 1. In the menu bar, click "View."
Step 2. Select "Show Hidden Photo Album."
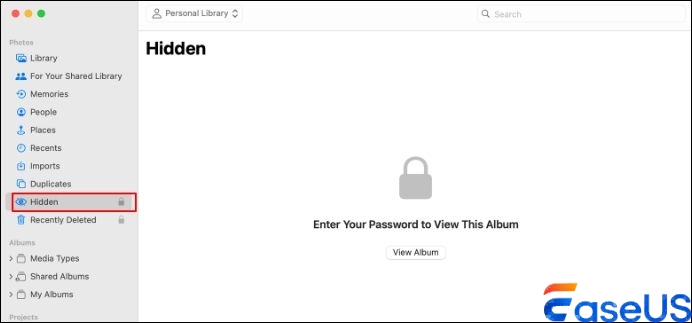
Step 3. Click the "Hidden Album" on the sidebar and provide your password to open it to display your hidden photos.
Here are the steps to guide you on how to unhide hidden photos!
1️⃣Unhiding one photo
Step 1. Go to the "Hidden Album" and provide your Apple ID or password to open it.
Step 2. Choose the photo you want to unhide.
Step 3. Select the "More" option and click "Unhide."
2️⃣Unhide multiple photos simultaneously
Step 1. Open the "Hidden Album" and provide your Apple ID or password.
Step 2. Click the "Select" option at the top and pick all the photos you want to unhide.
Step 3. After picking, hit "More" and click "Unhide."
Final Words
macOS devices can encounter corruption problems due to system crashes, an un-updated operating system, virus attacks, and more. This situation will render your data in a dangerous situation, and you may lose it. So, it's better to prevent the situation rather than wait until it happens. Use the Mac recovery software EaseUS Data Recovery Wizard for Mac to safeguard your data.
FAQs on Show Hidden Photos Mac
The following frequently asked questions and answers on the show Hidden Photos on Mac will aid you with more information.
1. How do I find my hidden photos on my Mac?
Hidden photos go to the hidden album; you can only find the images by displaying the album.
Here is how to find the hidden photos!
- Step 1. In the menu bar, click "View."
- Step 2. Select "Show Hidden Photo Album."
- Step 3. On the sidebar, click the "Hidden Album" and provide your password to open it to display your hidden photos
2. How do I show hidden photos?
Navigating through the finder to find your hidden photos is quite a hassle. To avoid all that, you can show your hidden images by:
- Making the hidden folder or files visible.
- Making the library visible.
3. Are hidden photos backed up to Mac?
Hidden photos are backed up on Mac if you had enabled the iCloud photos before hiding them. This is because the hidden photo will sync. However, the images won't be visible in the photo field unless you go to the hidden album.
Was This Page Helpful?
Jaden is one of the editors of EaseUS, who focuses on topics concerning PCs and Mac data recovery. Jaden is committed to enhancing professional IT knowledge and writing abilities. She is always keen on new and intelligent products.
Finley is interested in reading and writing articles about technical knowledge. Her articles mainly focus on file repair and data recovery.
-
EaseUS Data Recovery Wizard is a powerful system recovery software, designed to enable you to recover files you’ve deleted accidentally, potentially lost to malware or an entire hard drive partition.
Read More -
EaseUS Data Recovery Wizard is the best we have seen. It's far from perfect, partly because today's advanced disk technology makes data-recovery more difficult than it was with the simpler technology of the past.
Read More -
EaseUS Data Recovery Wizard Pro has a reputation as one of the best data recovery software programs on the market. It comes with a selection of advanced features, including partition recovery, formatted drive restoration, and corrupted file repair.
Read More
Related Articles
-
How to Recover Files Deleted by RM on Mac
![author icon]() Tracy King/Jun 30, 2026
Tracy King/Jun 30, 2026 -
WD My Passport Not Showing Up on Mac | Quickly Solve It
![author icon]() Jean/Jun 30, 2026
Jean/Jun 30, 2026 -
SD Card Keeps Disconnecting Mac? Fix It & Recover Lost Files Easily
![author icon]() Dany/Jun 30, 2026
Dany/Jun 30, 2026 -
If I Reset My Mac, Will I Lose Everything on iCloud
![author icon]() Jaden/Jun 30, 2026
Jaden/Jun 30, 2026