Problem #1. Can't Find Screenshots on Mac
Screenshotting is a very easy way to save bits of information or capture a shareable memory. But what if you can't find screenshots on Mac you just took? Here in the guide, we have compiled a few ways to help you find your screenshots without hassle or complications.
Problem #2. Can't Find My Screenshots at Desktop
Not being able to find the screenshots you took on your desktop might not be as rare as you thought it would be. For example, a user (kylieqq) posted on the apple forum asking about not being able to find their screenshots. He said, "My mac is macOS Sierra. I can take screenshots, but they are not at the desktop nor can be searched by "screenshot." Where are my screenshots?" To this, Apple Support Communities reached out and helped the user with their question.
Related topic: can you recover permanently deleted photos from iCloud?
Where is Screenshot Saved on a MacBook or iMac?
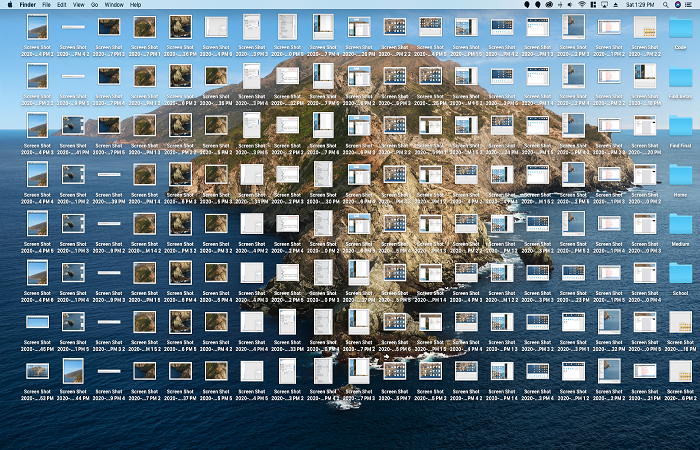
By default, screenshots are usually saved to your desktop as "[date] screenshot at [time]." You can even change the default location for saved screenshots using the "option" menu in the screenshot app. You can also drag thumbnails to folders or documents.
How To Find Screenshots on MacBook Air, MacBook Pro, or iMac
- Method 1. Search the file named 'Screenshot' on the desktop
- Method 2. Check the application's preference settings
- Method 3. Use Finder to search for screenshots
- Method 4. Use Spotlight to search for screenshots
- Method 5. Use free data recovery Software
- Bonus Tip: How to Change Screenshot Location on Mac
When you take a screenshot, macOS assigns it a label. You can easily find all the screenshots by searching this tab. Here are four ways to manually find screenshots on your MacBook Air, MacBook Pro, or iMac. And, if you prefer an automatic yet effective way to get back lost screenshots on Mac, the last method is for you.
* EaseUS Data Recovery Wizard for Mac scans your affected Mac's hard drive, desktop or Trash bin and recovers all the invisible and deleted screenshot images for you.
EaseUS Data Recovery Wizard Free offers up to 2 GB of free data recovery, including 500 MB available by default and an extra 1.5 GB unlocked after sharing on Facebook and X.
Method 1. Search the file named 'Screenshot' on the desktop
Every time you press the screenshot key command, the Screenshot is automatically saved to your desktop. The file is named after the name of the Screenshot, followed by the shooting date. It is saved in PNG format, so icons are sorted by file type or name, and if you have a lot of icons on your desktop, you'll have to dig around a bit.
Method 2. Check the application's preference settings
Mac applications save user settings in a configuration file. It can usually be specified with the extension "plist". In the device, you can quickly read and write these configuration files using a built-in utility called Default Settings. The screenshot app configuration file is “com.apple.screen capture” and you can read its contents by pasting the following command into your terminal app. The default setting is to read com. apple. screen capture. You can use the write command instead of the read command to add custom settings to the configuration file.
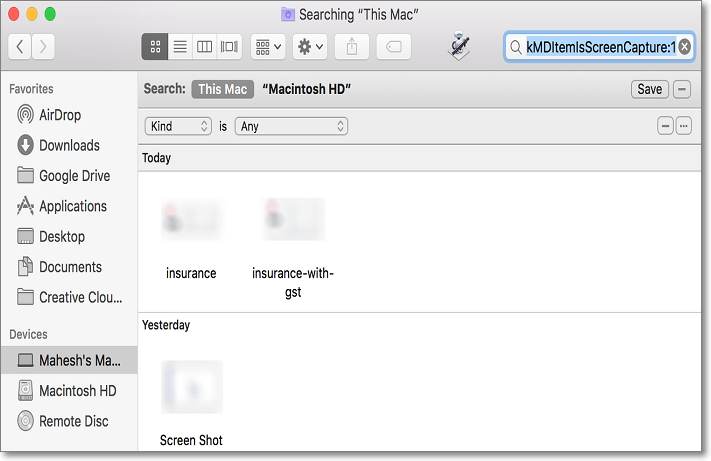
Method 3. Use Finder to search for screenshots
Finder is an excellent tool for finding files on Mac and can also be used to take all screenshots. Use the search function to search the Screenshots tab and search for all screenshots at once.
One advantage of using the Finder to search for screenshots is that you can save your custom search. The next time you want to see the Screenshot, click on the stored search in the sidebar.
Here's how to find screenshots using macOS Finder:
Step 1. Open a Finder window. Click the File menu in the menu bar and select search. You can also use the keyboard shortcut Cmd + F.
Step 2. Make sure This Mac is selected as the search option.
Step 3. With the cursor in the search field, type kMDItemIsScreenCapture: 1 and press Enter.
Step 4. Search results will display the Screenshot.
Step 5. To view the screenshot thumbnail, right-click anywhere in the window and select View > As Icon.
Step 6. To save this search for later use, click the "Save" button in the upper right corner of the window.
Step 7. Enter a name for your custom search, select "Add to Sidebar," and click Save.
Step 8. Now, you can find the Screenshot by clicking on Custom Search in the sidebar.
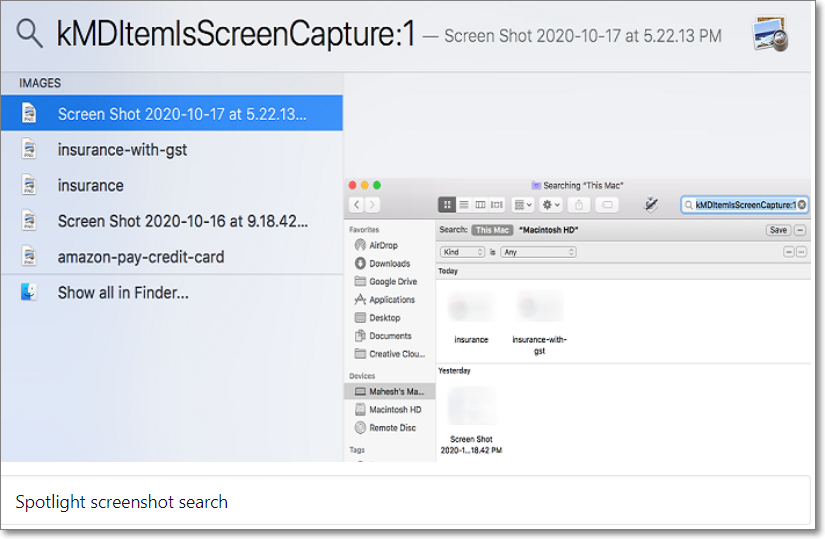
Method 4. Use Spotlight to search for screenshots
If you use Spotlight to search for items on your Mac, you can also use Spotlight to search for screenshots. However, unlike Finder, you cannot save your search, and you have to enter a search term each time.
One of the advantages of using Spotlight to see where your screenshots are is getting a bigger and better view of the screenshot file. You cannot get this feature from Finder or Terminal.
You can use Spotlight to capture all screenshots as follows:
Step 1. Press the "Cmd + Space" keyboard shortcut to launch Spotlight.
Step 2. Type kMDItemIsScreenCapture:1 in the search box and hit Enter.
Step 3. You will see all screenshots listed on the left. Select it with the arrow keys, and a preview of it will appear in the right pane.
Step 4. To get to the folder where the Screenshot is saved, highlight the Screenshot and press the keyboard shortcut Cmd + Enter. It will open the folder containing the Screenshot.
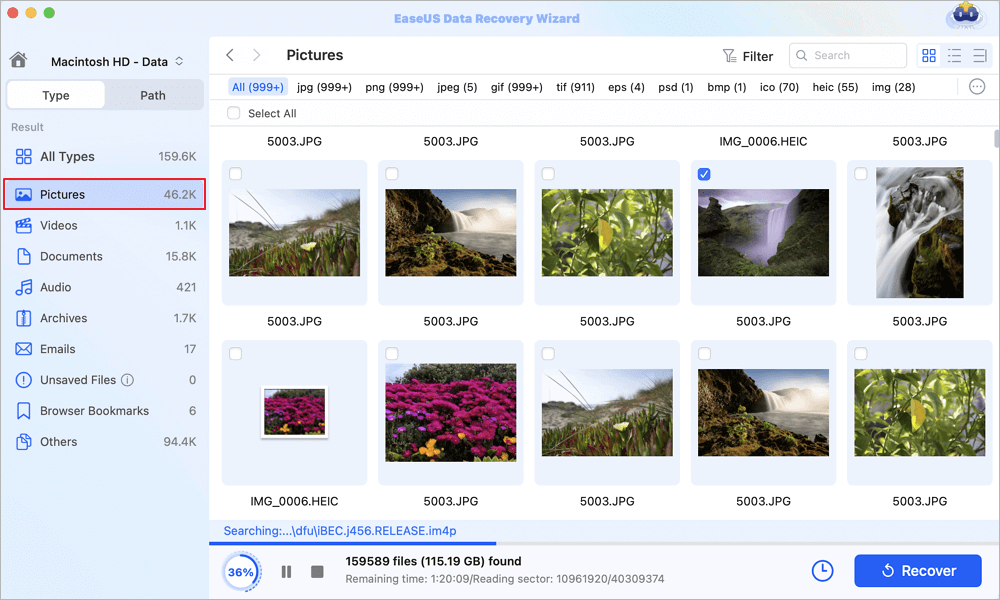
Method 5. Use free data recovery Software
You can scan and search programmatically if you lose file path and location information, such as screenshots. Scanning is entirely free. You can use the filter function to quickly filter out file types such as PNG and JPG from screenshots of scan results. Free support for 2GB screenshot file recovery.
EaseUS free Mac data recovery software can solve many cases of data loss and undo deletions, from a single Office Word document to a large number of permanently deleted files stored on your Mac, regardless of file size.
Now follow the three-step guide to perform screenshots recovery on your Mac:
Step 1. Scan for lost photos
Select the location where your valuable photos were lost and click the "Search for lost files" button.

Step 2. Select wanted photos
EaseUS Data Recovery Wizard for Mac will immediately start a scan on your selected disk volume. Meanwhile, the scanning results will be presented in the left pane. By Path and Type, you can quickly filter the photos you've lost earlier.
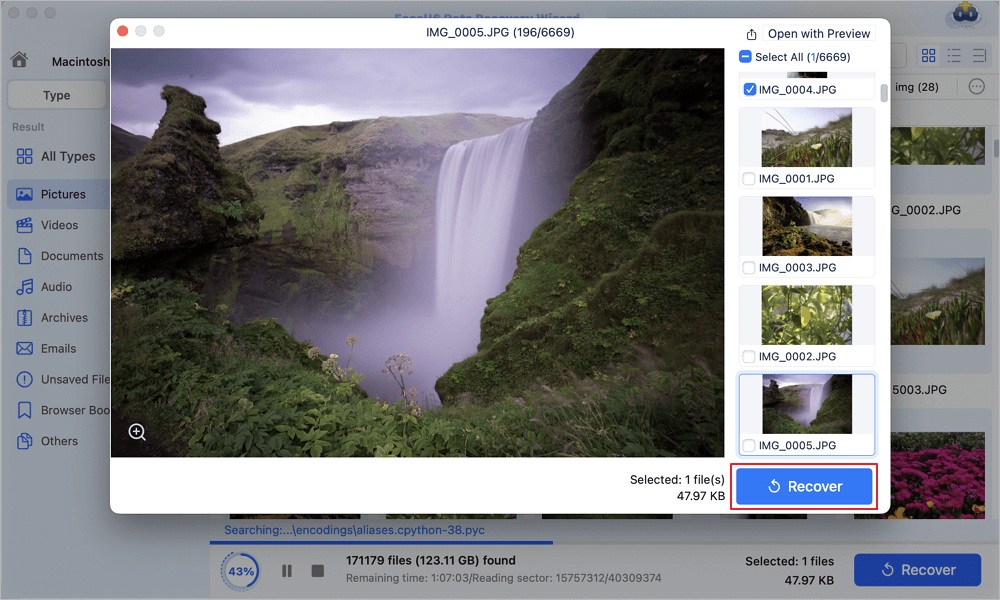
Step 3. Recover lost photos
Select the target photos and click the "Recover" button to get them back at once.
* What Makes EaseUS Data Recovery Wizard for Mac Powerful for Screenshots Recovery: Quick Download and Advanced Scan
The program will download within a few minutes and start scanning your computer with just one click. A quick C drive scan usually takes about 5 minutes, depending on how many gigabytes are used. Most home computers can thoroughly scan all your data within 10 hours. The number of detected files and the estimated time remaining to complete the scan are displayed at the bottom of the recovery wizard. Software descriptions are also available in several different languages.
The software offers two data recovery modes, Quick Scan and Advanced Scan. A quick scan is used to find and recover recently deleted files to determine if a virus has damaged your file system. Use "advanced scan" to recover long-lost data. It takes about two hours. EaseUS Data Recovery Wizard can also recover files from reformatted hard drives. It includes data stored on SD cards, memory cards, USB flash drives, pen drives, solid-state drives, and hard drives. The free trial version offers up to 2GB of data recovery.
Bonus Tip: How to Change Screenshot Location on Mac
It is always better to change the location of your screenshots because if you let them be, they'll pile up on your desktop and become a hassle when you turn back to them.
Here's how you can change the Screenshot's location on Mac:
- Press Shift + Command + 5. If you are running macOS Mojave or later (this is true if you bought or renewed a Mac from 2018), this will open an advanced screenshot menu.
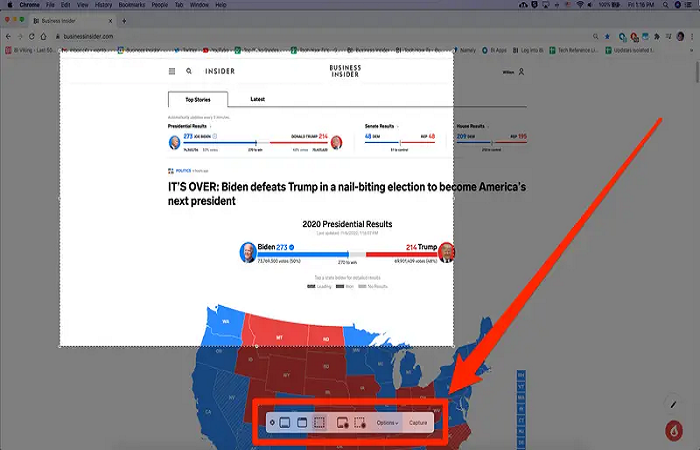
- Click 'Options' when a menu bar appears at the bottom of the screen.
- A pop-up window will open and be divided into sections. In the first section, "Save to," you can choose where your screenshots will be saved by default. You can select a new folder by clicking on any preset options or choosing another location.
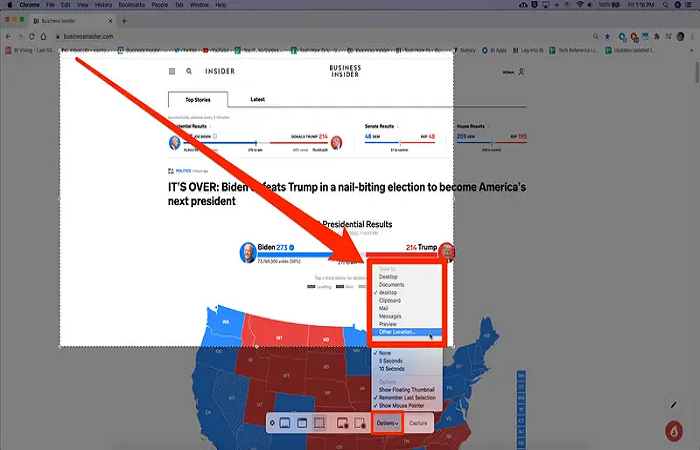
Any screenshot you take (without holding Control) will be saved in the new location you have chosen.
Conclusion
Screenshots allow you to capture exactly what you see on the screen and share it with others for future reference. It is beneficial to take screenshots, crop screenshots, save, and share them. Some people think that screenshots are the most important thing on the internet.
This article describes to you how to recover lost screenshots or save them for easy access anytime. Finally, the free data recovery software EaseUS is one of the best options for quick and complete file recovery from all types of Mac devices. It supports more than 100 actual data loss scenarios such as deletion, formatting, RAW, etc. This free software can recover them from various data loss situations.
Was This Page Helpful?
Finley is interested in reading and writing articles about technical knowledge. Her articles mainly focus on file repair and data recovery.
Jean is recognized as one of the most professional writers in EaseUS. She has kept improving her writing skills over the past 10 years and helped millions of her readers solve their tech problems on PC, Mac, and iOS devices.
-
EaseUS Data Recovery Wizard is a powerful system recovery software, designed to enable you to recover files you’ve deleted accidentally, potentially lost to malware or an entire hard drive partition.
Read More -
EaseUS Data Recovery Wizard is the best we have seen. It's far from perfect, partly because today's advanced disk technology makes data-recovery more difficult than it was with the simpler technology of the past.
Read More -
EaseUS Data Recovery Wizard Pro has a reputation as one of the best data recovery software programs on the market. It comes with a selection of advanced features, including partition recovery, formatted drive restoration, and corrupted file repair.
Read More
Related Articles
-
Fix com.apple.DiskManagement.disenter error 49180 with 4 Methods
![author icon]() Brithny/May 19, 2026
Brithny/May 19, 2026 -
Recover Unsaved Word/Excel Files in Crashed Office 2016 on Mac
![author icon]() Jean/Jun 30, 2026
Jean/Jun 30, 2026 -
Sonoma Download Files Are All Hidden, How to Unhide Files on macOS Sonoma
![author icon]() Brithny/Jun 30, 2026
Brithny/Jun 30, 2026 -
(Easy!) How to Delete Apps on Mac
![author icon]() Jean/Jun 30, 2026
Jean/Jun 30, 2026