Is your Mac Finder not showing files? If yes, you have come to the right place! The Finder application is Mac's most widely used and exploited built-in tool. Its local utility helps you find and arrange the files and folders that you store on your macOS operating system.
But the issue arises when Mac Finder does not show folders on your MacBook, even if they are present. How to find files on Mac that are not showing up? This article helps you get rid of this problem in 5 nifty ways. But before getting started with the fixes, let's explore some reasons why Mac Finder is not showing files:
| Possible Reasons | Details |
| ❌Crashed applications | If you rely on Mac Finder too much to find the stored files, you might notice that your Mac is slower and less responsive, which leads to not showing the files in Finder. It means Finder needs a quick reboot. |
| 💻Apple hides away some files for safety | As it's safer for your MacBook, Apple restricts some types of folders from the Mac Finder. But most of them can be located in the library folder, which stores app-type file data. |
| ⚠️Wrong file system entry | If your Mac spots an error and resets the date to January 24th, 1984, the origination of Macintosh PCs and greyed-out folders error in Finder may happen. |
Fix 1. Restore Mac Finder Missing Files with Recovery Software
This is one of the best methods to fix can't find files on Mac with potent recovery software, which supports macOS 10.9 to the latest macOS Sonoma. EaseUS Data Recovery Wizard for Mac Pro is a one-stop tool for Macintosh file recovery. No other file or folder retrieval tools are as straightforward and user-friendly as this one.
Regardless of what initiated a data loss, for example, accidental deletion, damaged data, or non-deliberate formatting, this tool can help get the missing files back. Some of the leading highlights of this data recovery software are the following:
- Recovery for every type of file and system, and support NTFS recovery on Mac.
- Recover deleted files on Mac and support data retrieval from almost every storage device.
- Recover deleted folders on Mac, and you can also preview the files and folders before recovery.
Using this top-notch data retrieval software like EaseUS Data Recovery Wizard for Mac can aid you in recovering accidentally lost data when other options have stopped working. Check the detailed tutorial below to find files that are not showing in Finder:
Step 1. Search for lost files
Select the disk location to search for lost files (it can be an internal HDD/SSD or a removable storage device) on macOS Sierra, High Sierra, Mojave, Catalina, Big Sur, Monterey, Ventura, and the latest Sonoma. Click the "Search for lost files" button.

Step 2. Go through the scanning results
EaseUS Data Recovery Wizard for Mac will immediately scan your selected disk volume and display the scanning results.

Step 3. Select the file(s) and recover
In the scan results, select the file(s) to preview and click the "Recover" button to have them back.

Download this professional tool today! If you like this passage, share it with your friends on social media.
Fix 2. Restart Finder to Fix Mac Finder Not Showing Files/Folders
If your MacBook is not showing files and gets slower while using Finder, go through the steps below to restart Finder on your Mac.
Step 1. Utilize the keyboard shortcut: "Command + Option + Escape".
Step 2. Find the "Force Quit Applications" option at the bottom by scrolling down.
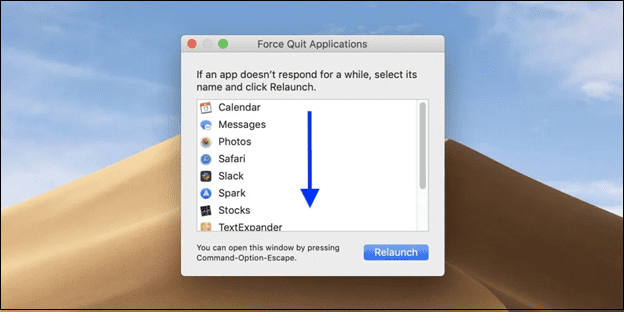
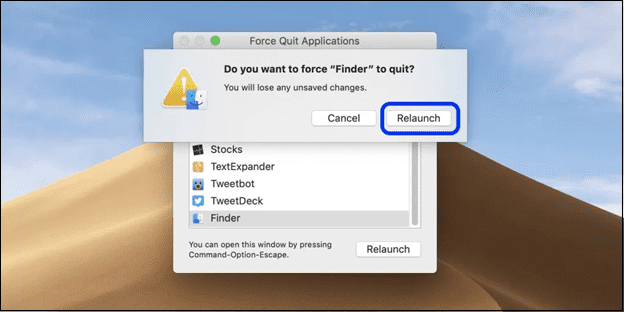
Step 3. Hit the "Finder" option.
Step 4. Select "Relaunch" at the bottom right edge of the window.
If your Finder cannot quit, you can try to force quit it. The following passage will teach you five methods to force quit apps on Mac:

5 Ways to Force Quit Apps on Mac| Ctrl+Alt+Del Alternative - EaseUS
How do you use Ctrl + Alt + Del on a Mac to force quit apps? This post provides the closest equivalent to Ctrl-Alt-Delete on a Mac. Read more >>
Fix 3. Show Hidden Files and Folders in Finder
Apple deliberately hides the file types on your MacBook to ensure the safety of your device. But after that, you might be required to find these concealed files to check if they're causing your MacBook to break down. Therefore, follow the steps below to show the hidden files and unhide folders on Mac temporarily:
Step 1. Kickstart the "Finder" application.
Step 2. Move to "Macintosh HD," and then hit "home."
Step 3. Press "Command + Shift +. (dot)."

Now, every hidden file on your MacBook must be visible. One of the best substitutes for demonstrating hidden files on your Mac is by using Terminal. The detailed steps for showing hidden files are the following:
Step 1. Launch "Terminal".
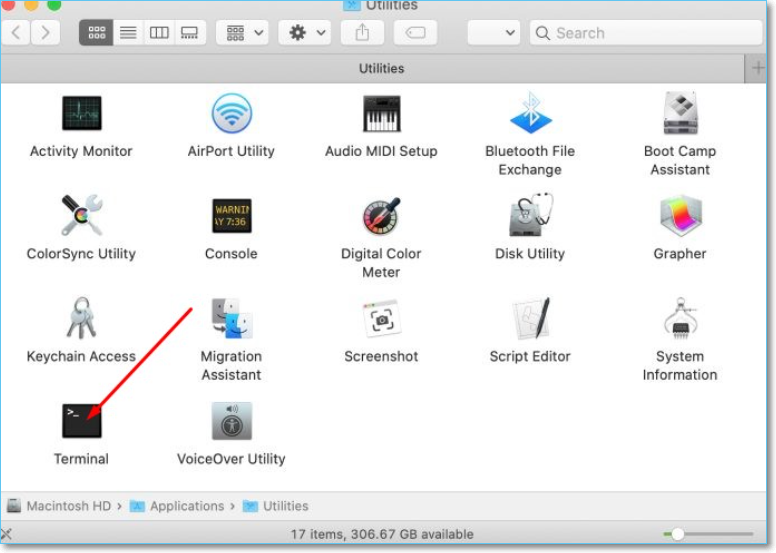
Step 2. Type the below-mentioned script:
$ defaults write com.apple.Finder AppleShowAllFiles true
$ killall Finder
Fix 4. Rebuild the Spotlight Index
It seems logical to restructure the Spotlight Search index when Mac Finder is unable to show the files you've been looking for because Finder uses Spotlight Search to discover your files. Follow the steps below to reconstruct the Spotlight index:
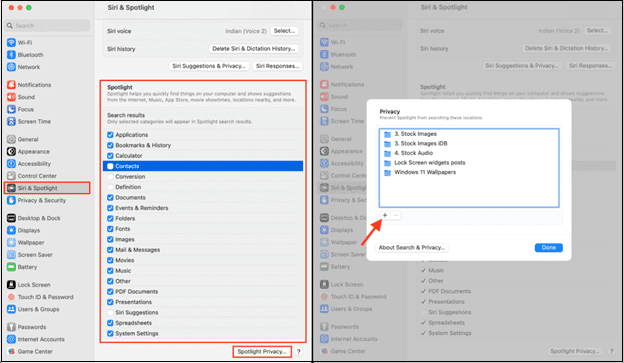
Step 1. Navigate to the "Apple menu" and opt for "System Settings" from the dropdown menu.
Step 2. Spot "Siri & Spotlight" and open it to opt for "Spotlight Privacy" in the lower right edge of the Spotlight menu window.
Step 3. Banish "Spotlight" from looking for these locations, and hit the "+" button to include them back.
If you like these fixes, please share this passage with your friends on social media.
Fix 5. Update macOS to Fix Finder Issues
It's worrisome to hear that your Finder is unresponsive after you have attempted the above ways. Therefore, the macOS version that your Mac is using right now has some unfixed issues or oversights. In case you have found yourself entangled in this situation, you may resolve the Finder errors by updating your macOS. The steps are the following:
Step 1. Hit the "Apple" logo > "System Preferences".
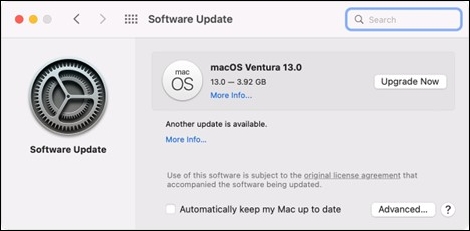
Step 2. Opt for "Software Update" in System Preferences.
Step 3. Hit "Update Now" or "Restart Now" to proceed to the nominal update on your MacBook. If it demonstrates an upgrade now, hit "click more info" to see if the recent version has any updates.
If the update is not showing on this window, you can update your Mac with other methods. Or you can read the following passage to learn more:

How Do I Update My Mac When It Says No Update
How do I update my Mac when it says no update? Well, there are numerous solutions you can try! Read more >>
Conclusion
It can be difficult to identify the causes of Mac Finder not showing files, but stressing is unnecessary. This post provides you with five solutions to fix this issue. Try the procedures mentioned above immediately without holding off! One of the best solutions to fix Mac Finder not showing folders is using EaseUS Data Recovery Wizard for Mac, which helps retrieve every type of data deleted accidentally.
Files and Folders Not Showing in Finder FAQs
Consider the FAQs below if the files and folders are now showing in Finder to understand the topic fully:
1. Why are my files not showing up in Mac Finder?
Choose Preferences from the Finder menu by pulling it down. Select the Sidebar tab from the top row of the Preferences dialogue. In the side panel of each Finder window, select the objects you would like to be displayed by checking the boxes adjacent to them. You are able to minimize the Finder Preferences window and proceed.
2. How to show hidden files and folders in Finder?
Go to the folder where the encoded files are stored. Hit the period key (Command + Shift + .). The folder's secret documents will now be visible. Hit Command + Shift + . once again to reveal the documents again.
3. How do I find files that are deleted in Finder?
Hit the Command, Shift, and (dot or period) keys on your keyboard to reveal any concealed Finder data. Search the Trash for the documents in case you accidentally removed them from Finder. Make use of Time Machine to recover the Finder deleted documents if the recycle bin is devoid of files or doesn't contain the missing file.
4. How can I restart Mac Finder?
You can restart Mac Finder in two ways. First, you need to launch "Finder," hit the "Apple" icon, hold "Shift" on your keyboard, and finally, hit "Force Quit Finder." Another option is to hold down the "alt-option" key, right-click the "Finder" symbol in the dock, and opt for "relaunch."
Was This Page Helpful?
Dany is an editor of EaseUS who lives and works in Chengdu, China. She focuses on writing articles about data recovery on Mac devices and PCs. She is devoted to improving her writing skills and enriching her professional knowledge. Dany also enjoys reading detective novels in her spare time.
-
EaseUS Data Recovery Wizard is a powerful system recovery software, designed to enable you to recover files you’ve deleted accidentally, potentially lost to malware or an entire hard drive partition.
Read More -
EaseUS Data Recovery Wizard is the best we have seen. It's far from perfect, partly because today's advanced disk technology makes data-recovery more difficult than it was with the simpler technology of the past.
Read More -
EaseUS Data Recovery Wizard Pro has a reputation as one of the best data recovery software programs on the market. It comes with a selection of advanced features, including partition recovery, formatted drive restoration, and corrupted file repair.
Read More
Related Articles
-
SD Card Repair Mac: Repair And Recocver SD Card
![author icon]() Jean/Jun 30, 2026
Jean/Jun 30, 2026 -
Word Can't Open the Document: User Does not Have Access Privileges Mac
![author icon]() Brithny/Jun 17, 2026
Brithny/Jun 17, 2026 -
SanDisk Drive Corrupted: 3 Effective Ways to Fix It
![author icon]() Brithny/Jun 28, 2026
Brithny/Jun 28, 2026 -
Mac Prohibitory Symbol on Startup Screen Mac🚫[4 Fixes]
![author icon]() Jaden/Jun 30, 2026
Jaden/Jun 30, 2026