Quick Navigation:
| Workable Solutions | Step-by-step Troubleshooting |
|---|---|
| 1. Find Flash Drives on Mac | Insert the USB flash drive, its icon will appear...Full steps |
| 2. Mount Flash Drives on Mac | Insert the USB flash drive, launch the Finder...Full steps |
| 3. Erase Flash Drives on Mac | Insert the USB flash drive, click on Applications...Full steps |
| 4. Format Flash Drives on Mac | Insert the USB flash drive, open disk utility...Full steps |
| 5. Recover Flash Drives Data | Download EaseUS Data Recovery for Mac...Full steps |
For transferring small to medium files, it's hard to imagine anything more convenient than a USB flash drive. They are mostly small in size come in a variety of shapes, colors, and cases. And, they work with both PC and Macs featuring a USB port.
A USB flash drive is known by many nicknames, including a memory stick, thumb drive, or pen drive. It is mainly a portable storage device, and it is the most widely used and the most recognized tech gadget around. Data can be transferred efficiently and simply from these compact devices to your laptop or desktop computer and vice versa.
Global computer hardware consumers are distributed into two main categories: PC users and Mac users. In this guide, we will be focusing on using a USB flash drive with a Mac computer.
How to Find Flash Drives on Mac
Mostly, USB flash drives get auto-detected and start working when plugged into the USB port of a Mac. Another type of portable storage device is the SD memory card which is also widely used. Older models of the MacBook came with memory card slots for reading SD cards and transferring data between the card and computer.
USB Flash drives can be plugged into the USB port of your mac laptop directly. For the MacBook models which do not have a memory card slot, you can attach a USB Type-C adapter to your MacBook to read a memory card.
If in some cases, the flash drive is not auto-detected, the finder app on the MacBook can be used to configure and display the externally attached storage devices.
Step 1. Insert the USB flash drive into the USB port of your Mac.
Step 2. The flash drive will be auto-detected, and its icon will appear on the desktop.
![]()
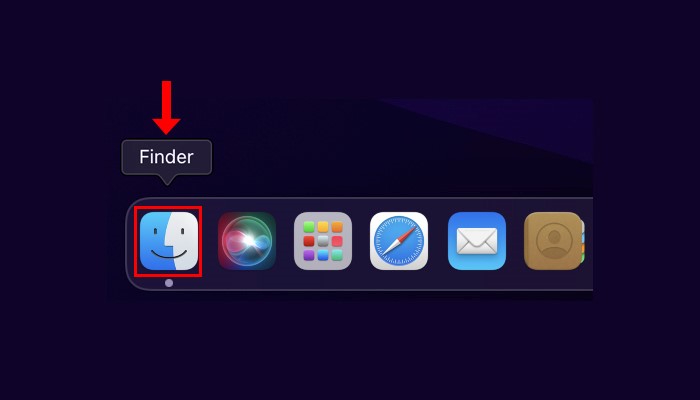
Step 3. If that is not the case, then open the Finder app. Now you can select the USB flash drive which you plugged in.
How to Mount Flash Drives on Mac
In some cases, a USB flash drive will not get detected automatically by the macOS, and the device will not mount. This usually happens if the flash drive is not compatible with macOS or there is an error in the flash drive itself, i.e., it is corrupted.
Signs that you have a corrupt USB flash drive include:
- The macOS does not recognize the device.
- It does not appear in the Finder app.
- The drive appears in Finder, but its contents are not accessible.
- The drive appears grayed-out in Disk Utility.
- You encounter macOS error messages when you try to use the flash drive.
Common reasons for USB flash drive corruption include:
- Unplugging flash drive without disconnecting/unmounting it.
- Unexpected or sudden power loss to flash drive.
- Device driver issues or wrong drivers installed.
- Wearing of memory module inside the device due to prolonged use.
- Software or OS crashes.
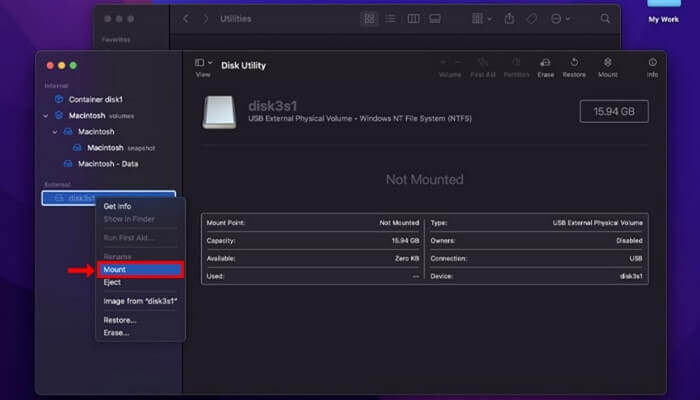
The most common method for overcoming the flash drive mounting problem is to restart the system and then reconnect the device to the system. If a restart does not mount your flash drive, then Disk Utility can be useful in resolving the issue.
Step 1. Insert the USB flash drive into the USB port of your Mac.
Step 2. Launch the Finder app.
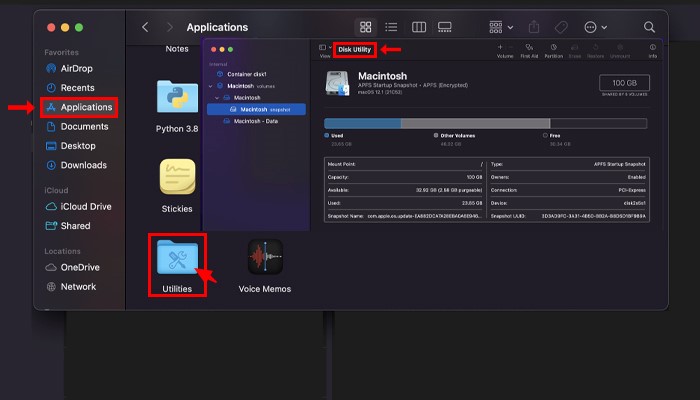
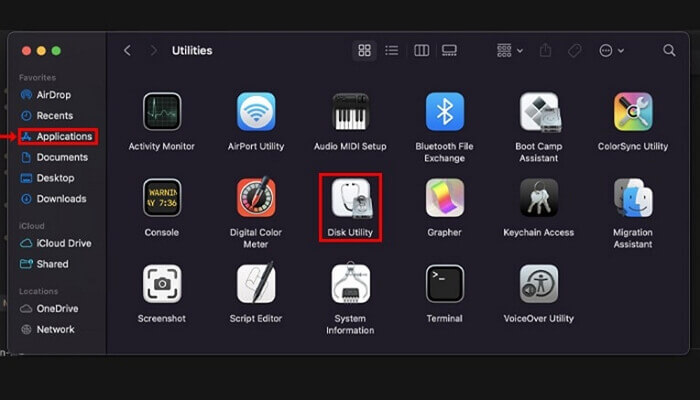
Step 3. Select the Applications option from the sidebar.
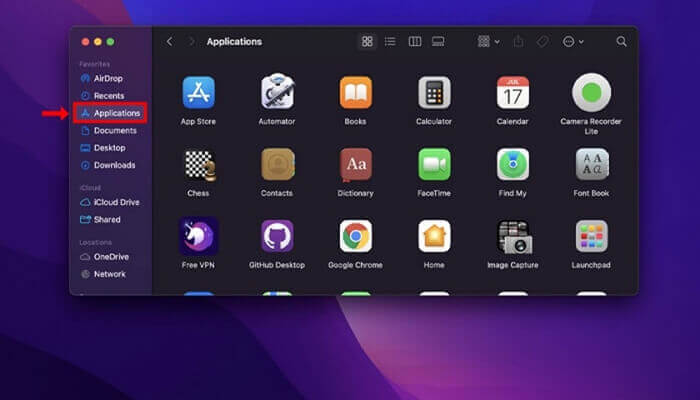
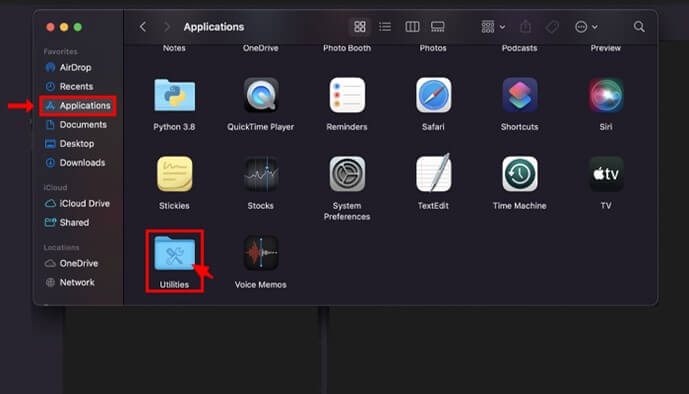
Step 4. All available applications will be displayed on the right side of the Finder. Double click on the Utilities folder.
Step 5. Next double click on Disk Utility to launch the app, which we will use to mount the flash drive.
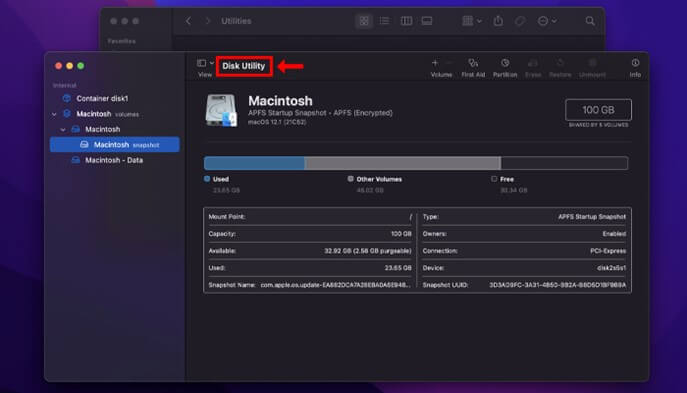
Step 6. Your flash drive should be displayed in the left sidebar of Disk Utility. Click on the name of your USB flash drive to access it.
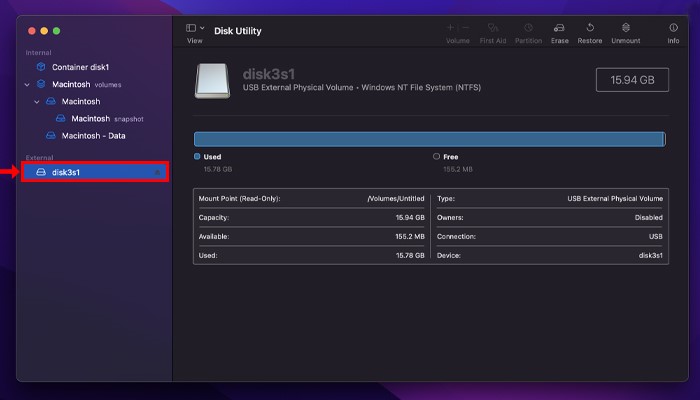
Step 7. If the USB flash drive does not appear in the Disk Utility app, then click on the File menu and then click on Refresh Information.
How to Erase Flash Drives on Mac
Due to regular usage of the USB flash drive, at some point, you will run out of space on the drive to store new data. You can always delete unwanted files to make space for newer files. If you have a backup of all the files on the flash drive and need to erase all the numerous files in one go, then Disk Utility can make this process a breeze for you. Perform the following steps:
Step 1. Insert the USB flash drive into the USB port of your Mac.
Step 2. In the Finder app, click on Applications, double click Utilities, and then Disk Utility app.
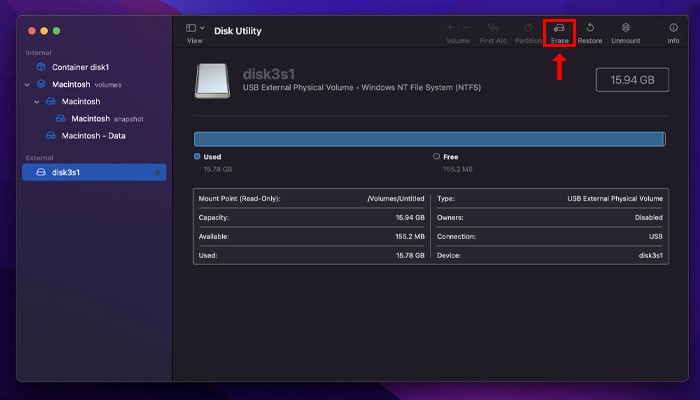
Step 3. Select your flash drive from the list on the left side of Disk Utility
Step 4. Click on the Erase option displayed on top
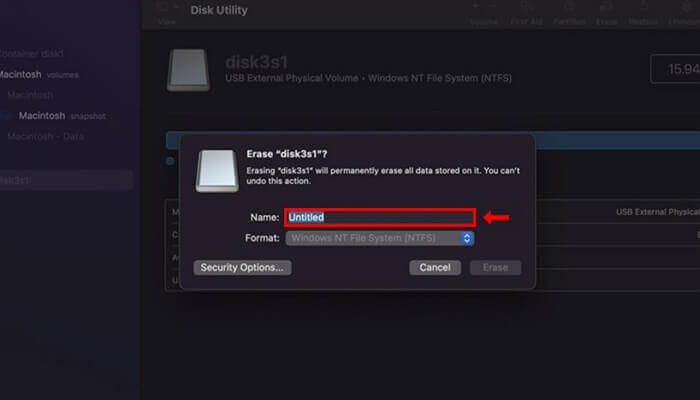
Step 5. A new dialog box appears asking for confirmation. Click the Erase button.
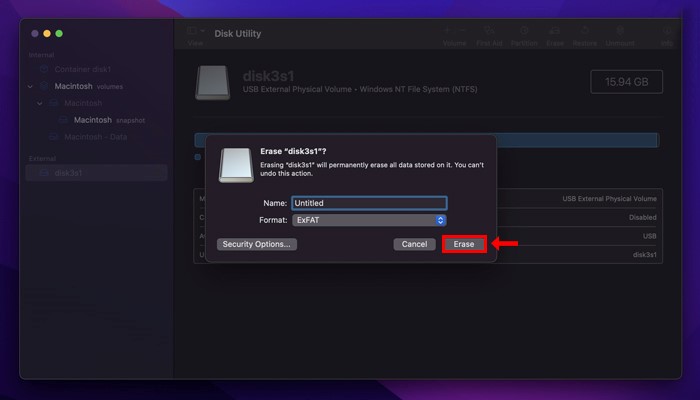
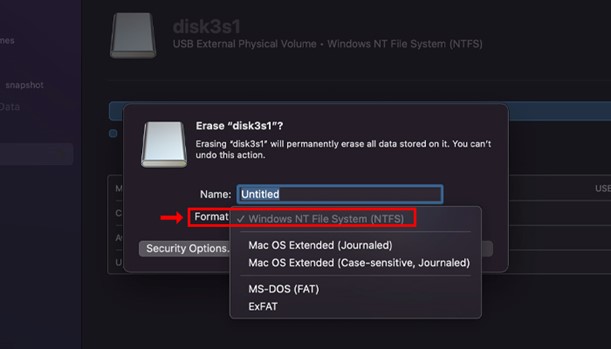
Before clicking on the Erase button, you have the option to specify a new name for your flash drive and select different OS file systems from a list.
How to Format Flash Drives on Mac
You may need to format a USB flash drive to make it compatible with a new file system. Formatting a flash drive completely removes all data from it and prepares it for fresh use. You can choose from various file systems to format the drive. This makes the drive compatible for use with a Mac or for use with both macOS and Windows. The following steps will help you format a flash drive:
Step 1. Insert the USB flash drive into the USB port of your Mac.
Step 2. Open Disk Utility from Applications.
Step 3. Select your USB flash drive from the Left Sidebar under External.
Step 4. Choose the Erase option from the tabs displayed on top.
Step 5. Specify a new 'Name' for your flash drive.
Step 6. From the 'Format' menu, select a file system according to your requirements.
Step 7. From the 'Scheme' menu, select a partition scheme.
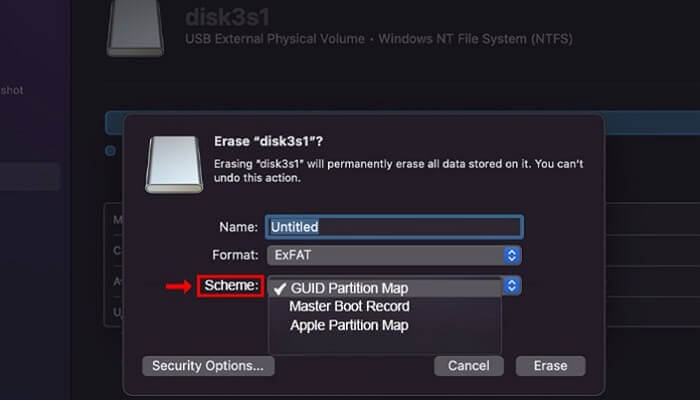
Step 8. Click on the 'Erase' button to format the flash drive.
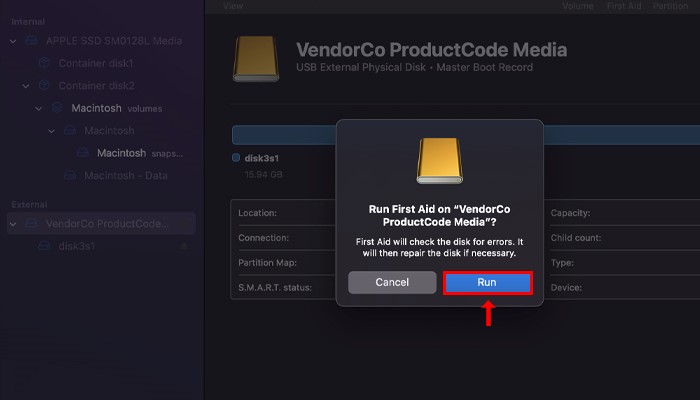
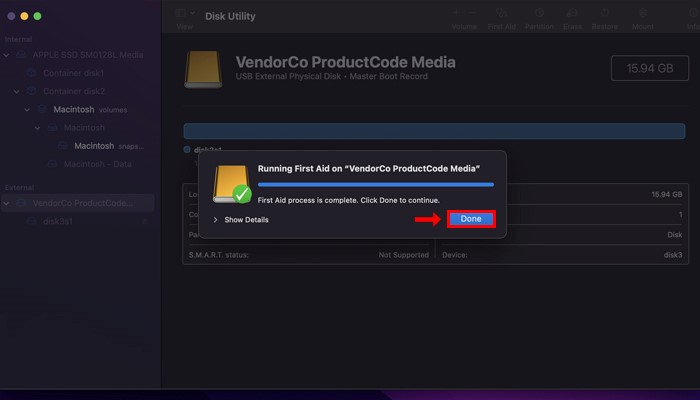
What Can First Aid Do for Flash Drives
The First Aid function helps you to determine the status of the Mac disk, volumes, and any attached external devices. It offers many built-in capabilities that detect and repair errors found on Mac disks. First Aid can scan the drives you specify and will inform you if the detected damage can be repaired or not.
Step 1. Insert the USB flash drive into the USB port of your Mac.
Step 2. Open the Disk Utility app and choose View > Show All Devices.
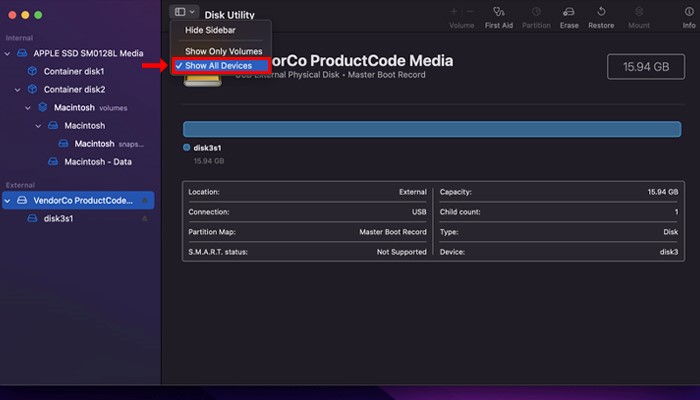
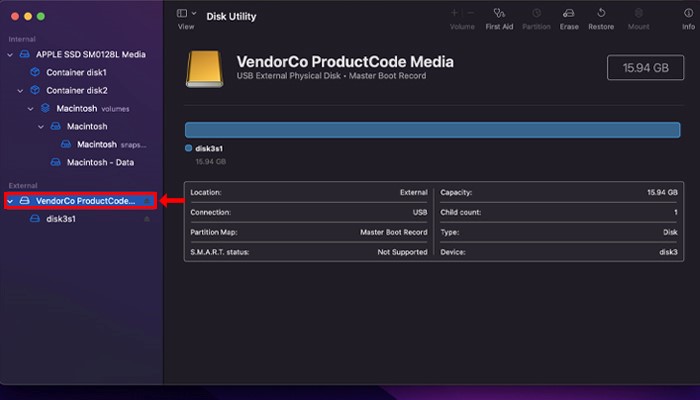
Step 3. Now select the USB flash drive. It will be displayed on the Left Sidebar.
Step 4. Choose the First Aid option from the tabs displayed on top.
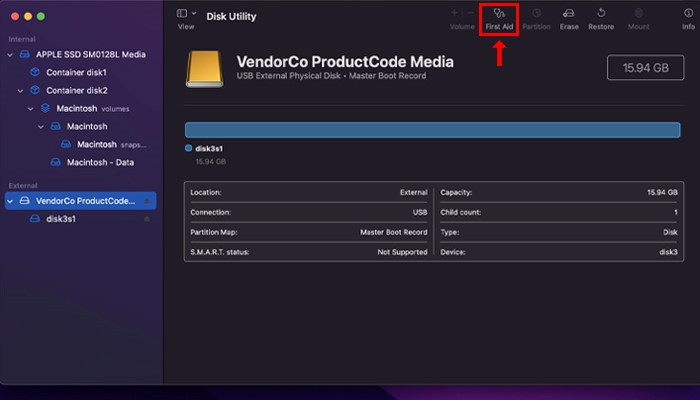
Step 5. Click the 'Run' button in the First Aid dialog box.
Step 6. Click the 'Done' button when First Aid has finished scanning.
Extra Tip: How to Recover Flash Drive Data
In most cases, permanently deleted files can be recovered using special USB data recovery software for Macs. Such software analyzes drives for recoverable data and informs you accordingly. They have the ability to recover various different file formats.
One of the leading recovery software for Mac includes the EaseUS Data Recovery for Mac. It is a third-party data recovery software for Mac and one of the finest tools available today.
The innovative features set includes:
- Recovery of over 1000 file formats.
- Supported file systems include FAT12/16/32, ex-FAT, NTFS, NTFS-5, ext2/3, HFS+, and ReFS.
- Filters option to customize the file scan.
- File preview for easy file selection.
- The free trial version lets you recover up to 2GB of data.
- Monthly, Yearly, and Lifetime subscriptions.
Step 1. Connect your USB drive to your Mac
Correctly connect your USB flash drive to your Mac. Launch EaseUS Data Recovery Wizard for Mac. Start selecting the flash drive and click "Search for lost files" to let the software scan for lost files on it.

Step 2. Find lost data on the USB drive
After the scan, all files will be presented in the left panel in the scan results.

Step 3. Recover data from flash drive
Select the files you want to recover and click the "Recover" button. Don't save the recoverable files to the USB drive itself in case of data overwriting.

Conclusion
USB flash drives provide incomparable convenience for the transfer of tiny, small, and medium-sized files. They're compatible with both PCs and Macs that have a USB port.
EaseUS Data Recovery for Mac is one the finest tool for recovering data from a Mac disk or an external flash drive used with a Mac. It offers ultra-fast and reliable data recovery. Its easy interface and innovative features, combined with its powerful data recovery abilities, place it in the top 5 data recovery apps currently available.
Was This Page Helpful?
Cedric Grantham is a senior editor and data recovery specialist of EaseUS. He mainly writes articles and how-to tips about data recovery on PC and Mac. He has handled 10,000+ data recovery cases and is good at data recovery of NTFS, FAT (FAT32 and ExFAT) file systems, and RAID structure reorganization.
Jean is recognized as one of the most professional writers in EaseUS. She has kept improving her writing skills over the past 10 years and helped millions of her readers solve their tech problems on PC, Mac, and iOS devices.
-
EaseUS Data Recovery Wizard is a powerful system recovery software, designed to enable you to recover files you’ve deleted accidentally, potentially lost to malware or an entire hard drive partition.
Read More -
EaseUS Data Recovery Wizard is the best we have seen. It's far from perfect, partly because today's advanced disk technology makes data-recovery more difficult than it was with the simpler technology of the past.
Read More -
EaseUS Data Recovery Wizard Pro has a reputation as one of the best data recovery software programs on the market. It comes with a selection of advanced features, including partition recovery, formatted drive restoration, and corrupted file repair.
Read More
Related Articles
-
Unable to Verify Startup Disk Mac? What to Do?
![author icon]() Dany/Jan 19, 2026
Dany/Jan 19, 2026 -
Fix 'Couldn't Open Disk 69879' Error During Erase Process
![author icon]() Finley/Jan 19, 2026
Finley/Jan 19, 2026 -
Does Reinstalling macOS in Recovery Mode Delete Everything on Mac
![author icon]() Jean/Jan 19, 2026
Jean/Jan 19, 2026 -
3 Ways to Fix Invalid B-tree Node Size Error and Recover Data
![author icon]() Jean/Jan 19, 2026
Jean/Jan 19, 2026