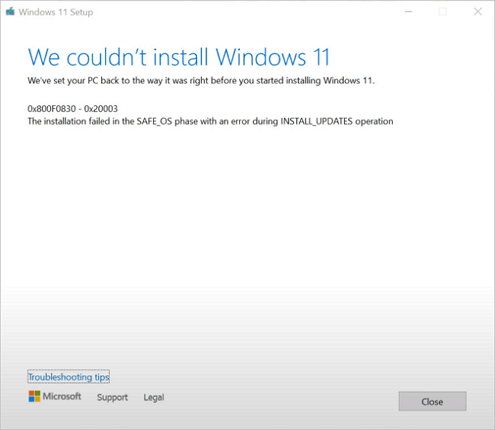
Microsoft has released Windows 11 on October 5, 2021. Most of us can enjoy the new features, interface, and improvements after installing the brand new Windows 11. But many users are faced with the problem of "we couldn't install Windows 11" - error code 0x800f0830 - 0x20003.
Error - We Couldn't Install Windows 11
"I get the following error when trying to upgrade to Win 11: '0x800F0830 - 0x20003', and its description says 'The installation failed in the SAFE_OS phase with an error during INSTALL_UPDATES operation'. Does anyone have any idea why?"
| Workable Solutions | Step-by-step Troubleshooting |
|---|---|
| 1. Use Built-in Tips | Try every USB port available; Determine you\'re using USB 2.0 or 3.0...Full steps |
| 2. Enable TPM 2.0 | Restart PC and press F2/F10/Del key to enter BIOS. Use the left key...Full steps |
| 3. Enable UEFI Secure Boot | Restart and press Del/F2 to enter the BIOS system. Keys are different depending...Full steps |
| 4. Create Installation Media | Download EaseUS Win11builder on your computer. It's a free Windows 11 iso downloader...Full steps |
Windows 11 Update/Installation Requirements
Many reasons could cause Windows 11 installation failure, and the most common one is that the computer does not fulfill the minimum system requirements for installing Windows 11. Before installing Windows 11, make sure that your PC meets the minimum requirements.
Processor: 1 gigahertz (GHz) or faster with 2 or more cores on a compatible 64-bit processor or System on a Chip (SoC)
RAM: 4GB
Storage: 64GB or larger storage device
System firmware: UEFI, Secure Boot capable
TPM: Trusted Platform Module (TPM) version 2.0
Graphics card: Compatible with DirectX 12 or WDDM 2.0 driver
Display: H>9" with HD Resolution (720p)
Internet connection and Microsoft accounts: Windows 11 Home edition requires internet connectivity and a Microsoft account to complete device setup for first use
If your computer can't fulfill the requirements, you may receive these errors:
- This PC can't run Windows 11
- PC must support Secure Boot
- The processor isn't supported for Windows 11
- The system disk needs to be 64GB or larger
How do I know that my computer is Windows 11 compatible? EaseUS provides you with Windows 11 Upgrade Checker that enables you to check Windows 11 compatibility easily and quickly.
Troubleshoot We Couldn't Install Windows 11
After checking your Windows 11 compatibility, you may receive the reports. Then, you can fix the error accordingly. Usually, when you get error code 0x800f0830, you also get the "Troubleshooting tips" to help you.
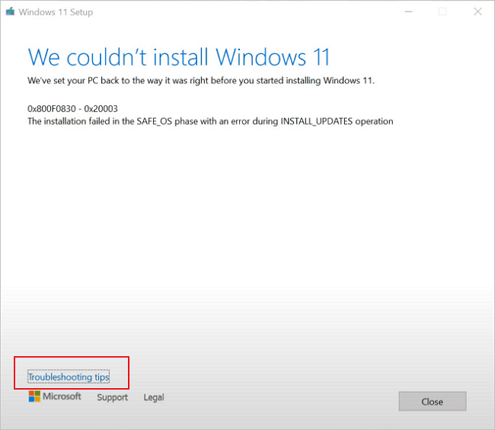
Method 1. Use Built-in Troubleshoot Tips
Follow the steps below to fix we couldn't install Windows 11.
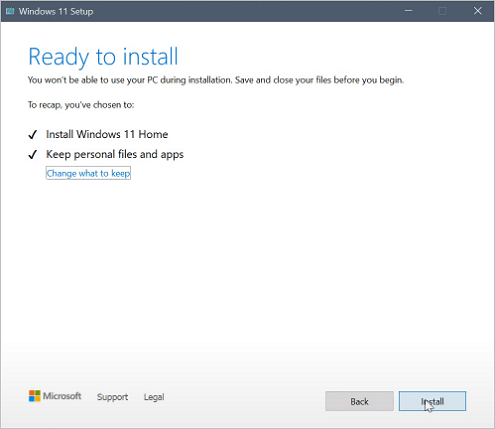
Step 1. Click the "Troubleshooting tips" button when you can't install Windows 11.
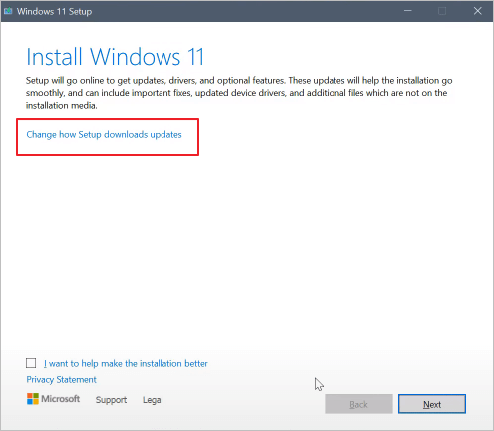
Step 2. Select "Change how Setup downloads updates".
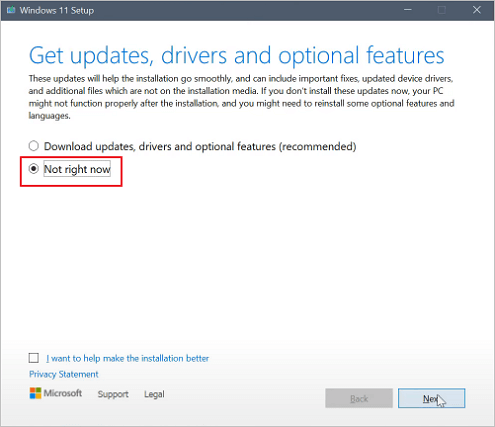
Step 3. When you see the "Get updates, drives, and optional features" screen, select "Not right now" and click "Next".
Step 4. Then, follow the on-screen instructions after the automatic check. When you see the installation interface, click install to get Windows 11 on your computer successfully.
Method 2. Enable TPM 2.0 on Your Computer
If you forget to enable TPM 2.0, your Windows 11 installation may get stuck. Therefore, you can fix the installation error by enabling TPM 2.0.
Step 1. Restart PC and press F2/F10/Del key to enter BIOS.
Step 2. Use the left key and go to the Security section.
Step 3. Check the TPM State and if it's Disabled, change it to Enabled.
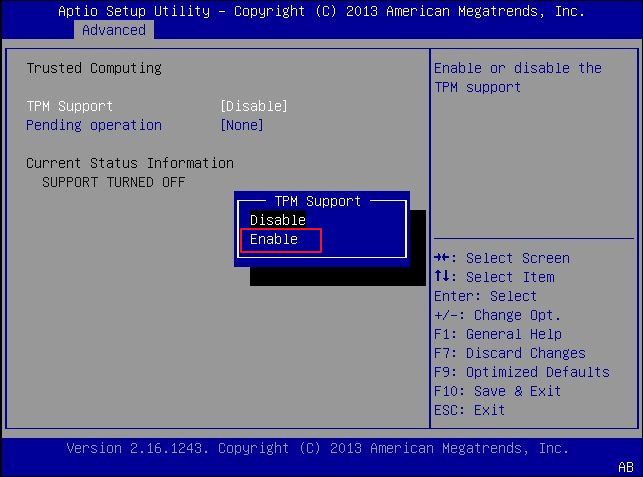
Step 4. Save the changes and exit BIOS.
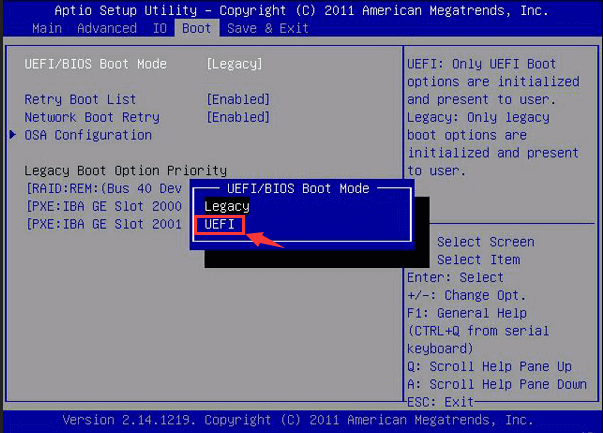
Method 3. Enable UEFI Secure Boot on a Supported Computer
Windows 11 requires Secure Boot to be enabled on the system to run the latest version. If your PC support it, but it isn't enabled, you will encounter the error - we couldn't install Windows 11. To enable secure boot:
Step 1. Restart and press Del/F2 to enter the BIOS system (keys are different depending on the computer host).
Step 2. Under the Boot tab, find the UEFI/BIOS Boot Mode. Use the up or down arrow key to choose the UEFI mode and press Enter.
Step 3. Returning to the previous column, we can see that Secure Boot has been enabled.
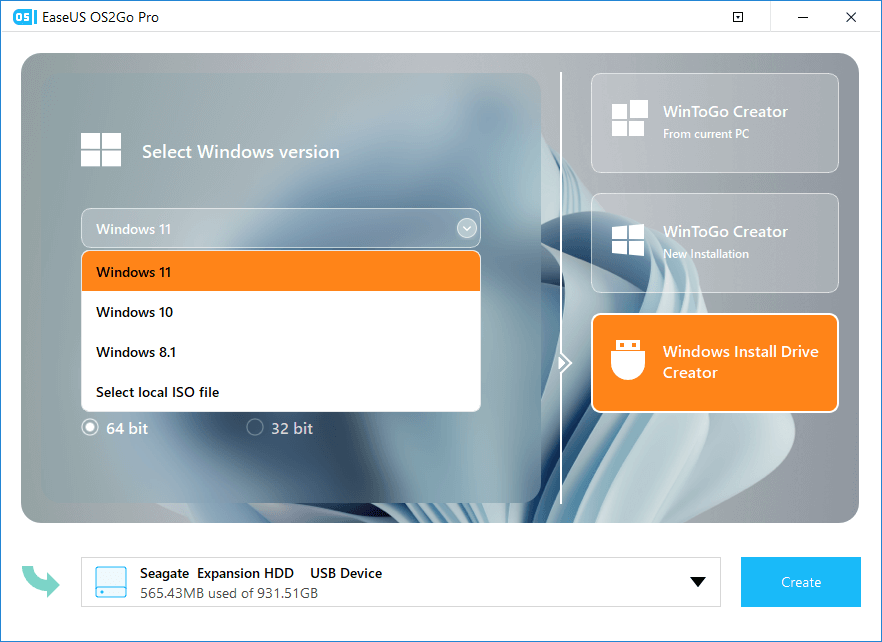
Method 4. Create Windows 11 Installation Media to Install Windows 11
You can also install Windows 11 by creating a portable Windows 11 USB drive. Things could be easier if you have EaseUS Win11builder. This tool helps you download Windows 11 and create a portable USB. Follow the steps to get detailed information.
Step 1. Launch OS2Go after installation, and click Windows Install Drive Creator. The obtained system information is available on the home screen, and it keeps updating all the time. Apart from Windows 11, Win11 builder also supports you to download Windows 10/8.1.
Step 2. Connect your USB flash drive to the computer. Win11 builder will automatically detect your USB device, so all you need to do is click the Create button.
Step 3. The software will empty your USB drive data if it's a used one. Once the downloading process begins, wait there until it finished or leave for a while to do you own job.
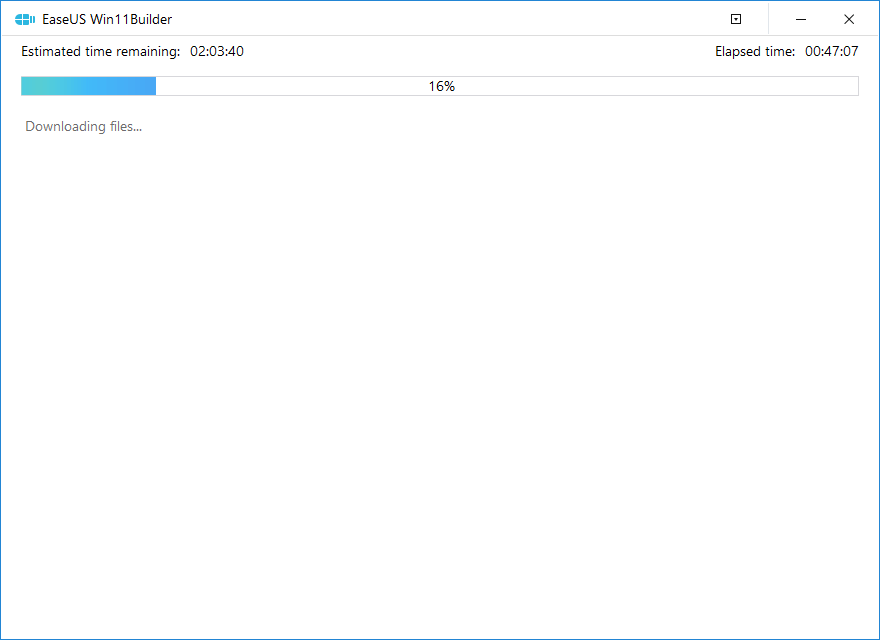
Step 4. After successfully downloading the Windows 11 iso image file on the USB drive, start to install Windows 11 from the bootable USB drive on your computer by following the installation wizard step by step.
If you have data loss problems during the process, you can ask EaseUS Data Recovery Wizard for help. This hard drive recovery program can help you in SD card recovery, file recovery, USB flash drive recovery, partition recovery, and more.
Conclusion
There's a pretty good chance the above resolutions will fix error 0x800f0830 and you can update Windows again. If you still fail to solve your problem, you can contact Microsoft support for further resolutions by clicking Contact support on Microsoft's help page. Or, contact EaseUS's experts to get remote help.
Was This Page Helpful?
Updated by Tracy King
Tracy became a member of the EaseUS content team in 2013. Being a technical writer for over 10 years, she is enthusiastic about sharing tips to assist readers in resolving complex issues in disk management, file transfer, PC & Mac performance optimization, etc., like an expert.
Brithny is a technology enthusiast, aiming to make readers' tech lives easy and enjoyable. She loves exploring new technologies and writing technical how-to tips. In her spare time, she loves sharing things about her game experience on Facebook or Twitter.
Related Articles
-
Samsung EVO vs QVO: Which SSD is Right for You?
![author icon]() Roxanne/Jan 11, 2024
Roxanne/Jan 11, 2024 -
What Is Microsoft Defender Advanced Threat Protection and How to Use It
![author icon]() Daisy/Jan 11, 2024
Daisy/Jan 11, 2024 -
Best External SSD for Steam Deck [2024 New List]
![author icon]() Roxanne/Jul 01, 2024
Roxanne/Jul 01, 2024 -
What Is an ISO File, Full Explained in Detail 2024
![author icon]() Sherly/Mar 14, 2024
Sherly/Mar 14, 2024