Part 1. How to Automatically Empty the Recycle Bin on Schedule
When you try to delete a file or folder, you're not actually deleting it from your computer. It only gets moved to the Recycle Bin, which continues to use valuable space on the hard drive. Though you may have to know how to manually empty the recycle bin, you may forget the automatic steps.
In this Windows 10 guide, we'll walk you through the steps to automatically empty the Recycle Bin using the Task Scheduler to keep the hard drive space optimized, while giving you enough time to recover deleted files.
1. Open Start, do a search for Task Scheduler, and press Enter.
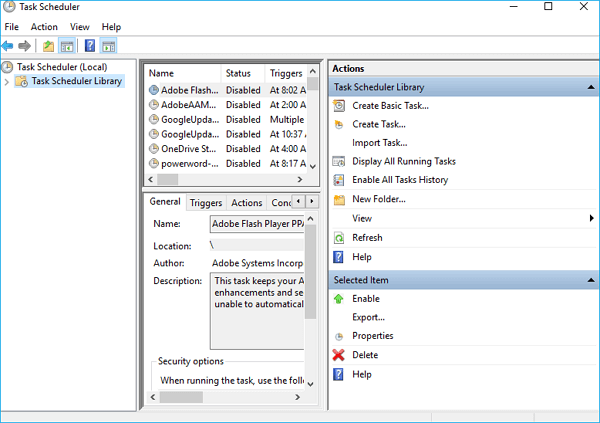
2. Right-click Task Scheduler Library and click New Folder.
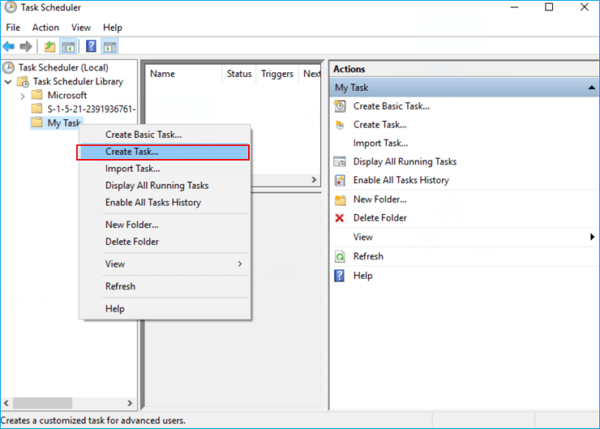
3. Name the folder My Tasks or anything descriptive. (You want to do this to keep your tasks organized and separated from the system tasks.) Right-click the newly created folder and select Create task.
4. On the General tab, enter a name for the task, such as Empty Windows Recycle Bin.

5. On the Triggers tab, click New to create an action that will trigger the task.
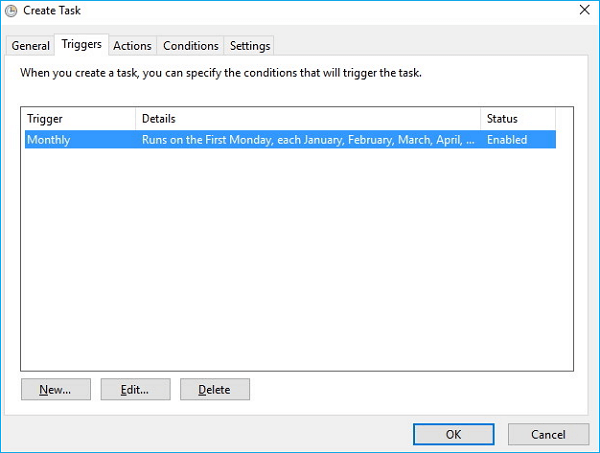
6. For the purpose of this guide, I'll select and configure On a schedule, but you can pick from a number of trigger actions, including At log on, At startup, On an event, and more.
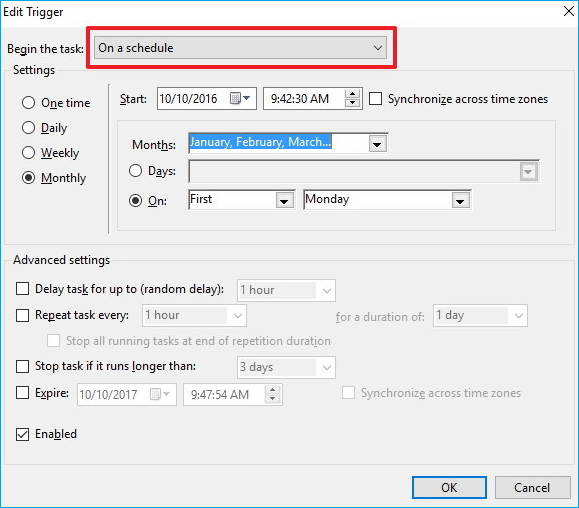
If you're using the schedule option as a trigger, consider using the Weekly or Monthly option, which will give you some time to recover deleted files.
7. On the Actions tab, click New.
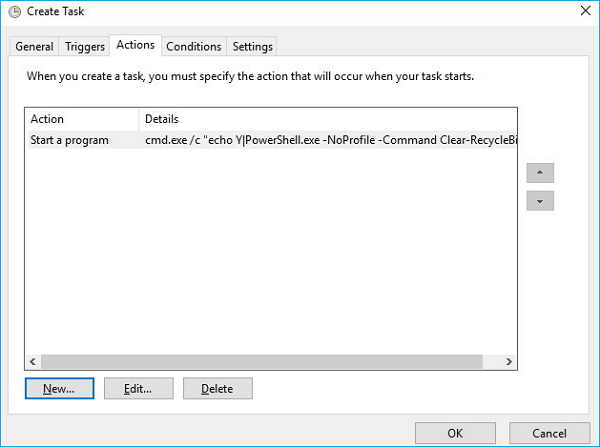
- Under Settings, on Programs/script enter cmd.exe.
- Under Settings, on Add arguments enter the following argument and click OK:
/c "echo Y|PowerShell.exe -NoProfile -Command Clear-RecycleBin" Then click OK to complete the task.
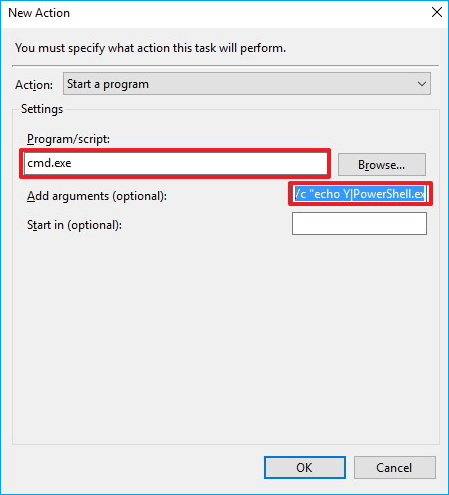
Once you completed the steps, the task will run automatically at the trigger condition you have configured.
Part 2. Stop Recycle Bin Automatically Deletion Windows 10
Two methods are provided below to help you stop recycle bin automatically deleting files.
Method 1. Delete the Task Scheduler
If you have created a new task to let your Recycle Bin empty itself, you can delete the task and the auto-deletion will stop immediately.
Method 2. Change Recycle Bin Settings
Step 1. Open Settings app. Navigate to System > Storage.
Step 2. Click Change how we free up space link. Uncheck the second option: delete files that have been in the recycle bin for over 30 days.
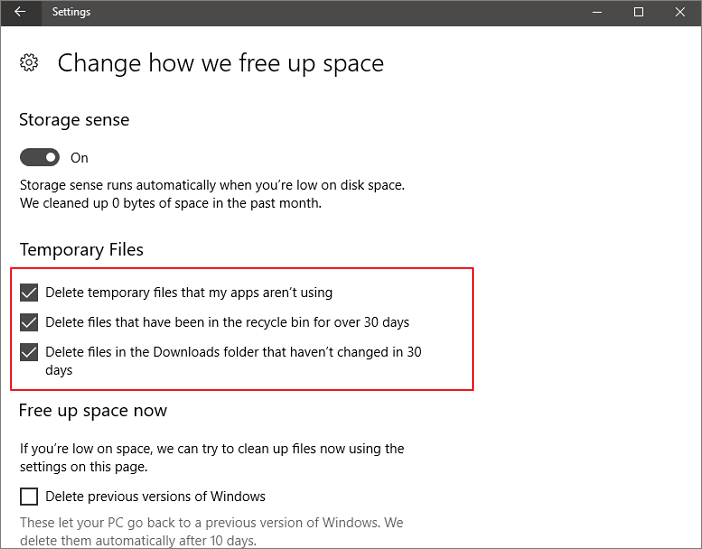
Then, your Recycle Bin will stop deleting files automatically.
Part 3. How to Recover Files from Recycle Bin
If you have lost some important files from Recycle Bin, you can still restore them with the help of EaseUS data recovery. It is a wonderful easy recovery tool which is really helpful to recover permanently deleted files from the emptied Recycle Bin in all Windows versions. It allows you to preview all the deleted files before you purchasing it. Here is the detailed guide about how to recover files deleted from recycle bin in Windows 10/8/8.1/7/XP/Vista.
Step 1. To specifically recover files from emptied Recycle Bin on Windows 11/10/8/7, hover the mouse pointer over the "Recycle Bin" option under the "Hardware Disk" section and click "Search for Lost Data".
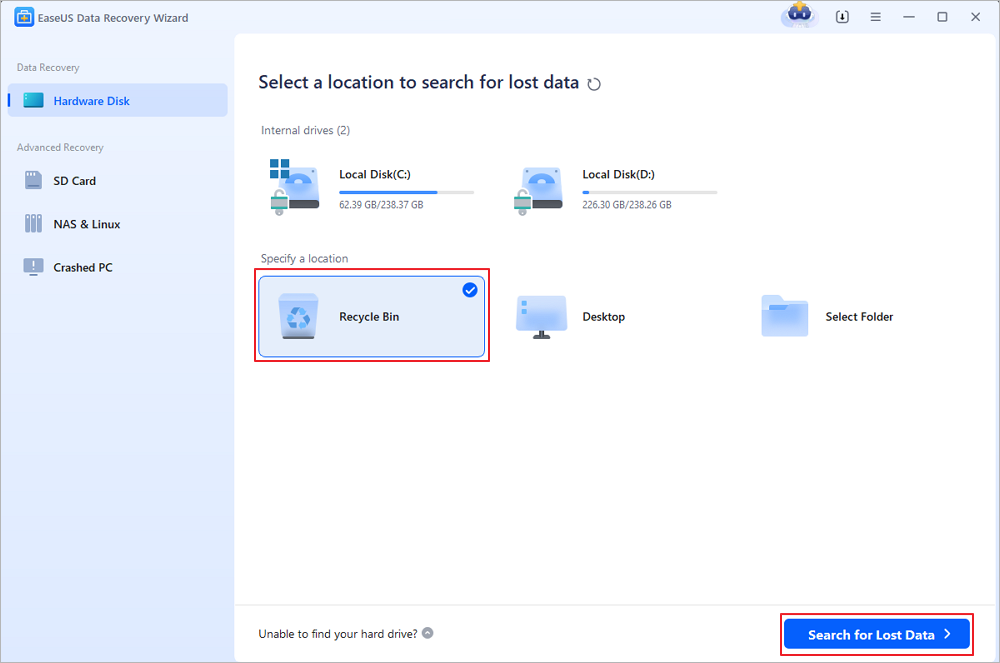
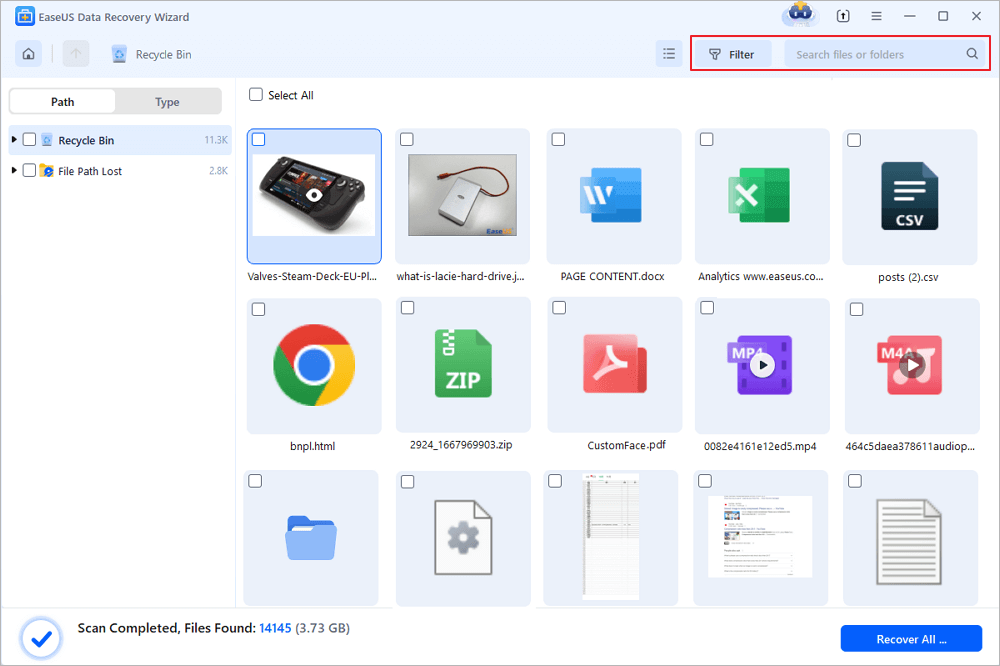
Step 2. EaseUS data recovery software will start a quick scan immediately for all deleted files, and later a deep scan will launch automatically to scan more lost files. After the scanning process, you can use the "Filter" feature to select a specific file type, such as Pictures, Word, videos, etc.
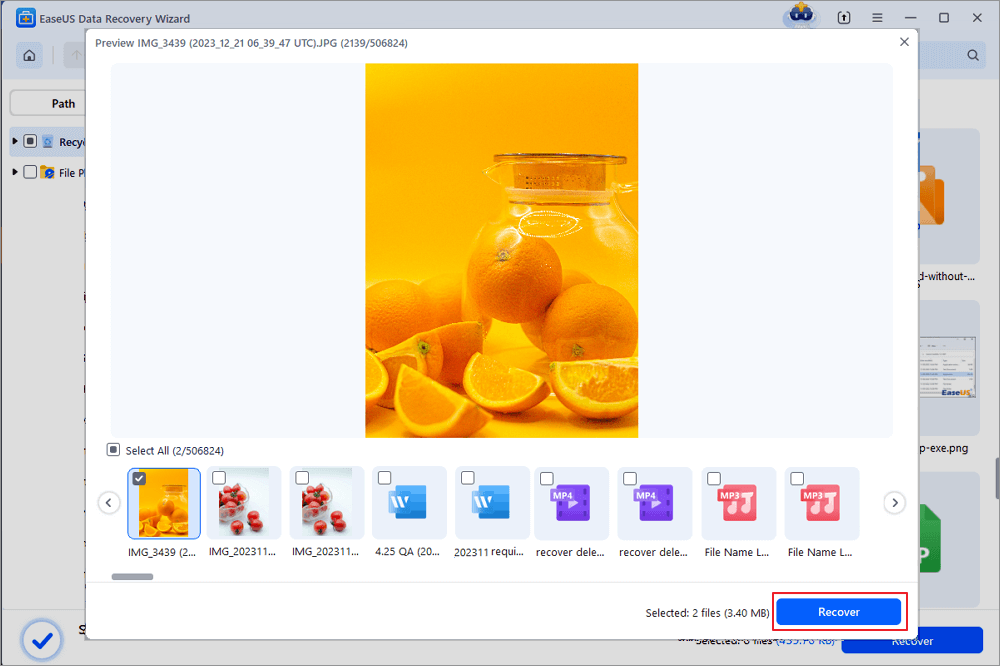
Step 3. Once you locate the files you want to restore, you can double-click it for a full preview. Then, select the target files and click "Recover". We suggest you select a different volume or an external USB drive to save the recovered files to avoid data overwriting. You can choose a cloud storage, such as OneDrive, Google Drive, etc., and click "Save" to save your recovered files.
Was This Page Helpful?
Brithny is a technology enthusiast, aiming to make readers' tech lives easy and enjoyable. She loves exploring new technologies and writing technical how-to tips. In her spare time, she loves sharing things about her game experience on Facebook or Twitter.
Related Articles
-
How to Empty Recycle Bin Synology NAS? Manual and Automatic Ways
![author icon]() Dany/Jan 29, 2026
Dany/Jan 29, 2026 -
Free Download EaseUS Data Recovery Wizard Torrent, Serial Key
![author icon]() Tracy King/Feb 12, 2026
Tracy King/Feb 12, 2026 -
Download EaseUS Data Recovery Wizard Professional 17.0 Full Version with Torrent
![author icon]() Tracy King/Jan 29, 2026
Tracy King/Jan 29, 2026 -
EaseUS Free Trial Code: Get EaseUS Data Recovery Wizard License Code Free
![author icon]() Tracy King/Feb 12, 2026
Tracy King/Feb 12, 2026