The Dish Hopper is the finest whole-home DVR and cable/satellite receiver experience people have experienced so far. You can use DVR external hard drives with Dish Hopper to share or store your recordings. However, there are still situations where you may wish to format the Dish Hopper hard drive. These include when trying to improve security, change the drive's function, or install a new file format. Also, you may format the disc while trying to fix some dreadful hardware issues.
If you wish to change the format of your Dish Hopper external hard drive but don't know about the best format, we've got you covered. In this article, you'll discover the best Dish Hopper External Hard Drive Format and how to set it guide. Let's get into the details!
What Is the Best Dish Hopper External Hard Drive Format?
Looking for the best file system format for your Dish Hopper external hard drive? Find out in this section! Some of the common external hard drive formats are:
- FAT32: The Windows File Allocation Table 32 (FAT32) is the oldest file system still in use today. It replaced the FAT16 format used by MS-DOS and Windows 3 and was introduced with Windows 95.
- exFAT: As of service packs for Windows XP and Windows Vista, the exFAT file system has been available to users since its introduction in 2006.
- NTFS: Windows typically utilizes this newer, more reliable file system called NTFS. The NTFS file system is used for formatting drives when Windows is installed.
- Ext2: It is a file system for the Linux kernel. As an alternative to the extended file system, it was created by French software developer Rémy Card.
- Ext3: The Linux kernel frequently employs a journaled file system called ext3 or a third extended filesystem. It ensures that your data stays intact even if your computer unexpectedly shuts down in an insecure way.
| Features | FAT32 | exFAT | NTFS | Ext2 | Ext3 |
|---|---|---|---|---|---|
| Speed | 4-5 MB/s | 15 MB/s | 25 MB/s | 1.44 MB/s | 120 MB/s |
| Size Limit | 2TB | 16 EiB | 256TB | 4TB | 32TB |
| Security | No recoverability and file compression | No encryptions and user permissions | Provide encryption, recoverability, and user permissions | No protection for malware attacks and software defects | Prevents loss of data integrity |
| Performance | Best on small storage volumes | Improved performance on USB and flash drives | Best performance on large files | Extend storage limits and improve performance | Good performance on large files |
Although ext3 is as good as NTFS in supporting large files and has a better hard drive speed, it is better suitable for Linux kernel than Windows. When it comes to Windows-based storage devices, NTFS is your best bet.
However, exFAT is superior for portable storage devices because of its improved efficiency in managing power and memory. You may also utilize the same storage device with both Windows and macOS. Moreover, the sole reason to use the FAT32 disc format nowadays is to access files from older OS. Ultimately, it depends on your preference for which file system you want to format your Dish Hopper external hard drive.
Set the Best Dish Hopper External Hard Drive Format
Now that you know the best Dish Hopper external hard drive format, you must be wondering how to set it on your hard drive. And that's exactly what you'll find out in this section. In this section, we've listed two of the finest methods to set up the best format on your Dish Hopper external hard drive, which include:
1. Set Dish Hopper External Format via EaseUS Partition Master
The easiest and most reliable method to set your Dish Hopper External format is by using EaseUS Partition Master. EaseUS Partition Master Free, the finest free disc manager, has capabilities that will blow you away. This freeware partition tool is ideal for Windows novices because of its ease of use.
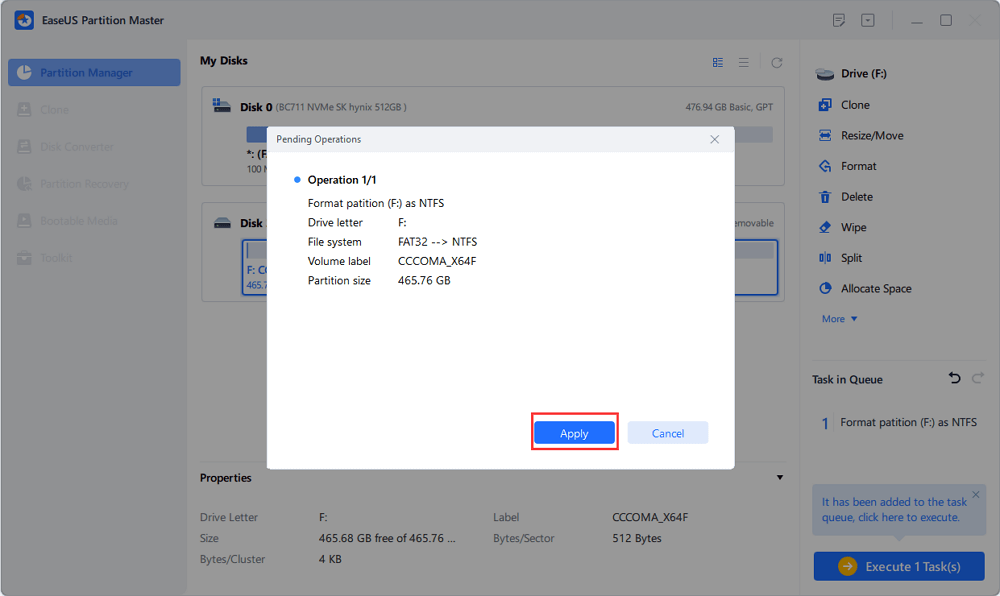
Step 1. Launch EaseUS Partition Master, right-click the partition on your external hard drive/USB/SD card which you want to format and choose the "Format" option.
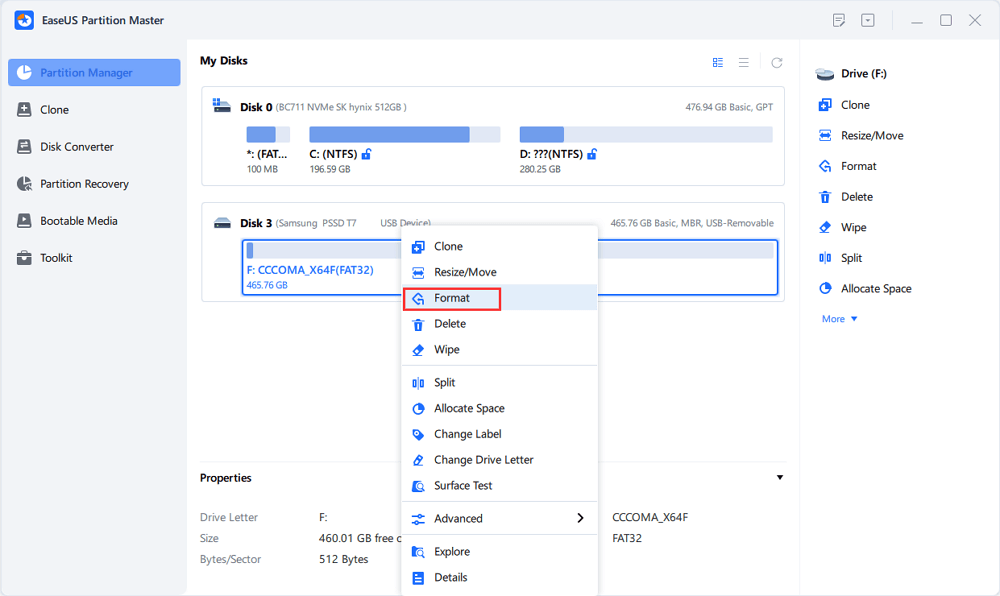
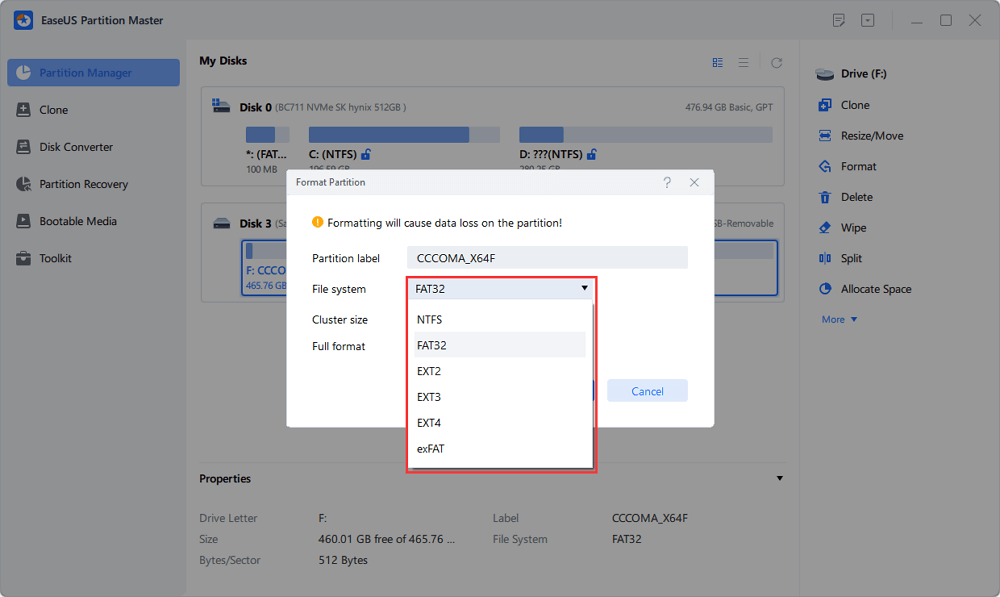
Step 2. Assign a new partition label, file system (NTFS/FAT32/EXT2/EXT3/EXT4/exFAT), and cluster size to the selected partition, then click "OK".
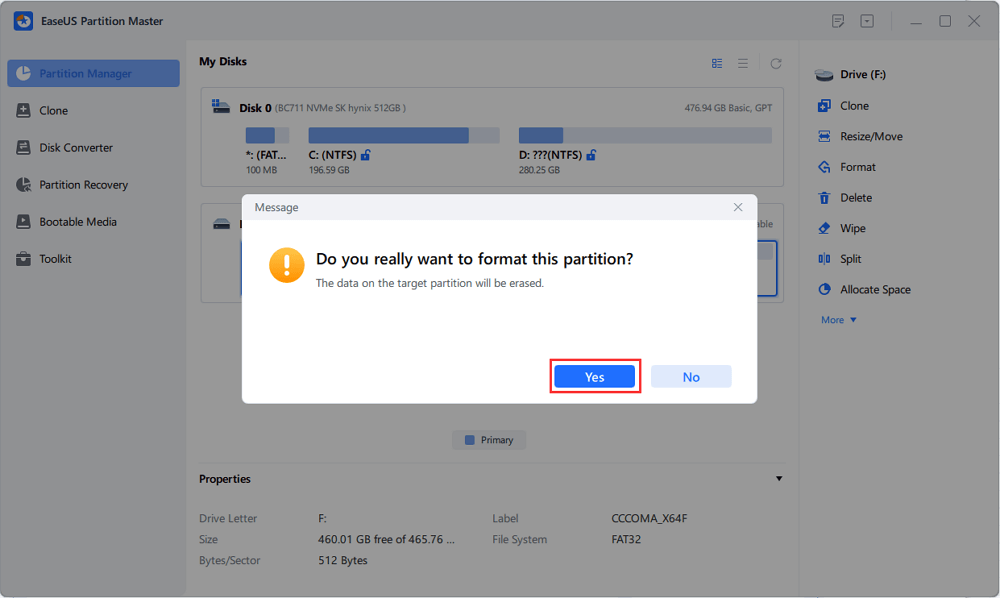
Step 3. In the Warning window, click "Yes" to continue.
Step 4. Click the "Execute 1 Task(s)" button in the top-left corner to review the changes, then click "Apply" to start formatting your external hard drive/USB/SD card.
Set the best Dish Hopper external hard drive format by EaseUS Partition Master today! Besides setting the format, you can also easily convert NTFS to FAT32. It also lets you check disk and fix the corrupted file system.
2. Set Dish Hopper External Format via File Explorer
Another way to set Dish Hopper's external format is using Windows File Explorer. If your computer has recognized the Dish Hopper hard drive, you will not need any additional software to format the disc, as you can do it simply from File Explorer. Even while it does not have as many customization possibilities as Disk Management software like EaseUS Partition Master, it is still possible to format the Dish Hopper hard disc without any problems.
To set Dish Hopper external format via Windows File Explorer, follow the steps below:
Step 1: Connect your Drive to the Computer
First and foremost, connect your Dish Hopper drive to your computer via a USB port.
Step 2: Open File Explorer
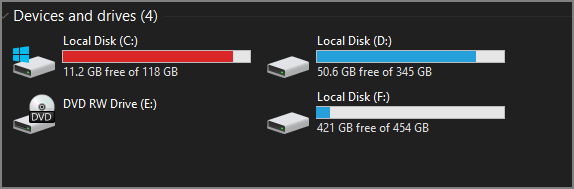
Now, open "Windows File Explorer" in the Search menu. Click on "This PC", and you will see the drive under the "Devices" and drive section.
Step 3: Format the Hard Drive
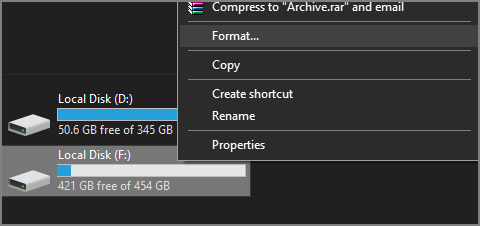
You need to right-click on the Dish Hopper drive and select "Format" from the menu.
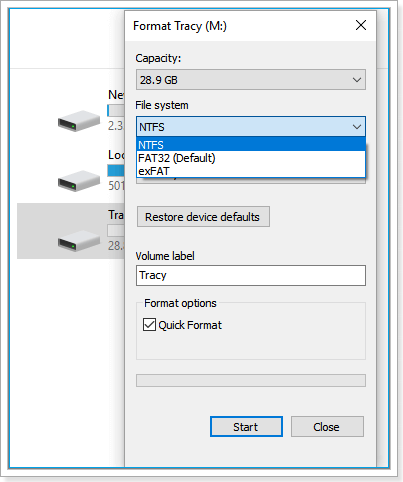
Step 4: Set Best Format
Select the format you wish to set under the "File System" section in the Format window. You can also set the Capacity and Volume Label. After that, check the "Quick Format" checkbox and click on "Format" to put the best Dish Hopper external format.
Conclusion
This is all about the Dish Hopper External Hard Drive Format guide. We hope you've enjoyed reading it and know how to set up the best format on your Dish Hopper external hard drive now! It is necessary to format your hard drive when you wish to set up a new hard drive format or prevent some security risks. Moreover, please let us know your opinion and how we can improve the guide in the commend. If you find it helpful, share it with friends today!
FAQ of Dish Hopper External Hard Drive Format
After reading the article, you must have some questions. You'll find answers to those questions here:
1. How do I use an external hard drive with Dish Hopper?
To use an external drive with DISH Hopper, follow these steps:
Step 1. Connect your external drive to your DISH Hopper receiver.
Step 2. Call the DISH Hopper network to activate your hard drive if you're connecting it for the first time.
Step 3. They will prompt you to the authentication window; click Yes to authenticate. Now, you can use it to send your recordings.
2. What format are DVR hard drives?
Some of the most common DVR hard drive formats are FAT32, NTFS, EXT2, and exFAT.
3. Why is my DVR not recognizing my hard drive?
If your DVR is not recognizing the hard drive, you can have the following problems:
- The ribbon on the hard drive is torn.
- The SATA port on the main board has failed.
- There can be insufficient power.
- An incompatible hard drive was installed, and Optiview DVR/NVR could not read it.
Was This Page Helpful?
Cici is the junior editor of the writing team of EaseUS. She accepted the systematic training on computers at EaseUS for over one year. Now, she wrote a lot of professional articles to help people resolve the issues of hard drive corruption, computer boot errors, and disk partition problems.
Related Articles
-
How to Fix 'the Archive Is Either in Unknown Format Or Damaged' [100% Working Solution]
![author icon]() Cici/2026-03-29
Cici/2026-03-29 -
Black Myth: Wukong Save File Location & Config File Location
![author icon]() Jerry/2025-09-01
Jerry/2025-09-01 -
How to Install macOS Ventura on Unsupported Mac with OpenCore Legacy Patcher
![author icon]() Dany/2026-05-17
Dany/2026-05-17 -
System Preferences Not Responding on Mac: Possible Causes and Solutions
![author icon]() Brithny/2025-09-17
Brithny/2025-09-17
EaseUS Data Recovery Services
EaseUS data recovery experts have uneaqualed expertise to repair disks/systems and salvage data from all devices like RAID, HDD, SSD, USB, etc.