macOS Sonoma introduces many new features and enhancements, but with every software update, it may sometimes result in unexpected problems. Customers have observed that the Finder is not responding after updating to Sonoma.
As the Finder is the backbone of macOS and is responsible for file management and navigation, it may disturb your productivity if it stops operating properly.
This tutorial will examine the reasons and provide five effective solutions to fix Finder not responding after updating to Sonoma. We have options to get your Finder back on track, whether you're a tech-savvy user or a newbie. Take a look!
- Fix 1. Force Quit Finder
- Fix 2. Restart Your Mac
- Fix 3. Delete the Finder Preferences File
- Fix 4. Restart Mac in Safe Mode
- Fix 5. Downgrade from macOS Sonoma to Ventura
Why is Finder Not Responding After Updating to Sonoma
After upgrading to macOS Sonoma, some users have reported that the Finder is not behaving as it should. This critical application, which manages files and navigates the Mac's file system, becomes unresponsive, causing a substantial disturbance in the user experience.
My MacBook Pro system was on 13 latest version. But today, I got a software update to 14. But, after performing the update, the Finder is not responding at all. All the other app seems to work ok... from the Apple Community
There may be several reasons why the Finder stops responding after installing the Sonoma update. Corrupted system files, incompatibilities with third-party applications, and even fundamental hardware issues are all potential reasons. These problems might show as unresponsive windows, spinning beachballs, or apps not working on Sonoma, making it impossible to use your Mac properly.
In the following sections, we'll look at five tried-and-true approaches for dealing with this issue, suggesting strategies to get your Finder back up and running and your Mac functioning smoothly again.
How to Fix Finder Not Responding After Updating to Sonoma
After determining why the Finder may stop functioning after a macOS Sonoma update, it's critical to investigate alternative remedies. Below, we'll review two major remedies that might help you remedy this problem. Remember that you may need to give your system time to execute the instructions between these stages.
Fix 1. Force Quit Finder
You may force quit Finder if it becomes unusable following the Sonoma update. Follow the steps below to see how it's done:
Step 1. To launch the "Force Quit Applications" window, press "Option + Command + Escape".

Step 2. Choose "Finder" from the list of available apps.
Step 3. Click the "Force Quit" button at the bottom of the window.
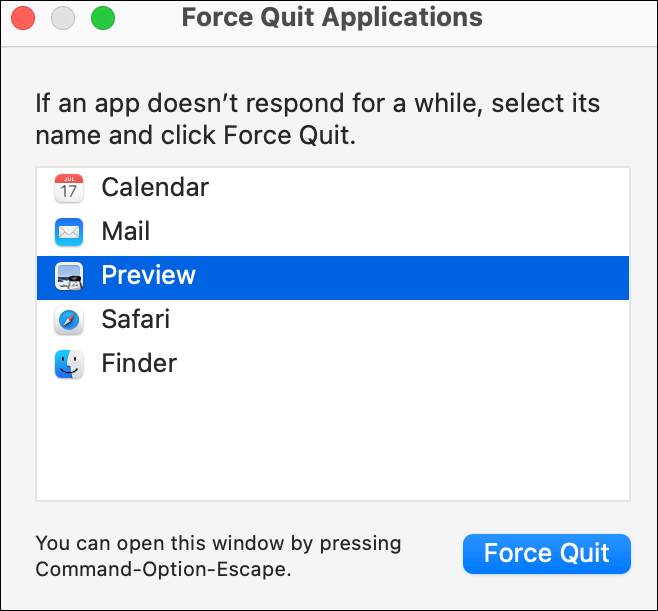
The Finder should shut down and restart automatically. Check whether the issue is resolved.
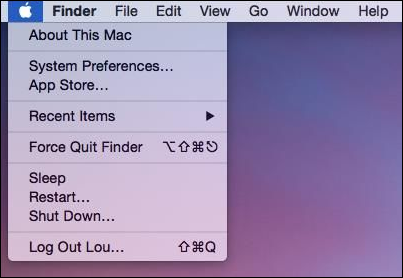
Fix 2. Restart Your Mac
A quick restart may remedy Finder issues. Follow the steps below to restart your device:
Step 1. Select Apple from the top-left menu.
Step 2. Select "Restart" from the drop-down.

Step 3. To continue, click "Restart" in the confirmation dialog.
Your Mac will restart; ideally, the Finder will behave as intended.
Fix 3. Delete the Finder Preferences File
To resolve the unresponsive problem, we shall use the Finder's preferences. However, it is critical to proceed with care since wrong actions may result in data loss or unintended destruction of critical files.
Suppose any crucial data is mistakenly erased or becomes inaccessible during the process. We suggest using professional data recovery software like EaseUS Data Recovery Wizard for Mac Pro to recover your lost data.
The advanced EaseUS data recovery software can recover permanently deleted files on Mac and recover lost data due to system failure, file deletion, and data corruption.
Both beginners and experts may utilize its easy interface. If you've mistakenly lost data while trying to repair Finder, EaseUS Data Recovery Wizard for Mac Pro may help. It can recover a variety of file kinds from your Mac's storage, including documents, images, movies, and more. Here are the steps you can refer to:
Step 1. Search for lost files
Select the disk location to search for lost files (it can be an internal HDD/SSD or a removable storage device) on macOS Sierra, High Sierra, Mojave, Catalina, Big Sur, Monterey, Ventura, and the latest Sonoma. Click the "Search for lost files" button.

Step 2. Go through the scanning results
EaseUS Data Recovery Wizard for Mac will immediately scan your selected disk volume and display the scanning results.

Step 3. Select the file(s) and recover
In the scan results, select the file(s) to preview and click the "Recover" button to have them back.

Remember that prevention is preferable to cure. Always make backups of your critical data before trying any system updates or adjustments to guarantee that your data is secure and readily recoverable in the event of an unexpected data loss.
Share this article on social media to help others learn how to fix the Finder not responding after updating to macOS Sonoma error.
Fix 4. Restart Mac in Safe Mode
If the above workarounds haven't repaired the Finder's unresponsiveness after upgrading to Sonoma, restart your Mac in Safe Mode. Safe Mode starts your Mac with the bare minimum of system extensions and drivers, which might help you detect and isolate the problem. Here's how to go about it:
Step 1. Go to the Apple menu and choose "Shut Down".
Step 2. Hold down the "Shift" key while pressing the power button.
Step 3. When you see the Apple logo or a spinning gear, let go of the "Shift" key.
Step 4. When you log in, your Mac enters Safe Mode. The screen's top-right corner displays "Safe Boot".
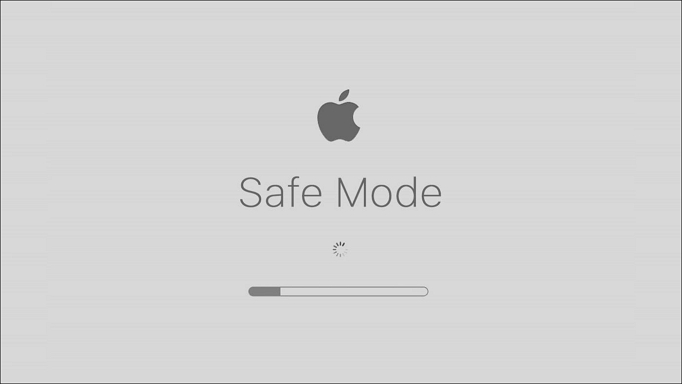
In Safe Mode, your Mac will do a directory check on your startup drive and load just the necessary system applications. If the Finder is responsive in Safe Mode, a third-party program or plugin may be causing the issue. After that, you may begin troubleshooting by finding and uninstalling troublesome applications.
Fix 5. Downgrade from macOS Sonoma to Ventura
If you've tried all of the preceding remedies and the Finder still doesn't respond after upgrading to macOS Sonoma, you may want to try reverting to a more stable version, such as macOS Ventura. This is a sophisticated method, so back up your data. Here's how to downgrade macOS Sonoma to Ventura:
Step 1. Make a full backup of your data before downgrading the OS. Back up using the Time Machine or EaseUS data recovery software.
Step 2. Browse the Apple store to download the macOS Ventura installer.
Step 3. Do not open the downloaded file. If it begins automatically, click "File" and "Quit". The Ventura installer will now show in your Applications folders.
Step 4. Connect a USB stick and call it 'Ventura installer'.
Step 5. Open Terminal from Applications > Utilities. Replace [MyVolume] with your USB drive name in Terminal: sudo /Applications/Install\ macOS\ Ventura.app/Contents/Resources/createinstallmedia --volume /Volumes/MyVolume.

Step 6. Execute the command with "Return". Close "Terminal" after Terminal verifies installation creation.
Step 7. Select the Ventura Installer from "System Settings > General > Startup Disk" in the Apple menu.
Step 8. Shut down and restart your Mac in recovery mode.
Step 9. In macOS Utilities, choose "Disk Utility". Select "Erase" on your Mac's startup disk. Use the on-screen instructions to wipe the disk.
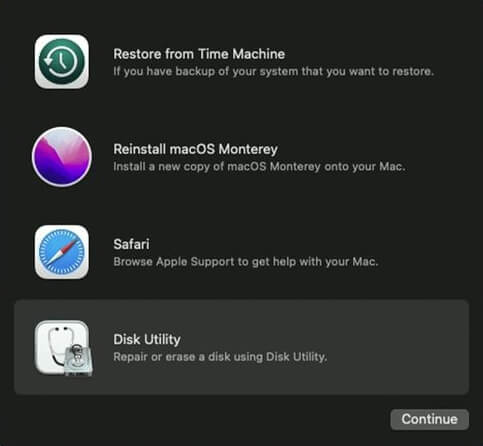
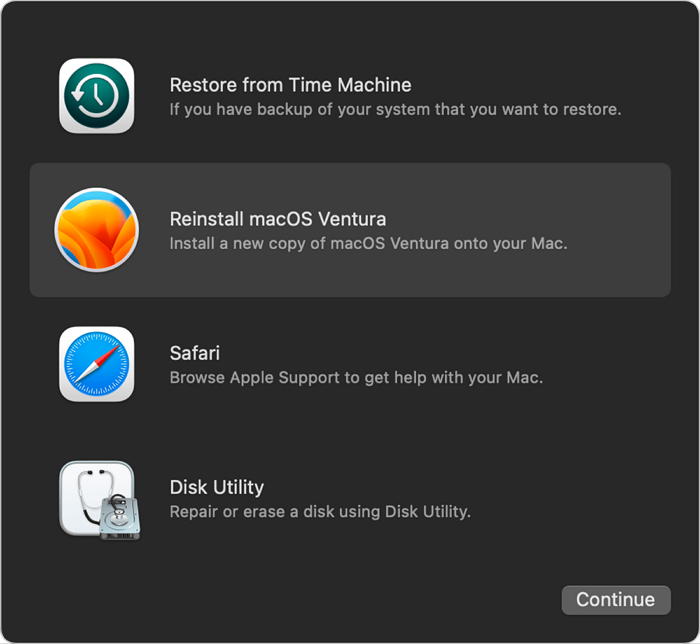
Step 10. Exit Disk Utility and choose "Reinstall macOS Ventura".
If none of the above remedies have cured the Finder unresponsiveness problem, you might try downgrading your macOS version as a final option. Before starting this operation, taking care of and maintaining data backup is critical.
Conclusion
It might be annoying to experience Finder unresponsiveness after upgrading to macOS Sonoma, but there are various practical remedies to this problem. Users have a variety of alternatives dependent on the severity of the issue, ranging from forcibly closing Finder to upgrading to a more stable macOS version. However, it is critical to start with the easiest remedies and only go on to more sophisticated solutions if required.
Additionally, always prioritize data backup to protect critical information throughout the troubleshooting procedure. Users may restore control of the Finder and enjoy a more fluid macOS experience by following these instructions. Consider utilizing EaseUS Data Recovery Wizard for Mac Pro, a dependable application for recovering lost information, for data recovery requirements.
Finder Not Responding After Updating to Sonoma FAQs
Following are some challenges that users face with Finder after updating to macOS Sonoma:
1. Why is my Finder not responding?
Program incompatibilities, damaged settings, or system malfunctions might cause an unresponsive Finder. It commonly follows the macOS Sonoma update, which may cause compatibility difficulties. Force closing Finder, restarting your Mac, and removing Finder preferences should fix this.
2. How do I force reset my Finder?
Follow these instructions to reset the Finder on macOS forcibly:
Step 1. Click the Apple logo in the upper-left corner and choose "Force Quit".
Step 2. In the Force Quit Applications box, choose "Finder".
Step 3. Select the "Re-launch" option.
This will restart Finder and may cure the unresponsiveness problem. If the issue continues, try the other solutions suggested in the article, such as restarting your Mac in Safe Mode or downgrading to a more stable macOS version.
Was This Page Helpful?
Daisy is the Senior editor of the writing team for EaseUS. She has been working at EaseUS for over ten years, starting as a technical writer and moving on to being a team leader of the content group. As a professional author for over ten years, she writes a lot to help people overcome their tech troubles.
Brithny is a technology enthusiast, aiming to make readers' tech lives easy and enjoyable. She loves exploring new technologies and writing technical how-to tips. In her spare time, she loves sharing things about her game experience on Facebook or Twitter.
Related Articles
-
Internet Browsers Not Working after Windows Upgrade? Fix It Now!
![author icon]() Tracy King/2025-07-04
Tracy King/2025-07-04 -
How to Activate Windows 10 for Free Permanently in 2025
![author icon]() Jean/2025-12-11
Jean/2025-12-11 -
[Full Guide] How to Factory Reset PC Without Turning It On
![author icon]() Jerry/2025-07-04
Jerry/2025-07-04 -
[New Tutorial] Backup Game Saves on PS4 in Three Methods
![author icon]() Dany/2025-07-04
Dany/2025-07-04
EaseUS Data Recovery Services
EaseUS data recovery experts have uneaqualed expertise to repair disks/systems and salvage data from all devices like RAID, HDD, SSD, USB, etc.