Disk Management is an in-built feature of Windows OS that enables us to organize all the disk-based data. Sometimes, it seems that the "Delete Volume Greyed Out" in Disk Management. People struggle to activate the Delete Volume functionality to delete any volume or remove partitions from the disk. This guide is focused on this issue that discusses the reasons and solutions to deal with it.
Why Is Delete Volume Greyed Out
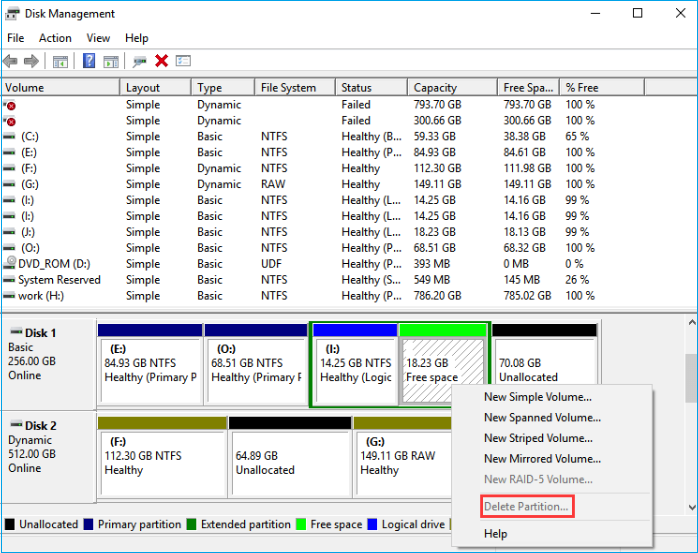
If you are dealing with a Delete Volume Greyed Out issue in your windows computer, you may be wondering why it happens. Even when you delete all files in the partition, the problem remains the same, and the disk shows occupied.
Well, here are the most common reasons to cause these errors:
- Operation System files: The Delete volume option would be greyed out if the partition you delete has the operating system files installed.
- Page file: Page files contain the specific information present in the RAM, and these hidden files are stored in a particular volume on Hard Disk. If you want to delete this volume, you will not get the Delete partition option due to the presence of a page file in RAM.
- Virtual memory files: There is a possibility that the virtual memory files are set on the partition, so the delete volume is greyed out.
- Second partition on the USB drive: A USB drive with a second partition cannot be deleted, and the deleted volume options are greyed out. You will need to remove the second partition in the drive in order to resolve the error.
Now that you are familiar with the causes of the problem. Let's find out the ways to fix it.
- Warning
- You need to be careful to delete the system partition. If you delete the operating system, it will cause the system to fail to boot. So, remember to backup all essential data before deleting partitions.
How to Fix Delete Volume Greyed Out
How to fix this issue? Here we will introduce four methods in detail to solve this problem. So, let's discuss how to remove all the culprits and make the feature available to use.
Method 1. Delete Partition Including System via EaseUS Partition Master
If you want to delete the system partition, create a Windows boot disk and enter WinPE to delete the system partition or C partition. Fortunately, you can use a third-party tool - EaseUS Partition Master for one-stop operation. It's a safe and easy-to-use software that offers a great feature to delete partitions, including the system.
There are two stages to delete the system partition. But don't worry, we will provide the detailed information. A newbie can also use it without any hassle. Here are the steps to follow:
Guide 1. Create Bootable Drive
Step 1. To create a bootable disk of EaseUS Partition Master, you should prepare a storage media, like a USB drive, flash drive or a CD/DVD disc. Then, correctly connect the drive to your computer.
Step 2. Launch EaseUS Partition Master, and find the "Bootable Media" feature on the left. Click on it.
Step 3. You can choose the USB or CD/DVD when the drive is available. However, if you do not have a storage device at hand, you can also save the ISO file to a local drive, and later burn it to a storage media. Once made the option, click the "Create" button to begin.
- Check the Warning message and click "Yes".
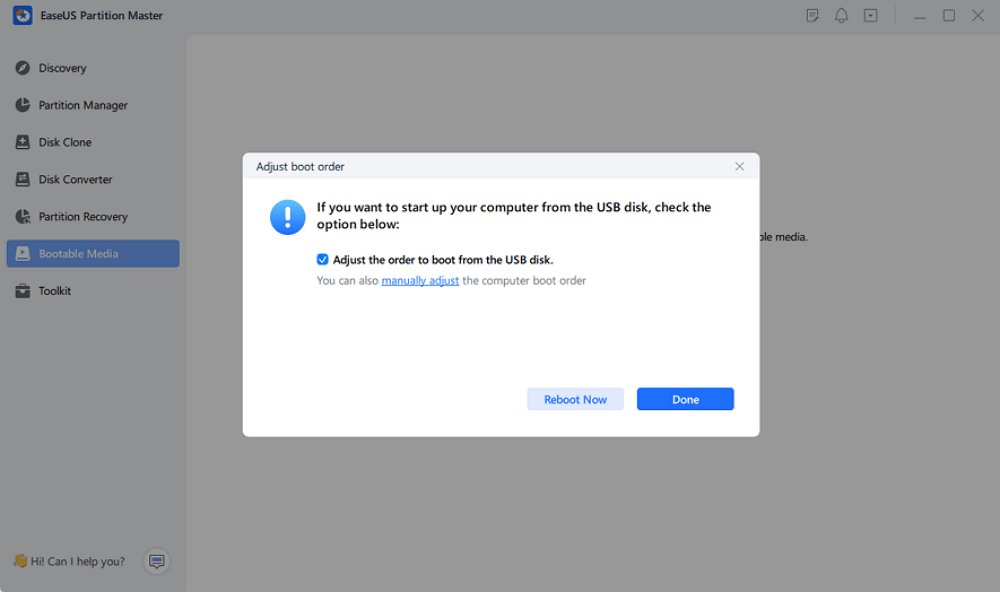
Step 4. When the process finishes, you'll see a pop up window, asking if you want to restart computer from the bootable USB.
- Reboot Now: it means you want to restart the current PC and enter EaseUS Bootable Media to manage your disk partitions without OS.
- Done: it means you don't want to restart the current PC but to use the bootable USB on a new PC.
Note: To use the bootable disk on a new PC, you need to resart the target computer and press F2/F8/Del key to enter BIOS, and set the USB bootable disk as the first boot disk.
Wait patitiently and your computer will automatically boot up from the USB bootable media and enter EaseUS WinPE desktop.

Guide 2. Delete System Partition in WinPE
Note that this will delete all existing partitions on the system disk, including the OS. So make sure you've backed up all essential content in advance.
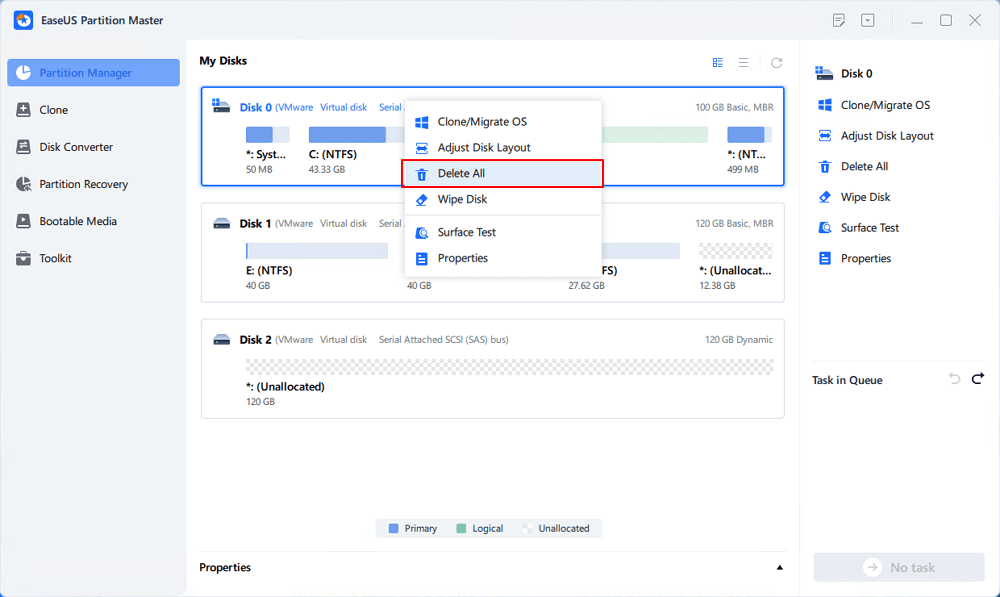
Step 1. Launch EaseUS Partition Master, go to the Partition Manager section, right-click your OS disk and select "Delete All".
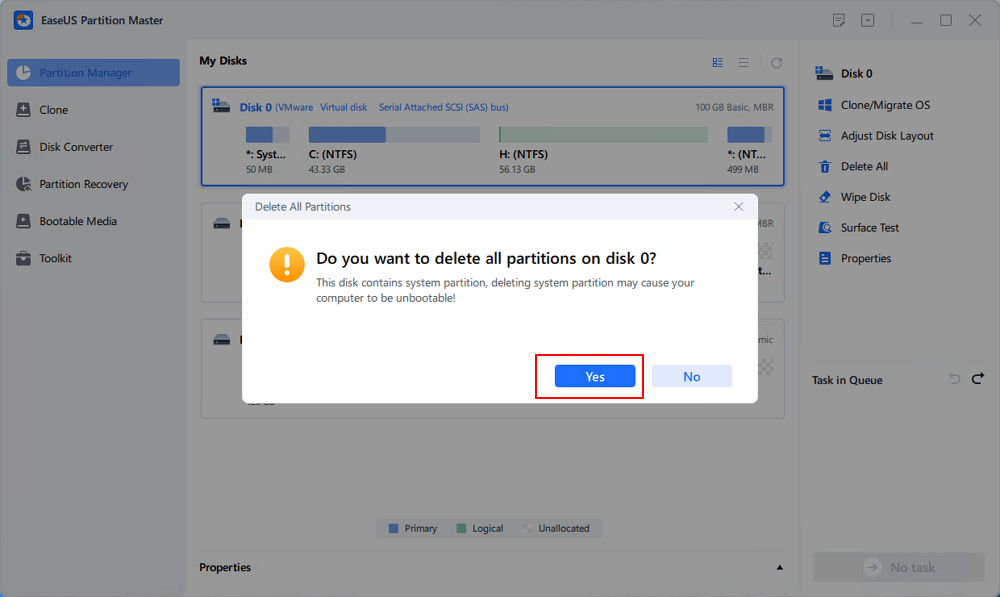
Step 2. Click "Yes" ton confirm that you are sure to delete all partitions on the OS disk.
Step 3. Click "Execute * Task" and click "Apply" to start deleting all partitions with OS on the selected disk.
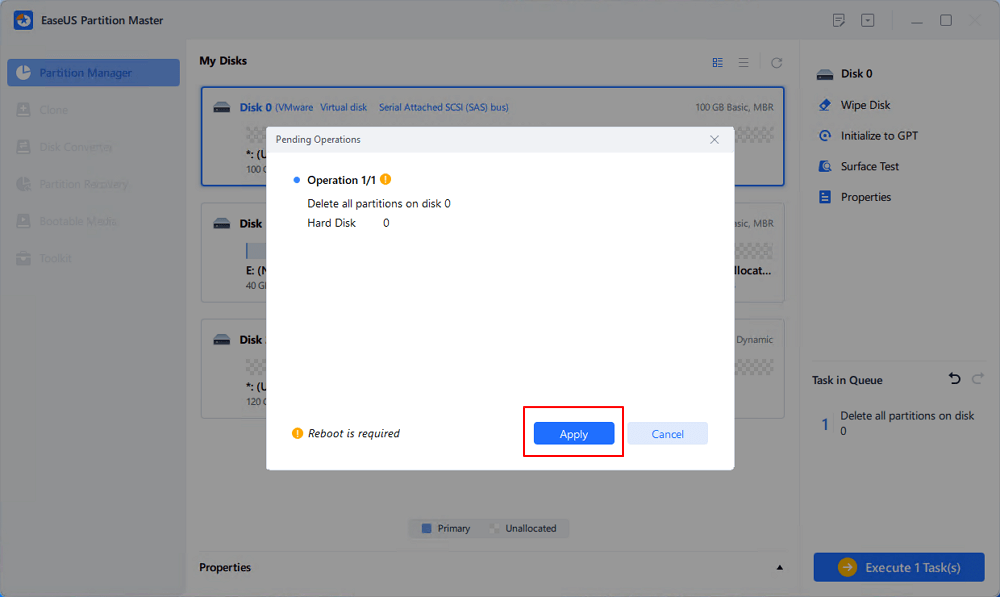
Note: After this, you'll just need to wait patiently and EaseUS Partition Master will automatically delete the OS drive and other data partition on your disk.
What Else Can EaseUS Partition Master Do?
EaseUS Partition Master is a powerful tool that can solve more problems with disk partition. It has many other features as follows:
- Delete NTFS partition
- Resize or move partitions
- Convert NTFS to FAT32 without data loss
- Extend the C drive to solve the "C drive full" error
Method 2. Delete Partition via Diskpart
Diskpart command is an easy and popular alternative to disk management on Windows. The entire process is based on the command lines and helps to increase the I/O performance of hard disks. The documentation of many programs suggests using Diskpart to create and delete the partition. Here are the steps to delete partitions via Diskpart:
Step 1: Go to the search box and type "Command Prompt." Click the app to launch it.
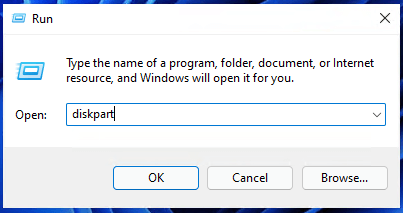
Step 2: Under the command prompt, type "diskpart" and hit "Enter" to run.
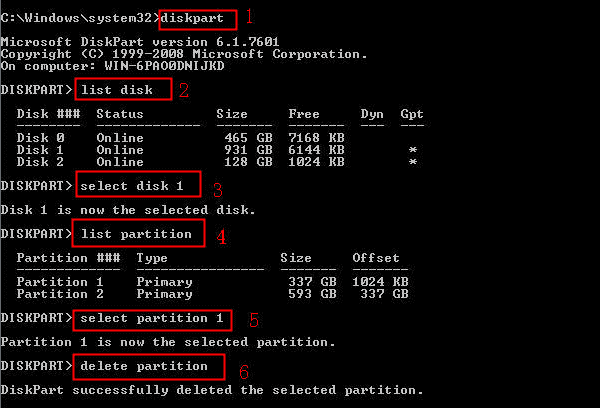
Step 3: Type the following commands one by one and hit "Enter" after every command.
list disk
select disk 1 (1 is the sequence number of the disk partition, you can enter the number accordingly)
list partition
select partition 1(1 is the sequence number of the disk partition you are going to delete)
delete partition
Step 4: Type "exit" to back to the desktop.
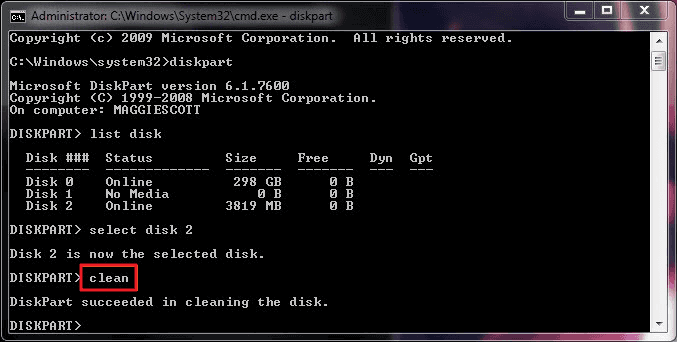
Diskpart is a tool with many features. However, you need to avoid command errors when entering commands. You can also use it to delete all partitions.
How Do I Use DiskPart to Delete All Partitions in Windows? Your Guide Is Here
On this page, you'll learn what is DiskPart, what can you do with this tool in Windows PC, and how to use DiskPart to delete a partition or delete all partitions with clean command.
Method 3. Remove the Virtual Memory Partition
The virtual memory store hidden system files in C-drive with the.SYS extension. These files are also known as pagefiles that store the information present on the RAM to save data from apps and ongoing processes. You will need to remove these files from the virtual memory partition to reduce the I/O load from the drive. Follow the given steps to remove the virtual memory partition:
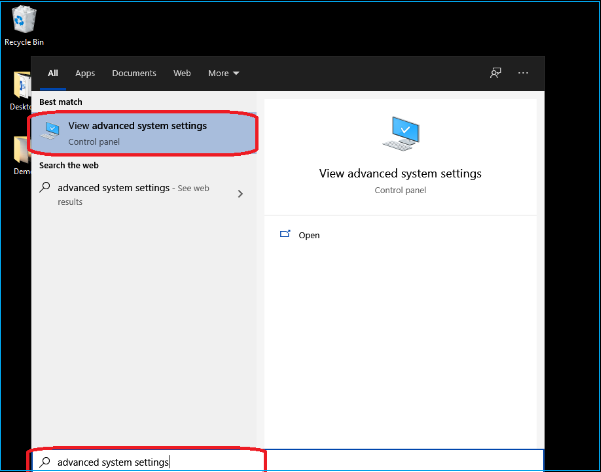
Step 1: Go to the search box and type "advanced system settings". Click to launch it.
Step 2: Select the "View advanced system settings" option.
Step 3: Tap on the "Advanced" menu, and click the "Settings" button under "Performance."
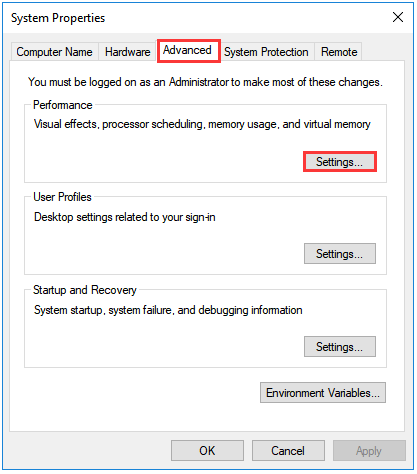
Step 4: Click the "Advanced" tab and select the "Change" button under the "Virtual memory" section.
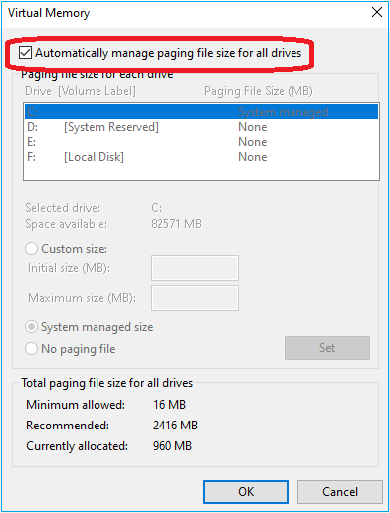
Step 5: On the "Virtual Memory" menu, uncheck the "Automatically manage paging file size for all drives" checkbox.
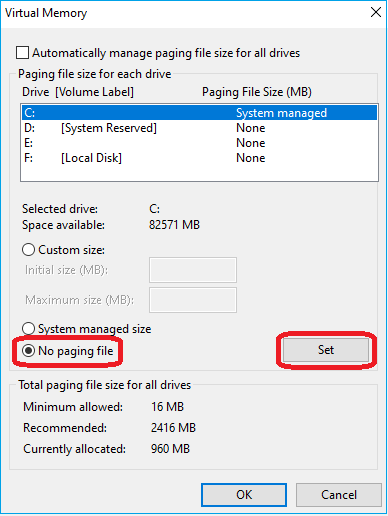
Step 6: Choose the "Custom size" option from the list and type the minimum and maximum size of the Pagefile in MB.
- Notice:
- The Pagefile size should be according to the physical memory.
Step 7: Click "No paging file", and "Set," then "OK."
Once done, Restart your computer.
Method 4. Create New Volume to Delete Partitions in the Extended Partition
You can create a New Volume to enable the Greyed volume of Deleted partitions. Here are the steps:
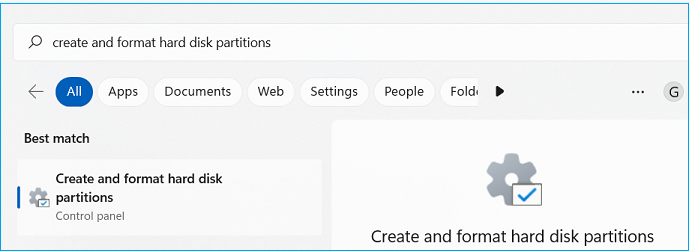
Step 1: In the Search bar, type "Create and format hard disk partitions," and click to open it.
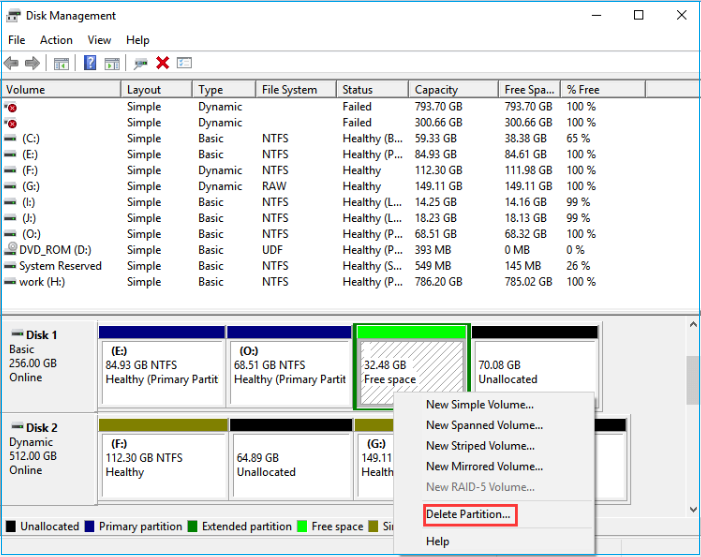
Step 2: Right-click the "Free space" and select "Create New Volume."
Step 3: Confirm the changes.
Step 4: Right-click the newly created volume, and you will find the delete volume/delete partition option available now.
In this article, we have solved the problem of the "Delete Volume greyed out." If you have encountered other Disk Management problems, click the button below to find a solution.
Conclusion
Finally, the article comes to an end after solving your problem. After understanding all the causes and solutions, you could fix Delete Volume Greyed Out issue on your Windows PC. You have four different solutions, and you can choose anyone to meet your needs. Please mention in a comment to let us know which method helped you to solve the problem successfully. You can also share this article if you like it.
FAQ of Delete Volume Greyed Out
We hope this article has provided you with all the essential information to fix the problem of Delete Volume Greyed Out. However, you can follow our FAQ section if you still have further questions.
1. Cannot delete disk volume?
If you cannot delete the disk volume, or the "Delete Volume" option is greyed out for you in Disk Management, it can be due to the following reasons: There are some Page files on the volume you want to delete. There can be operating system files or multiple virtual memory files. You will need to remove all the files in order to delete the disk volume.
2. How do I enable delete volume in Disk Management?
If you can't use the "Delete Volume" in Disk Management, you can use EaseUS Partition Master to delete partitions or fix it by following the steps below.
Step 1. Press Windows + R and type "sysdm.cpl" in the dialog box.
Step 2. Go to the "Advanced" tab, and click the "Settings" button under the Performance tab.
Step 3. Click "Advanced" from the menu and select "Change."
Step 4. Uncheck Automatically manage paging file size for all drives box, then click "No Page File".
3. How do I fix the extended volume that is greyed out?
If you want to fix the extended volume, like being unable to extend volume in the C drive, you will need to create a new partition. It will enable all the greyed-out options. To do so, open Disk Management and review the state of your disk partition. Right-click on the free space and create a new volume. You will see the greyed out are available now.
Was This Page Helpful?
Updated by Tracy King
Tracy became a member of the EaseUS content team in 2013. Being a technical writer for over 10 years, she is enthusiastic about sharing tips to assist readers in resolving complex issues in disk management, file transfer, PC & Mac performance optimization, etc., like an expert.
Cici is the junior editor of the writing team of EaseUS. She accepted the systematic training on computers at EaseUS for over one year. Now, she wrote a lot of professional articles to help people resolve the issues of hard drive corruption, computer boot errors, and disk partition problems.
Related Articles
-
Black Myth: Wukong Save File Location & Config File Location
![author icon]() Jerry/2026-05-21
Jerry/2026-05-21 -
How to Stop Windows 10 Deleting Files Automatically
![author icon]() Tracy King/2026-05-21
Tracy King/2026-05-21 -
Screen Turns Off When Playing Games - 6 Ways to Fix!
![author icon]() Jerry/2026-06-18
Jerry/2026-06-18 -
How to Repair Damaged SD Card in Android
![author icon]() Tracy King/2026-02-12
Tracy King/2026-02-12
EaseUS Data Recovery Services
EaseUS data recovery experts have uneaqualed expertise to repair disks/systems and salvage data from all devices like RAID, HDD, SSD, USB, etc.