
Content
Page Table of Contents
About the Author
Hot Topics
Are you going to use a new SSD or HDD on your Windows PC? A new drive often needs a few setup steps before you can use it. Windows needs to detect the drive, initialize it, create a partition, and format it with a suitable file system. The exact steps depend on how you plan to use the drive. A new SSD for Windows needs a different setup from a new HDD used only for file storage.
This guide walks you through the whole new disk setup and initialization process. You will also learn how to choose GPT or MBR, set up partitions, and fix common problems when Windows does not recognize a new disk.
New Disk Setup: Overview of The Whole Process
Setting up a new SSD or HDD in Windows usually takes a few steps before the drive is ready to use. After installing the drive, Windows needs to detect it first. You then need to initialize the disk, choose a partition style, create a partition, and format it with a suitable file system.
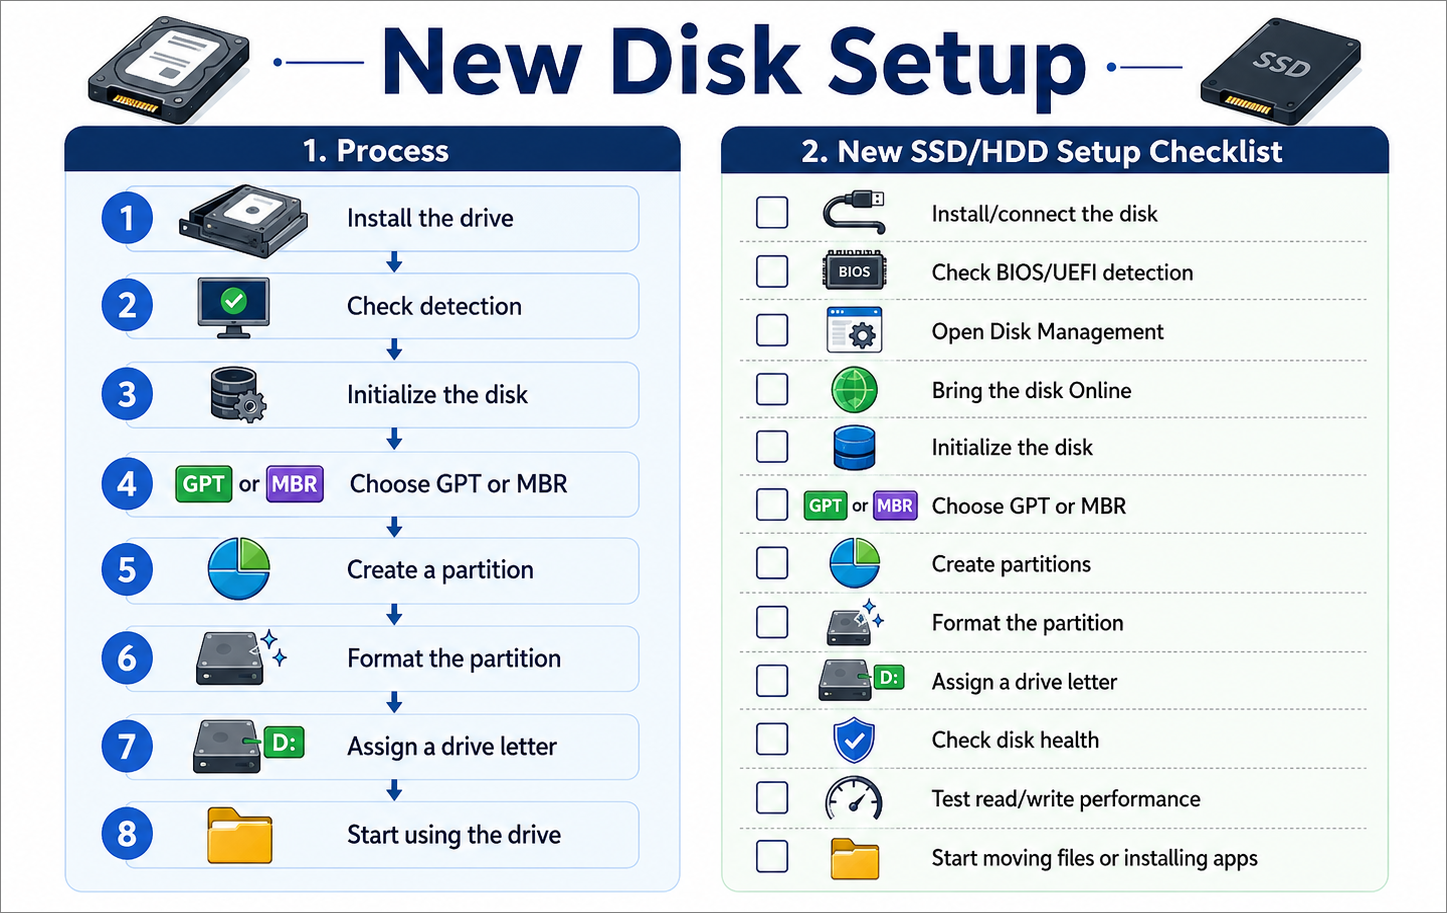
The complete new disk setup process usually looks like this:
| Step | What to do | Purpose |
| 1 | Install the SSD/HDD | Connect the new drive to your PC |
| 2 | Check detection | Make sure Windows or BIOS can see the drive |
| 3 | Initialize the disk | Prepare the disk for partition management |
| 4 | Choose GPT or MBR | Select a suitable partition style |
| 5 | Create a partition | Turn unallocated space into a usable volume |
| 6 | Format the partition | Set a file system such as NTFS or exFAT |
| 7 | Assign a drive letter | Make the drive easy to access in File Explorer |
| 8 | Start using the drive | Store files, install apps, or use it for Windows |
For most new storage drives, you can complete the basic setup with Windows Disk Management. However, if you need to resize partitions, manage unallocated space, clone a disk, or migrate Windows to a new SSD, a dedicated partition manager can make the process easier. EaseUS Partition Master is one option that brings these disk setup and management features together in one place.
In the following sections, we will walk you through the most important disk setup and initialization steps, from installing and initializing a new drive to partitioning, formatting, and preparing it for different uses.
How to Install a New Disk
Installing a new SSD or HDD is the first step in setting up additional storage on a Windows PC. Before you can use the disk, you need to install it correctly, connect it to your computer, and make sure Windows detects it.
Step 1. Turn Off Your Computer.
Shut down your computer and disconnect it from the power source. Skip this step if you are installing an external drive.
Step 2. Prepare the New Disk.
Remove the disk from its packaging and hold it by the edges. Avoid touching the connectors or circuit board. Prepare the required accessories based on the drive type, such as:
- A SATA data cable for a 2.5-inch SSD or 3.5-inch HDD.
- A SATA power cable from the computer's power supply.
- An M.2 mounting screw for an M.2 SSD.
- A USB cable or enclosure for an external drive.
Step 3. Install and Connect the Disk.
The installation process depends on the type of drive you are using.
- SATA SSD or HDD: Open the computer case, mount the drive in an available bay, and secure it with screws. Connect the drive to the motherboard with a SATA data cable, then connect it to the power supply.
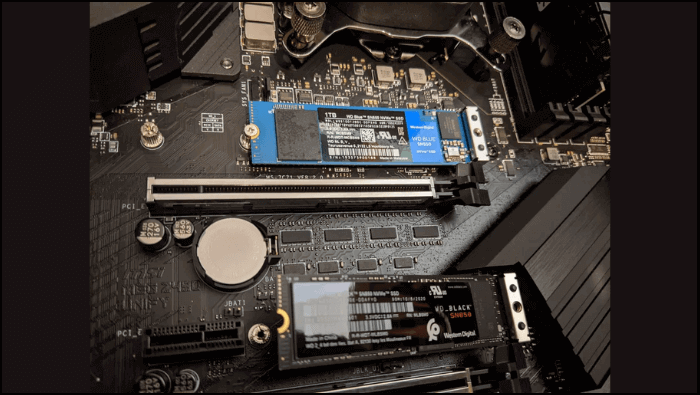
- M.2 SSD: Insert the SSD into a compatible M.2 slot at a slight angle, press it down gently, and secure it with the mounting screw.
- External drive: Connect the drive to your computer using a USB cable.
Make sure the M.2 slot supports your SSD's interface, such as PCIe NVMe or SATA, because some M.2 slots support only one type.
Step 4. Start Your Computer.
Reconnect the power cable and turn on your computer. Windows should automatically detect the new disk.
Step 5. Check the Disk in Windows.
Open Disk Management and check whether the new disk appears. It may be listed as Unknown, Not Initialized, or Unallocated if it has not been set up yet.
Once Windows detects the disk, you can initialize it and continue with partition setup.
How to Initialize a New Disk
A new SSD or HDD often needs to be initialized before you can create partitions and use it in Windows. Disk initialization sets up the partition style, such as GPT or MBR, for the drive. After initialization, the disk usually appears as Unallocated in Disk Management, and you can create a new volume.
How to Initialize a New SSD
For a brand-new SSD, you can initialize it directly in Windows Disk Management:
Step 1. Press Windows + X and select Disk Management.
Step 2. Find the new SSD marked Unknown or Not Initialized.
Step 3. Right-click the disk and select Initialize Disk.
Step 4. Choose GPT or MBR, then click OK.
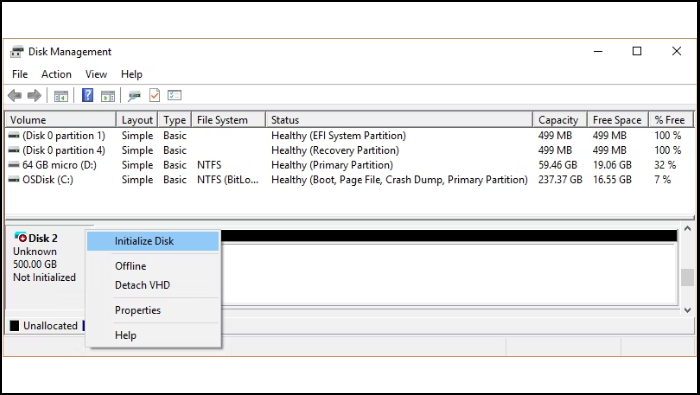
Once the SSD is initialized, its space will usually show as Unallocated. You can then create a partition and format it before using the drive.
How to Initialize a New HDD
The steps are almost the same for a new HDD.
Step 1. Open Disk Management, find the new HDD, and right-click the disk marked Unknown or Not Initialized.
Step 2. Select Initialize Disk, choose GPT or MBR, and click OK.
Step 3. The HDD will then show unallocated space. You can create a new volume, format it, and assign a drive letter to make it available in File Explorer.
GPT vs MBR for a New Disk
When you initialize a new disk, Windows asks you to choose between GPT and MBR. These are partition styles that define how partitions are organized on the drive. The correct choice depends mainly on your computer's firmware, operating system, and compatibility requirements.
For most modern Windows 10 and Windows 11 computers, GPT is the better default.
GPT vs. MBR: What's the Difference?
GPT is the newer partition style and is designed to work with modern UEFI-based systems. It supports large-capacity drives and more partitions than MBR. MBR is an older standard that is mainly used with Legacy BIOS systems and older operating systems.
| Feature | GPT | MBR |
| Modern Windows PCs | Recommended | Supported |
| Boot mode | UEFI | Legacy BIOS |
| Large-capacity drives | Better suited | More limited |
| Primary partitions | Up to 128 on Windows | Up to 4 |
| Modern system drives | Recommended | Mainly for older systems |
GPT or MBR for a New SSD/HDD?
Not sure which partition style to choose when setting up a new SSD or HDD? For most modern Windows PCs, GPT is the better choice. MBR is mainly useful for older computers or systems that still use Legacy BIOS.
| Situation | Recommended Partition Style | Why |
| New SSD on a modern Windows PC | GPT | Works well with UEFI and modern versions of Windows |
| New HDD on a modern Windows PC | GPT | Supports large-capacity drives and more partitions |
| Windows 11 system drive | GPT | Windows 11 uses UEFI and typically requires GPT for standard UEFI boot |
| Large-capacity SSD/HDD | GPT | Avoids the 2 TB MBR partition limit |
| Older PC with Legacy BIOS | MBR | Offers better compatibility with older boot systems |
| Older operating system or device | MBR | May provide better compatibility in some older setups |
How to Convert MBR to GPT or GPT to MBR
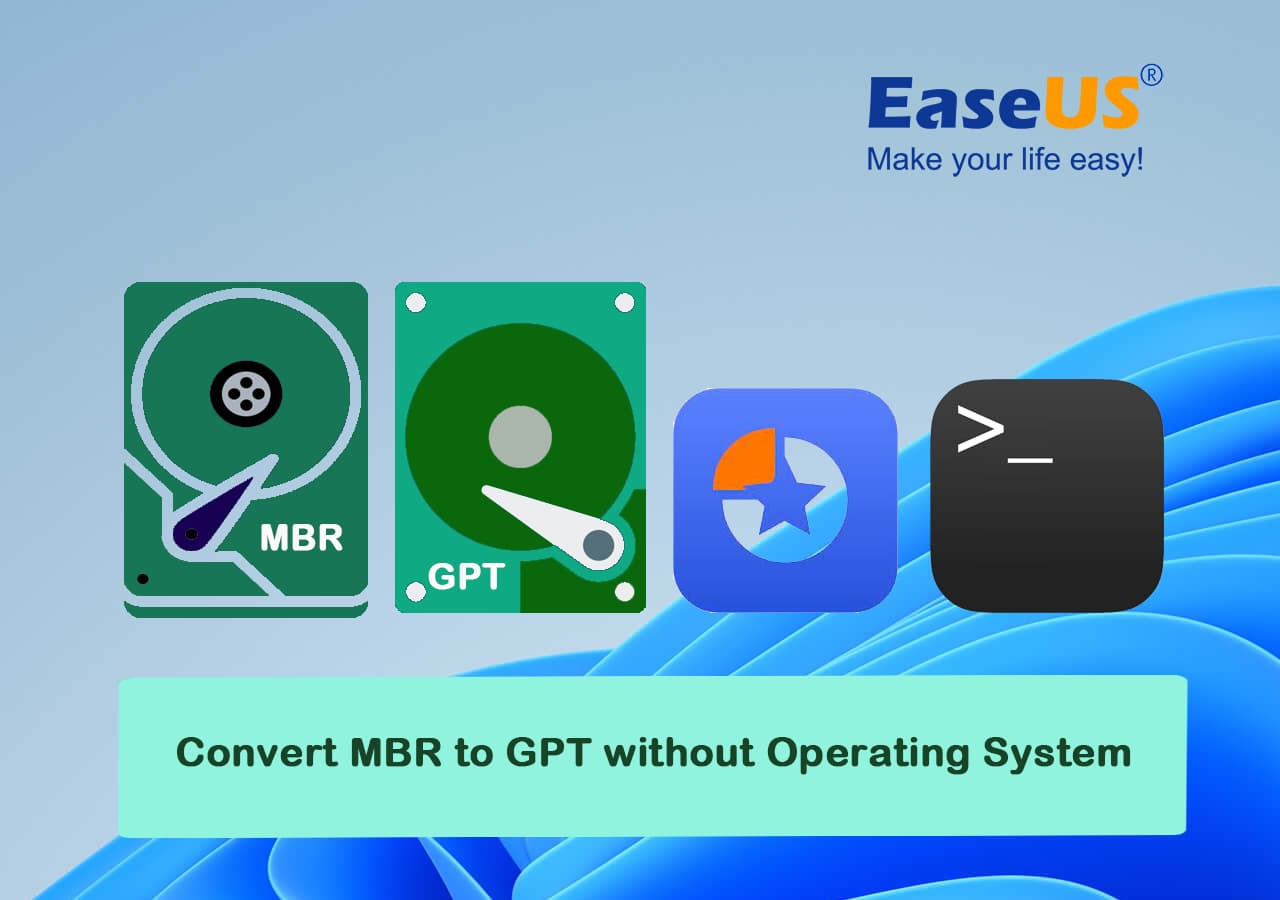
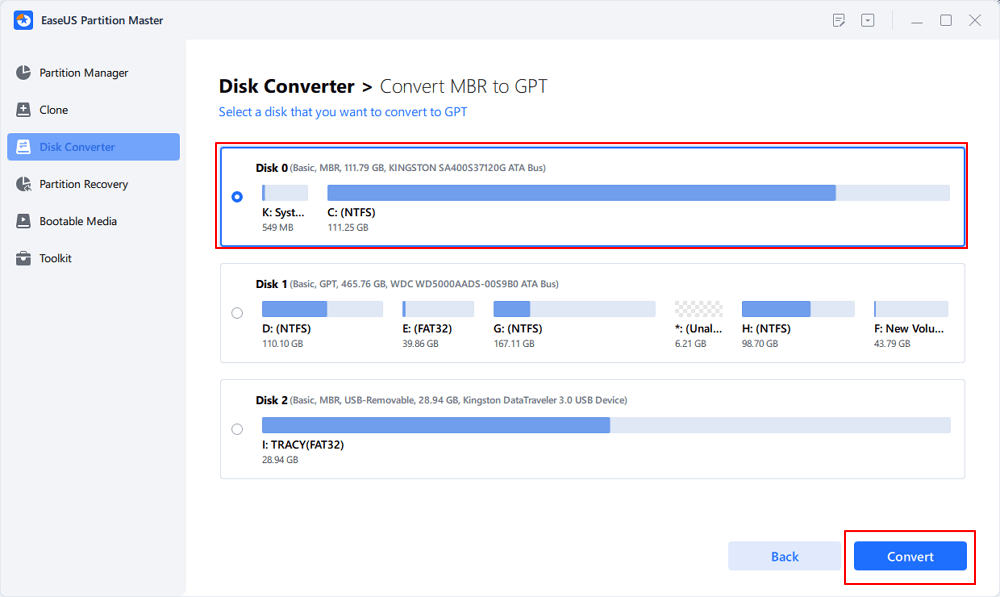
You can convert a disk from MBR to GPT or from GPT to MBR when your hardware or operating system requirements change. The easiest way to convert MBR to GPT or vice versa is to use a professional disk converter.
Step 1. Download and launch EaseUS Partition Master on your computer.
Step 2. Go to Disk Converter, select "MBR => GPT" and click "Next" to continue.
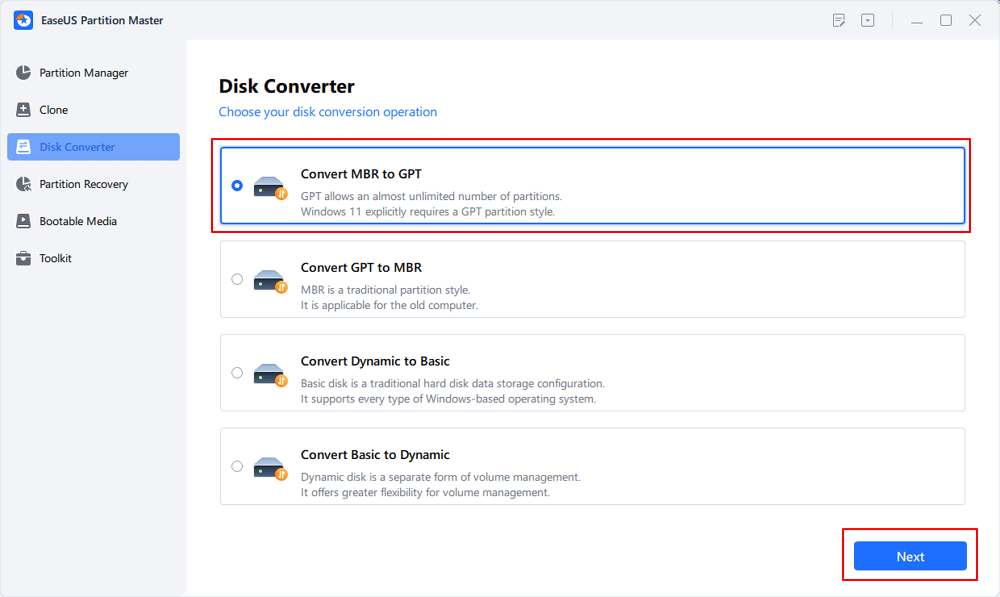
Step 3. Select the target MBR disk that you tend to convert to GPT, and click "Convert" to start the conversion.
How to Partition a New Disk (SSD or HDD)
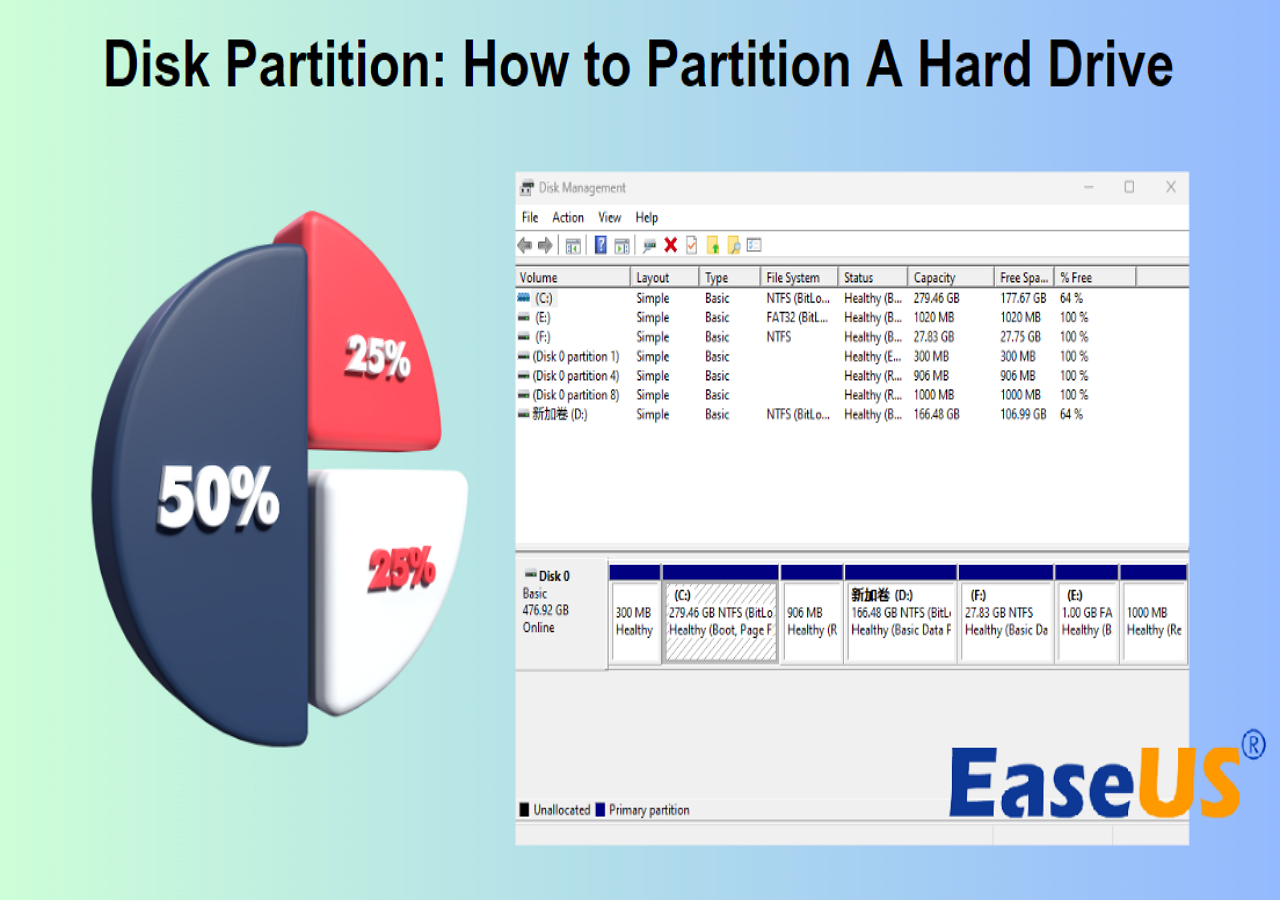
After you initialize a new SSD or HDD, Windows usually shows the available space as Unallocated. You need to create a partition before you can store files on the drive. Windows Disk Management can handle this basic task without extra software.
Step 1. Open Disk Management.
Press Windows + X and select Disk Management. Find the new SSD or HDD in the list and make sure you have selected the correct disk.
Step 2. Find the unallocated space.
A newly initialized disk usually appears with a black bar and the label Unallocated. This is the space available for creating a new partition.
Step 3. Create a new volume.
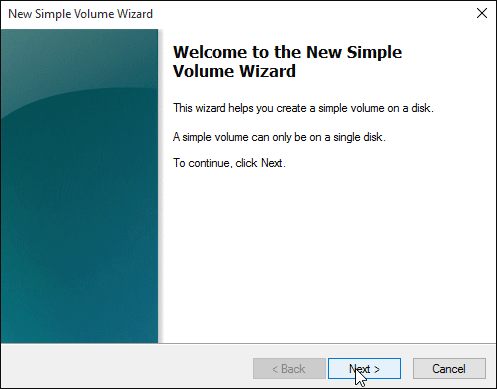
Right-click the unallocated space and select New Simple Volume. The New Simple Volume Wizard will open.
Step 4. Set the volume size.
Enter the amount of space you want to use for the partition. You can use the full available space if you want one partition on the disk.
Step 5. Assign a drive letter.
Choose a drive letter such as D: or E:. Windows will use this letter to identify the partition in File Explorer.
Step 6. Format the partition.
Choose a file system such as NTFS and complete the wizard. The new partition should then appear in File Explorer.
How to Format a New Disk
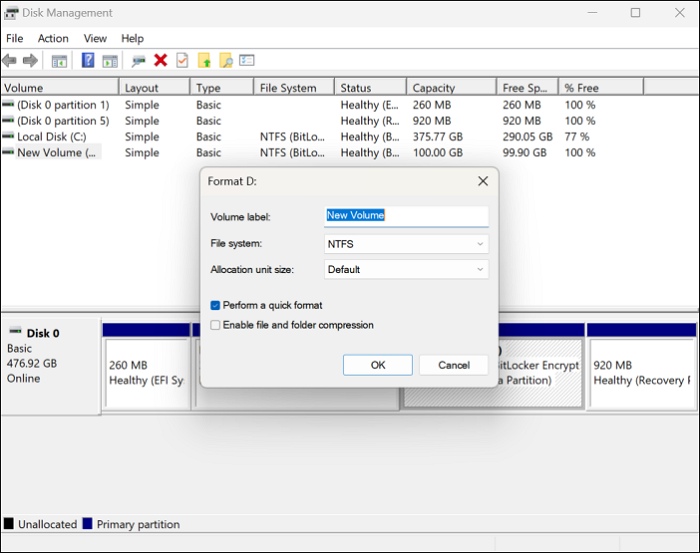
Formatting creates a file system that Windows can use to store and manage files. A new SSD or HDD usually needs to be formatted after you create a partition. For most internal Windows drives, NTFS is the common choice.
How to Format a New SSD or HDD
You can format a new partition directly from Disk Management.
Step 1. Open Disk Management.
Press Windows + X and select Disk Management.
Step 2. Select the partition.
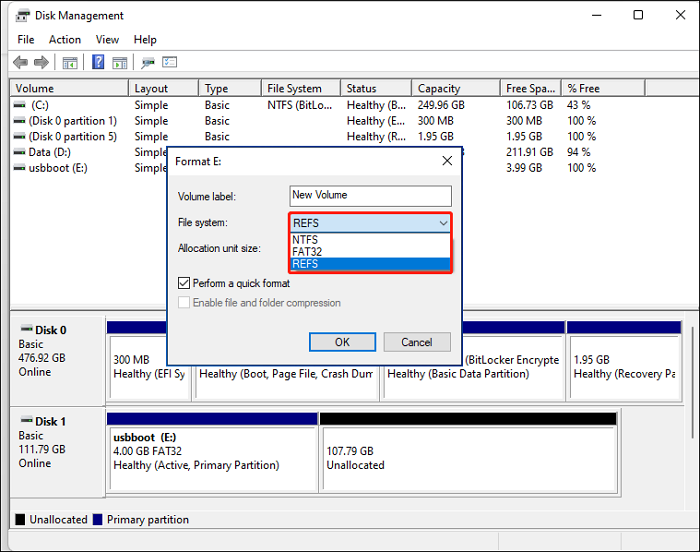
Find the new volume you want to format. Right-click it and select Format.
Step 3. Choose a file system.
Select NTFS for a typical internal Windows drive. Choose exFAT if you need to use the drive across different compatible devices.
Step 4. Set the volume label.
Enter a name for the drive if you want one, such as Data or Games.
Step 5. Start formatting.
Keep Quick Format selected for a normal new drive and click OK. Windows will format the selected partition.
Formatting removes the existing file system structure on that partition. Check the selected drive carefully before you start, especially if the disk was used before.
NTFS vs. exFAT vs. FAT32
The best file system depends on how you plan to use the new drive.
| File System | Best For | Limitation |
| NTFS | Internal Windows SSDs and HDDs | Less suitable for some non-Windows devices |
| exFAT | External drives and cross-platform use | Fewer Windows-specific features |
| FAT32 | Older devices and systems | Individual files cannot exceed 4 GB |
Pro tip: For a new internal SSD or HDD used mainly with Windows, NTFS is usually the best choice. exFAT is a better option when the drive needs to work with multiple operating systems or devices. FAT32 is mainly useful when an older device requires it.
How to Set Up a New Disk for Different Uses
The setup for a new SSD or HDD depends on what you want to do with it. A storage drive only needs basic partitioning and formatting, while a new Windows boot drive requires an operating system installation or migration.
Set Up an SSD as a Boot Drive
If you want the new SSD to become your Windows boot drive, you can either install Windows from scratch or move your existing system to the SSD.
Step 1. Install the SSD.
Connect the SSD to your computer and make sure BIOS/UEFI detects it.
Step 2. Initialize and partition the SSD.
For a modern Windows PC, initialize the SSD as GPT and create the required partitions.
Step 3. Install or migrate Windows.
For a clean setup, install Windows on the new SSD. If you want to keep your existing system, use a disk cloning or OS migration tool to move Windows to the SSD.
Use an SSD or HDD as a Storage Drive
A new storage drive does not need a Windows installation. You only need to prepare the disk so Windows can use it.
Step 1. Initialize the drive.
Open Disk Management and initialize the new SSD or HDD. GPT is usually the best choice for a modern Windows PC.
Step 2. Create a partition.
Right-click the unallocated space and select New Simple Volume.
Step 3. Format the partition.
Choose NTFS for a typical internal Windows storage drive. Assign a drive letter and finish the setup.
The drive will then appear in File Explorer, and you can use it for documents, photos, videos, games, applications, or backups.
Set Up a Second Hard Drive
A second hard drive can provide extra storage while keeping Windows on your existing drive.
Step 1. Install the second drive.
Connect the HDD or SSD and start Windows.
Step 2. Check the drive in Disk Management.
Make sure Windows detects the new drive. Initialize it if it is shown as Unknown or Not Initialized.
Step 3. Create and format a volume.
Create a new volume from the unallocated space, format it, and assign a drive letter. You can then use the second drive alongside your existing system drive.
New Disk Not Showing Up: Troubleshooting
A new SSD or HDD should appear in Disk Management after you install it. If it does not show up in File Explorer or Disk Management, the problem can come from the connection, Windows settings, or the drive itself.

SSD Not Showing Up in Disk Management
Is SSD not showing up in Disk Management? Don't worry; this article provides four effective fixes and some quick fixes for this issue. Dive into this article now.
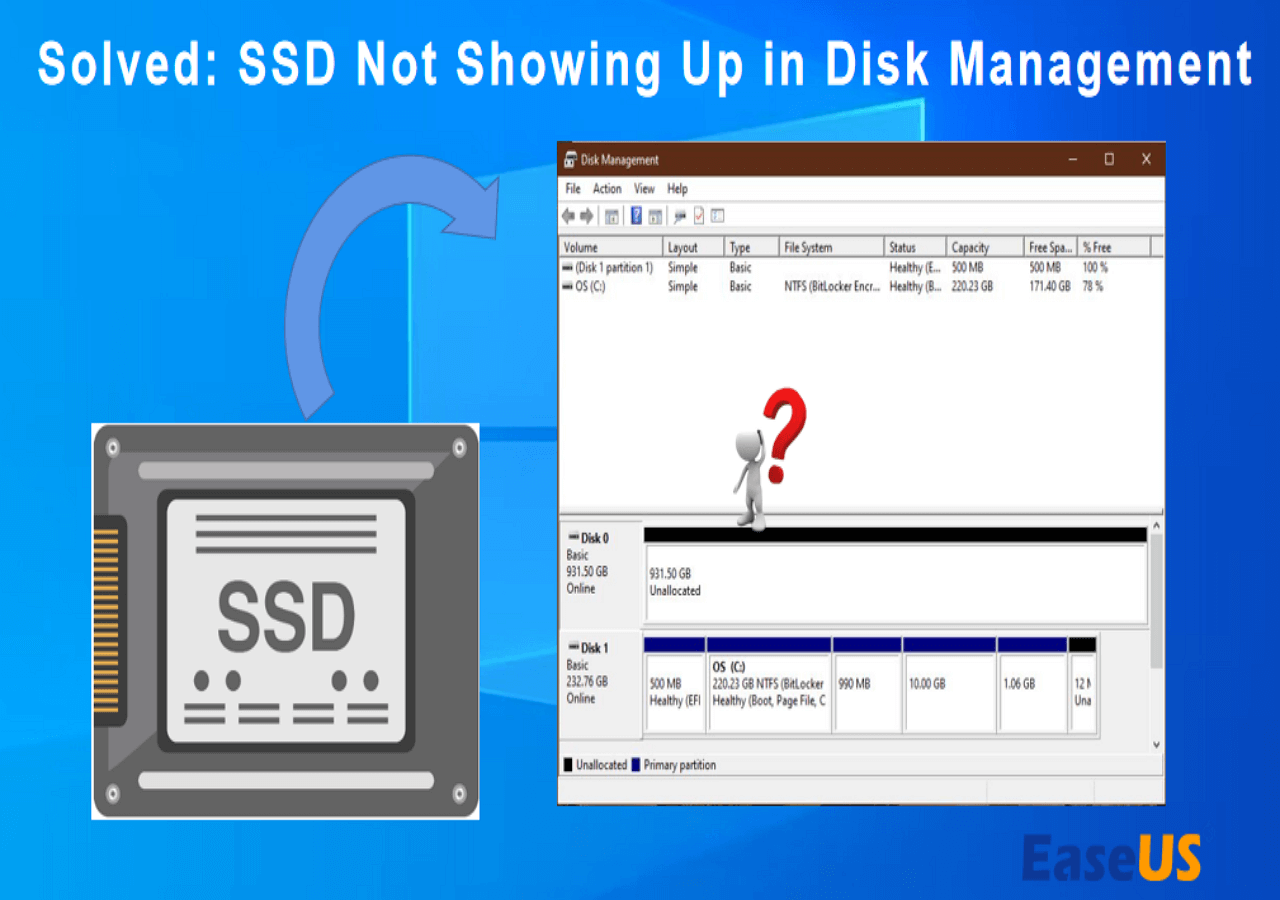
Common reasons why a new disk is not showing up include:
- The SSD or HDD is not connected properly.
- The drive is not detected by BIOS or UEFI.
- The disk has not been initialized.
- The disk space is still unallocated.
- The drive does not have a drive letter.
- The disk is offline.
- The storage driver has a problem.
- The drive or connection has a hardware issue.
Try the following fixes based on how the drive appears on your computer.
Fix 1. Check the Disk Connection
Make sure the new SSD or HDD is connected correctly. For a SATA drive, check both the power and SATA data cables. For an M.2 SSD, make sure it is fully inserted into a compatible M.2 slot. If you are using an external drive, try another USB port or cable.
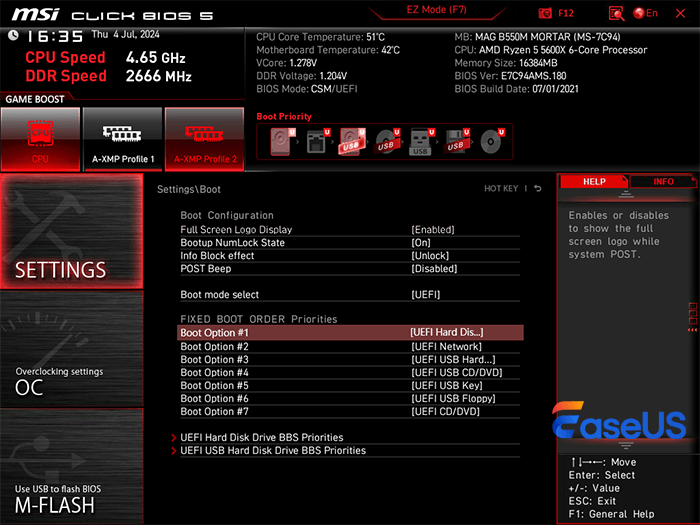
Fix 2. Check the Drive in BIOS/UEFI
Restart your computer and enter BIOS or UEFI. Check whether the new SSD or HDD is listed as a connected storage device.
If the drive does not appear in BIOS/UEFI, Windows cannot detect it either. Check the connection, storage slot, power supply, and drive compatibility before moving on.
Fix 3. Check Disk Management
Open Disk Management and look for the new drive. The disk might be detected even if it does not appear in File Explorer.
Fix 4. Update or Reinstall the Storage Driver
If Windows does not detect the drive correctly, the storage or controller driver could be causing the problem. Open Device Manager and check Disk drives and Storage controllers for warning icons.
Update the relevant driver and restart the computer. You can also check Windows Update for available driver updates.
Fix 5. Check the Drive on Another Computer
If the new SSD or HDD still does not appear, connect it to another computer if possible. This can help determine whether the problem is related to the original PC or the drive.
If the drive works on another computer, check the original computer's storage slot, BIOS settings, drivers, or hardware compatibility. If it is not detected elsewhere either, the drive or its connection could be the source of the problem.
New Disk Setup Tools
Windows provides Disk Management for basic new disk setup. It can initialize a drive, create partitions, format volumes, and assign drive letters. If you need more advanced operations, a dedicated partition manager can provide additional options.
EaseUS Partition Master
If you want to handle the whole new disk setup process in one place, EaseUS Partition Master is a practical option. It combines disk initialization, partition management, formatting, disk cloning, and OS migration in one interface, so you do not need to switch between different tools for different disk tasks.
With EaseUS Partition Master, you can use the same tool to:
- Initialize a new disk and choose GPT or MBR.
- Create, delete, resize, move, and format partitions.
- Manage unallocated space and extend partitions when needed.
- Clone an entire disk when replacing an old drive.
- Migrate Windows to a new SSD without reinstalling the operating system.
- Check disk health and performance before putting a drive into regular use.
How to manage your new hard drive with EaseUS Partition Master:
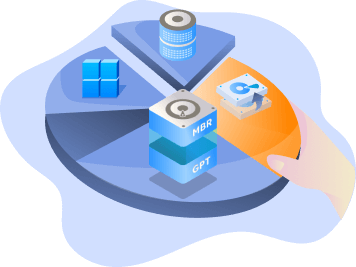
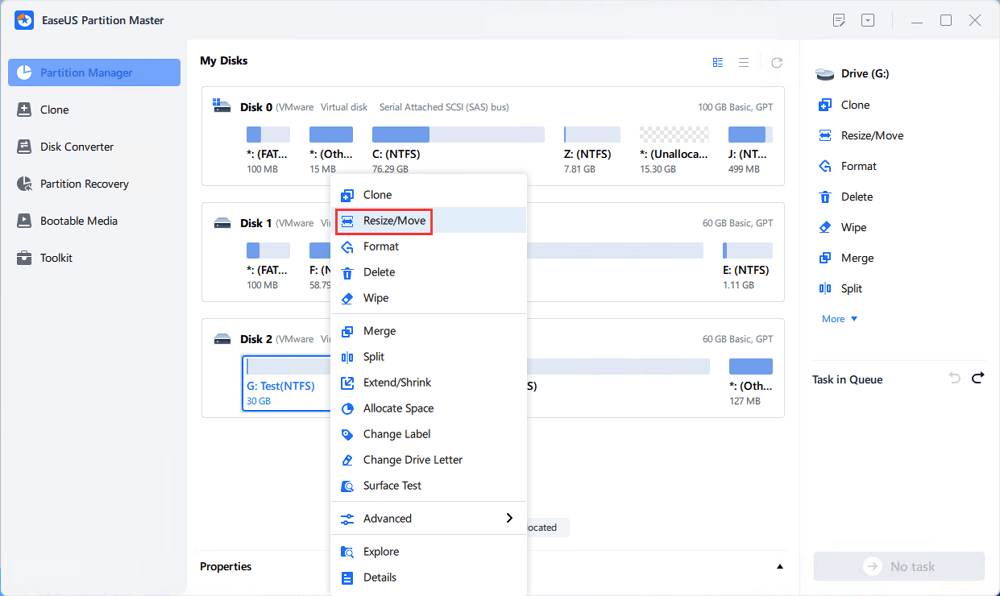
[1] "Resize/Move" enables you to adjust space of a selected disk partition as wish. Right-lick "Resize/Move", you can shrink a volume, extend the other one, or create unallocated space for special use.
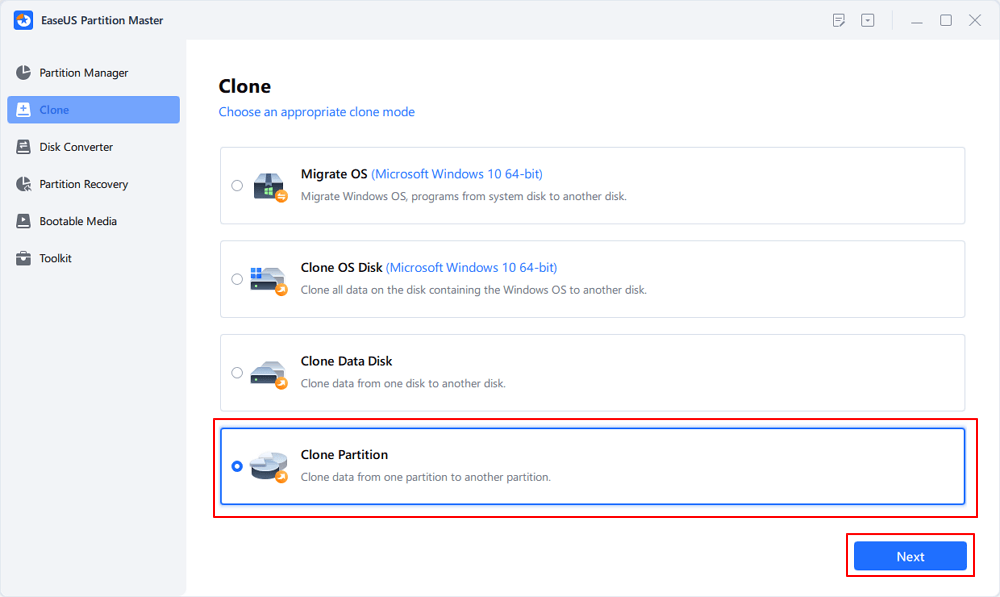
[2] "Clone" aims to make two identical hard disks or partitions with the same layout and content. You can use the "Clone" feature to upgrade a hard disk, replace a failing one, backup the drive data and so on.
[3] "Delete" is a common method to remove an unwanted disk partition, turning it into unallocated space.
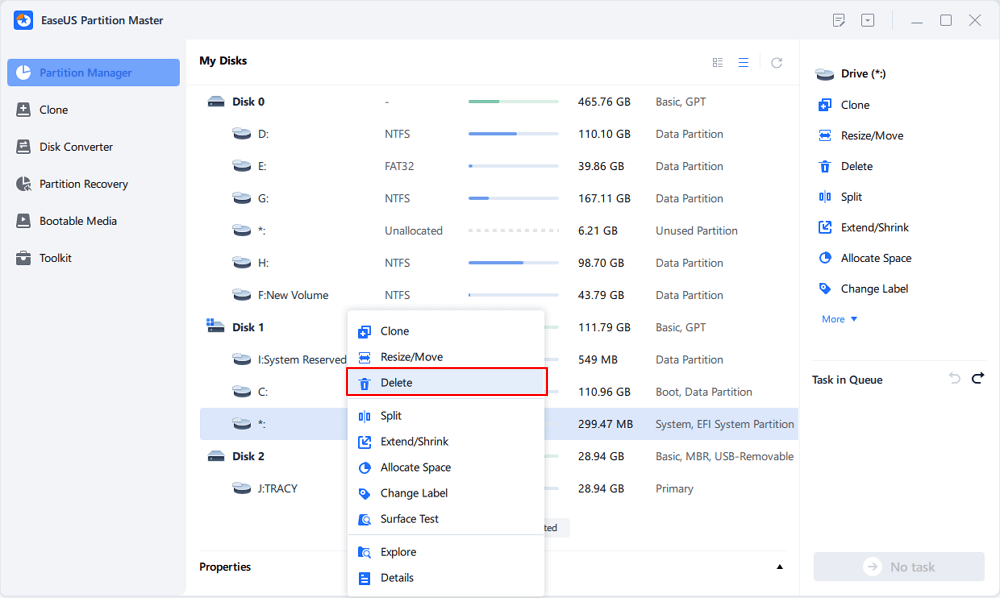
[4] "Format" is frequently used in many situations. By formatting a drive partition, you can alter the file system, fix some corruption issues, and sometimes remove viruses and malware.
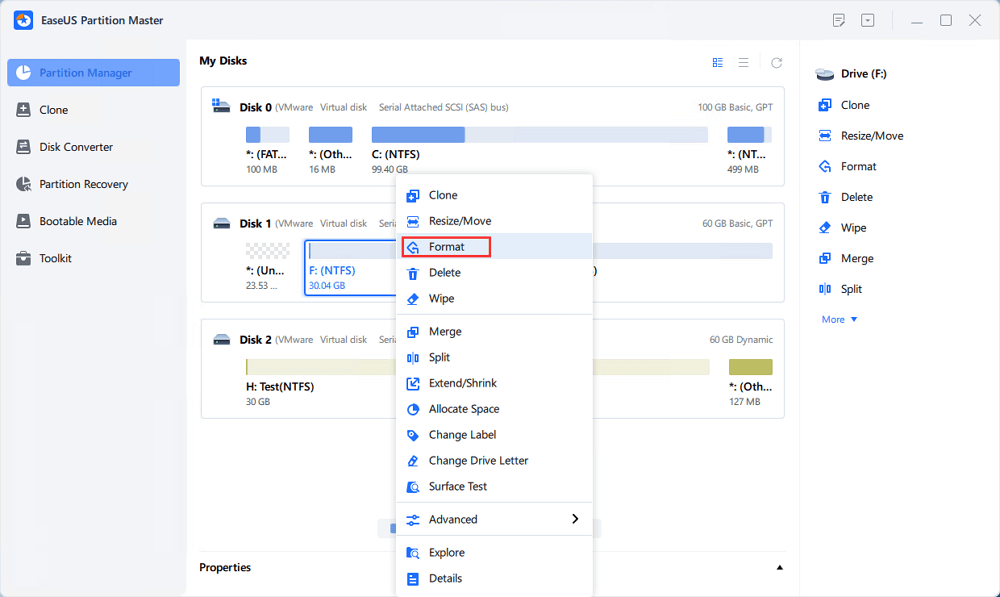
[5] "Allocate space" is very useful when one drive partition space is too much while the other is inadequate.
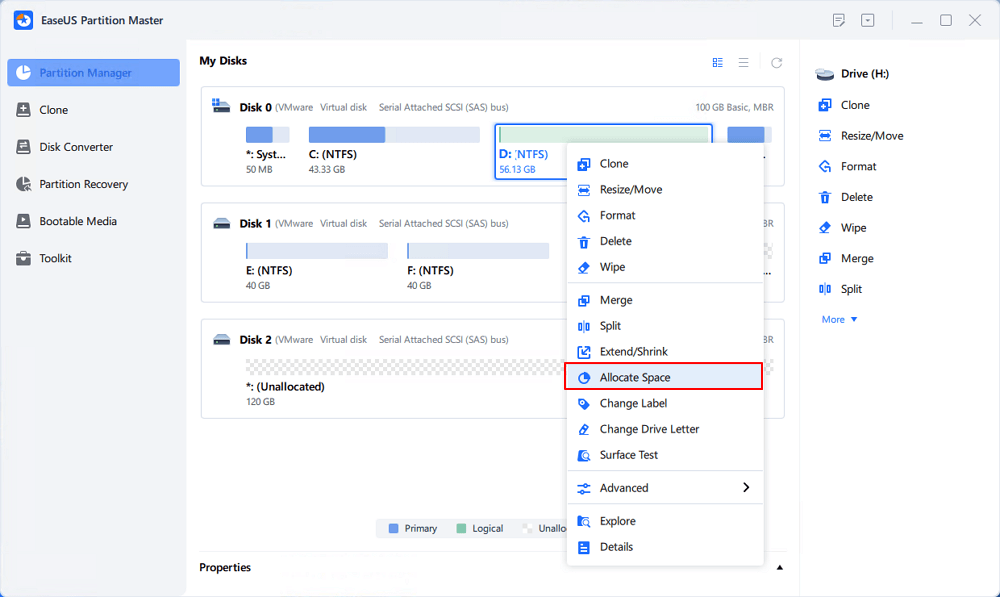
[6] "Migrate OS" makes it easy to transfer a Windows installation drive to the other without reinstalling.
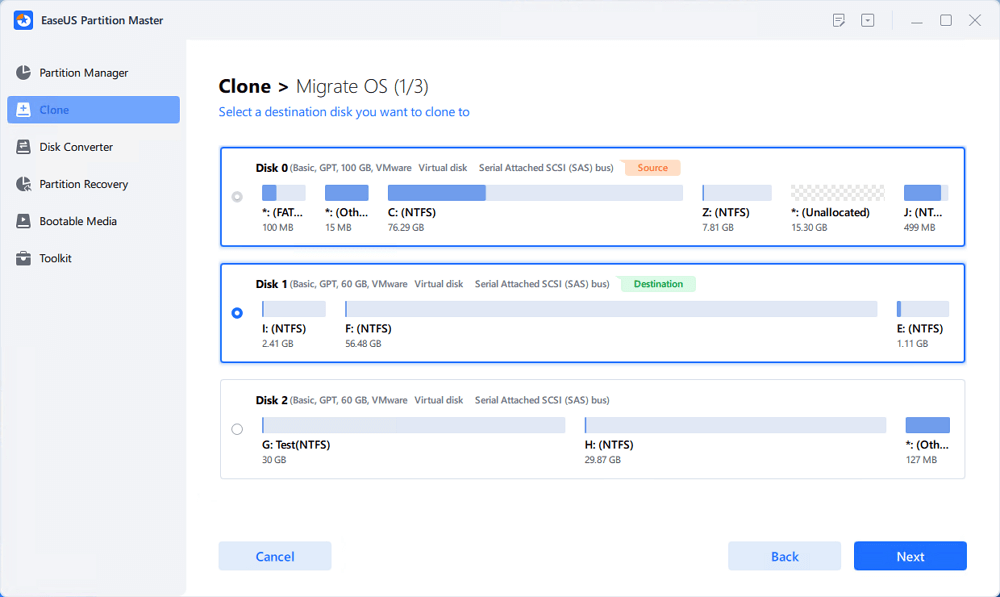
[7] Conversion between GPT and MBR, NTFS and FAT32, and Basic to Dynamic is getting more and more popular among EaseUS Partition Master customers. Besides all the listed benefits, there are so many functional yet practical features are waiting you to explore.
Disk Management
Disk Management is suitable for a basic new SSD or HDD setup. It is a good choice when you only need to prepare an empty drive for normal storage. You can use it to complete the main preparation steps:
- Initialize a disk
- Choose GPT or MBR
- Create and delete partitions
- Format volumes
- Assign drive letters
- Shrink or extend partitions
EaseUS Partition Master VS Disk Management:
| Feature | Disk Management | EaseUS Partition Master |
| Initialize Disk | ✔️ | ✔️ |
| Create & Format | Basic partition management | More partition options |
| Resize Partition | Shrink/extend with limits | Resize more flexibly |
| Move Partition | Limited | Move partitions directly |
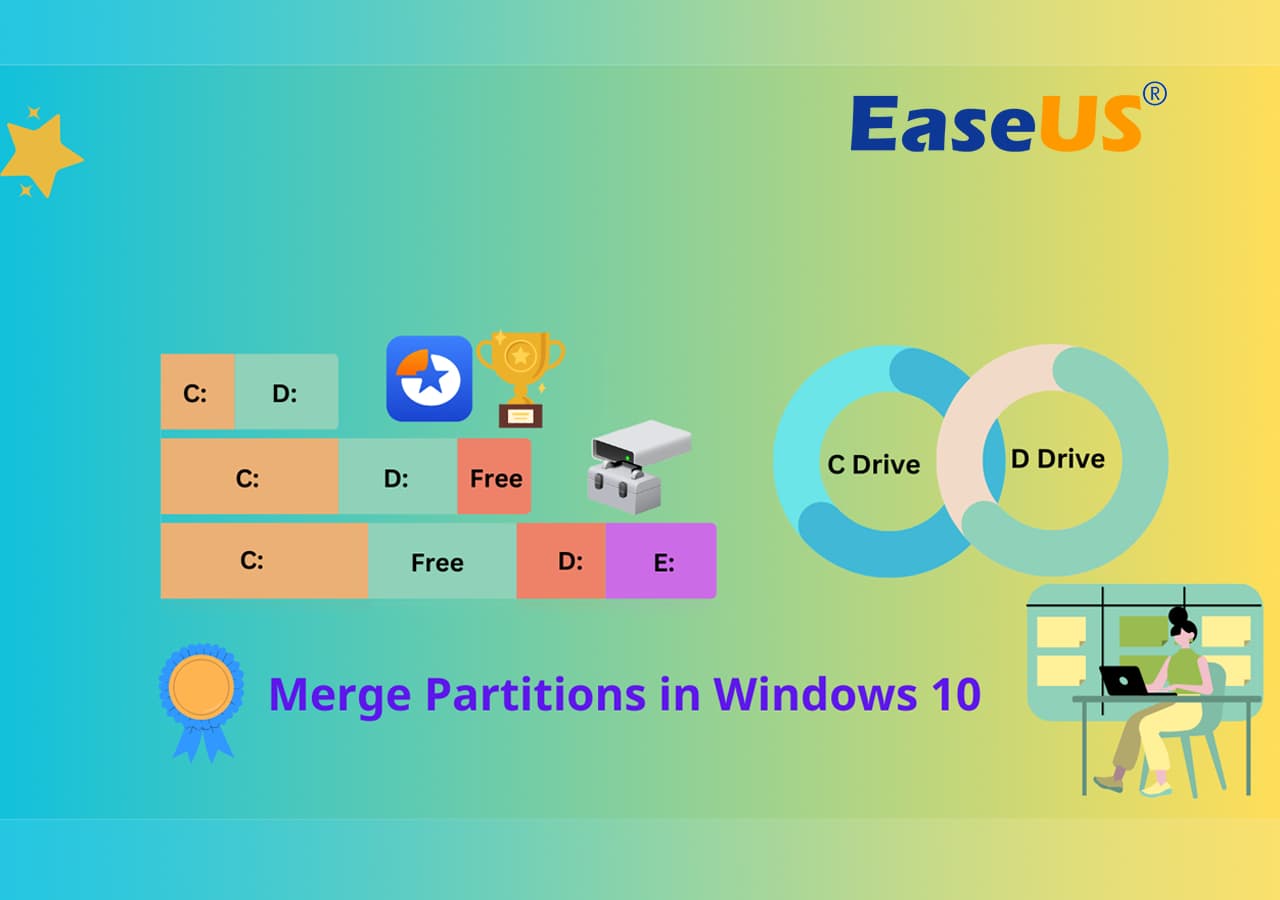
| Merge Partitions | Requires deleting a partition | Merge partitions without deleting data in most cases |
| Manage Unallocated Space | Extend when adjacent | Merge non-adjacent unallocated space |
| Disk Clone | ❌ | ✔️ |
| OS Migration | ❌ | ✔️ |
| GPT/MBR Conversion | Requires extra steps | Dedicated conversion tool |
| Disk Health Check | Basic disk information | Health, file system, bad sector, and performance checks |
Conclusion
Setting up a new SSD or HDD in Windows is usually straightforward once the computer detects the drive. For a typical new storage drive, the main steps are to install the drive, initialize it, choose GPT or MBR, create a partition, format it, and assign a drive letter.
GPT is generally the better choice for modern Windows PCs, while NTFS is usually the best file system for an internal Windows drive. If the new SSD will become your Windows boot drive, decide whether you prefer a clean installation or want to migrate your existing system.
For disk setup tools, Disk Management is sufficient for basic setup, while EaseUS Partition Master can help with more flexible partition management, disk cloning, partition conversion, and Windows migration.
How Can We Help You
About the Author

Sherly joined EaseUS in 2022 and she has always loved writing articles and enjoys the fun they bring. She receives professional training here, focusing on product performance and other relative knowledge. She has written over 200 articles to help people overcome computing issues.

Written by Joey Albert
Joey is an enthusiast of science and technology. With a passion for uncovering the latest tech innovations, she creates clear, engaging how-to guides that make technology accessible and enjoyable for all.
Product Reviews
-
I love that the changes you make with EaseUS Partition Master Free aren't immediately applied to the disks. It makes it way easier to play out what will happen after you've made all the changes. I also think the overall look and feel of EaseUS Partition Master Free makes whatever you're doing with your computer's partitions easy.
Read More -
Partition Master Free can Resize, Move, Merge, Migrate, and Copy disks or partitions; convert to local, change label, defragment, check and explore partition; and much more. A premium upgrade adds free tech support and the ability to resize dynamic volumes.
Read More -
It won't hot image your drives or align them, but since it's coupled with a partition manager, it allows you do perform many tasks at once, instead of just cloning drives. You can move partitions around, resize them, defragment, and more, along with the other tools you'd expect from a cloning tool.
Read More
Related Articles
-
Can't Open USB Drive on Windows 11/10 (Quick Fix)
![author icon]() Oliver/2026/09/24
Oliver/2026/09/24 -
Can I Clone SSD to M.2 Free? Yes, Sure. Your Guide Is Here
![author icon]() Cici/2026/09/28
Cici/2026/09/28 -
3 Easiest Ways to Run USB Speed Test in Windows 10 in 2026
![author icon]() Tracy King/2026/09/23
Tracy King/2026/09/23 -
How to Merge Unallocated Partition Windows 11/10/7
![author icon]() Jean/2026/07/09
Jean/2026/07/09
 Oliver/2026/09/24
  Cici/2026/09/28
  Tracy King/2026/09/23
  Jean/2026/07/09