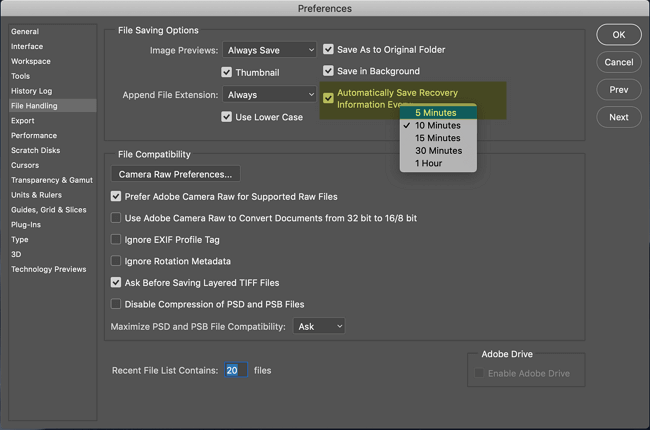
If you have enabled the "Autosave" option in your Photoshop app on your Mac, you can find the Photoshop Autosave location on a Mac like this picture.
In this article, we will show you how to find the Photoshop Autosave location on your Mac. Keep reading!
Recover Photoshop Files on a Mac with Software
If your Photoshop files were lost, unsaved, or deleted, and you want to recover them, apart from using the "Put Back" feature in the Mac Trash Bin folder, which has a restriction that the Photoshop files be deleted by clicking the "Move to Bin" option less than 30 days, consider using data recovery software EaseUS Data Recovery Wizard for Mac that maximizes the chance of Photoshop file recovery.
EaseUS software can help you recover unsaved Photoshop files on a Mac with a user-friendly interface without any file recovery experience requirement. Follow the steps below to recover your deleted, lost, or unsaved Photoshop files:
Step 1. Scan for lost documents
Select the location where your important Word/Excel/PPT/Numbers/Pages documents were lost and click "Search for lost files".

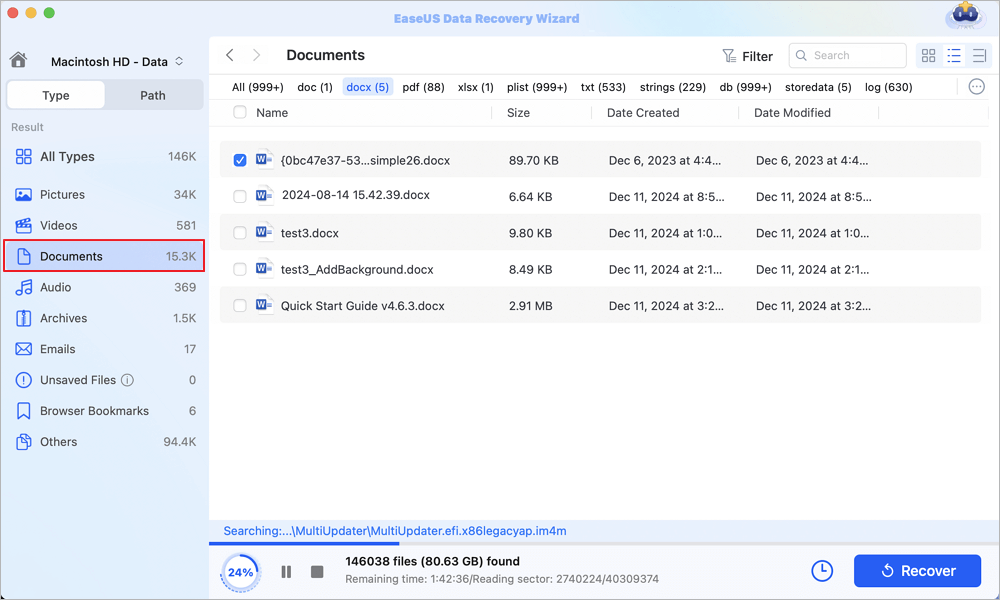
Step 2. Find lost documents on Mac
EaseUS Data Recovery Wizard for Mac will immediately start a scan on your selected disk volume. Meanwhile, the scanning results will be presented in the left pane. Select "Documents" and you can quickly filter the DOC/PDF/PPT/XLS files you've lost earlier.
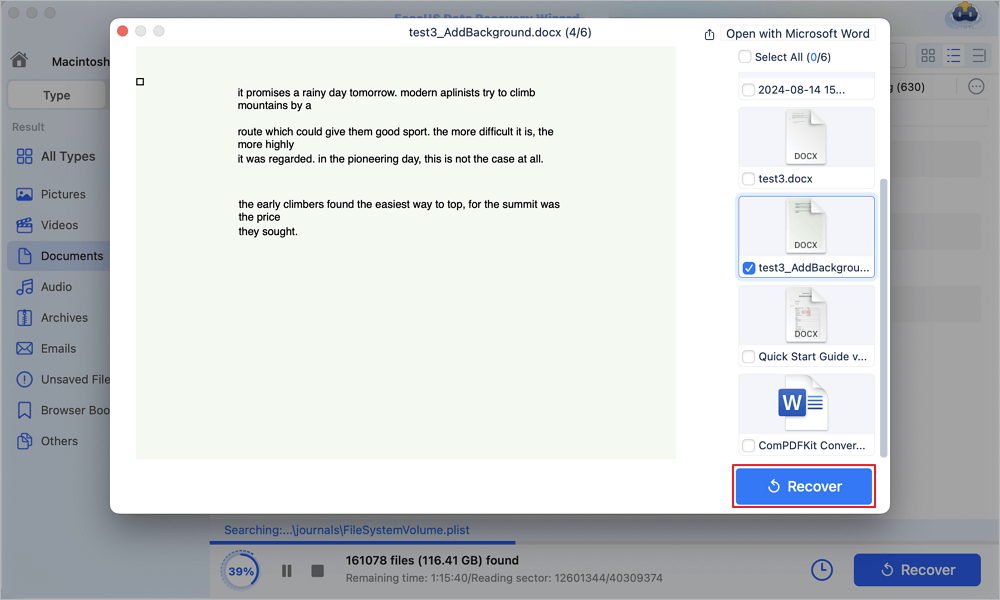
Step 3. Recover lost/deleted documents
Select the target files and preview them by double-clicking them. Then, click "Recover" to get lost documents back at once.
Share this article on social media to help others learn how to recover Photoshop files on a Mac.
Where Is Photoshop Autosave Location on a Mac
If you want to restore an unsaved Photoshop file on your Mac, you can find the Autosave folder that stores unsaved Photoshop files. Follow the steps below to find where the Photoshop Autosave location is on your Mac:
Step 1. Launch Finder on your Mac, and click "Go > Go to Folder".

Step 2. Type the following path, and press "Enter" to open the Autosave Photoshop folder on your Mac.
| ~/Library/Application Support/Adobe/Adobe Photoshop CC 2017/AutoRecover |
Note that different versions of Photoshop may have different storage locations for Autosave files.
Suppose the Finder app not working; read this article to solve the problem.

Fix Finder Not Responding After Updating to Sonoma with 5 Proven Ways
This article discusses how to fix the Finder not find after updating to Sonoma issues. Read more >>
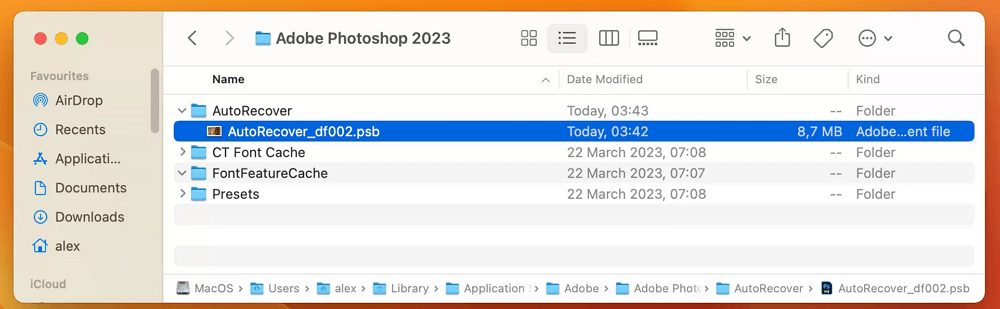
Recover PSD Files on a Mac from Photoshop Autosave Location
After opening the Autosave folder on your Mac, you can find unsaved Photoshop files and recover the PSD files by saving the found PSD files as new projects.
Conclusion
This article introduces where the Photoshop Autosave location is on a Mac, how to access the Antosave Photoshop files, and recover PSD files from the Photoshop Autosave location.
The most effective way to recover a lost, deleted, or unsaved Photoshop file is using EaseUS Data Recovery Wizard for Mac, which scans all the recoverable files on your Mac hard drive quickly and safely!
Photoshop Autosave Location on a Mac FAQs
Here are questions people frequently ask when they search for where Photoshop Autosave location is on a Mac; take a look!
1. Where are Photoshop temporary files on Mac?
Follow the steps below to access the temporary files of Photoshop on a Mac:
Step 1. Go to "Finder > Application > Terminal".
Step 2. Enter open $TMPDIR and press "Enter".
Step 3. Go to the "Temporaryitems" folder, find the PSD file, and open it with Photoshop to save it on your Mac.
2. Where is the Photoshop auto-recovery folder?
Follow the steps to find the Photoshop auto-recovery folder:
Step 1. Launch Finder on your Mac, and click "Go > Go to Folder".
Step 2. Type the path ~/Library/Application Support/Adobe/Adobe Photoshop CC 2017/AutoRecover and press "Enter" to open the Autosave Photoshop folder on your Mac.
Was This Page Helpful?
Jaden is one of the editors of EaseUS, who focuses on topics concerning PCs and Mac data recovery. Jaden is committed to enhancing professional IT knowledge and writing abilities. She is always keen on new and intelligent products.
Brithny is a technology enthusiast, aiming to make readers' tech lives easy and enjoyable. She loves exploring new technologies and writing technical how-to tips. In her spare time, she loves sharing things about her game experience on Facebook or Twitter.
-
EaseUS Data Recovery Wizard is a powerful system recovery software, designed to enable you to recover files you’ve deleted accidentally, potentially lost to malware or an entire hard drive partition.
Read More -
EaseUS Data Recovery Wizard is the best we have seen. It's far from perfect, partly because today's advanced disk technology makes data-recovery more difficult than it was with the simpler technology of the past.
Read More -
EaseUS Data Recovery Wizard Pro has a reputation as one of the best data recovery software programs on the market. It comes with a selection of advanced features, including partition recovery, formatted drive restoration, and corrupted file repair.
Read More
Related Articles
-
How to Recover Deleted Zip and RAR Files on Mac [4 Proven Ways]
![author icon]() Jaden/Jun 30, 2026
Jaden/Jun 30, 2026 -
Sharing Name and Photo Not Available, Why and How to Fix It
![author icon]() Brithny/May 19, 2026
Brithny/May 19, 2026 -
How to Recover SD Card with Bad Sectors on Mac
![author icon]() Jaden/Jun 30, 2026
Jaden/Jun 30, 2026 -
How to Recover a Deleted Webp File on Mac [Image Recover]
![author icon]() Jaden/Jun 12, 2026
Jaden/Jun 12, 2026