Popular for its intuitive interface, elegant design, and advanced functionalities, macOS offers a smooth computing experience. In this post, we'll explore the possibility of bringing this experience to Windows users.
If you are wondering if you can install macOS on a Windows PC, the answer is yes. It may come as a surprise, but it is possible.
As we're aware, macOS is Apple's proprietary operating system. However, acquiring a legitimate license is crucial before utilizing any software protected by its developers' intellectual property. The same principle applies to macOS.
macOS Download for Windows Methods: How to Install macOS on a PC
Transitioning to macOS on your Windows offers a gateway to Apple's sleek interface, robust features, and interconnected ecosystem. While macOS is designed for Apple hardware, enthusiasts can replicate the experience through methods like creating a Hackintosh (macOS download for Windows) or using virtualization tools.
Fix 1. Create a Bootable Hackintosh Installation USB Drive
Installing macOS on Windows and creating your Hackintosh begins with booting Mac from a USB. This process needs a functional Mac with access to a USB thumb drive, the Mac App Store, and a dedicated amount of time.
- Compatible hardware components, including the necessary drivers and configurations within the hardware setup, are essential for running macOS successfully.
- Although not overly complex, precision in each step is imperative, making the process somewhat time-consuming.
- Research your specific motherboard model for BIOS tweaks to avoid installation errors.
If you've assembled your Mac and have a USB thumb drive at hand, adhere to the following guidelines to fashion a bootable macOS USB:
Step 1. Open Mac App Store and log in with your Apple ID if prompted. After that, download the latest version of macOS.
Step 2. Restart your Mac by holding down "Command + R" and releasing it once the "Apple" icon appears. Then, wait for macOS Recovery to initialize.
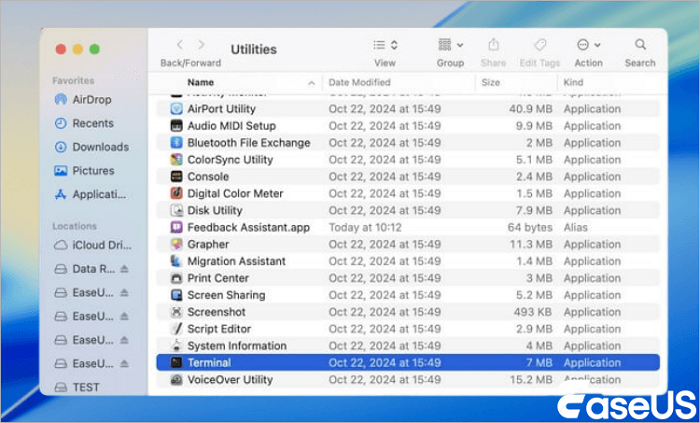
Step 3. Navigate to "Utilities" > "Terminal."

Once Terminal is open, input csrutil disable and press "Enter." After this, wait until Terminal confirms the successful deactivation of System Integrity Protection (SIP).
Step 4. Proceed to the Apple menu and restart your Mac. After rebooting, connect your USB drive.
Step 5. Open Disk Utility, select the USB drive from the left column, and click "Erase." Select the macOS Extended format from the pop-up menu, designate a name for your USB drive, and click "Erase." Finally, click "Done."
Step 6. Execute the Unibeast application. If it's not already installed, obtain the latest version. Proceed through the prompts, agreeing as necessary, until you're ready to utilize the app. Afterward, you'll encounter a window displaying the USB drive you prepared earlier.
Step 7. Click "Next," select "Sonoma," and proceed with the prompts. Choose between "UEFI Boot Mode" or "Legacy Boot Mode" based on your hardware specifications. If your hardware is older, opt for the legacy boot mode.
Step 8. Select your graphics card type, "NVIDIA" or "ATI," and click "Next."
Step 9. Review your selections and click "Next." When prompted, enter your password, then click "OK."
If you find this information helpful, please share it with others on social media to assist them in overcoming this common challenge.
We provide a video to help you download macOS for Windows. Here are some highlights of the video:
- 06:58 Click on "Utilities" > "Go."
- 07:03 Choose "Disk Utility."
- 07:13 Under Disk Utility, select "Show All Devices."

Fix 2. Use a Virtual Machine to Install macOS on a PC
This is a crucial prerequisite for integrating macOS onto your device. The device should primarily run the Windows operating system.
Avoid using outdated Unlocker versions. For Intel CPUs, add specific CPUID flags in the VMX file to prevent kernel panics. Disable Hyper-V if using Windows.
You need to get appropriate software, which is conveniently available as open-source and free of charge online. It's crucial to have this software installed and ready before proceeding with the macOS installation.
To install macOS into Virtual Box on your Windows operating system:
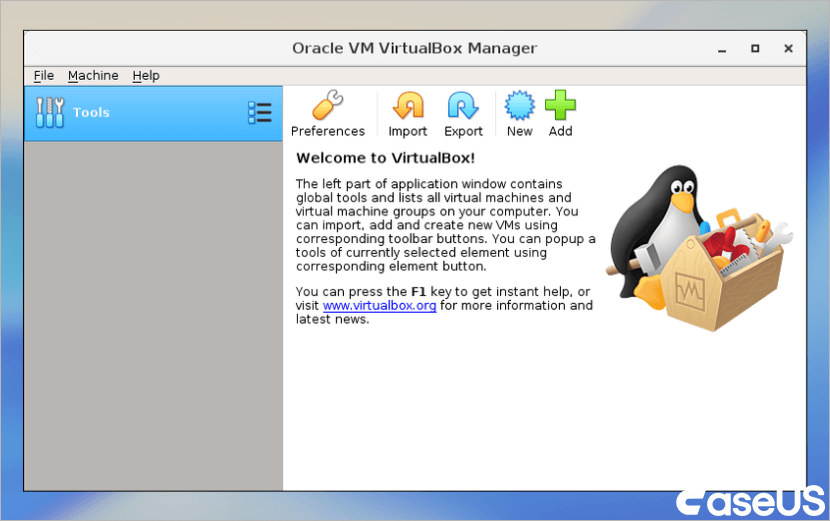
Step 1. Initiate the Virtual Box software on your device. Inside the software, click on the "New" button.

Step 2. Subsequently, a new window will emerge. Name the operating system, specifying "macOS" in this field. Click "Next" to proceed.
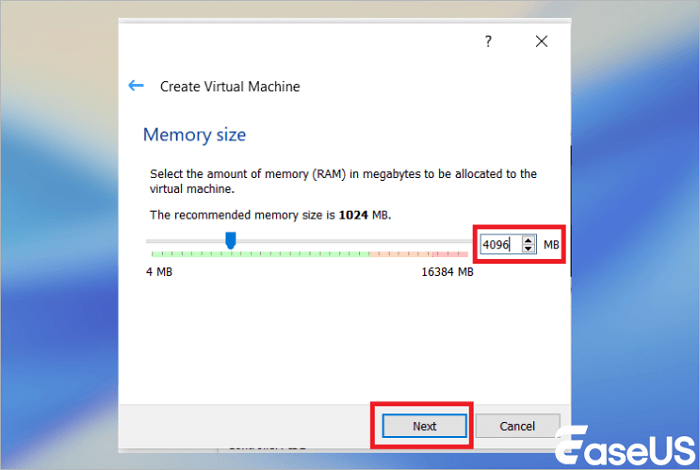
Step 3. In the appearing window, adjust the memory size for the operating system disk. For macOS installation, allocate a minimum of 4000 MB or 4 GB. Click "Next" once done.

Step 4. Proceed to the next window without making any alterations. Click on the "Create" button.
Step 5. In the window that appears, select the "VHD (Virtual Hard Disk)" option. Click "Next" to continue.
Step 6. Next, select "Dynamically allocated" and click "Next." The software will prompt for the installation location, which is recommended to remain unchanged. Click "Create" to proceed.
If you found this guide useful, please share it on your social media platforms to help others install macOS on their PCs.
Tip: Keep Data Safe on Your Mac [After macOS Update]
One common concern among users when installing or updating macOS is the safety of their data. Using a specialized data recovery tool can help to address this issue.
EaseUS Data Recovery Wizard for Mac proves to be a powerful solution that safeguards data and retrieves lost files on Mac effectively.
- User-friendliness: EaseUS Data Recovery Wizard for Mac has an easy-to-use interface that makes it accessible to those with little technical expertise. Its intuitive design enhances easy navigation through the software for easy data recovery.
- Versatility: This software can recover various file types, including documents, photos, videos, and audio files.
- Selective recovery: This tool allows for selective file recovery, allowing users to choose which files to restore based on their preferences.
- Deep scan: For more complex data loss scenarios, the Deep Scan function thoroughly analyzes your storage device, ensuring no lost files remain undiscovered.
Step 1. Select the location
Select the disk where you lost data after updating to macOS Sonoma/Ventura/Monterey/Big Sur. Then, click "Search for lost files".

Step 2. Find lost data after the scan
EaseUS Data Recovery Wizard for Mac will immediately scan your selected disk volume and display the scanning results on the left pane. Use the file type and file path to find wanted data on Mac.

Step 3. Recover data after macOS update
Select the target files that were unknowingly lost during or after the update and click the "Recover" button to get them all back.

Other Tips:
- Backup Everything: Use external drives or cloud storage to back up Windows data before partitioning or installing macOS. A corrupted partition could wipe your Windows data.
- Avoid Writing to Target Drives: During Hackintosh installation, disconnect all non-essential drives to prevent accidental formatting. For VMs, save the macOS VM file on a separate partition.
- Use Reliable Tools: Avoid pirated ISOs or unverified third-party tools. Stick to trusted guides and software to prevent malware infections.
- Test in Virtual Machine First: Before attempting a Hackintosh, test macOS in a VM to familiarize yourself with the installation process and identify potential issues.
Summary
In this article, we learned how to install macOS on a PC by creating a bootable USB drive and utilizing a virtual machine.
While these methods offer opportunities to experience macOS on non-Apple hardware, it's essential to proceed with caution due to potential legal and technical considerations.
Additionally, to ensure data safety during the installation process and beyond, we recommend downloading professional data recovery software. EaseUS Data Recovery Wizard for Mac serves as an excellent choice for comprehensive data protection and retrieval solutions.
macOS Download for Windows FAQs.
Do you still want macOS Download for Windows? Take a look at some commonly asked questions below to learn more!
1. Is it legal to install macOS on Windows?
Yes. While this is possible, you'll need to invest some time and energy; it's important to understand that attempting to install macOS on a Windows may violate Apple's licensing terms, which restrict its usage to Apple hardware. Therefore, proceeding with such an installation is at your own discretion and risk.
2. Is it possible to install iOS on a Windows?
No, iOS cannot be installed on a PC. However, it is possible to install Apple's macOS on a PC, often referred to as a Hackintosh, when running on non-Apple hardware.
3. Can you install macOS on an AMD PC?
Yes. Installing macOS on an AMD PC is possible through a process known as creating a "Hackintosh." It involves using compatible hardware and software modifications to run macOS on non-Apple machines.
Was This Page Helpful?
Jaden is one of the editors of EaseUS, who focuses on topics concerning PCs and Mac data recovery. Jaden is committed to enhancing professional IT knowledge and writing abilities. She is always keen on new and intelligent products.
-
EaseUS Data Recovery Wizard is a powerful system recovery software, designed to enable you to recover files you’ve deleted accidentally, potentially lost to malware or an entire hard drive partition.
Read More -
EaseUS Data Recovery Wizard is the best we have seen. It's far from perfect, partly because today's advanced disk technology makes data-recovery more difficult than it was with the simpler technology of the past.
Read More -
EaseUS Data Recovery Wizard Pro has a reputation as one of the best data recovery software programs on the market. It comes with a selection of advanced features, including partition recovery, formatted drive restoration, and corrupted file repair.
Read More
Related Articles
-
Mac Raw Recovery: How to Recover Data from Raw Hard Drive/Partition
![author icon]() Daisy/Jan 19, 2026
Daisy/Jan 19, 2026 -
Missing Files After macOS Sequoia Update? Click Here to Recover
![author icon]() Jaden/Jan 19, 2026
Jaden/Jan 19, 2026 -
Desktop Missing in Finder? See Fixes Here
![author icon]() Finley/Jan 19, 2026
Finley/Jan 19, 2026 -
Maxtor External Hard Drive Not Showing Up Mac [with 5 Proven Methods to Fix It]
![author icon]() Brithny/Jan 19, 2026
Brithny/Jan 19, 2026