Page Table of Contents
Running out of storage space or noticing slower performance on your PC? Upgrading to a bigger hard disk is a cost-effective way to get more capacity and better speed without reinstalling Windows, while also transfer data to new drive. By cloning your current system to a new, larger HDD or SSD, you can keep your operating system, applications, and files exactly the same, only with more room to grow.
This step-by-step guide will show you how to prepare, clone, and troubleshoot so that you can smoothly migrate to a larger drive.
- 🎨Key Takeaways: How to Upgrade to a Larger Drive
- 1. Get a new, larger HDD/SSD that is compatible with your computer.
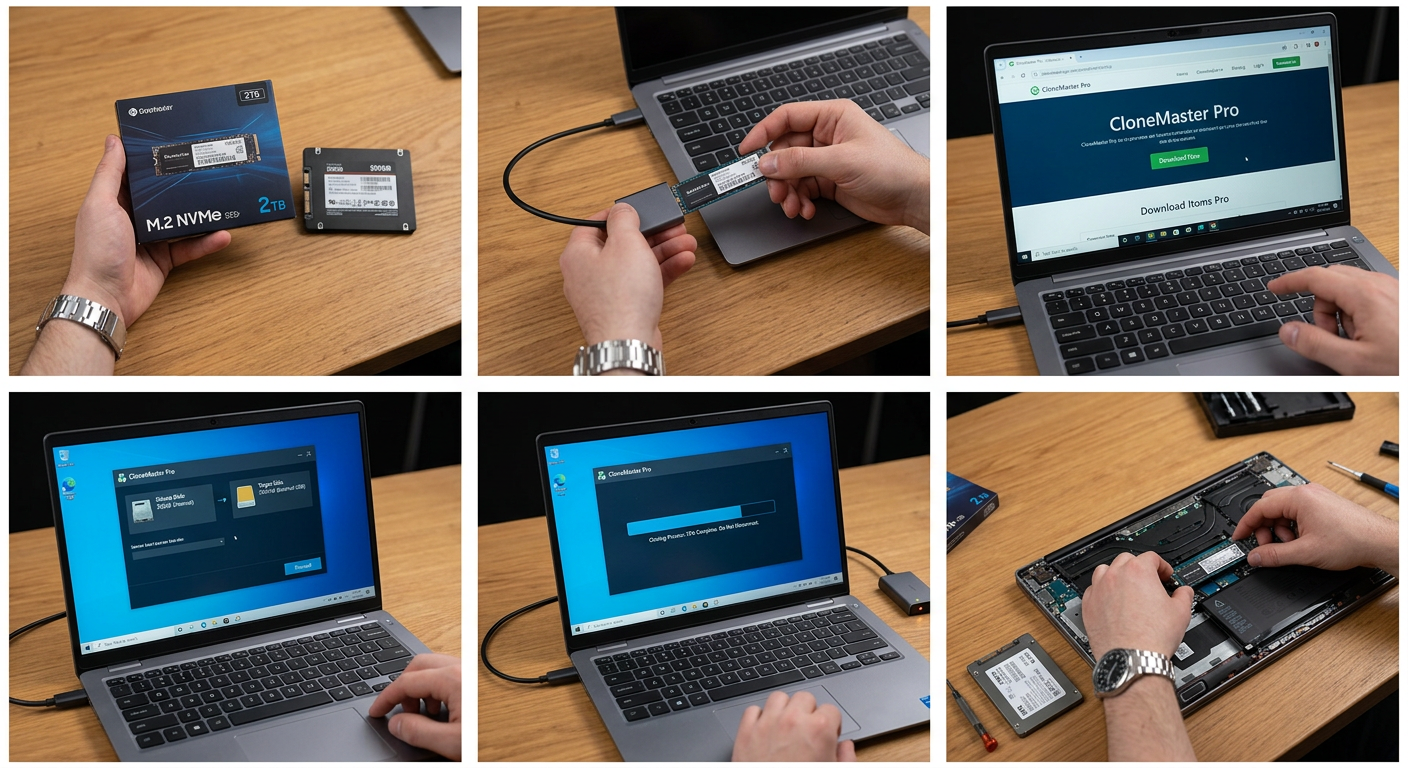
- 2. Connect/Install the new disk to your computer via USB-to-SATA/NVMe cable or adapter.
- 3. Download a reliable disk cloning software.
- 4. Select the old disk as the source disk, and larger disk as the target one.
- 5. Clone old hard drive to the new one.
- 6. Relpace the old disk with the new cloned disk, and boot PC from it.
Preparation: What You Need to Clone Hard Drive to Larger Drive
Cloning a hard drive to a larger one can solve low disk space concerns, improve overall performance and stability, store more applications, games, or multimedia, and extend the life of your computer. Here are all the essential things you should prepare before taking action to upgrade to a larger hard drive or clone a hard drive:
#1. Connect both hard drives to your computer
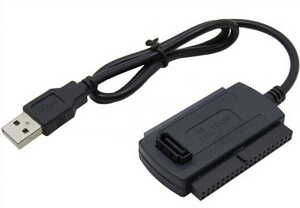
If you're using a desktop computer, you can always try to install the second drive alongside your old hard drive to clone it. However, it's impossible for laptops with only one slot to install two hard drives, so you should prepare a SATA/NVMe-to-USB cable to connect the larger hard drive (HDD or SSD) to your laptop via USB. By the way, you can also install your new drive in an external hard drive enclosure/adapter to replace the USB cable.
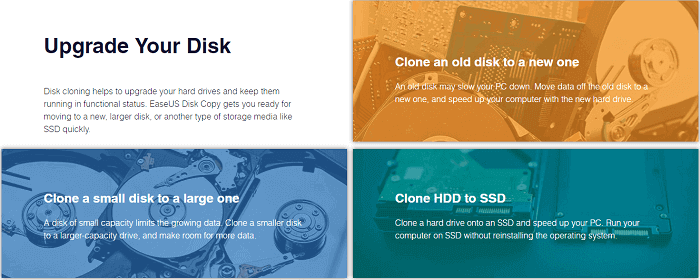
#2. A reliable disk cloning tool - EaseUS Disk Copy
Customers treat EaseUS Disk Copy as the model of the disk cloning market. With the multiple built-in features, you can upgrade hard disk, migrate OS to new drive, clone HDD to SSD, SSD upgradem replace c drive with new SSD, and even replace a failing hard drive without booting into Windows.
In addition, you can use it to clone a hard drive with bad sectors due to its sector-by-sector cloning technology. It can also help you replace a computer's hard disk without losing data and reinstalling Windows.
Windows 11/10/8/7
With the help of EaseUS Disk Copy, it's all too easy to clone an old hard drive to a larger one.
Steps: How to Clone Hard Drive to Larger Drive
EaseUS Disk Copy is very easy and quite safe to use. Any time when you need to upgrade a hard drive from old to new, from small to large, or from a mechanical HDD to a stable SSD, and transfer your C drive to a new SSD, feel free to apply EaseUS Disk Copy to execute a bootable clone.
- Tips to ensure a successful boot after cloning
- Check disk style and boot mode: Open Disk Management > right-click disk > Properties > Partition style (MBR or GPT). Confirm BIOS/UEFI settings match the new drive. This ensures the cloned disk will boot properly.
Step Guide:
Follow the steps to clone your hard drive to a larger one without reinstalling Windows and programs:
Before cloning:
- If your computer has only one slot, connect the target disk to your machine via a USB-to-SATA/NVMe adapter.
- If your computer has an extra slot, install the target disk into the empty slot properly, and make sure it is compatible.
Step 1. Launch EaseUS Disk Copy and choose Disk Mode.
Install EaseUS Disk Copy cloning software on your Windows computer, then launch it and select Disk Mode from the left panel.
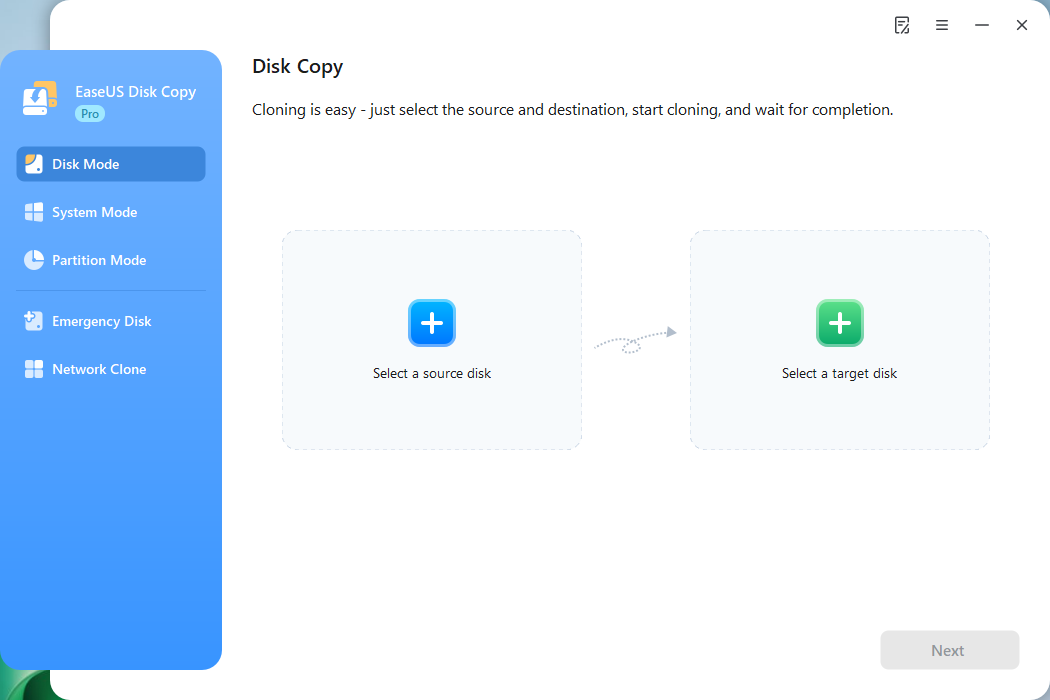
Step 2. Select the source drive.
Select the drive you want to copy, then click Select.
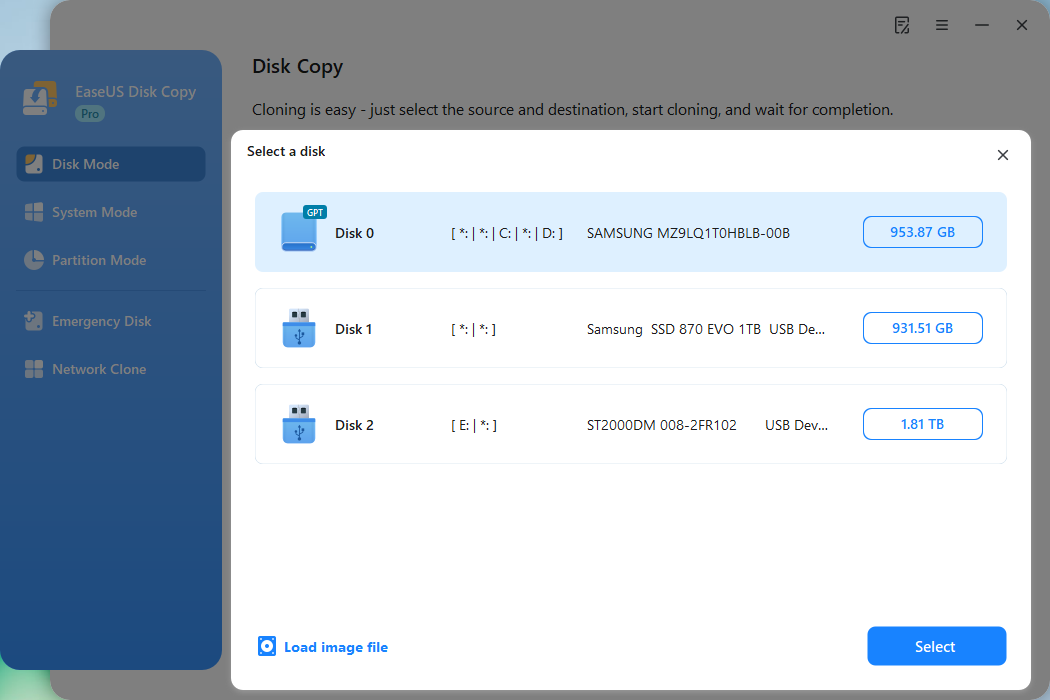
Step 3. Choose the target disk.
Choose the disk that you want to clone data to, and click Select. Note that the used space of the source disk should be less than the target disk capacity.
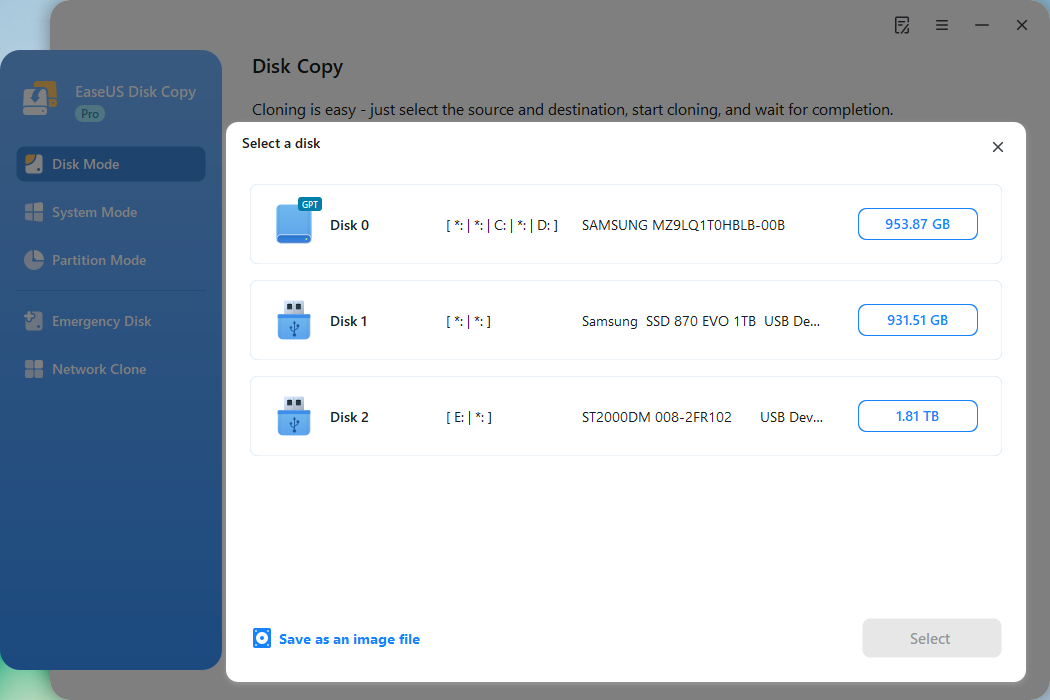
*At this step, you can also click the option "Save as an image file" to store your disk as a compressed image file, which can be restored without any data loss.
Step 4. Adjust disk layout.
Specify the target disk layout as your preference. You can choose among:
- Autofit the disk: makes some changes by default on the destination disk layout so that it can work at its best.
- Copy as the source: create a 1-to-1 copy of your source disk; the layout is the same as the source disk.
- Edit disk layout: allows you to manually resize/move the partition layout on this destination disk.
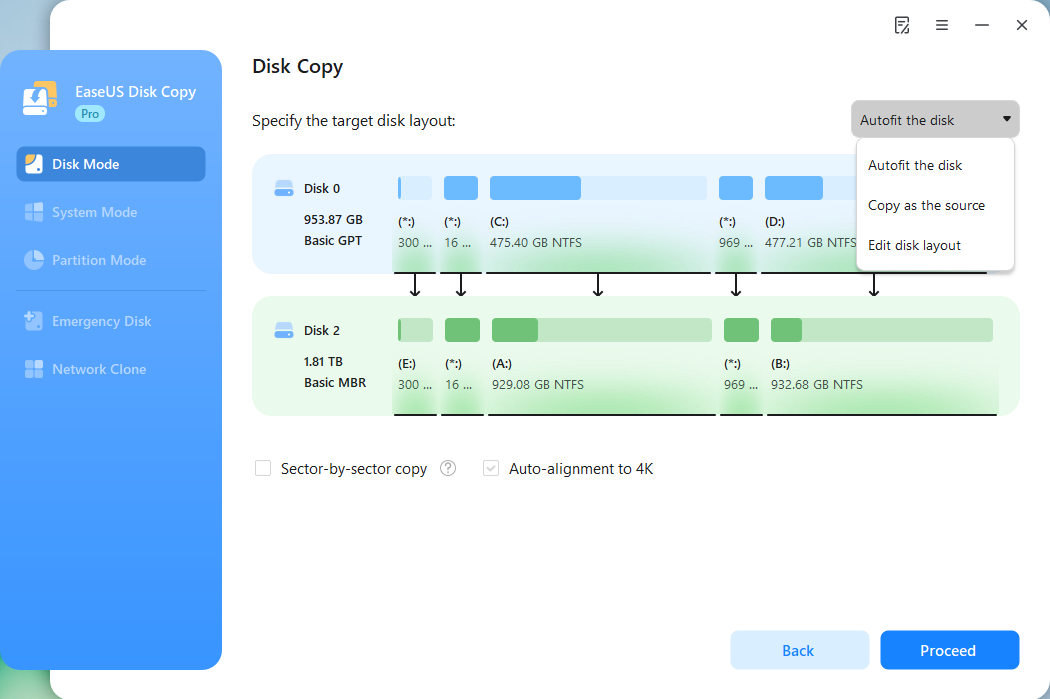
*If the target disk is an SSD, the option "Auto-alignment to 4K" will be checked automatically to optimize the performance of your SSD.
Step 5. Start cloning.
Click Proceed, and a message will appear, warning you that data will be lost. Confirm the message by clicking Continue.
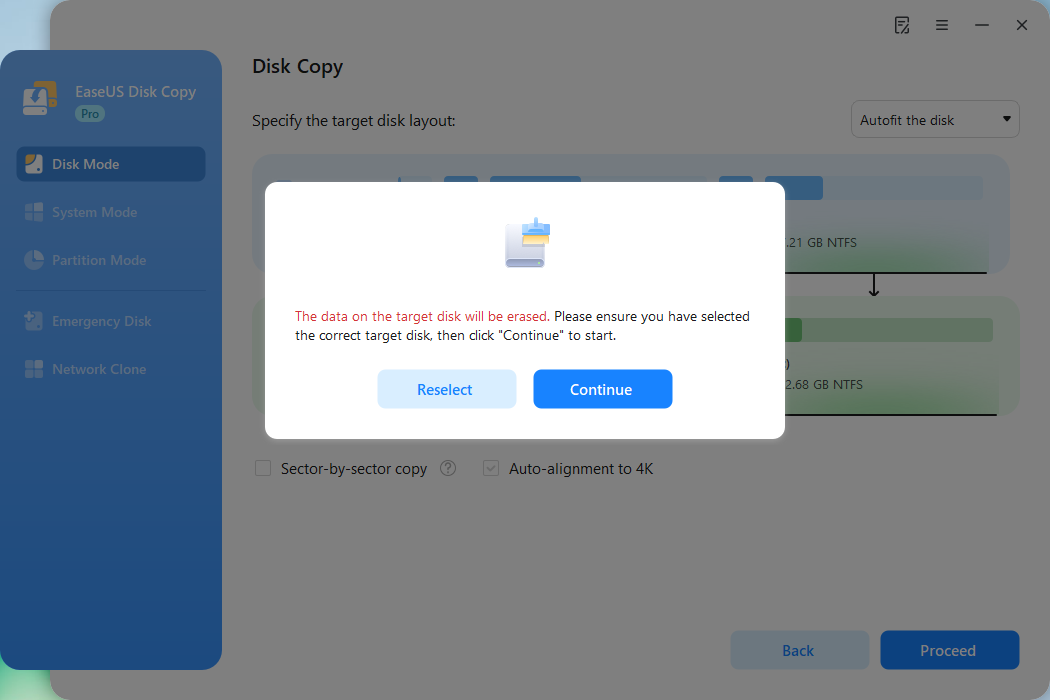
Now, it will start executing the cloning task.
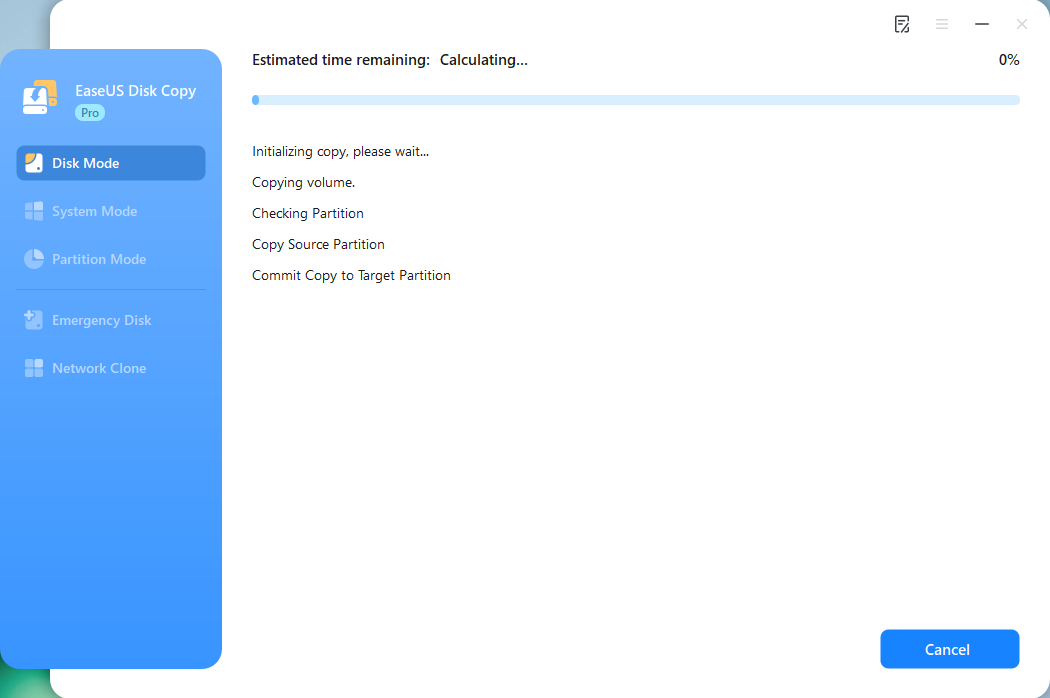
*The time it takes to clone a hard drive depends on how much data is on the source disk, and it will also be affected by the disk types, USB connection, etc.
Video Tutorial:
Watch this YouTube guide to clone a smaller disk to a larger one easily.
Time code:
- 00:26 - Connect the Larger SSD to Your PC
- 00:58 - Check If Your PC Recognizes the SSD
- 01:25 - How to Clone SSD to Larger SSD
- 04:08 - Verify If PC Can Boot From the Larger SSD
Post-Clone Checklist
- ✅ HDD replacement: Replace the old hard drive with the new one.
- ✅Check boot priority in BIOS/UEFI.
- ✅ Confirm all files and applications are intact.
- ✅ Open Disk Management and verify full disk capacity is available.
- ✅ Run Windows Update or driver updates if needed.
- ✅ Keep the old drive as backup until you're sure the new one is stable.
Troubleshooting: Cloned Disk Won't Boot
Even if the cloning process completes successfully, sometimes the new hard drive may not start Windows as expected. Don't panic-most issues can be fixed with a few adjustments. Here are the most common problems and their solutions:
1. Wrong boot order
Symptom: PC still boots from the old drive or shows "No bootable device found".
Solution:
- Restart the computer and enter BIOS/UEFI (usually by pressing Del, F2, or F12).
- Navigate to the Boot menu.
- Set the new larger disk as the first boot device.
- Save changes and restart.
2. Partition style mismatch (MBR vs GPT)
Symptom: Black screen, error like "Operating System not found", or boot failure after cloning. Our system boot mode (UEFI or Legacy BIOS) must match the partition style of the disk (GPT for UEFI, MBR for Legacy).
Solution:
- Check current mode: Press "Win + R", type msinfo32, and hit Enter. ook under BIOS Mode (UEFI or Legacy).
- If mismatched, convert disk style using EaseUS Partition Master or the Windows built-in mbr2gpt tool. Or change BIOS settings from Legacy to UEFI (or vice versa) to match the disk.
3. Unallocated space is not usable
Symptom: The new drive shows the same capacity as the old one, even though it's larger. Cloning copied the partitions exactly, leaving unused space unallocated.
Solution:
- Right-click Start > choose Disk Management.
- Locate the new disk > right-click the unallocated space > select Extend Volume.
- Follow the wizard to merge the unallocated space into your primary partition.
- Alternatively, use EaseUS Partition Master to resize/move partitions with one click.
If you like this post, you can share it on your social platforms to help more people.

Bonus: Clean Install Windows on Larger Hard drive
If you prefer not to clone your old drive, for example, because you want to avoid carrying over old software, drivers, settings, or potential system clutter, then performing a clean installation of Windows on the new larger drive is the better choice.
This method gives you a fresh, fast, and stable operating system while keeping your old drive intact as external storage. Follow the steps below to install Windows from scratch and upgrade your storage at the same time.
Part 1: Prepare Installation Media
Step 1. Go to the official Microsoft website and download the Media Creation Tool.
Step 2. Create a bootable USB drive
- Insert a USB drive (at least 8 GB).
- Run the Media Creation Tool and select "Create installation media for another PC".
- Choose the Windows edition, language, and architecture (64-bit recommended).
- Select USB flash drive and follow the prompts to create the bootable installer.
Part 2: Swap Drives
Step 1. Shut down your computer and unplug it from power.
Step 2. Remove the old drive and install the new, larger drive (refer to your device's manual for hardware instructions).
Step 3. Insert the bootable USB drive into a USB port.
Part 3: Install Windows
Step 1. Turn on the computer and press the boot menu key (e.g., F12, ESC, F2) or enter BIOS/UEFI to set the USB drive as the first boot device.
Step 2. After booting, select your language and click Next > Click Install now. If prompted, enter your product key (or skip if reinstalling the same edition). Accept the license terms and select Custom: Install Windows only (advanced).
Step 3. You'll see the unallocated space of your new, larger drive.
Step 4. Click Next, Windows will automatically create the necessary partitions and begin installation.
Part 4: Post-Installation Steps
Step 1. Initialize the disk: Right-click the Start button and select Disk Management. If the new drive shows as "Unknown" or "Not Initialized", right-click it and select Initialize Disk, choose GPT partition style (recommended for modern systems).
Step 2. Format and assign a drive letter: In Disk Management, locate the unallocated space on the new drive, right-click and select New Simple Volume, follow the wizard to assign a drive letter (e.g., `D:` for a secondary partition) and format as NTFS.
Step 3. Place the old drive into an external USB enclosure, and connect it via USB, you can now access it as external storage.
FAQs on Upgrade Disk to a Bigger/Larger One
1. Can I clone a larger hard drive to smaller SSD?
Make sure that the used space on your hard drive is less than that of the total capacity of the SSD. Right-click on your hard drive in Windows Explorer, and choose Properties. There you will check how much space has been used. If the used space is within the SSD capacity, download EaseUS Disk Copy to clone the larger hard drive to smaller SSD.
2. How do I install a larger hard drive?
After cloning a smaller HDD to a larger hard drive, you can now safely remove the old drive from your computer. Next, replace hard drive with the larger hard drive.
3. How to clone a laptop hard drive?
To clone a laptop hard drive to a new one, you need to use a SATA-to-USB cable or an external hard drive enclosure to connect the new drive to your laptop. Next, follow the above guide to use Disk Copy to clone a laptop hard drive.
Conclusion
Upgrading to a bigger hard disk is one of the easiest ways to expand storage and keep your system running smoothly. By cloning your current drive, you avoid the hassle of reinstalling Windows and applications while gaining more space for future use. With the right preparation and tools like EaseUS Disk Copy, the process is safe, fast, and beginner-friendly.
-
Updated by
![]()
Daisy
Daisy is the Senior editor of the writing team for EaseUS. She has been working at EaseUS for over ten years, starting as a technical writer and moving on to being a team leader of the content group. As a professional author for over ten years, she writes a lot to help people overcome their tech troubles.…Read full bio