Page Table of Contents
If your Windows is preinstalled on a small SSD drive, such as a 128GB SSD, you will run out of storage space after a long use. Under such circumstances, replacing your current SSD with a larger one will be an excellent idea. However, many of you may wonder how to reinstall Windows on new SSD? No worries. EaseUS will describe how to install Windows after replacing SSD and how to upgrade SSD without reinstalling Windows. Hurry up and learn!
| ⛏️Methods | 👣Steps |
| Clone SSD Without Reinstalling Windows |
1️⃣Step 1. Download and install EaseUS Disk Copy 2️⃣Step 2. Connect SSD to PC via USB-to-SATA cable 3️⃣Step 3. Launch the software and select the old SSD as the source disk and the new SSD as the target disk 4️⃣Step 4. Click Proceed to clone SSD |
| Clean Install Windows on SSD |
1️⃣Step 1. Create Windows 10 Installation Media to USB 2️⃣Step 2. Boot Computer from Bootable USB 3️⃣Step 3. Install Windows to SSD 4️⃣Step 4. Complete Windows Installation Process |
- ✔️ For non-technical & Windows beginners users, select clone to easily transfer Windows from SSD to SSD.
- ✔️ For advanced Windows fans, clean install Windows on SSD with more effort.
Make Everything Ready Before Installing Windows
Before you install Windows to SSD, you'd better ensure everything gets ready to make the installation process smooth and successful. Here is what you need to do:
- Backup data on your SSD to another disk. If your SSD stores your important data, back up data first because the installation will wipe data on it. To this end, you can try Backup & Restore (Windows 7) or professional free backup software - EaseUS Todo Backup.
- Prepare a USB-to-SATA cable. Install SSD to your computer via the cable when reinstalling Windows after replacing SSD.
- Initialize SSD for Windows installation. If you use a new SSD, you need to initialize it, which means formatting the new SSD. If the destination SSD is not brand new, you do not need to format it.
Clone SSD to SSD Without Reinstalling Windows
Generally speaking, you must reinstall Windows when replacing a new HDD or SSD, but this is no longer the case with the help of cloning. This is because cloning can help you transfer data from one SSD to another, including your installed Windows and personal data.
To this end, all you need to do is find a secure and reliable cloning program since Windows has no built-in cloning features. EaseUS Disk Copy, dedicated and efficient disk cloning software, comes in handy.
EaseUS disk cloning software, with an easy-to-use interface and fast cloning speed, can help you move OS to another drive easily and quickly. In addition, it has advanced sector-by-sector cloning technology, which can let you clone an HDD/SSD with bad sectors.
EaseUS disk clone software can help you perform various tasks in the cloning field, such as cloning a disk, migrating an OS, upgrading a hard drive, or backing up a disk. It can help copy C drive to a new drive and transfer data from an old hard drive to a new computer. Just download and try this simple yet powerful disk cloning software to clone SSD to another SSD to avoid reinstalling Windows:
Before cloning:
- If your computer has only one slot, connect the target disk to your machine via a USB-to-SATA/NVMe adapter.
- If your computer has an extra slot, install the target disk into the empty slot properly, and make sure it is compatible.
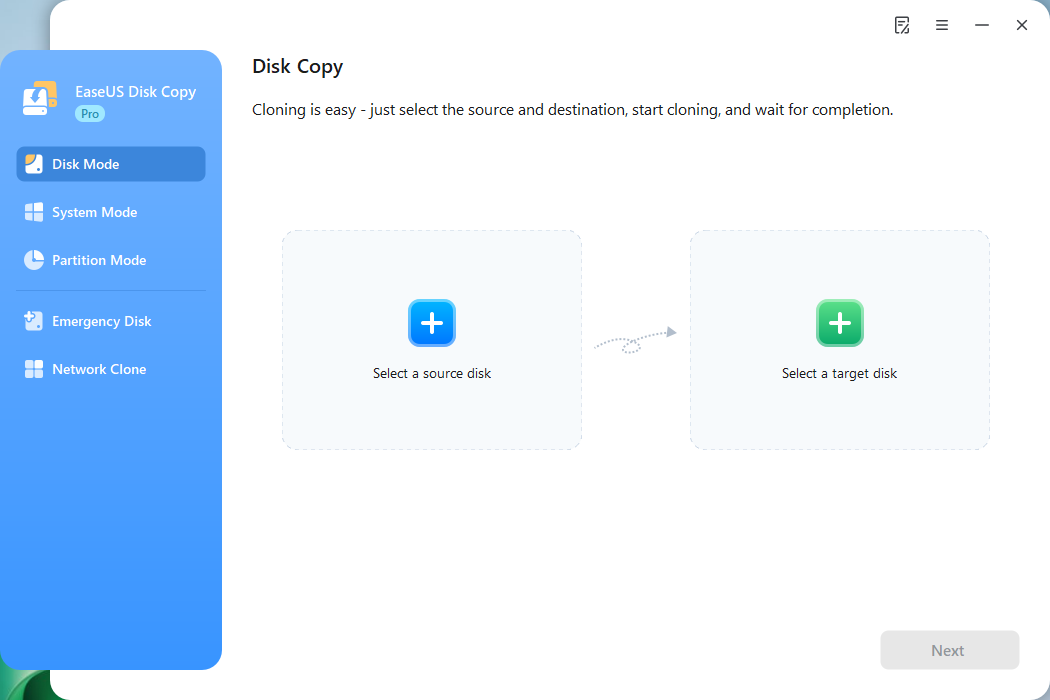
Step 1. Launch EaseUS Disk Copy and choose Disk Mode.
Install EaseUS Disk Copy cloning software on your Windows computer, then launch it and select Disk Mode from the left panel.
Step 2. Select the source drive.
Select the drive you want to copy, then click Select.
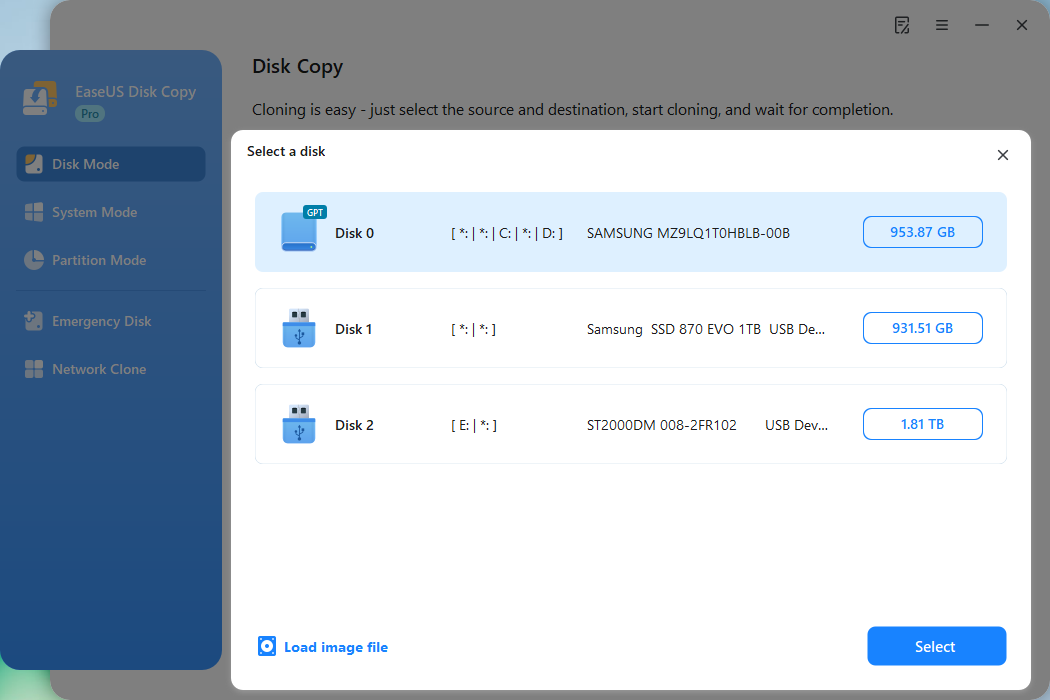
Step 3. Choose the target disk.
Choose the disk that you want to clone data to, and click Select. Note that the used space of the source disk should be less than the target disk capacity.
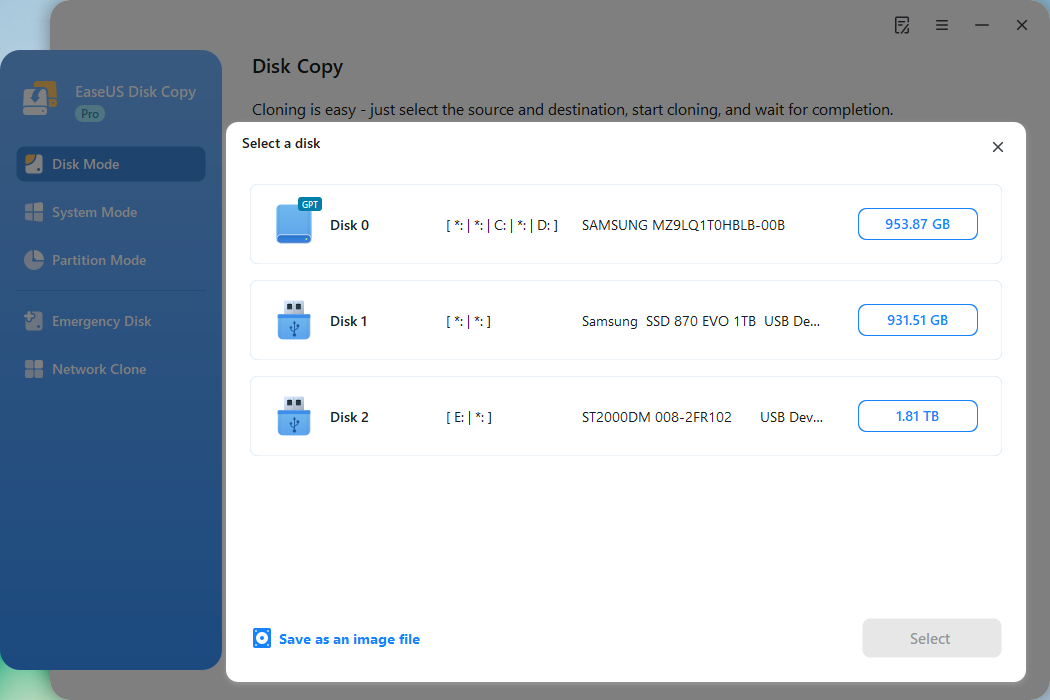
*At this step, you can also click the option "Save as an image file" to store your disk as a compressed image file, which can be restored without any data loss.
Step 4. Adjust disk layout.
Specify the target disk layout as your preference. You can choose among:
- Autofit the disk: makes some changes by default on the destination disk layout so that it can work at its best.
- Copy as the source: create a 1-to-1 copy of your source disk; the layout is the same as the source disk.
- Edit disk layout: allows you to manually resize/move the partition layout on this destination disk.
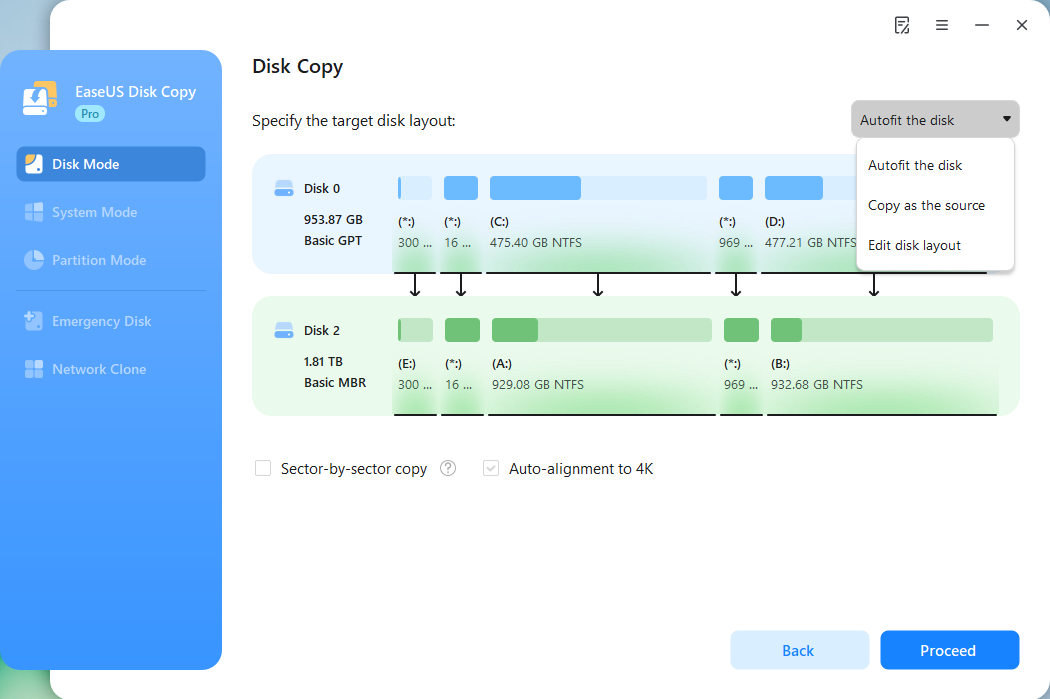
*If the target disk is an SSD, the option "Auto-alignment to 4K" will be checked automatically to optimize the performance of your SSD.
Step 5. Start cloning.
Click Proceed, and a message will appear, warning you that data will be lost. Confirm the message by clicking Continue.
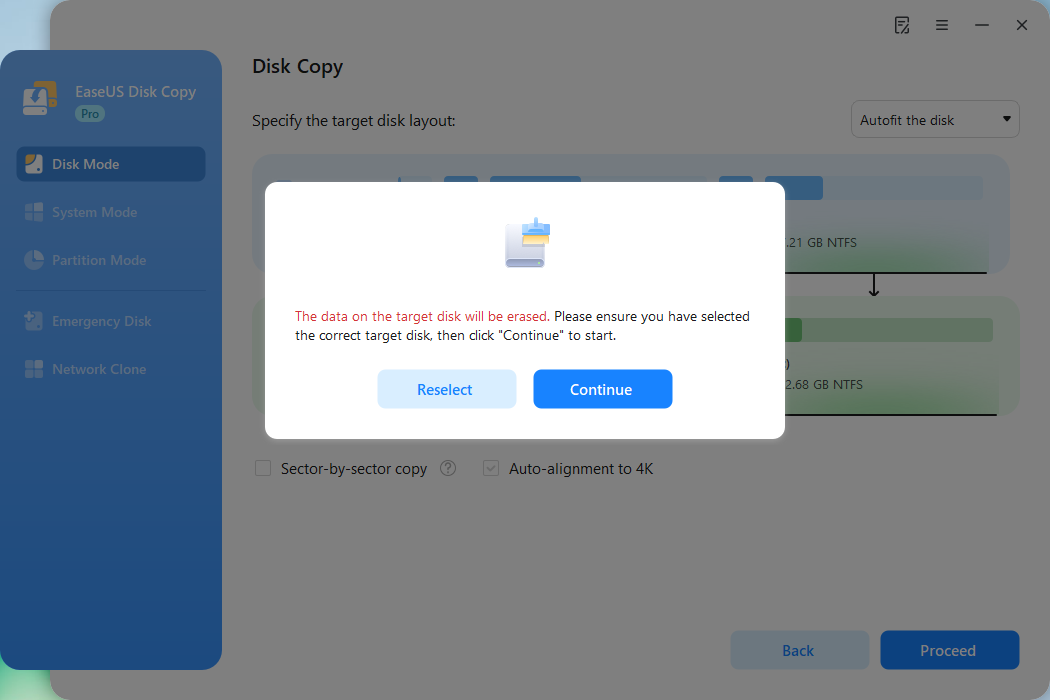
Now, it will start executing the cloning task.
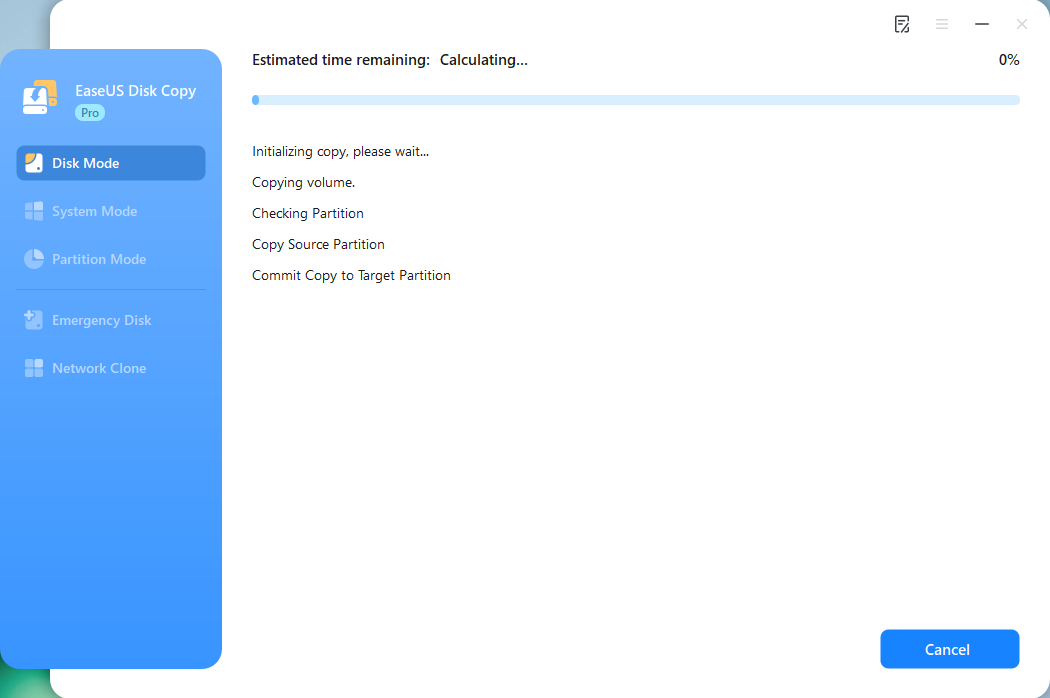
*The time it takes to clone a hard drive depends on how much data is on the source disk, and it will also be affected by the disk types, USB connection, etc.
Share this article on your social media to help others install Windows after SSD upgrades!
Fresh Install/Clean Install Windows 10/11 on SSD
In addition to cloning, you can also perform a clean installation to manually install Windows after SSD upgrade. This is extremely helpful when your OS crashes or dies. To do so, you need to prepare a USB with a capacity of at least 8GB. Here, take Windows 10 installation as an example:
Part 1. Create Windows 10 Installation Media
You can utilize the Windows 10 Media Creation Tool to create a Windows bootable USB drive. This Tool can directly download the Windows 10 ISO file and fashion a Windows 10 bootable USB. Go to the Windows 10 download page to download and install the Tool. Then, open the Tool and follow the on-screen guide to make a Windows 10 bootable USB.
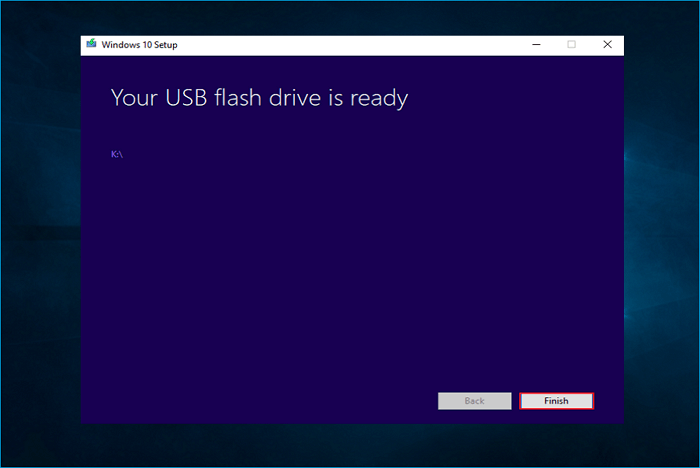
With Windows 10 installation media handy, you can go to the next part to install Windows 10.
Part 2. Boot Your Computer from Bootable USB
After making the bootable USB, you can replace the old SSD with the new SSD and connect the USB to your computer. Then, reboot your PC and press the BIOS key (F2, Delete, or F12) to enter BIOS settings to set the bootable USB as the first boot device. Then, you can start the Windows 10 installation process.

Part 3. Install Windows to SSD
When the Windows 10 setup wizard launches, select the Language, Windows Edition, and Architecture, press Install now, pick I don't have a product key, accept the license terms, and opt Custom: Install Windows only (advanced).

Part 4. Complete the Windows Installation Process
After that, follow the on-screen instructions to complete the Windows 10 installation process. When done, your Windows will be installed on the SSD, and you can boot your PC as normal.
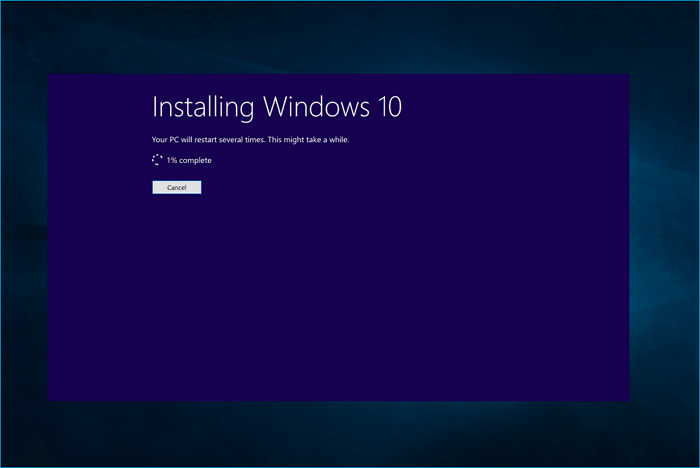
If you want to know more information about how to install Windows on SSD from USB, read the article below:

How to Install Windows 10 on New Hard Drive from USB
This article will tell you how to install Windows 10 on a new hard drive from USB via the Windows Media Creation Tool and via cloning the hard drive. Read more >>
To Wrap Things Up
That is all about how to install Windows after replacing SSD. This article tells 2 common ways to install Windows on SSD when upgrading SSD: cloning and clean installation. If you want an easy way, cloning Windows 10 to SSD is your choice, whereas choosing a fresh install to have a new Windows OS.
If you want to clone your old SSD to a new one, you must use third-party SSD cloning software since Windows has no preinstalled cloning features. EaseUS Disk Copy is an excellent and easy-to-use cloning utility for Windows PCs that can clone HDD to SSD or SSD to SSD. It can transfer your Windows from one SSD to another with just 3 simple clicks. Just download and try to help you avoid reinstalling Windows when replacing a hard drive.
FAQs on How to Install Windows After Installing New SSD
1. If I install a new M.2 SSD, would I have to reinstall Windows?
It depends. If you clone your old hard drive to the M.2 SSD, you do not have to reinstall Windows, whereas if you just take out the old drive and install the new M.2 SSD, you need to perform a clean installation of Windows.
2. Do I need to wipe my SSD before installing Windows?
No, wiping the drive is optional unless you are troubleshooting drive problems. What you need to do is format SSD or delete all partitions on your SSD, which will erase all data.
3. How do you install Windows on a new SSD without a USB?
To install Windows on new SSD without a USB, directly clone your Windows OS to the SSD by connecting the SSD to your PC via the USB-to-SATA cable. To this end, you will also need to get a reliable disk cloning tool, such as EaseUS Disk Copy and Clonezilla.
4. Can I install W10 on my new SSD and keep my old SSD (with W10 installed already) as storage?
Yes, you can install Windows on a new SSD while keeping the old SSD as storage. When you clone your Windows 10 to the new SSD, you can format the old SSD and use it as your storage device.
-
Updated by
>"I hope my articles can help solve your technical problems. If you are interested in other articles, you can check the articles at the bottom of this page, and you can also check my Facebook to get additional help."…Read full bio
EaseUS Disk Copy

One-Click Disk Clone
Smooth PC Upgrade
EaseUS Disk Copy Resources

Start cloning disk with EaseUS Disk Copy


