Page Table of Contents
- ☄️Bullet Points: How to Clone Windows to Smaller SSD
- Step 1️⃣. Connect the smaller SSD to your computer.
- Step 2️⃣. Download and launch OS migration software, EaseUS Disk Copy.
- Step 3️⃣. Click Yes when the pop-up windows asks "A new drive on this computer was found, do you want to migrate OS to the new drive?"
- Step 4️⃣. Adjust the SSD layout, and click Proceed to start cloning.
❓Question: Can I Clone Windows to a Smaller SSD?
"I just bought a 500GB SSD to replace my old 1TB HDD, but my laptop shows it contains about 600GB of data. Can I still clone my Windows 11 to this smaller SSD without losing files or breaking my system?"
It is a common dilemma that many users want to upgrade to a faster SSD but worry about losing data while cloning the hard drive to a smaller SSD. The good news is that you can migrate OS to a smaller SSD as long as its storage is smaller than the overall capacity of the new SSD.
In this guide, we'll walk you through the entire process, including how to check storage space, clean up unnecessary files, clone your system correctly, and boot from the cloned SSD, ensuring a smooth transition to your new SSD
What to Prepare Before Cloning Windows to a Smaller SSD
Before cloning, you should make some preparations to ensure a smooth process. Here's how to prepare properly:
1. ✅Check Your Current Disk Usage
- Open File Explorer > Right-click C drive > Properties.
- If "Used space" exceeds your SSD's capacity, you can release space by deleting temporary files, uninstalling unused programs, or moving large files to an external drive.
2. ✅Shrink the Windows Partition (optional)
If your data fits, but the partition is too large:
- Open Disk Management.
- Right-click C: drive > Shrink Volume.
- Enter the amount to shrink (leave enough free space for future updates).
3. ✅Download a Reliable Disk Cloning Tool
Since Windows lacks built-in cloning for smaller drives, you must make use of a third-party tool, and EaseUS Disk Copy is one of the most popular choices because it will automatically adjust partitions to fit smaller SSDs, support UEFI/GPT/MBR boot modes, and ensure 4K alignment for SSD performance. It is compatible with various HDDs/SSDs, and allows you to move the OS to SSD without any boot issues. Download and get ready for the cloning process.
Windows 11/10/8/7
4. ✅Connect SSD to the Computer Properly
It is very important to ensure that the device recognizes the new SSD. If your computer has only one disk bay, connect it with an adapter or USB-to-SATA cable. If your computer contains an extra disk slot, you can install the SSD directly into the computer.
Share this guide on your Twitter/Instagram to help your fans and friends migrate Windows OS to a smaller SSD smoothly.

How to Clone Windows 11/10 to a Smaller SSD
With all the preparations done, now that your system is ready, follow these detailed steps to copy your Windows OS to the smaller SSD smoothly.
🚀If your SSD is a new one, EaseUS Disk Copy will automatically detect it and ask you if you want to migrate the OS to it. If not, you can skip to the next part.
Before cloning:
- Install or connect the destination disk that you want to move OS to your computer, and make sure it can be appropriately recognized.
- Ensure the target HDD or SSD has enough capacity to accommodate your system files.
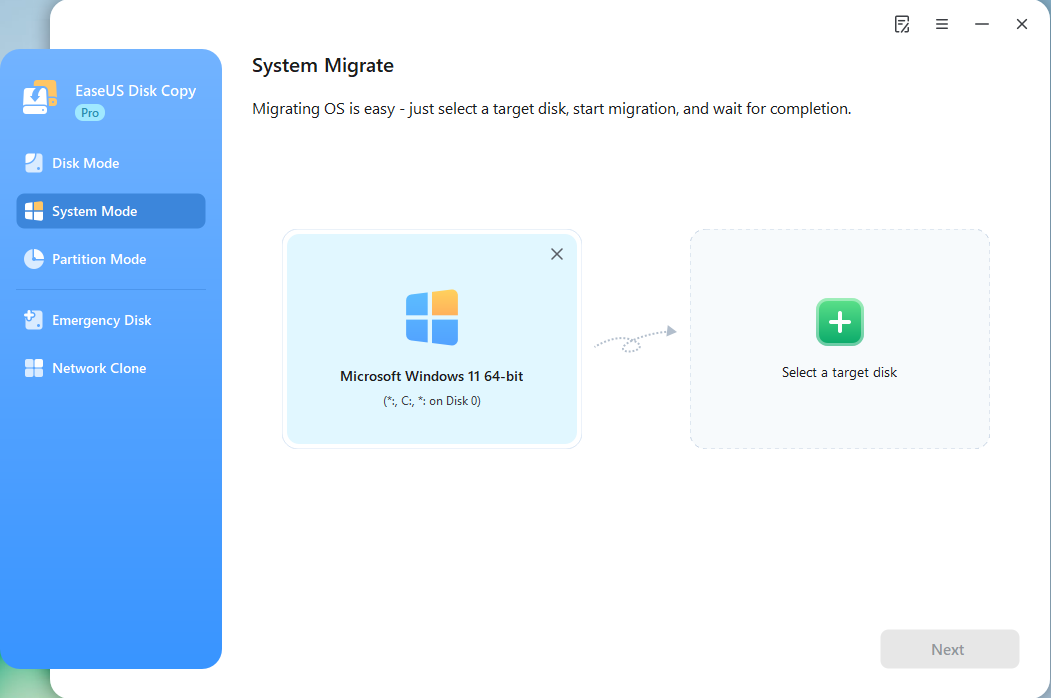
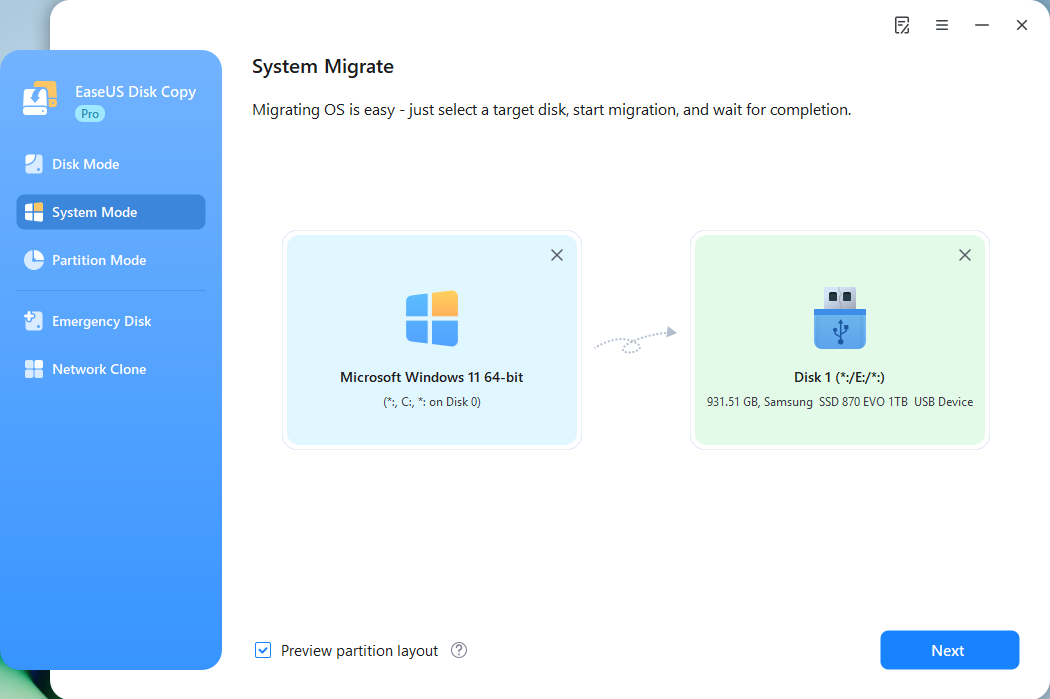
Step 1. Launch EaseUS Disk Copy and choose System Mode.
Install EaseUS Disk Copy system migration software on your computer, launch it, and choose System Mode. EaseUS Disk Copy will select the current system you use by default, including all system-related files and boot sectors.
*If you apply dual-boot system, you can select another system by yourself.
Step 2. Select the target HDD/SSD.
Choose the destination HDD/SSD that you want to move OS to.
Step 3. Adjust target disk layout.
Specify the target layout as your preference. You can choose among:
- Autofit the disk: makes some changes by default on the destination disk layout so that it can work at its best.
- Copy as the source: create a 1-to-1 copy of your source disk, the layout is the same as the source disk.
- Edit disk layout: allows you to manually resize/move the partition layout on this destination disk.
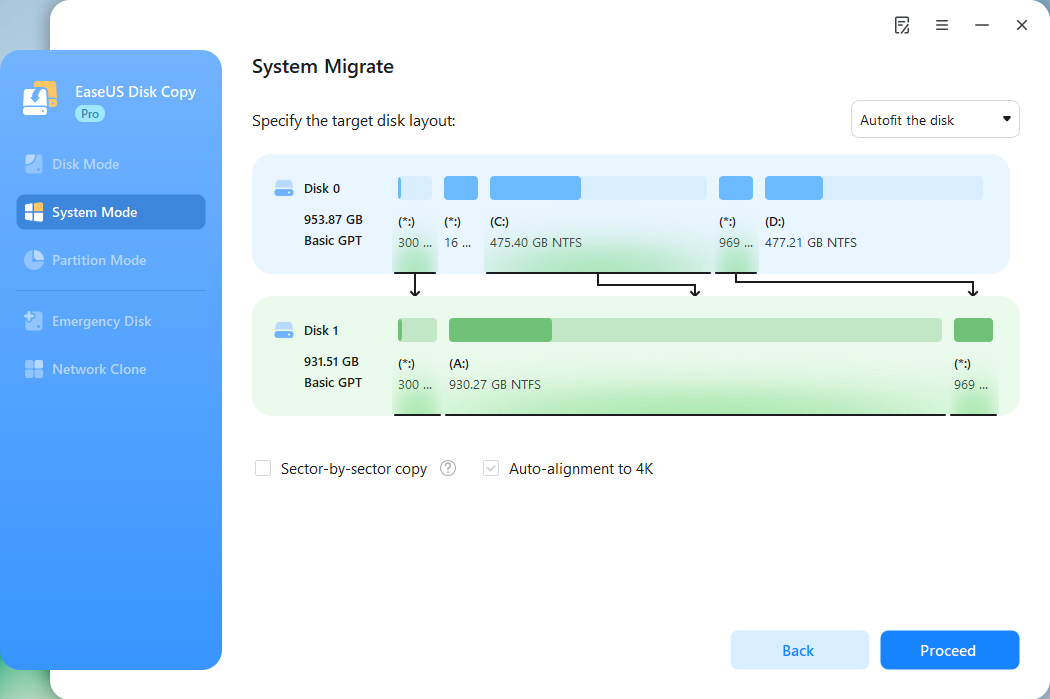
*The option Auto-alignment to 4K will be checked automatically to optimize the performance of your SSD.
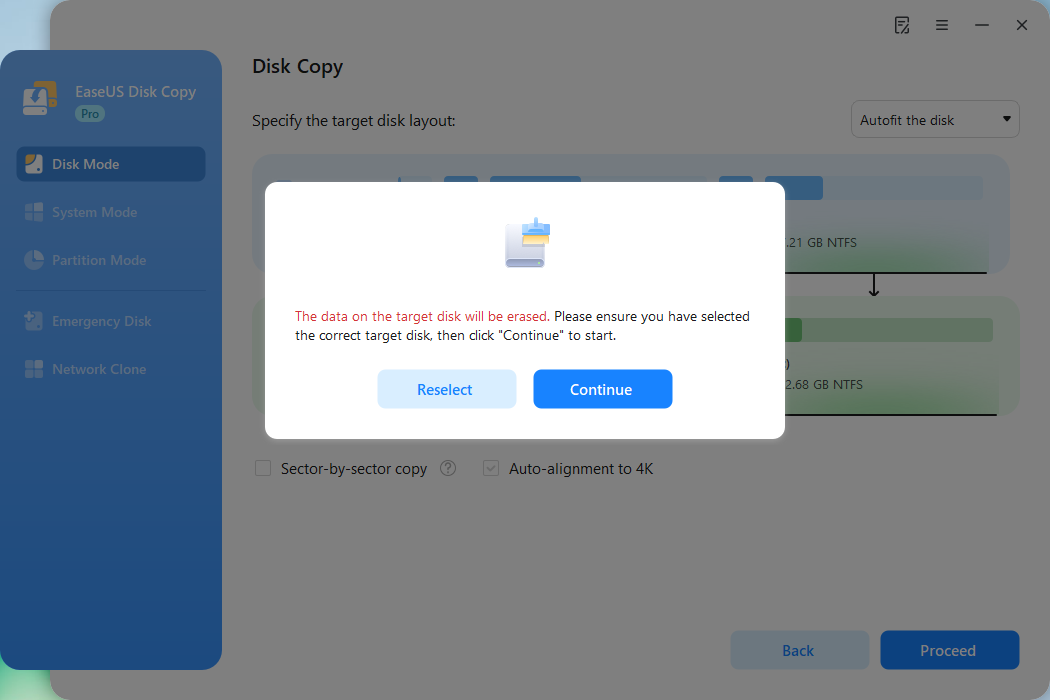
Step 4. Start cloning OS.
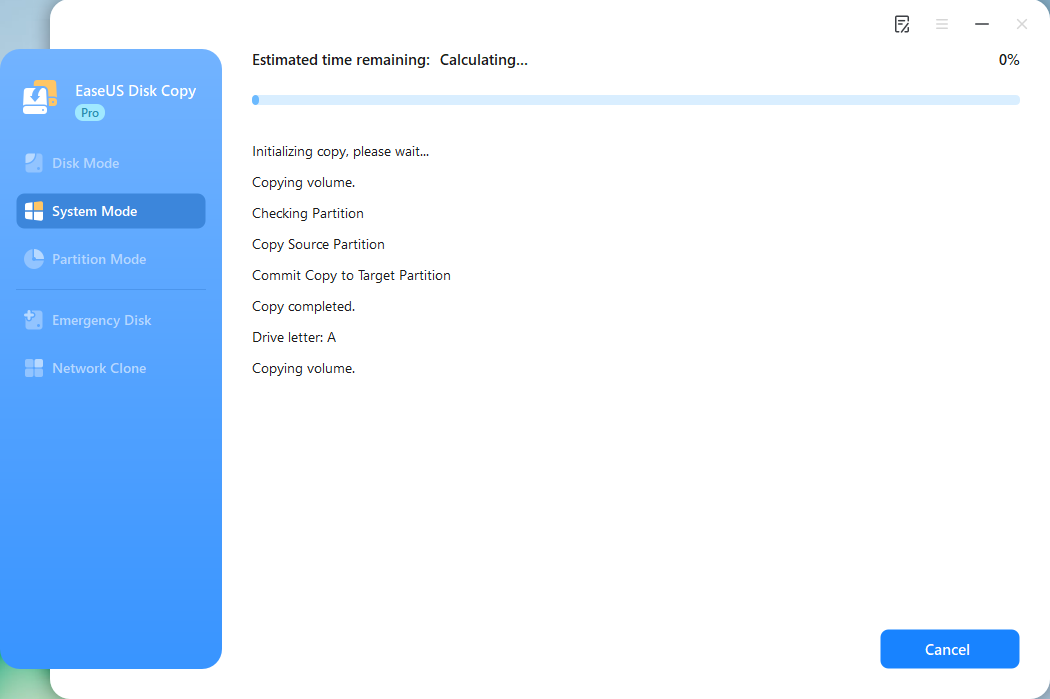
Click Proceed, and a message will appear, warning you that data will be lost. Confirm the message by clicking Continue. Now, it will start cloning OS to the new disk.
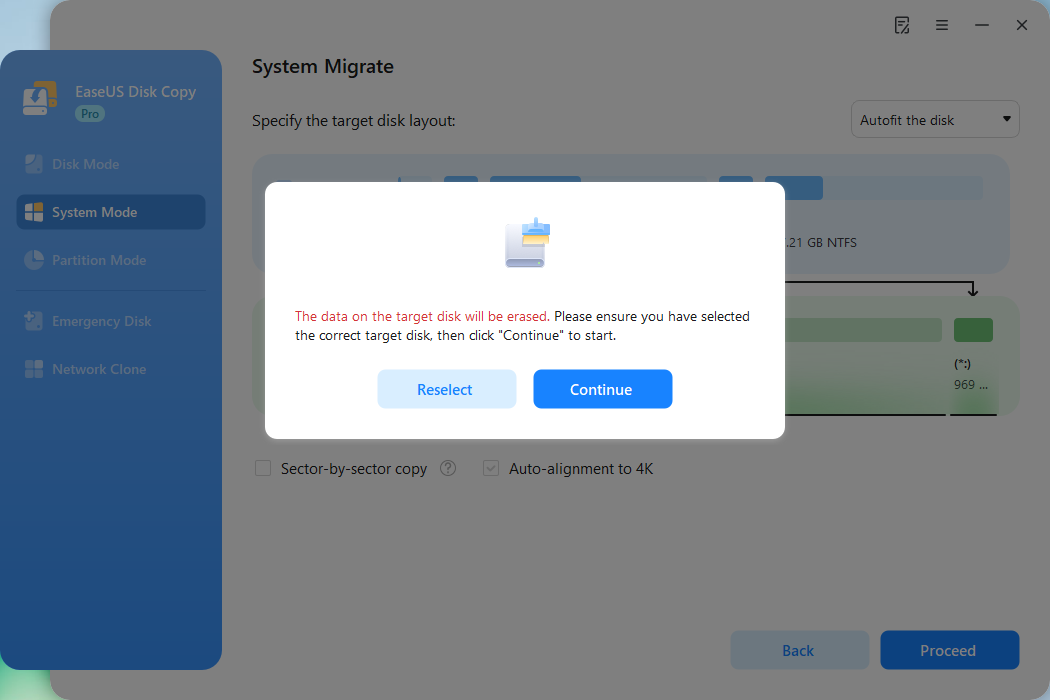
Now, it will start cloning OS to the new disk.
🎯These steps are applicable when your SSD is not a new disk. While choosing the source disk, select one that your OS is located.
Before cloning:
- If your computer has only one slot, connect the target disk to your machine via a USB-to-SATA/NVMe adapter.
- If your computer has an extra slot, install the target disk into the empty slot properly, and make sure it is compatible.
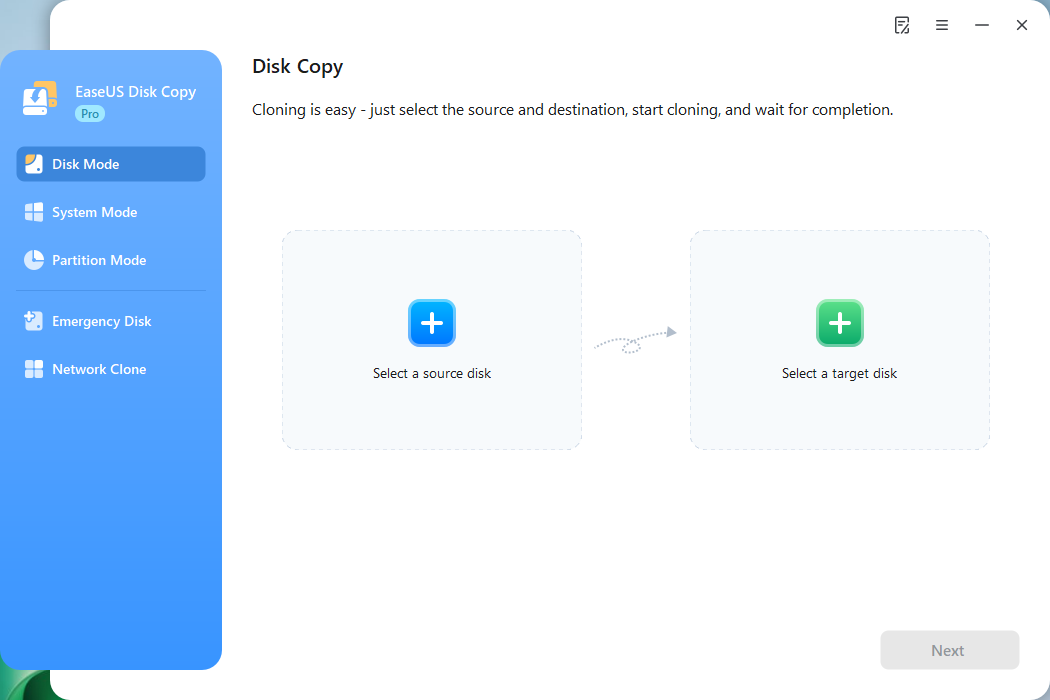
Step 1. Launch EaseUS Disk Copy and choose Disk Mode.
Install EaseUS Disk Copy cloning software on your Windows computer, then launch it and select Disk Mode from the left panel.
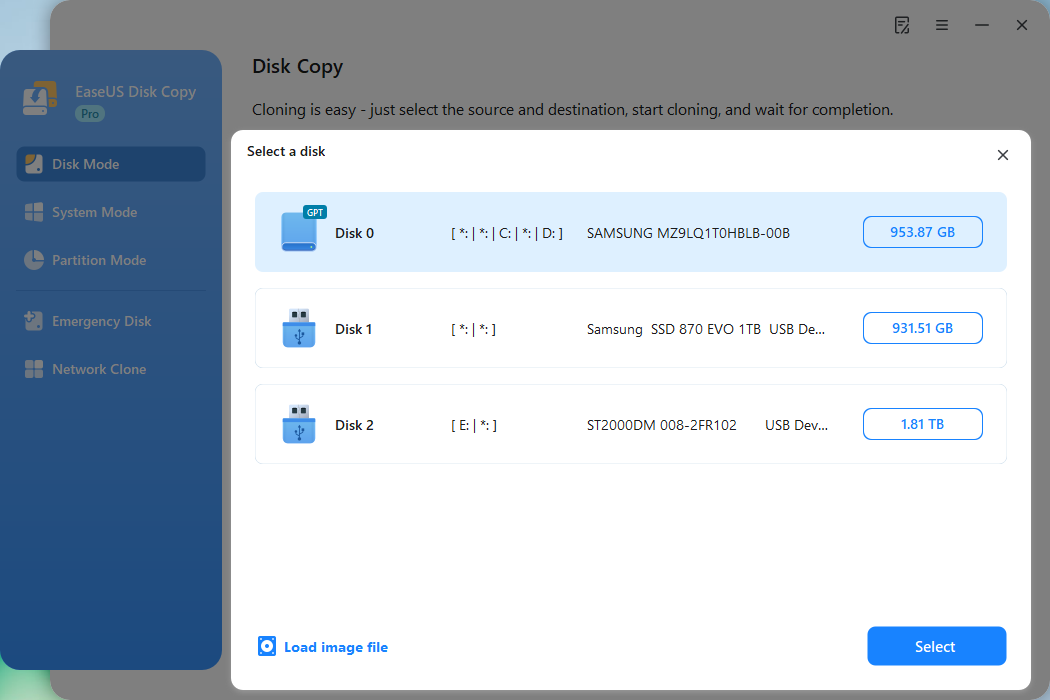
Step 2. Select the source drive.
Select the drive you want to copy, then click Select.
Step 3. Choose the target disk.
Choose the disk that you want to clone data to, and click Select. Note that the used space of the source disk should be less than the target disk capacity.
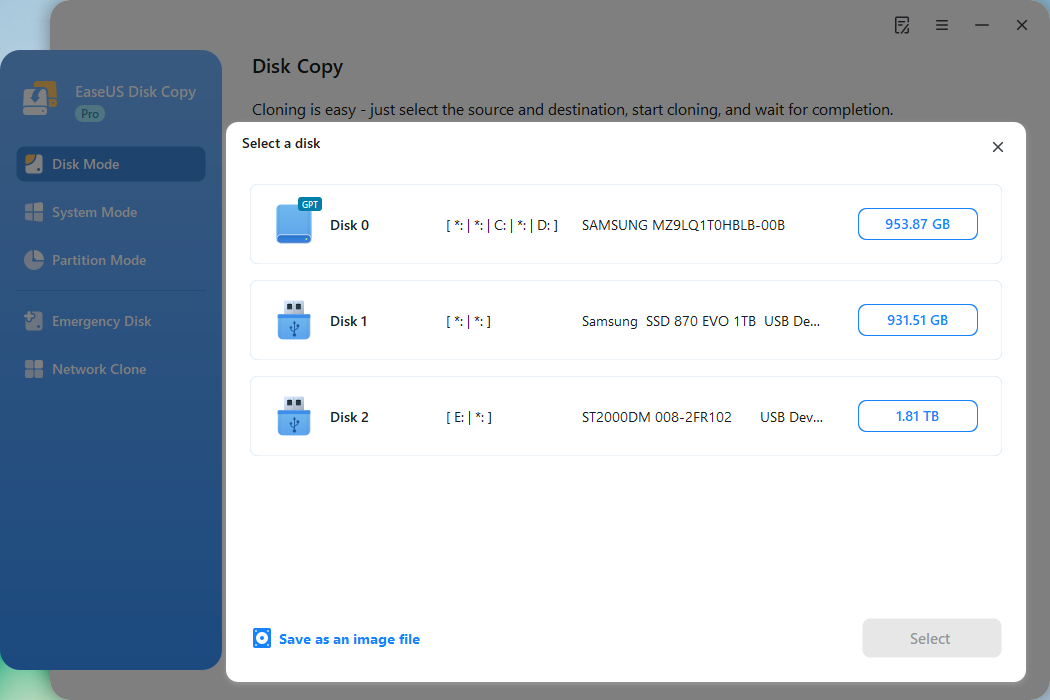
*At this step, you can also click the option "Save as an image file" to store your disk as a compressed image file, which can be restored without any data loss.
Step 4. Adjust disk layout.
Specify the target disk layout as your preference. You can choose among:
- Autofit the disk: makes some changes by default on the destination disk layout so that it can work at its best.
- Copy as the source: create a 1-to-1 copy of your source disk; the layout is the same as the source disk.
- Edit disk layout: allows you to manually resize/move the partition layout on this destination disk.
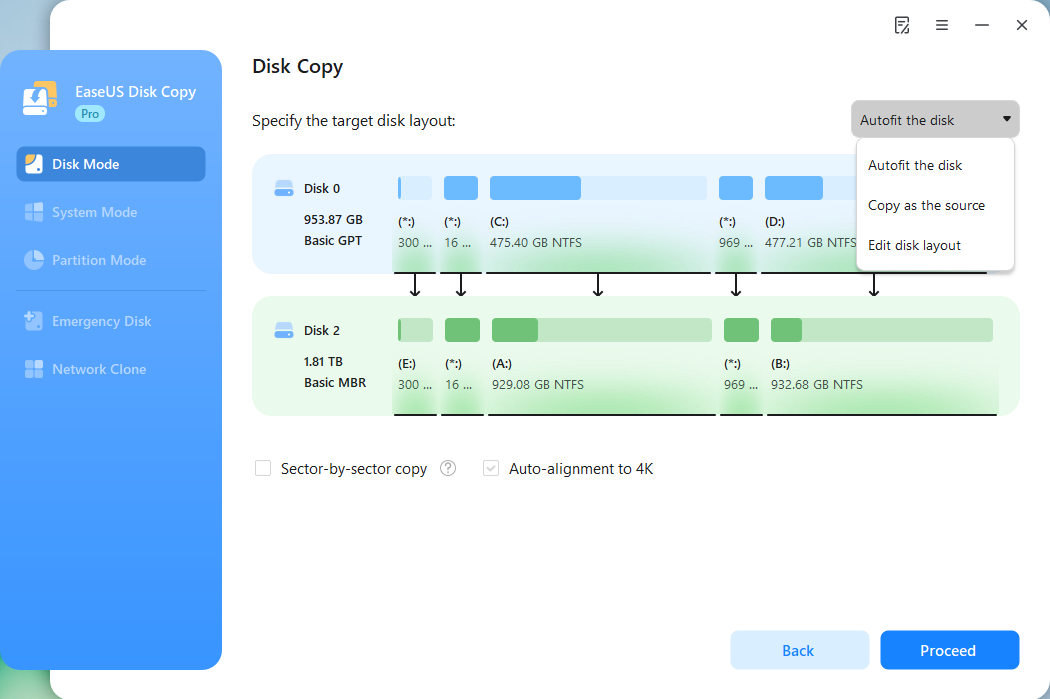
*If the target disk is an SSD, the option "Auto-alignment to 4K" will be checked automatically to optimize the performance of your SSD.
Step 5. Start cloning.
Click Proceed, and a message will appear, warning you that data will be lost. Confirm the message by clicking Continue.
Now, it will start executing the cloning task.
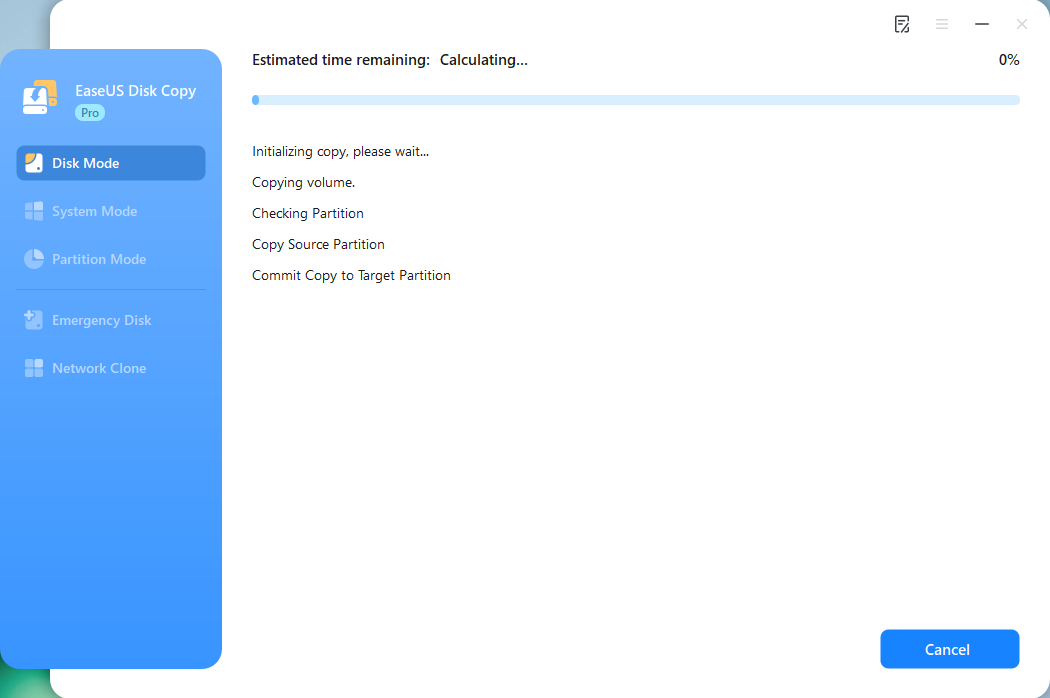
*The time it takes to clone a hard drive depends on how much data is on the source disk, and it will also be affected by the disk types, USB connection, etc.
How to Make the Smaller SSD Bootable After Cloning
After cloning, you can now swap to the new cloned SSD and run Windows on the new disk. Here are the steps:
- Resart your PC and enter BIOS.
- Under the boot menu, choose the new SSD as the boot drive.
- Save the change and exit BIOS.
As for the old hard drive, you can use it as a secondary storage drive if your computer has an extra disk bay.
However, according to many users' feedback, the unbootable problem is always encountered after cloning, which is very frustrating. Here are some solutions you can try to make your system botable.
1️⃣. Change Boot Order in BIOS/UEFI
- Restart PC and enter BIOS (F2/DEL key).
- Set the new SSD as the first boot device.
2️⃣. Verify Disk Partition Style (GPT/MBR)
- Open Disk Management and check if the SSD matches the source disk's style (GPT for UEFI, MBR for Legacy).
- If not, change GPT/MBR in Disk Management before cloning.
Share this guide on your Twitter/Instagram to help your fans and friends migrate Windows OS to a smaller SSD smoothly.
Final Verdict
Cloning Windows to a smaller SSD is 100% possible if you ensure that the used data is smaller than the SSD's capacity. With the help of EaseUS Disk Copy, the process will be much easier, and save you the trouble of manipulating complex steps.
By following this guide, you'll avoid failed cloning, unbootable drives, and SSD performance issues. Getting your faster SSD up and running in no time.
Windows 11/10/8/7
FAQs About Cloning Windows to Smaller SSD
Why is my SSD capacity smaller after cloning?
After cloning, your SSD may show a smaller capacity due to partition alignment issues or leftover recovery partitions from the old drive. The cloning process usually copies partitions exactly, including unused space. You can use Disk Management to check for unallocated space or resize partitions. Also, some SSDs reserve extra space for over-provisioning, which isn't user-accessible but improves performance and longevity.
How to clone HDD to SSD different sizes?
To clone HDD to SSD of different sizes, you need to ensure that the used space of the HDD must be smaller than the overall capacity of the SSD, then follow the normal process to clone HDD to SSD. If the used space is larger than the SSD, you can remove some unnecessary and redundant data in File Explorer to save more space.
How do I resize my SSD after cloning?
To resize SSD after cloning, you can make use of Disk Management. Here are the steps:
- Press Win + X > Disk Management.
- Right-click the partition and select Extend Volume (if unallocated space exists).
- If partitions are locked, use third-party tools like EaseUS Partition Master to adjust sizes.
- Ensure 4K alignment for optimal performance.
Can you clone a 1TB HDD to 500GB SSD?
It depends on how much data is saved on the HDD. If the used space on the 1TB HDD is under 500GB, you can clone HDD to SSD successfully. Otherwise, the process won't be completed, and some of the data will get lost. EaseUS Disk Copy allows your to adjust the disk layout while cloning, allowing you to adjust partition to fit the smaller SSD.
-
Updated by
![]()
Larissa
Larissa has rich experience in writing technical articles and is now a professional editor at EaseUS. She is good at writing articles about data recovery, disk cloning, disk partitioning, data backup, and other related knowledge. Her detailed and ultimate guides help users find effective solutions to their problems. She is fond of traveling, reading, and riding in her spare time.…Read full bio