Page Table of Contents
PAGE CONTENT:
You can improve your gaming experience by upgrading your Steam Deck's memory unit. You may clone it when the standard storage option no longer serves your increasing demands. A great solution is to perform a Clonezilla Steam Deck SSD upgrade. Developers designed the Steam Deck so you can upgrade it by replacing the internal SSD.
Increasing its storage allows you to reduce the loading times and accommodate more games. You'll have an enjoyable and smoother gaming experience with an upgraded Steam Deck. This article from EaseUS guides you on how to upgrade Steam Deck SSD by cloning it with Clonezilla. It will also examine how to upgrade using EaseUS Disk Copy, the best alternative to Clonezilla.
How to Upgrade Steam Deck SSD Using Clonezilla
Clonezilla is a disk and partition cloning/imaging tool. The software helps transfer data from one SSD to another to create an exact copy of your SSD. It's an open-source clone tool in the multicasting version that can simultaneously clone over 40 PCs. There is also the unicasting version that only restores and backs up on one computer. The tool creates a copy of the contents of your SSD on another storage device and allows you to recover and back up your computer.
If your Steam Deck SSD no longer serves your needs, you can upgrade it using Clonezilla. Here, you will learn how to upgrade your SSD with Clonezilla to let you store more games and have an enjoyable gaming experience. You will discover how to prepare for upgrading using the relevant steps.
You need a few things to upgrade Clonezilla Steam Deck SSD successfully. Here are the things you need.
- A Windows PC.
- 2230 form factor NVMe SSD.
- Steam Deck with a 25% charge or less remaining.
- Pair of tweezers and a plectrum.
- A PH1 or PH0 screwdriver.
- A disk cloning tool.
Here are the stages and steps to clone Steam Deck SSD Clonezilla.
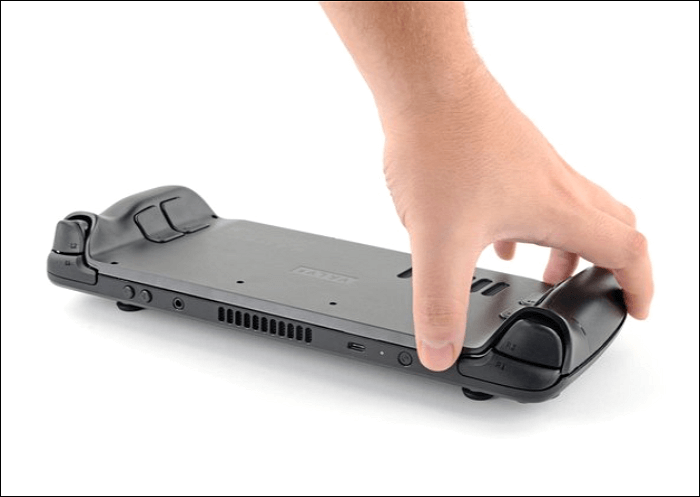
Stage 1. Disconnect Original SSD
To avoid puncturing a Li-ion battery, discharge your Steam Deck battery below 25 percent before you open it. Additionally, put the Steam Deck in battery mode before modding. Now, start the process.
Step 1. Place your Steam Deck on a flat surface. Unscrew the back cover, unclip it, and then remove it.
Step 2. Uncover the hidden shield screw to remove the shield.
Step 3. Next, remove the battery.
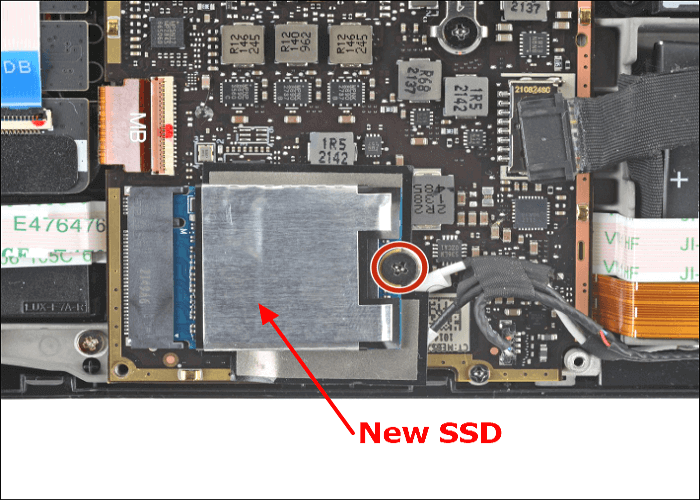
Step 4. You can then unscrew the SSD and remove it.
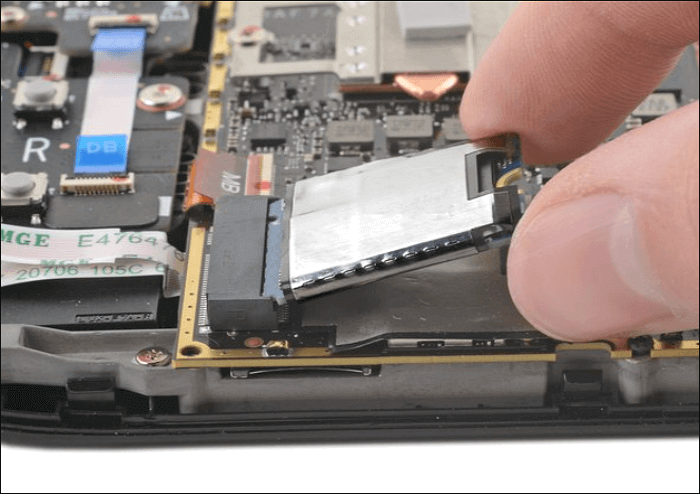
Step 5. Take out the SSD shielding as well.
Stage 2. Clone Old SSD to New SSD via Clonezilla
You should start by connecting both SSDs to your computer for efficient cloning. Clonezilla has the features to enable you to clone old SSD to a new one efficiently. It lets you duplicate your whole SSD and create a copy of it. You can also use it to develop Windows, macOS, and Linux operating system backups.
Follow these steps to clone the Old SSD to the New SSD using Clonezilla.
Step 1. Download Clonezilla from its official website.
Step 2. Download and run Rufus to create a bootable media with a USB. Choose and burn the downloaded Clonezilla to the USB.
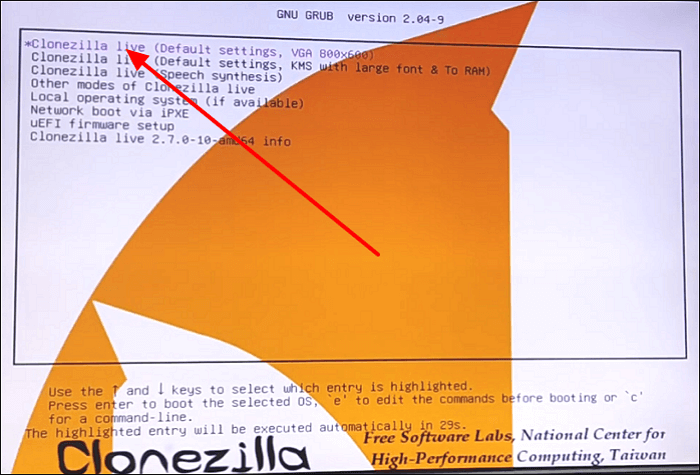
Step 3. Restart your PC and get to the boot menu by tapping F2, F10, Del, or Esc. Change the bootup sequence and choose the computer to boot up from the USB drive. Select "Clonezilla live", and press Enter when you see the Clonezilla window.
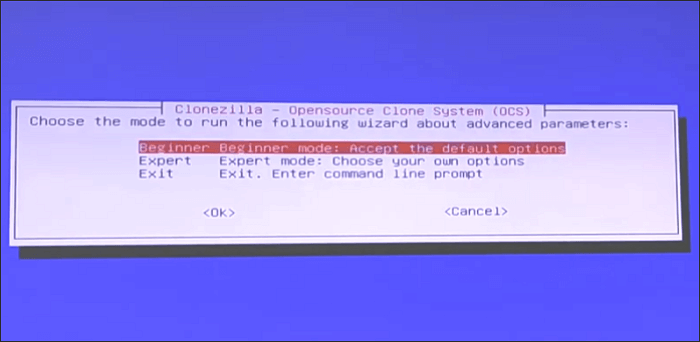
Step 4. Select your desired keyboard language and layout. Tap on "Start Clonezilla" to view the Clonezilla option screen. Choose "device-device" to enable you to clone the device you are operating with and copy it to another storage. Choose "Beginner Mode" to minimize the advanced options you interact with.
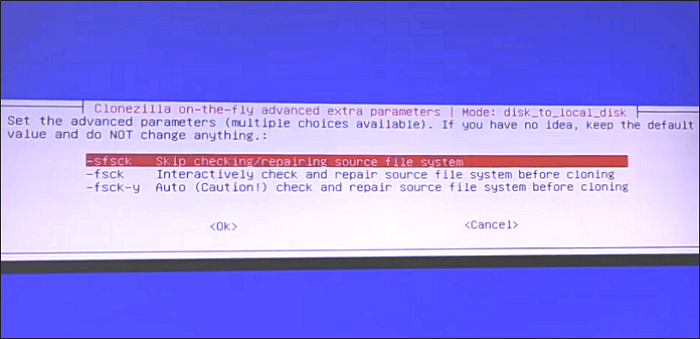
Step 5. Choose your old Steam SSD as the "source" and your new SSD as the "target" disk. In addition, select the "Skip checking/ repairing source file systems" option and press Enter. Confirm your cloning data by typing "Y" three times. This will initiate the Steam Deck SSD upgrade via Clonezilla.
Step 6. Begin the cloning process and wait until it is complete. Shut down your PC once done. You have now cloned your original Steam Deck SSD to the new one.
Share this article on social media to help others find a reliable way to upgrade Steam Deack SSD!
Stage 3. Insert the New SSD into Your Steam Deck
After cloning your SSD, you should insert it into the Steam Deck. Here are the steps to follow.
Step 1. Transfer the foil shielding from your old SSD to the new one.
Step 2. Carefully put the new SSD into the right slot and attach screws to fasten it.
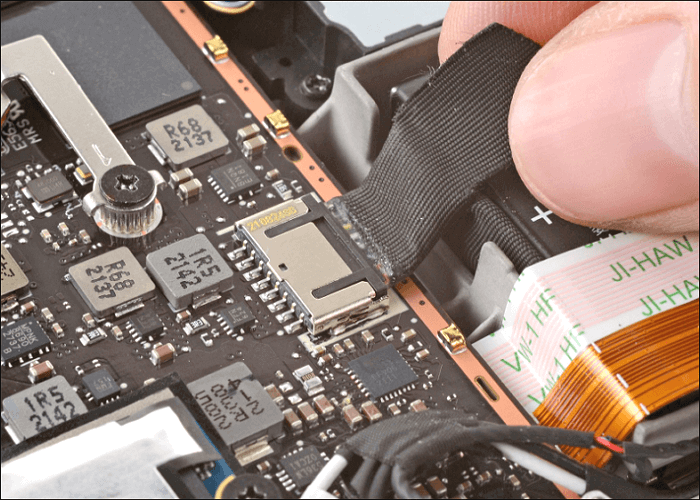
Step 3. Reconnect the battery by carefully putting the fabric strip into the battery port. The power light flashes briefly in white when connected, showing successful completion.
Step 4. Reattach the shielding to its original position by aligning it with the screw hole under it. After setting up all the parts, check that the fan wires are above the shield for best performance.
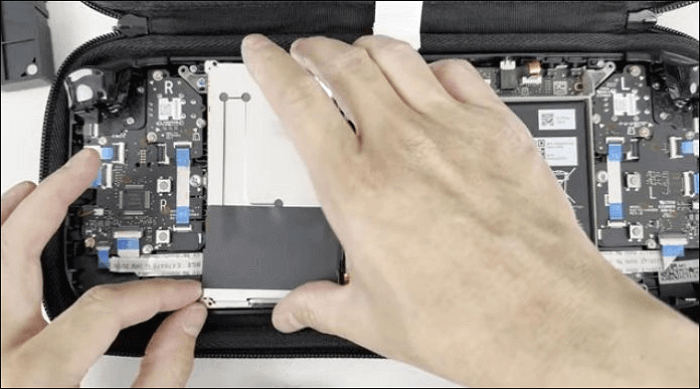
Step 5. Reattach and secure the back plate by holding it and positioning it on the Steam Deck.
- Notice:
- You don't have to worry if your Steam Deck fails to start up. It may be due to reassembly issues, which can be solved by disassembling the Steam Deck again and detaching the SSD and battery connector. The two are mainly the cause of problems. The Steam Deck won't power on if you don't install them correctly.
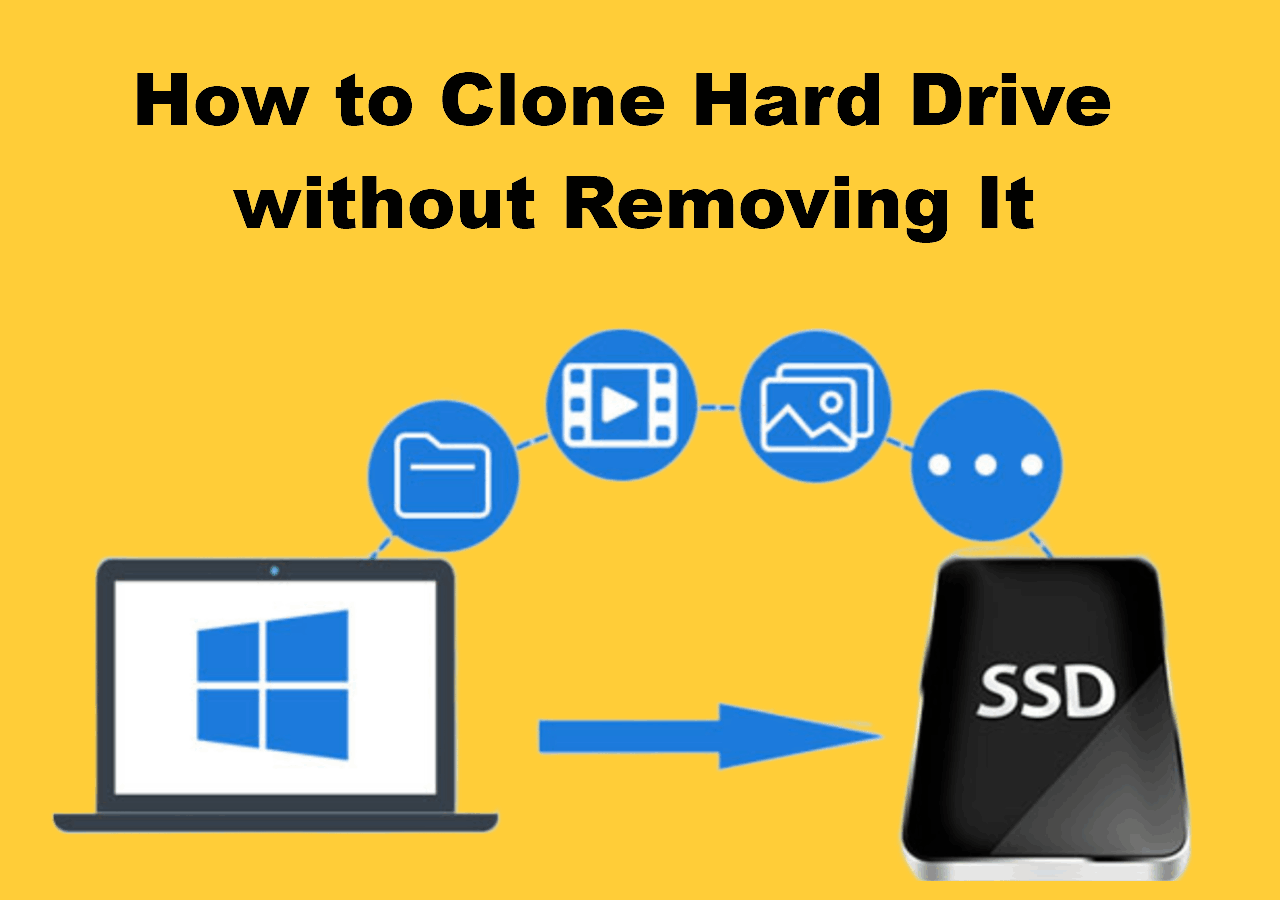
How to Upgrade Steam Deck SSD Using EaseUS Disk Copy
Using Clonezilla to clone Steam Deck SSD is tiresome because of the complexities involved. So, you can look for a simpler alternative to have a smoother process. EaseUS Disk Copy is the best alternative because it creates sector-by-sector clones of SSDs and partitions. It's an easy-to-use tool for experienced and novice users.
Windows 11/10/8/7
EaseUS Disk Copy offers more speedy cloning than Clonezilla and similar tools. This helps you complete the Steam Deck SSD cloning process quickly. After cloning, you can successfully boot your Steam Deck from the cloned SSD. The tool can also clone SSD to M.2 SSD or SATA/M.2/NVMe types or migrate Windows installation from HDD to SSD.
Key Features
- Upgrade Steam Deck SSD without losing data.
- Faster cloning speeds with a simple UI.
- It supports bit-for-bit disk cloning.
- Migrate Windows 10/11 without reinstallation.
- Create a complete backup for instant restoration.
Download this tool now for the best cloning experience. The steps for using it are very simple.
Before cloning:
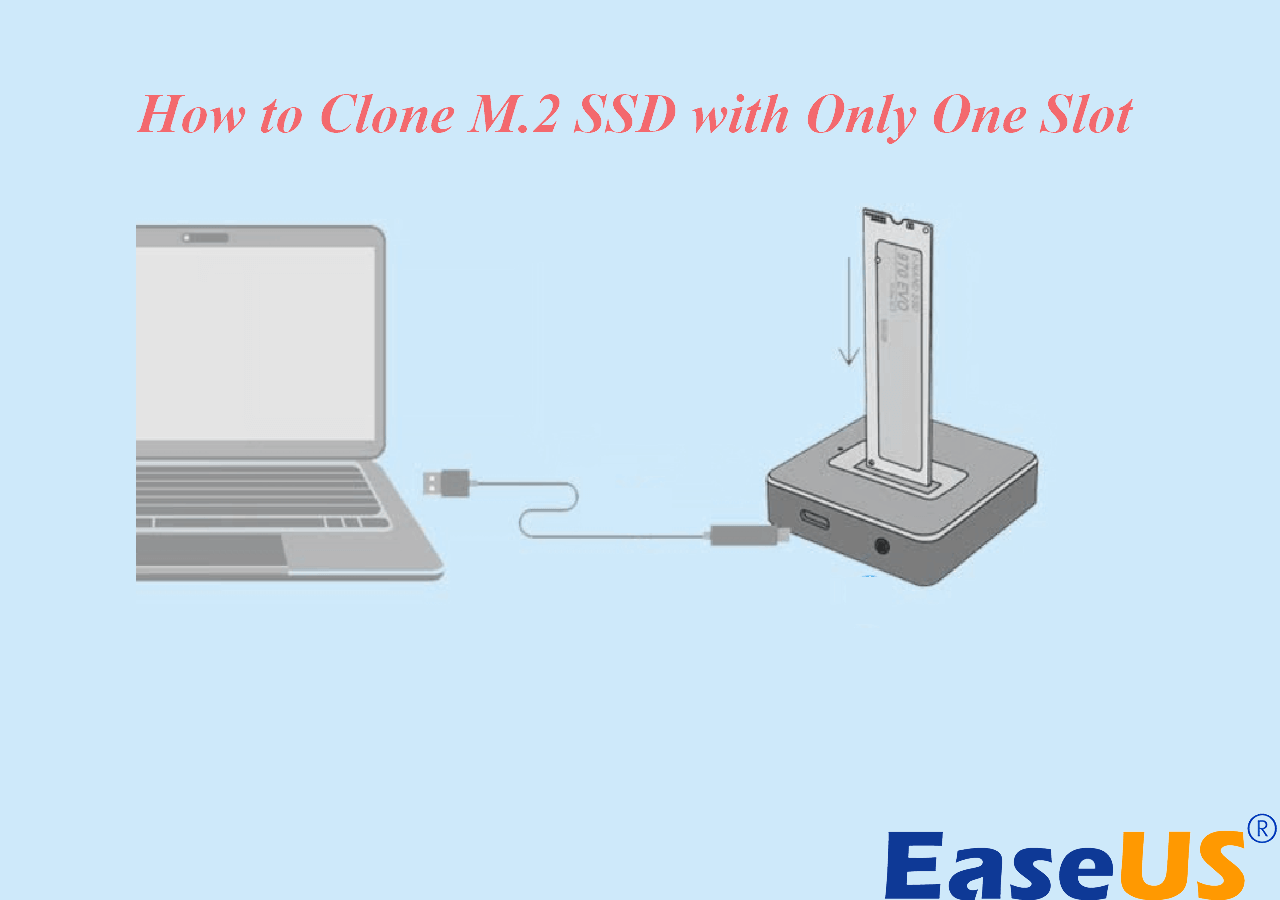
- If your computer has only one slot, connect the target disk to your machine via a USB-to-SATA/NVMe adapter.
- If your computer has an extra slot, install the target disk into the empty slot properly, and make sure it is compatible.
Step 1. Launch EaseUS Disk Copy and choose Disk Mode.
Install EaseUS Disk Copy cloning software on your Windows computer, then launch it and select Disk Mode from the left panel.
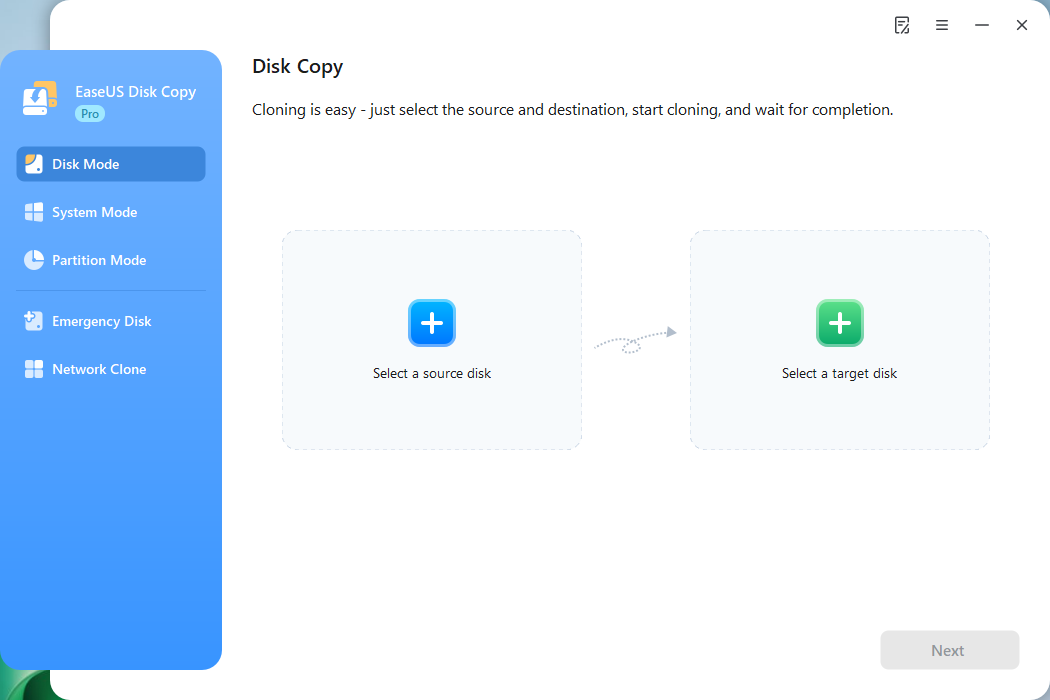
Step 2. Select the source drive.
Select the drive you want to copy, then click Select.
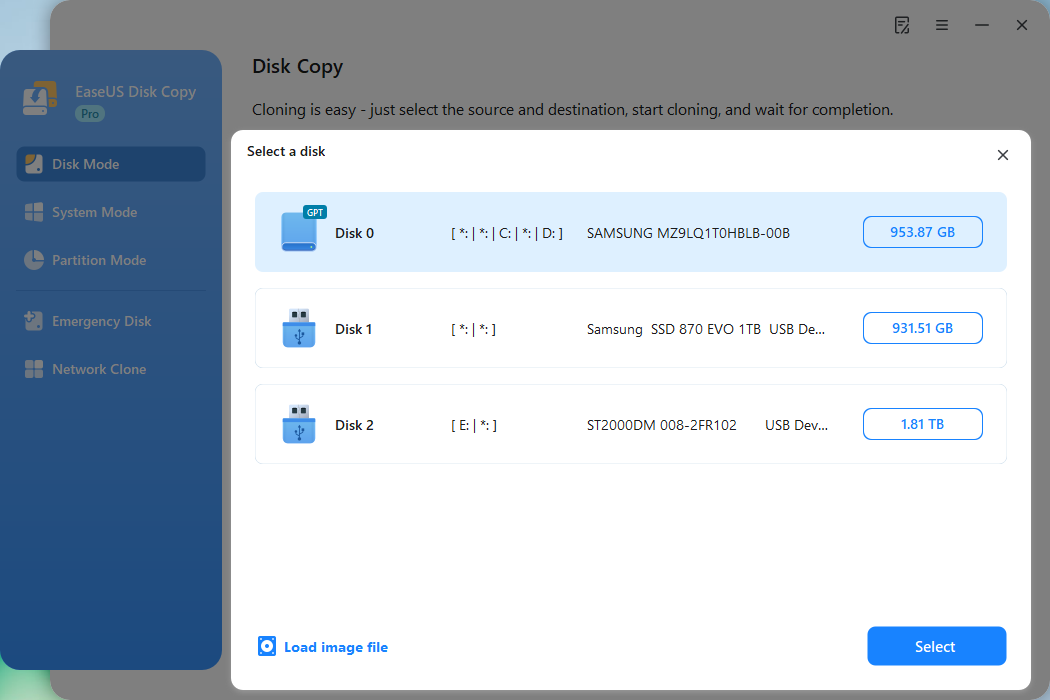
Step 3. Choose the target disk.
Choose the disk that you want to clone data to, and click Select. Note that the used space of the source disk should be less than the target disk capacity.
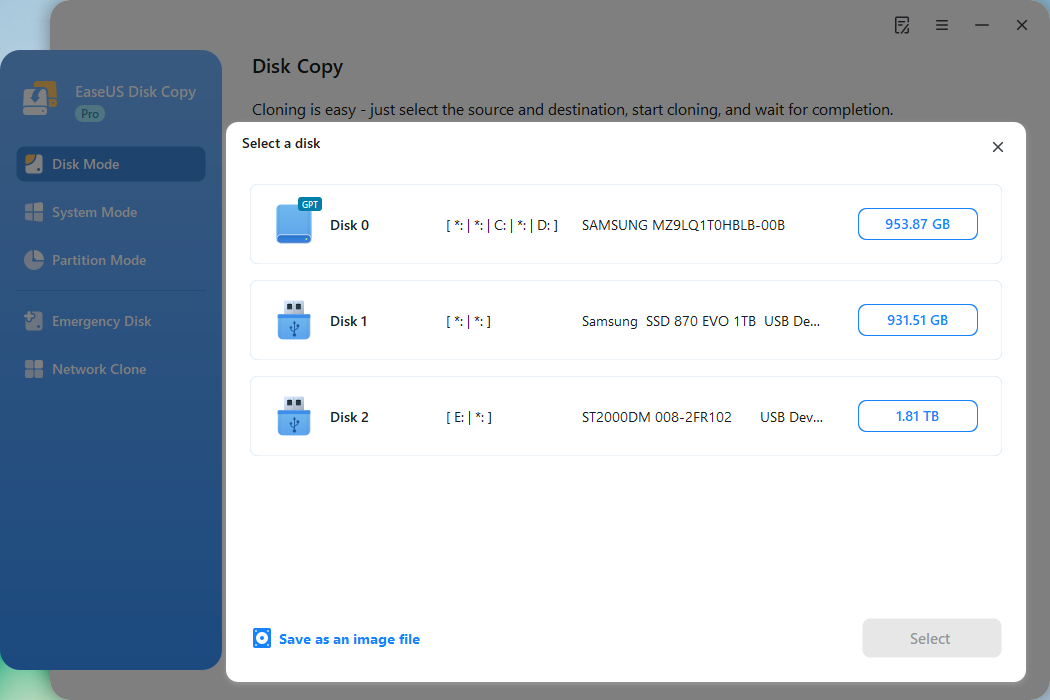
*At this step, you can also click the option "Save as an image file" to store your disk as a compressed image file, which can be restored without any data loss.
Step 4. Adjust disk layout.
Specify the target disk layout as your preference. You can choose among:
- Autofit the disk: makes some changes by default on the destination disk layout so that it can work at its best.
- Copy as the source: create a 1-to-1 copy of your source disk; the layout is the same as the source disk.
- Edit disk layout: allows you to manually resize/move the partition layout on this destination disk.
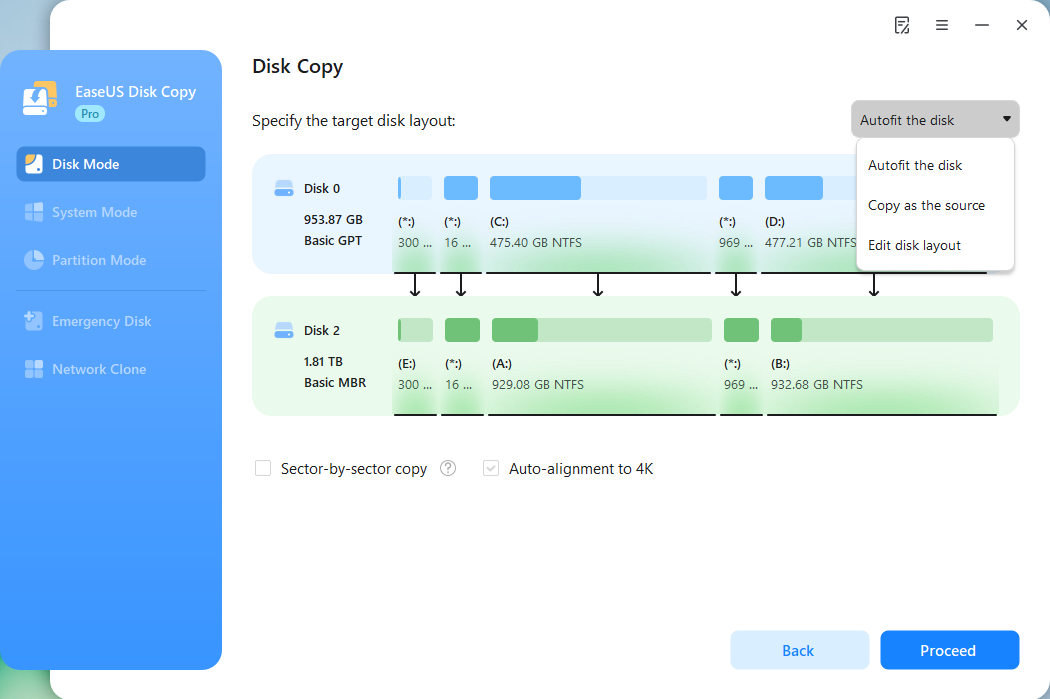
*If the target disk is an SSD, the option "Auto-alignment to 4K" will be checked automatically to optimize the performance of your SSD.
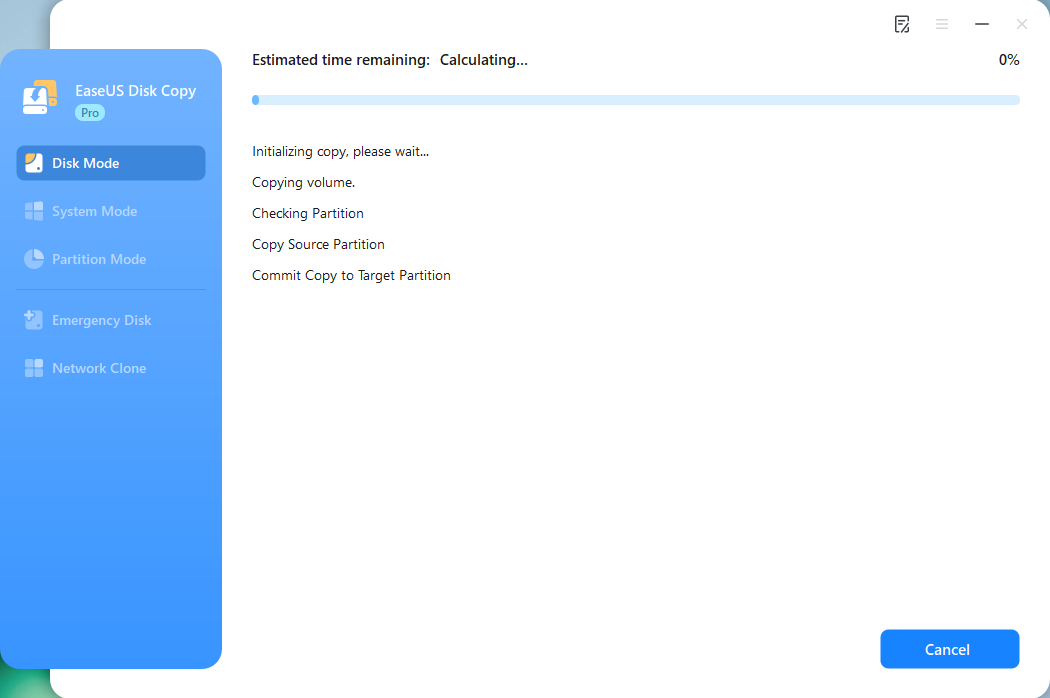
Step 5. Start cloning.
Click Proceed, and a message will appear, warning you that data will be lost. Confirm the message by clicking Continue.
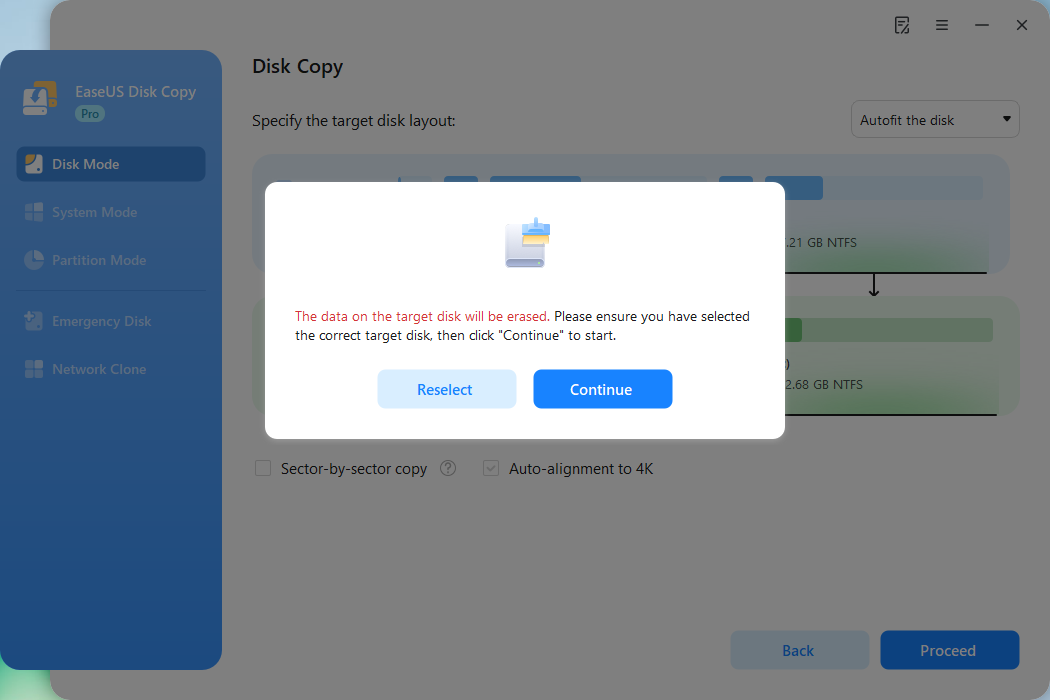
Now, it will start executing the cloning task.
*The time it takes to clone a hard drive depends on how much data is on the source disk, and it will also be affected by the disk types, USB connection, etc.
To Sum Up
The article taught you how to perform the Clonezilla Steam Deck SSD upgrade. You have learned how to use Clonezilla, which has various features that make it help complete the process. However, using the tool is tiresome and more complex, and you may spend more time on it. EaseUS Disk Copy is a great alternative because it is more user-friendly and efficient.
EaseUS Disk Copy performs a sector-by-sector cloning of your SSD or partitions. With the tool, you can upgrade your drive without losing data and with 100 percent security. You can also resize your partitions when cloning your disk. Download this tool now for the best Steam Deck SSD upgrade process.
Windows 11/10/8/7
FAQs on How to Clone Steam Deck SSD Clonezilla
Some of the most frequently asked questions on this topic include:
1. Can You Upgrade Steam Deck SSD Using Clonezilla?
The answer is YES. Clonezilla allows you to upgrade a Steam Deck SSD to a similar or larger one. The tool enables you to duplicate and create a copy of your SSD. It also lets you create backups and use them when your original drive fails.
2. Which Is the Best Third-party Tool for Cloning Steam Deck SSD?
EaseUS Disk Copy is the best option for cloning Steam Deck SSD. The tool has robust features that let you clone your SSD to a new one without losing data. It's a secure tool that offers sector-by-sector cloning of your SSD. Besides, it offers faster cloning speeds than Clonezilla.
3. Why Should I Upgrade My Steam Deck SSD?
Upgrading your Steam Deck SSD offers the following benefits:
- Enhanced performance.
- Increase loading times.
- Improved gaming experience.
- Enhanced durability.
- Increased storage capacity.
-
Updated by
![]()
Jerry
>"I hope my articles can help solve your technical problems. If you are interested in other articles, you can check the articles at the bottom of this page, and you can also check my Facebook to get additional help."…Read full bio