Page Table of Contents
Have you ever experienced insufficient space in the default drive after downloading many programs and storing many files? What to do if your primary drive on Windows 11 runs out of storage? If you are in such a dilemma, you can change the default drive to a larger one. We will tell you how to change default hard drive Windows 11 or how to change main disk drive for installing apps or saving files.
Can You Change Main Drive on Windows 11
The default hard drive (or primary hard drive) is a hard disk where the operating system is installed, and Windows uses it for different system operations. Yes, you can change default storage drive on Windows 11. You may need to change your default hard drive when your default disk runs out of space due to the accumulation of files and applications affecting your PC's speed and efficiency.
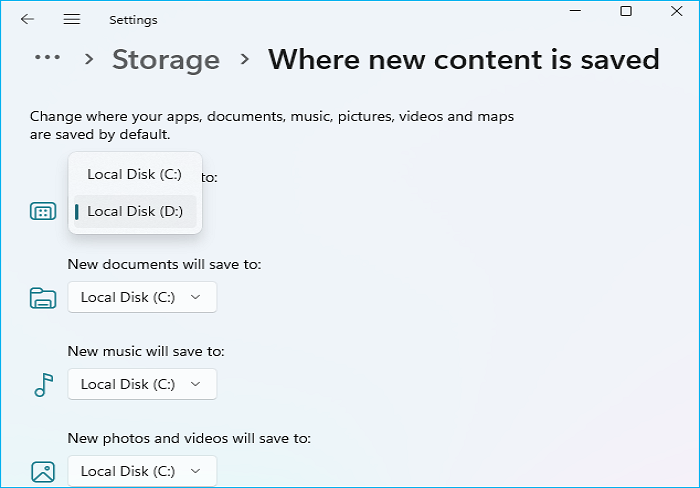
You can change where new content is saved in Windows 11 by going to Settings > System > Storage > Advanced storage settings > Where new content is saved and selecting a new drive, such as from C to D, from the drop-down menus for different content types.
In addition, you may want to replace HDD with SSD as the default boot drive to improve your PC's performance. However, how do you change your default hard drive? As stated above, the default hard drive is where Windows is installed, so the Windows installation must be resolved if you want to change the main hard drive.
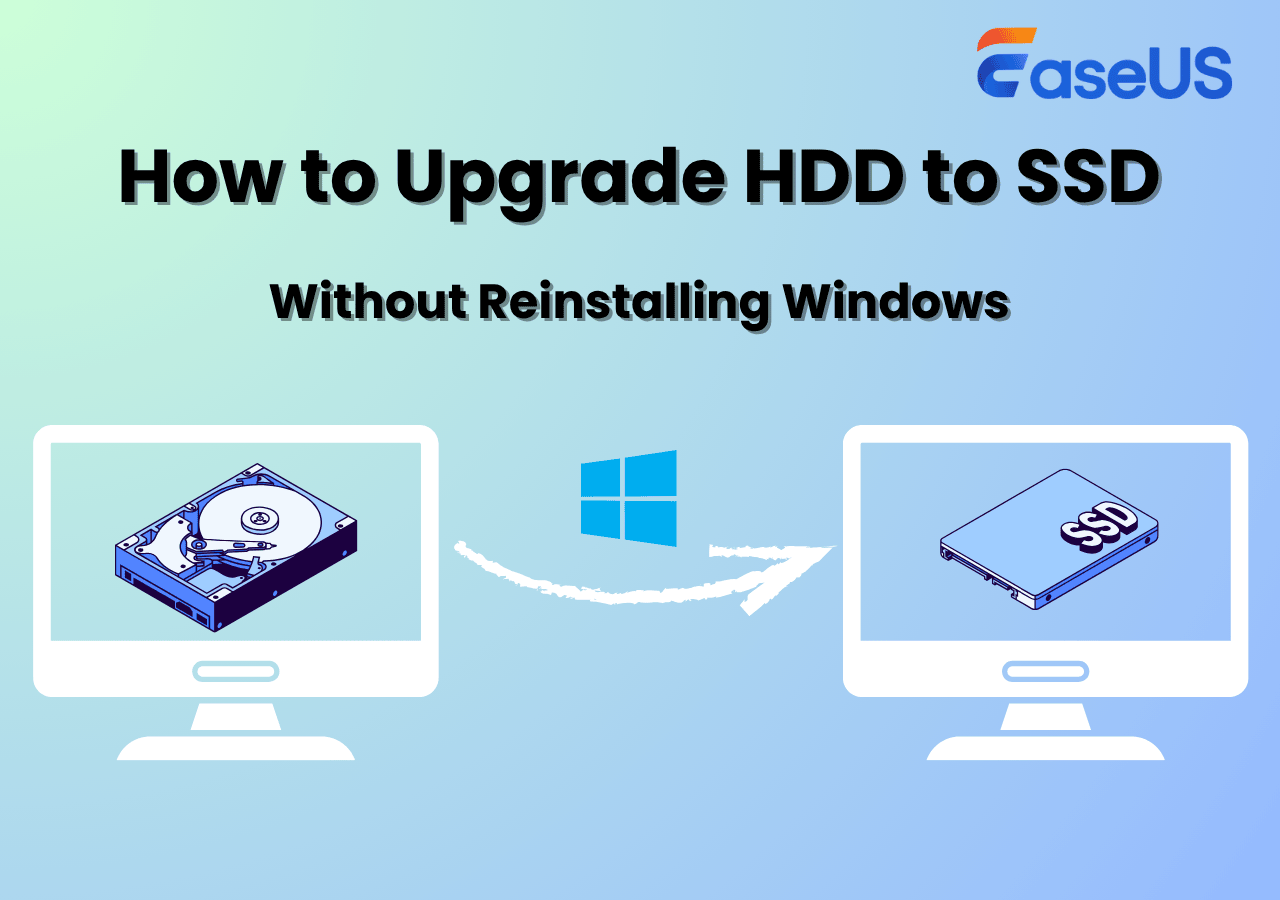
To change your main storage device on PC in Windows 11 or make a hard drive the primary drive, you can clean install Windows on the new hard drive. To fresh install Windows on a new disk, you must create a Windows 11 bootable USB, use it to boot your computer, and then install Windows on the new hard drive from the USB. It is worth noting that performing a clean installation requires reinstalling all necessary programs and drivers.
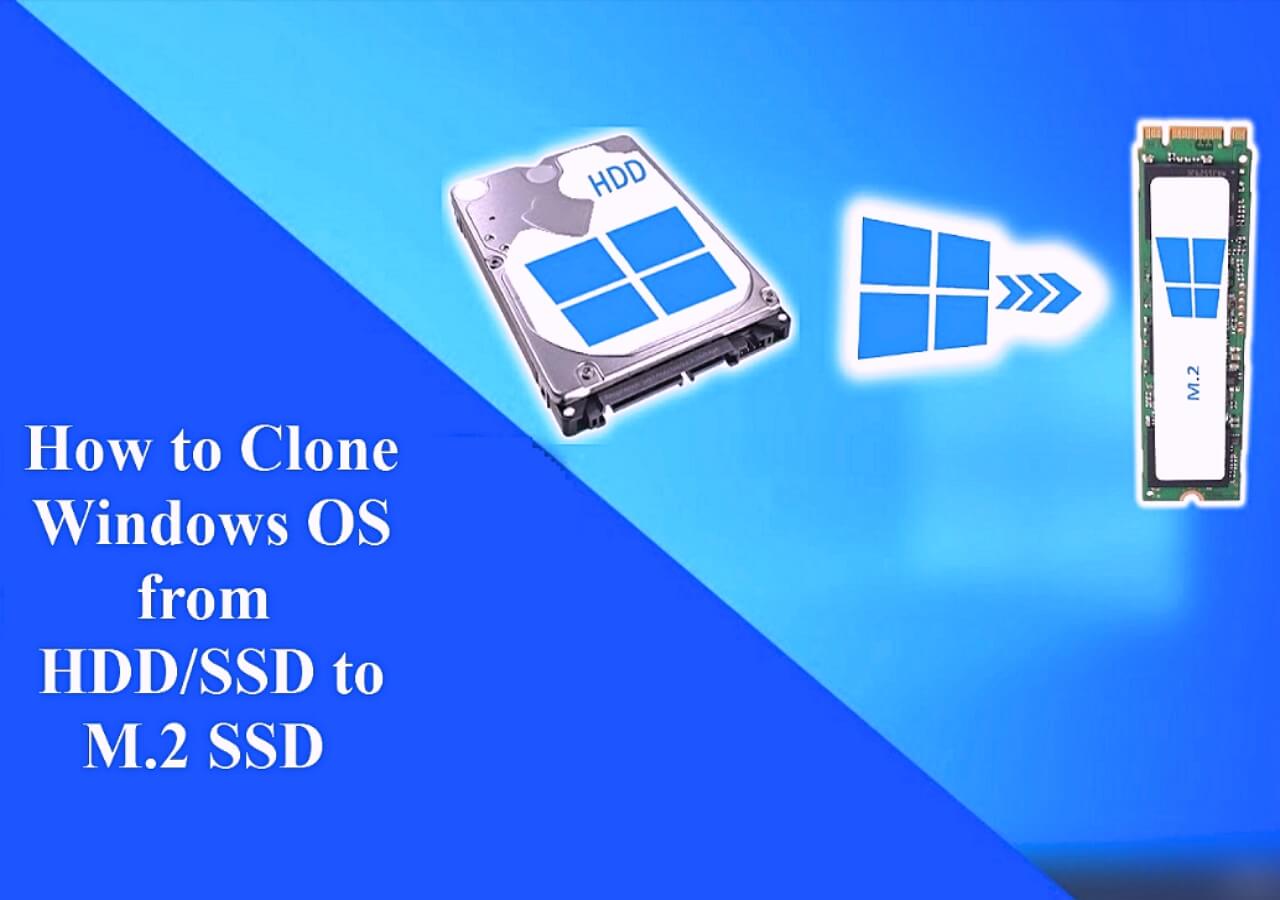
Alternatively, you can switch the primary hard drive by cloning your OS to another disk. Cloning can help you transfer data, programs, and Windows from one hard drive to another without reinstalling. You only need to find reliable disk cloning software, since Windows lacks built-in cloning tools.
How to Change Default Save Locations in Windows 11
If you just want to change the default hard drive for installing apps or saving files because your C drive is running out of space, changing your default installation disk can let you manage your storage on Windows 11 more efficiently and effectively. Here is how to change the default installation drive on Windows 11 via Settings:
Step 1. Click the Windows button and click Settings or press Win + I to access Settings.
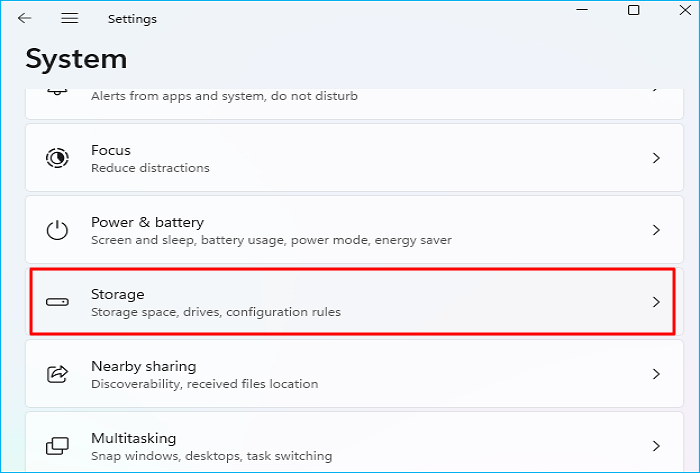
Step 2. Click System > Storage.
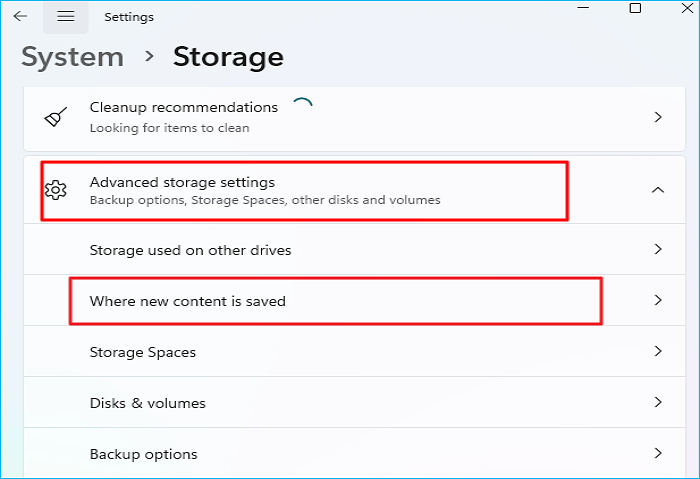
Step 3. Under "Advanced storage settings," click "Where new content is saved."
Step 4. Under "New apps will save to," select the disk where you want new apps installed and documents or music saved.
If you just want to move individual user folders, such as Documents or Downloads, from the C drive to the D drive, you can right-click them in File Explorer, go to Location, and choose Move to a new folder on another drive. Here is how to change individual user folder locations on Windows 11:
Step 1. Go to File Explorer.
Step 2. In the left pane, right-click the user folder you want to move (e.g., Downloads, Documents, Desktop).
Step 3. Select Properties and then go to the Location tab.
Step 4. Click the Move button.
Step 5. Navigate to the new folder you want to use on your other disk and click Select Folder.
Step 6. Click Apply, then Yes when prompted to move your files to the new location.
Repeat this process for any other user folders you wish to move.
Is this article helpful? If so, share it on social media to help more people!

How to Change Primary Drive Windows 11 via Cloning
Cloning is the best and easiest way to install Windows on a hard drive because it lets you transfer Windows from one hard drive to another, including the saved data and installed programs. After cloning, your target disk is, by default, bootable, and you can use the cloned hard drive to replace your original disk. To clone a hard drive, you can use EaseUS Disk Copy, a safe and reliable disk cloning tool.
EaseUS disk cloning software can help you directly migrate OS from one disk to another and clone a hard drive to another from diverse makers. This remarkable disk cloning tool lets you clone a boot drive easily and quickly without reinstalling Windows or losing data. If your target disk is an SSD, it offers auto-4K alignment for better SSD performance after cloning.
Download this simple yet powerful cloning software to help you clon one disk to another to avoid reinstalling Windows.
Windows 11/10/8/7
- Notice:
- You need to prepare a USB-to-SATA cable or hard drive enclosure to connect the new disk to your PC and manage the disk before cloning.
Here is how to clone one hard drive to another using EaseUS Disk Copy:
Before cloning:
- If your computer has only one slot, connect the target disk to your machine via a USB-to-SATA/NVMe adapter.
- If your computer has an extra slot, install the target disk into the empty slot properly, and make sure it is compatible.
Step 1. Launch EaseUS Disk Copy and choose Disk Mode.
Install EaseUS Disk Copy cloning software on your Windows computer, then launch it and select Disk Mode from the left panel.
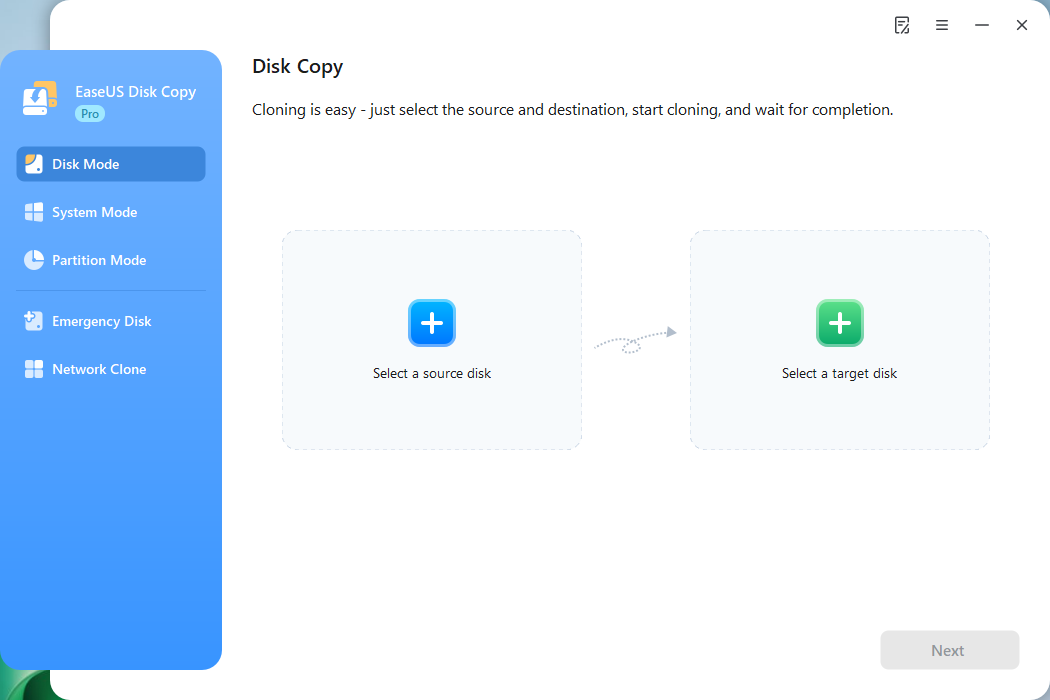
Step 2. Select the source drive.
Select the drive you want to copy, then click Select.
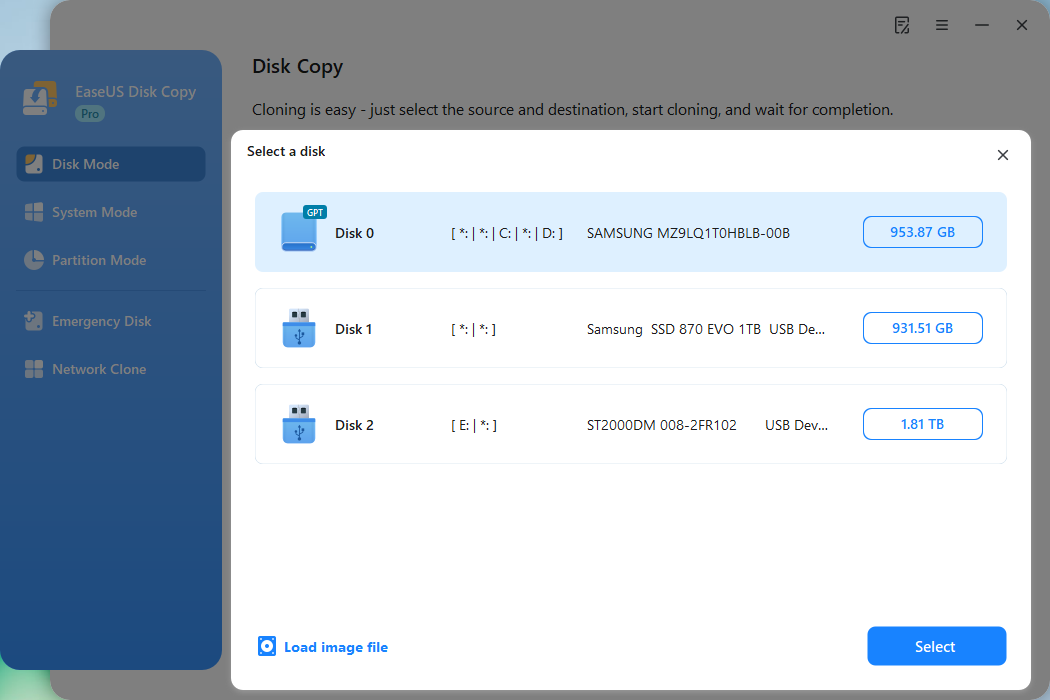
Step 3. Choose the target disk.
Choose the disk that you want to clone data to, and click Select. Note that the used space of the source disk should be less than the target disk capacity.
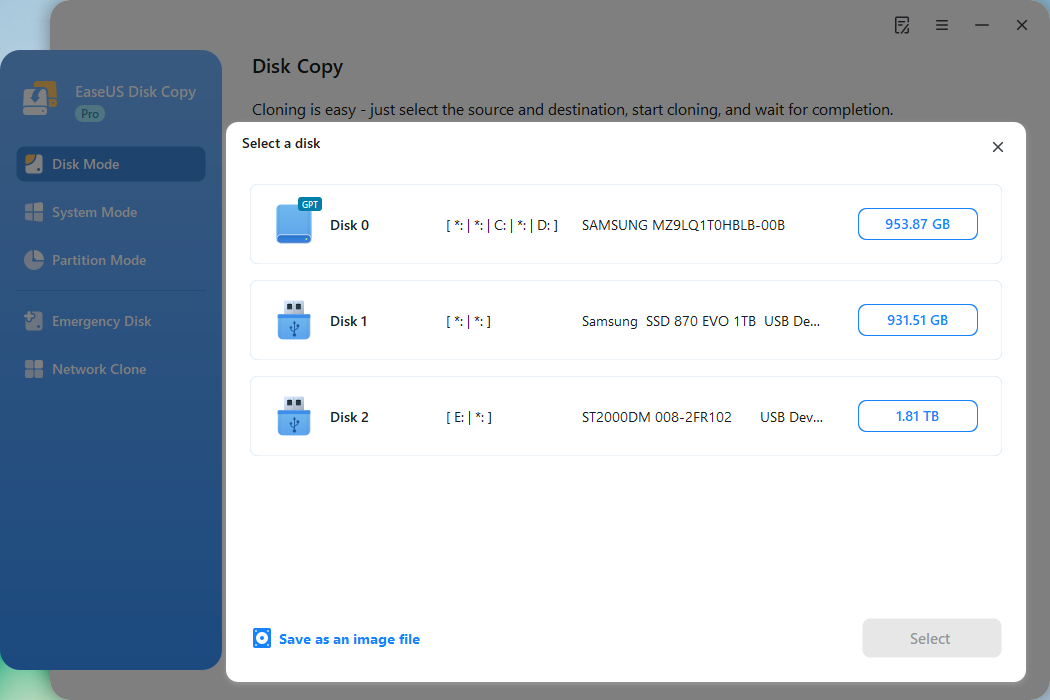
*At this step, you can also click the option "Save as an image file" to store your disk as a compressed image file, which can be restored without any data loss.
Step 4. Adjust disk layout.
Specify the target disk layout as your preference. You can choose among:
- Autofit the disk: makes some changes by default on the destination disk layout so that it can work at its best.
- Copy as the source: create a 1-to-1 copy of your source disk; the layout is the same as the source disk.
- Edit disk layout: allows you to manually resize/move the partition layout on this destination disk.
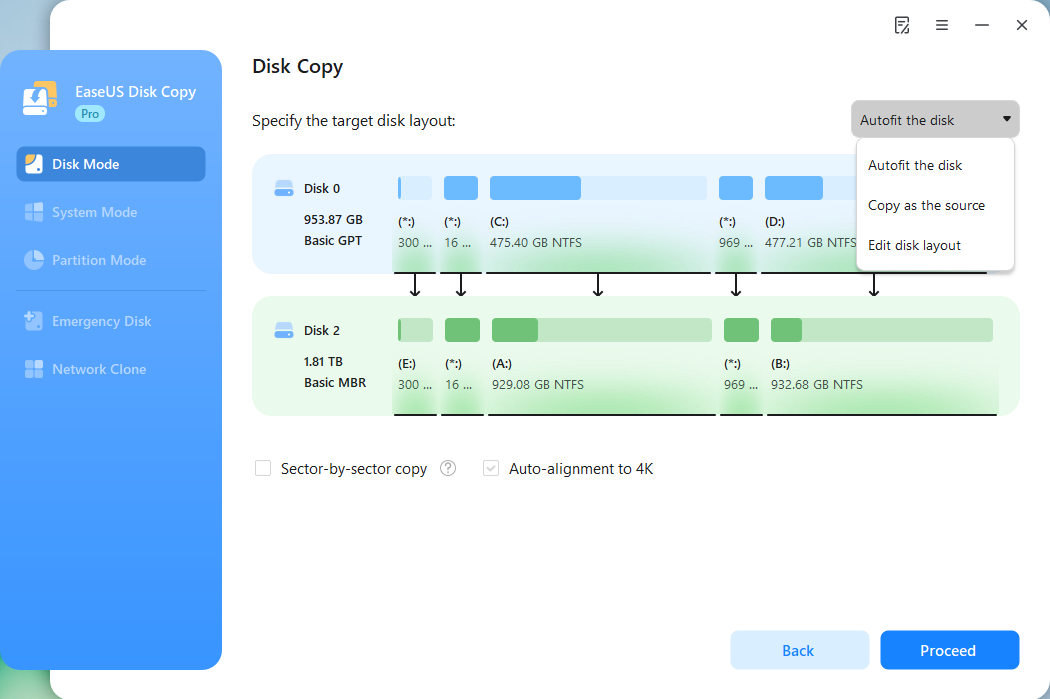
*If the target disk is an SSD, the option "Auto-alignment to 4K" will be checked automatically to optimize the performance of your SSD.
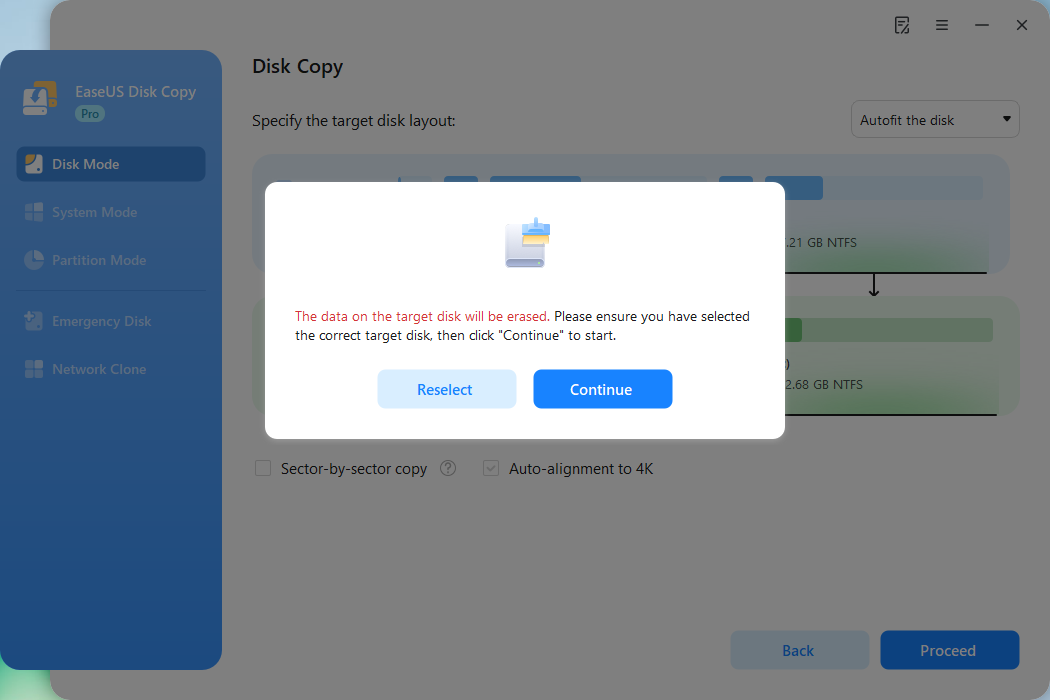
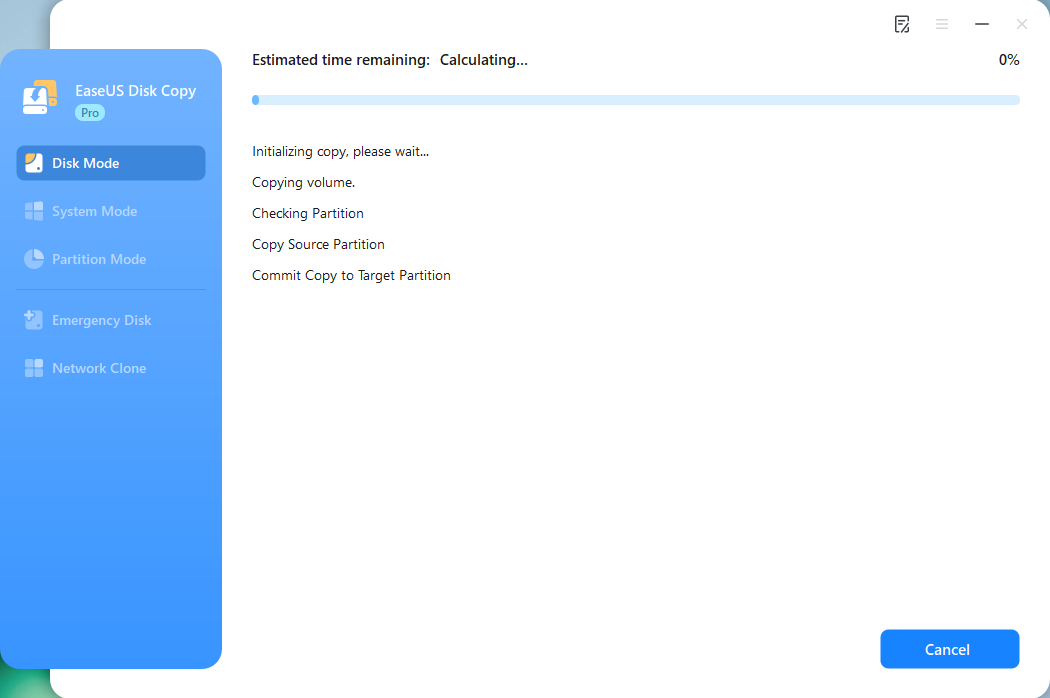
Step 5. Start cloning.
Click Proceed, and a message will appear, warning you that data will be lost. Confirm the message by clicking Continue.
Now, it will start executing the cloning task.
*The time it takes to clone a hard drive depends on how much data is on the source disk, and it will also be affected by the disk types, USB connection, etc.
This video shows how to clone a hard disk using EaseUS Disk Copy:

After cloning, you can use the cloned hard drive to replace your original disk and boot from the cloned disk. As for the old disk, you can format it and use it as your storage device. For more detailed information on how to replace a hard drive and boot from the hard drive, refer to:
To Wrap Things Up
The default hard disk is where your Windows 11 is installed. If you want to change the default boot hard disk, you must reinstall Windows on your new disk. Thanksfully, you can clone one hard drive to another and use the cloned disk to replace your original one. If you just want to change the default save locations in Windows 11 or set disk D as default drive, you can change where the new content is saved in Windows 11 settings.
EaseUS Disk Copy, a dedicated and safe disk cloning utility, can help you clone a hard drive to another easily and quickly. Just download it to help you clone a disk and migrate OS to another drive without reinstalling Windows!
Windows 11/10/8/7
How to Change Main Hard Drive Windows 11 FAQs
Below are frequently asked questions on "How to change your main storage device on PC Windows 11."
1. How to switch primary hard drive Windows 11?
To switch primary boot drive via cloning:
Clone the old hard drive to the new disk and replace the original disk with the cloned one.
To change default install location in Settings:
Click System. In the left sidebar, click Storage. Under the More storage settings or Advanced storage settings, look for Change where new content is saved. In the dropdown menu under New apps will save to, choose the drive where you want new apps to be installed.
2. How to change the default save locations in Windows 11?
To change default drive for program installation or default installation location for Apps:
- Press "Win + I" to open "Settings."
- Click "System".
- Click "Storage" in the left sidebar.
- Under "Advanced storage settings," click "Where new content is saved."
- Under "New apps will save to," choose the disk where you want new applications to be installed.
3. How to change default boot drive in Windows 11?
To change your default boot drive on Windows 11 without reinstalling Windows:
- Prepare a new disk and an adapter (USB-to-SATA cable).
- Download and install EaseUS Disk Copy.
- Connect the new disk to your computer via the adapter.
- Launch the cloning software and clone the old disk to the new one.
- Replace the original disk with the cloned one.
- Boot from the cloned disk.
4. How to change default drive from C to D?
To use your D: drive instead of C: drive for new content, change default save locations in Windows Settings for apps, documents, and media, which redirects new installs and saves; for existing apps, move them via Settings > Apps > Apps & features; and for user folders (Docs, Music, etc.), right-click the folder in File Explorer, go to Properties > Location, and set a new disk, applying changes for new content to move.
-
Updated by
![]()
Jerry
"I hope my articles can help solve your technical problems. If you are interested in other articles, you can check the articles at the bottom of this page, and you can also check my Facebook to get additional help."…Read full bio