-
![]()
-
![]()
-
![]() What Are Effective Ways to Solve Excel 2016 Not Saving Changes
What Are Effective Ways to Solve Excel 2016 Not Saving Changes June 30,2026
 6 min read
 -
![]()
-
![]() Data Recovery Software with Original File Names [Full Guide in 2026]June 16,20266 min read
Data Recovery Software with Original File Names [Full Guide in 2026]June 16,20266 min read -
![]()
-
![]()
-
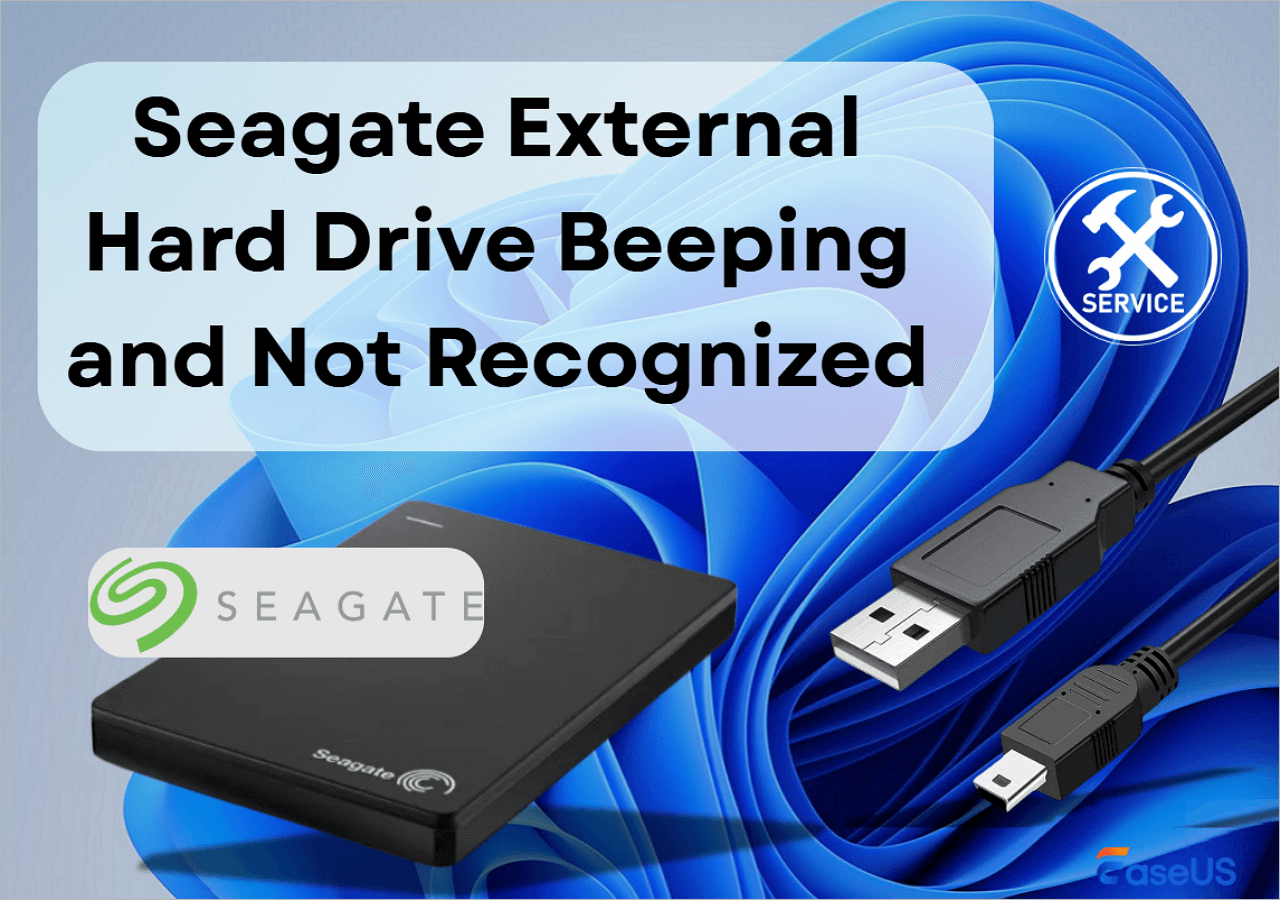
![]() Seagate External Hard Drive Beeping and Not Recognized? [Solved]June 16,20266 min read
Seagate External Hard Drive Beeping and Not Recognized? [Solved]June 16,20266 min read -
![]()
-
![]() Look! 5 Methods to Fix PNG Files Not Opening in Windows 10/11June 16,20266 min read
Look! 5 Methods to Fix PNG Files Not Opening in Windows 10/11June 16,20266 min read
Page Table of Contents
"When I start up my computer and it's loading the bios it says something like this: No Device Detected. I don't know what happened to it randomly did this, and it's been doing this for like a week (won't work) its definitely plugged in and powered so I don’t know what could be wrong or if its just broke. If I get a new hard drive would it work or is there another reason why it's not being detected or working?"
In general, hard drive not detected issue occurs on my laptops includes Dell, HP, Samsung, and more. This issue can often happen when you start the computer. You can check the 5 fixes to solve "Dell hard disk not detected".
| Workable Solutions | Step-by-step Troubleshooting |
|---|---|
| 1. Check BIOS Settings | Shut down the computer and press the power button to restart it...Full steps |
| 2. Run Dell Diagnostic Tool | Shut down Dell. Press the power button to restart it. Keep taping...Full steps |
| 3. Check Hard Drive Connection | Before uninstalling the hard drive, you should backup all your data...Full steps |
| 4. Update Dell Drivers | Identify the Dell product. Scan for the available updates...Full steps |
| 5. Run An Data Recovery Software | Connect the hard drive to another PC via SATA cable and download...Full steps |
Why is Hard Drive Not Detected in Dell
There are the culprits why does dell laptop say no hard drive detected:
- Hard disk not detected.
- Corrupted BIOS.
- The hard drive has bad sectors.
- Loose or damaged SATA cable.
...
Now let's zoom in on the main part to learn how to fix no hard drive detected in Dell.
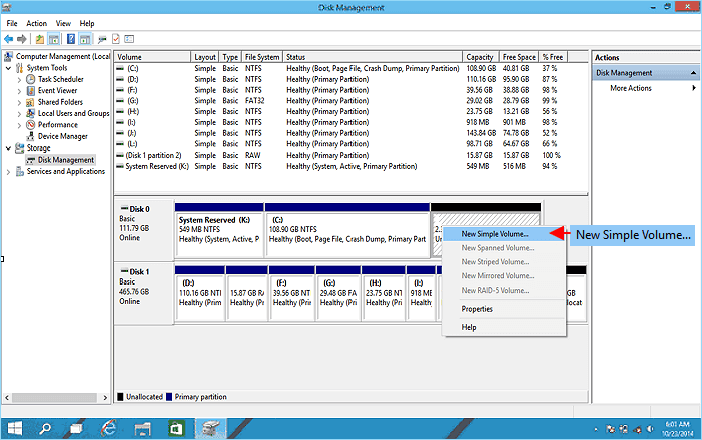
Fix 1. Check BIOS Settings on Dell Laptop
Step 1. Shut down the computer and press the power button to restart it.
Step 2. Press F2 many times to enter the BIOS.
Step 3. You can see the Setting menu on the left side of the Dell screen.
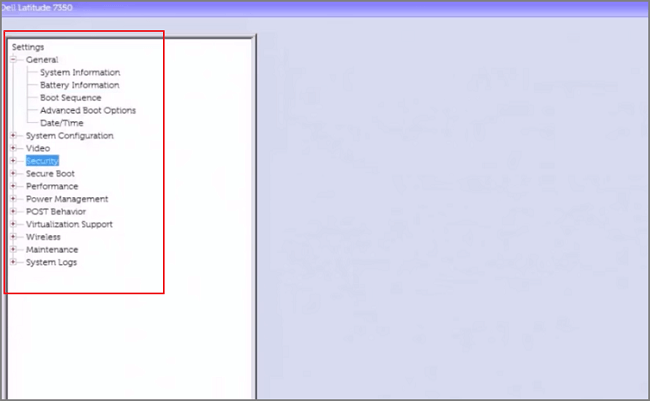
Step 4. Under the General tab, click Date/Time.
Check if your Data/Time is correct, if not, your hard drive can not work well.
Step 5. Click Boot Sequence to change the boot option.
You can see Boot List Option here. No matter what boot option you choose, you cannot boot your computer right now, so we advise you to change Boot List Option.
Change UEFI to Legacy:
- Expand the Secure Boot tab
- Click Secure Boot Enable
- Turn on Disabled
- Click Yes when the warning window pop up
- Go to Advanced Options
- Check the box of Enable Legacy Option ROMs
- Go back to Boot List Option and choose Legacy.
Change Legacy to UEFI:
- Go to Secure Boot
- Click Secure Boot Enable and choose Enabled
- Navigate to Advanced Boot Options
- Uncheck Enable Legacy Option ROMs
- Go back to Boot Sequence and choose UEFI.
Step 6. Change System Configuration
Expand System Configuration > Click SATA Operation > Choose AHCI > Click Apply button to apply Change > Click OK when Apply Setting Configuration box appears.
Step 7. Exit from BIOS and restart your computer.
Check if Windows is booting from the hard drive in Dell.
Fix 2. Run Dell Diagnostic Tool
If the BIOS settings don't work, you can use the Dell self-diagnostic test to check hard drive errors. Dell ePSA diagnostic tool is used for scanning the hardware and finding the malfunctioning components.
Step 1. Shut down the computer. And press the power button to restart it. Keep taping the F2.
Step 2. You can see the diagnostic screen.
Step 3. Use the Down arrow key to focus on the Diagnostics.
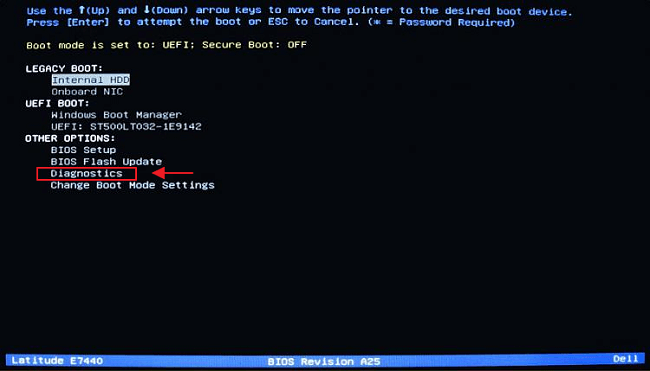
Step 4. Hit Enter button and you can run your diagnostic tool.
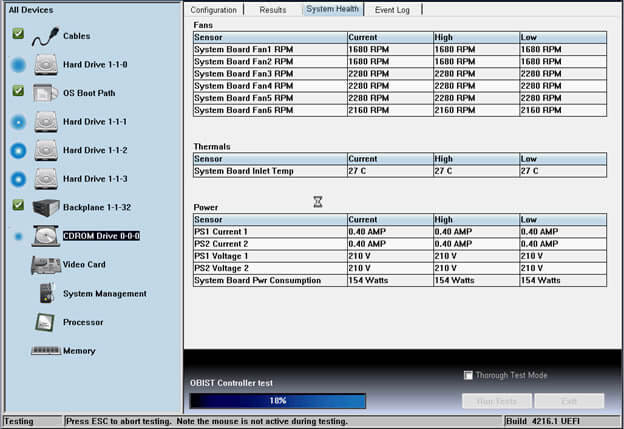
It will scan all your hardware on the computer. Check the following box and answer the question:
Were color bars displayed? Choose Yes or No basic on your computer. And then wait for the testing process to be done.
Step 5. Click the arrow icon on the right corner of the screen.
You can check all scanned hardware on the left side. The green check hook means running well, and the red mark displays some wrong here.
Fix 3. Check Hard Drive Connection from Dell Laptop
Before uninstalling the hard drive, you should backup all your data to avoid data loss. Disconnect all cables connected to the laptop. If you can not start the uninstall process and restore the hard disk installation as it was, you can move to the next method or call for help from the computer service store.
Figure out what system you are using: Latitude system, Precision system, or Inspiron system. Check how to uninstall hard drive released by Dell.com
Check the SATA cable of the hard drive for looseness or damage.
Fix 4. Update Dell Drivers
You can update your dell drivers to make it detectable.
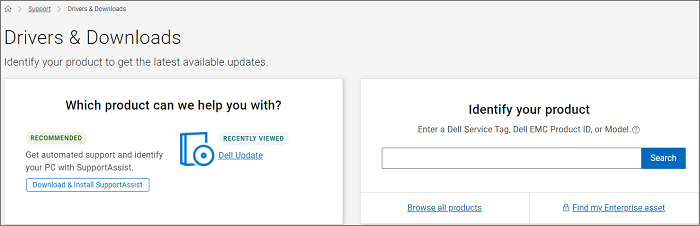
Update drivers through Dell Drivers & Downloads website:
Step 1. Identify the Dell product.
Step 2. Scan for the available updates.
Step 3. Choose driver updates to install.
Fix 5. Run An Data Recovery Software
If none of the above methods can fix the undetectable issue, you can connect the hard drive to another PC and run the EaseUS Data Recovery Wizard to recover your data and fix the issue.
1 - Connect the hard drive to another PC via SATA cable.
2 - Download and Run EaseUS Data Recovery.
Step 1. Launch EaseUS Data Recovery Wizard in Windows 11/10/8/7 and choose the place where you lost data. Then, click "Search for Lost Data" to find lost data.

Step 2. After the scan, use the file format filter on the left or upper right corner to find the files you need. You can also search in the search box, which is the fastest way to find the target file. Then, you can click the "Preview" button or double-click a file to preview its content.

Step 3. Click the checkbox next to the file and click "Recover" to get back the lost data to your local storage or Cloud drive.

To Sum Up
In this article, we've listed five solutions to fix the hard drive detected on a Dell laptop. For my advice, the above two methods are worth trying. If none of them works, you can apply the EaseUS data recovery tool to retrieve data and see whether the issue is being fixed.
Was this page helpful?
-
![]()
Written by
Tracy became a member of the EaseUS content team in 2013. Being a technical writer for over 10 years, she is enthusiastic about sharing tips to assist readers in resolving complex issues in disk management, file transfer, PC & Mac performance optimization, etc., like an expert.…


20+
Years of experience

160+
Countries and regions

72 Million+
Downloads

4.9 +
Trustpilot Score


