The Mac Spotlight search feature is a built-in search engine on macOS Sonoma, Ventura, and earlier versions, allowing you to search for anything you have stored on your macOS Ventura. The best part is that with Siri suggestions enabled, this feature provides you with sports scores, news, stock market information, weather conditions, and more.
So, use the Spotlight search shortcut on Mac to locate your files quickly! But often, users may find out that Spotlight search not working because of system errors, inadequate settings, or indexing errors.
Is the Spotlight search not working? Let's look into seven fixes below to fix the macOS Ventura or Sonoma search system not working error!
| Workable Solutions | Step-by-step Troubleshooting |
|---|---|
| Fix 1. Relaunch Spotlight Search | Open Launchpad, hit Other > Activity Monitor, and locate SystemUIServer...Full steps |
| Fix 2. Restart Your Mac | Hit the Apple menu, opt for Restart to reboot your Mac, and use Spotlight Search again...Full steps |
| Fix 3. Rebuild Spotlight Index | To rebuild the whole Spotlight Index, you must drag Macintosh HD into its Privacy tab...Full steps |
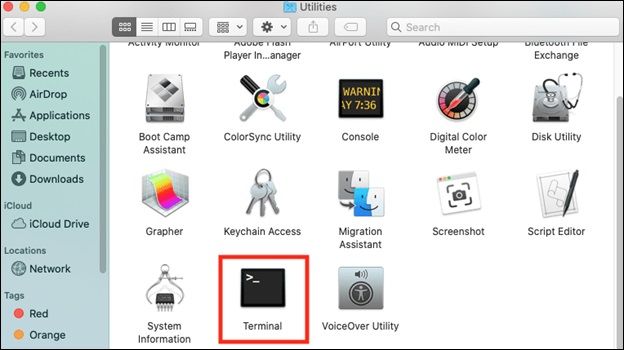
| Fix 4. Reindex Using Terminal | Open Terminal by launching Finder > Applications > Utilities, and type a command...Full steps |
| Other Practical Fixes | Delete com.apple.Spotlight.plist file, run First Aid in Disk Utility, and update Mac...Full steps |
Before fixing the Spotlight stops working error, read on to learn the possible causes.
Why Spotlight Search Not Working
As you use your MacBook daily for personal and office tasks, you probably have stored several photos, files, documents, folders, and other confidential data throughout your Mac. Hence, Mac Spotlight search is cumbersome for you to find files on Mac, making it hassle-free to discover everything you need.
Innumerable reasons may lead to the Spotlight search not working on macOS Ventura or other macOS versions. The possible reasons are listed below:
- Imprecise Spotlight settings
- System glitches and errors
- Mac Spotlight indexing errors
Don't worry if this error occurs on your MacBook; read the following methods to fix it!
How to Fix Spotlight Search Not Working
Countless fixes to Spotlight Search are not working on the macOS Ventura problem. Go through the fixes below:
Fix 1. Relaunch Spotlight Search
In case Spotlight crashes daily while trying to use it, you need to start by relaunching Spotlight services. You need to force the system service that tackles Mac's user interface to shut down. The steps are the following:
Step 1. Open Launchpad, and hit "Other > Activity Monitor".
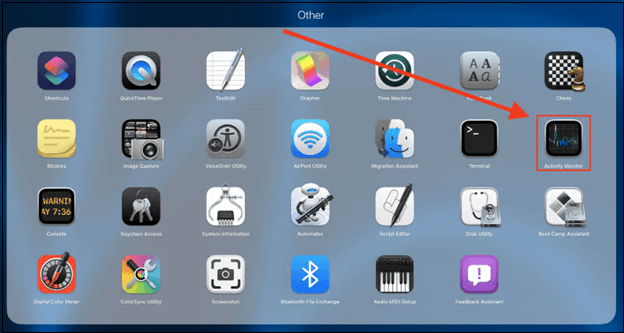
Step 2. Employ the search field in the screen's top right edge to locate SystemUIServer under the CPU tab. Once you detect the service, you need to highlight it by hitting the name.
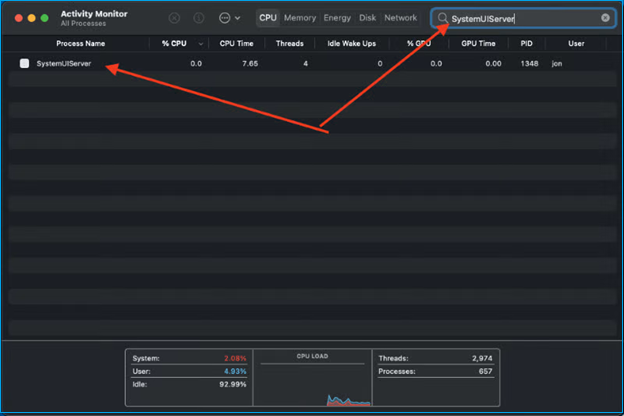
Step 3. Force it to stop by hitting the stop button on the screen's upper side once you're done highlighting the system.

Step 4. A pop-up window will emerge to select your preference. You need to hit the "Force Quit" button to close the program or use the Ctrl Alt Del on Mac. You may now continue the process via other services based on Spotlight searches, such as Spotlight and mds.

Force Quit Not Working on MacBook Pro/Air
This article discusses 5 practical methods to fix the Force Quit button not working error. Read more >>
Fix 2. Restart Your Mac
Restarting your MacBook often fixes the Spotlight errors, which lead to Spotlight not working. Follow the steps below to restart your MacBook:
Step 1. Hit the Apple menu, and opt for Restart to reboot your MacBook.

Step 2. Now, you need to use Spotlight Search again to check if it's working. If the "Restart" option not working, you should hard restart your MacBook.
Fix 3. Rebuild Spotlight Index
You must consider disabling and then rebuilding the Spotlight Index feature. It will help refresh the fundamental settings and detect the issue you're currently dealing with. Therefore, go through the steps below to rebuild the Spotlight Index:
Step 1. To rebuild the whole Spotlight Index for your macOS Ventura, you must drag "Macintosh HD" from your desktop into its "Privacy" tab.
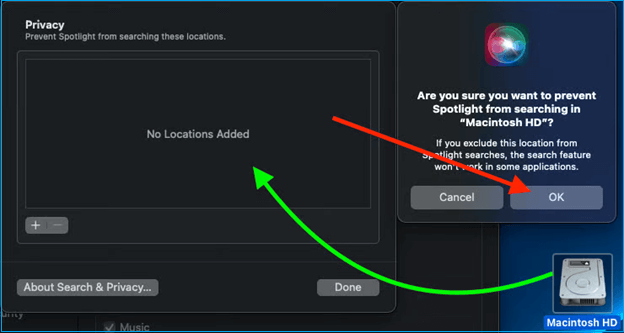
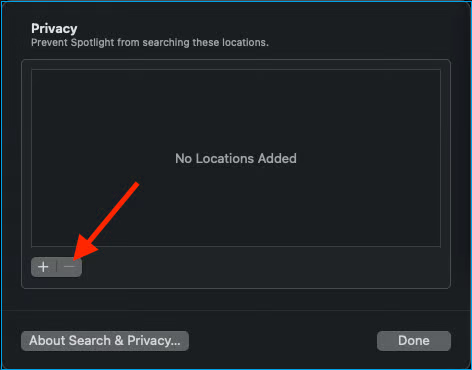
Step 2. Hit the "OK" button to confirm you don't want Spotlight to index the drive or directory in the pop-up window. Next, opt for the item you inserted and hit the "Minus (-)" button to delete it.
It allows your Mac to delete the Spotlight Index, and rebuild it entirely, which usually takes some time since you're indexing the complete internal storage. However, if you can't find the "Macintosh HD" in step 1, this article will help you solve this question.

Macintosh HD Not Showing Up in Finder or Recovery Mode, How to Fix
This article introduces 5 practical ways to fix Macintosh HD not showing up in Finder or Recovery Mode issue. Read more >>
Fix 4. Reindex Spotlight Search Using Terminal
In case your Spotlight Search can't work after recreating the index in the System Preferences, it's time to reindex Spotlight employing Terminal. Follow the steps below to reindex Spotlight Search:
Step 1. Open Terminal by launching "Finder > Applications > Utilities".
Step 2. Type sudo mdutil -E / in the terminal window, and hit the "Return" or "Enter" button.
This command will eliminate the fixed index on your MacBook and recreate it with the new one. For this, you need to enter your admin password for the change.
Share this article on social media to help others learn more about how to fix the Spotlight Search not working on Mac.
Fix 5. Delete com.apple.Spotlight.plist File
If this stubborn Spotlight Search function isn't working, you may try deleting the com.apple.Spotlight.plist file. These are the steps to follow:
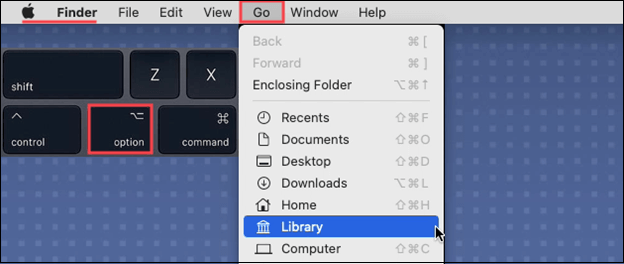
Step 1. You must press "Alt" or "Option" from the Finder and opt for "Go > Library".
Step 2. Launch the "Preferences" folder.
Step 3. Delete the com.apple.Spotlight.plist file.
Step 4. Log out of your macOS Ventura, and log back in immediately to check if Spotlight works effectively.
Fix 6. Run First Aid in Disk Utility
Frustrating Spotlight errors might be linked with drive errors; therefore, you must search for issues using the Disk Utility applet in macOS. Follow the steps below to run Mac First Aid in Disk Utility:
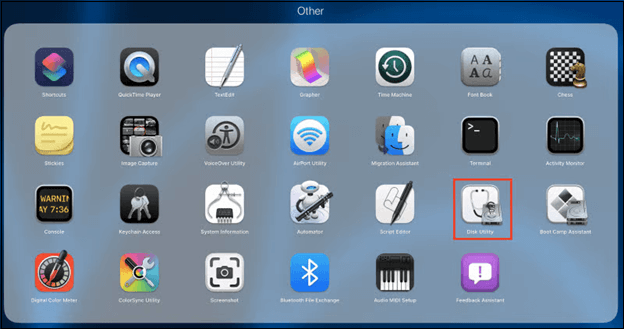
Step 1. Open Launchpad, and hit the "Other" option.
Step 2. Opt for "Disk Utility" and quickly navigate to "Macintosh HD" on the sidebar.
Step 3. Select First Aid button on the screen's upper side.

Step 4. Hit the "First Aid" button and select "Run" in the pop-up window.
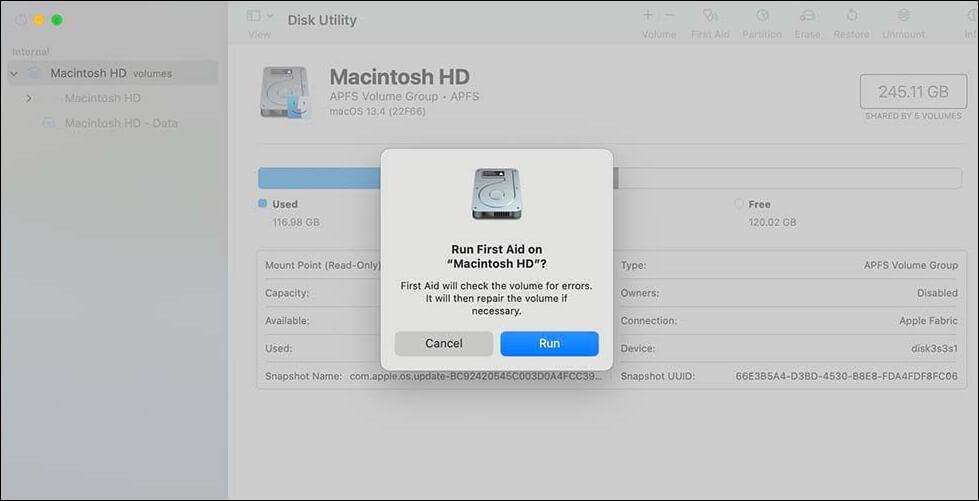
Step 5. Now, allow a few minutes for Disk Utility to scan and mend disk errors. After that, hit the "Done" button when a new window emerges.
If your system spots disk errors but cannot resolve them, you may mend them by restarting your Mac into recovery mode. Here's an article that introduces how to fix the common First Aid error.

First Aid Found Corruption That Needs to Be Repaired, What Should I Do
This article discusses how to repair the first aid found corruption that needs to be repaired error. Read more >>
Fix 7. Update macOS
Updating your Mac if Spotlight Search isn't working after a macOS upgrade is vital. Moreover, if you haven't updated the macOS for months, or the macOS Sonoma installation failed, it may be why your Mac's Spotlight Search isn't working. Follow the steps below:
Step 1. Launch the Apple menu > System Preferences > Software Update.
Step 2. Search for the updates and update your MacBook. Once done, you may check whether the Spotlight not working error is fixed!
Does updating macOS delete everything? Will updating macOS Sonoma lead to data loss on my Mac? Some users suffering from losing their essential data after new updates.
Hence, you need to back up your data prior to updating macOS. If you have updated macOS without backups and lost important files, you must not worry as you can choose a professional data recovery software, EaseUS Data Recovery Wizard for Mac.
Losing data in a catastrophe caused by deletion without a backup, virus attacks, hardware failure, system crash, macOS update, and unforeseen shutdown is annoying. In case your confidential data vanishes, you can recover lost files after the macOS Ventura update with the EaseUS data recovery software.
Conclusion
It will be frustrating if Spotlight Search fails to function if you frequently rely on it to find various applications, documents, and folders on your Mac. Fortunately, these above-mentioned modifications are frequently quick and easy to complete. Therefore, whether you must reboot your Mac or utilize built-in applications to look for disk issues is a simple process.
Spotlight Search Not Working FAQs
Go through these FAQs below to better understand the topic:
1. How do I reset my Spotlight index Mac?
In order to rest Spotlight Index Mac, you need to follow the steps:
Step 1. Opt for Apple menu > System Settings
Step 2. Select "Siri & Spotlight" in the sidebar, scroll down, and hit "Spotlight Privacy" on the right-hand side.
Step 3. Hit the "Add" button (+) and opt for the disk to add.
Step 4. Opt for the disk you have just incorporated from similar locations. After that, hit the remove button to eliminate it from the list.
Step 5. Hit the "Done" button, and shut down System Settings.
2. How do I activate Spotlight on Mac?
In order to activate Spotlight on Mac, you need to hit the command-space bar or the Spotlight symbol in the menu bar.
3. Why is my search not working on Mac Finder?
Most frequently, indexing is to blame for the finder's poor performance in finding objects. Fortunately, resetting the index will resolve the finder search immediately.
4. How do I enable Spotlight to search streaming files?
Another option is located in the preferences window. Press that gear to: You are currently in the configuration window for the Google Drive synchronization utility. Here, make sure the option labeled "Enable Spotlight to search streaming files" is selected.
Was This Page Helpful?
Brithny is a technology enthusiast, aiming to make readers' tech lives easy and enjoyable. She loves exploring new technologies and writing technical how-to tips. In her spare time, she loves sharing things about her game experience on Facebook or Twitter.
Related Articles
-
FIX 'the device has either stopped responding or is disconnected' Error
![author icon]() Jean/2025-01-24
Jean/2025-01-24 -
Mac Safe Mode | Boot Mac to Safe Mode in macOS 13/12/11 [ 2025 Guideline ]
![author icon]() Jaden/2025-01-24
Jaden/2025-01-24 -
How to Mount a Disk on Mac [Step-by-Step Tutorial in 2025]
![author icon]() Brithny/2025-01-24
Brithny/2025-01-24 -
Solved: Mac Running Slow After macOS Sequoia Update
![author icon]() Jaden/2025-01-24
Jaden/2025-01-24
EaseUS Data Recovery Services
EaseUS data recovery experts have uneaqualed expertise to repair disks/systems and salvage data from all devices like RAID, HDD, SSD, USB, etc.