This article will introduce 7 effective methods to fix the Mail not working on a Mac error. Check out!
- Fix 1. Force Quit and Relaunch the Mail App
- Fix 2. Restart Your Mac
- Fix 3. Reset the Mail App
- Fix 4. Check the Mail App Activity
- Fix 5. Disable Your Mail Account and Try Again
- Fix 6. Check the System Status of iCloud Mail
- Fix 7. Downgrade from macOS Sonoma to Ventura
Why Mail Not Working on Your Mac
Apple Mail is the one-stop email client among iPad, iPhone, and Mac users, as it's preinstalled on these useful Apple devices. In case you're having issues while sending or getting emails, facing crashes, or other macOS Sonoma issues with Apple Mail, this article has got you covered!
Are you willing to know the probable causes for your Apple Mail application to cease responding or functioning? Mail not working on Mac after updating to Sonoma may happen due to internet connection instability, imprecise login details, outdated macOS, outages of Apple servers, wrong settings configuration, and inadequate space on your account.
You must not worry, as resolving this "Mail not working on Mac" issue isn't as daunting as you think. This article will help guide you through the top ways to fix this problem. Let's get started!
How to Fix Apple Mail Not Working
The below-mentioned tips will help fix Apple Mail's not working issues. Before trying out the fixes below, it's recommended to reboot your MacBook Pro or Air, as restarting often assists in eliminating minor app problems.
Fix 1. Force Quit and Relaunch the Mail App
When the Apple Mail applications start showing issues, the most vital step is to restart the application. For this, force quitting, along with relaunching the mail app, is required. Quitting the Mail app will cease every background process linked with it, and Mail can precisely restart when you relaunch it. Follow the steps below:
Step 1. Hit the "Mail" symbol in the dock in order to make it your active application, and select "Command + Q" to quit.
Step 2. Control-click the Mail icon, and hit the "Quit" button if you can't make the application your active window.
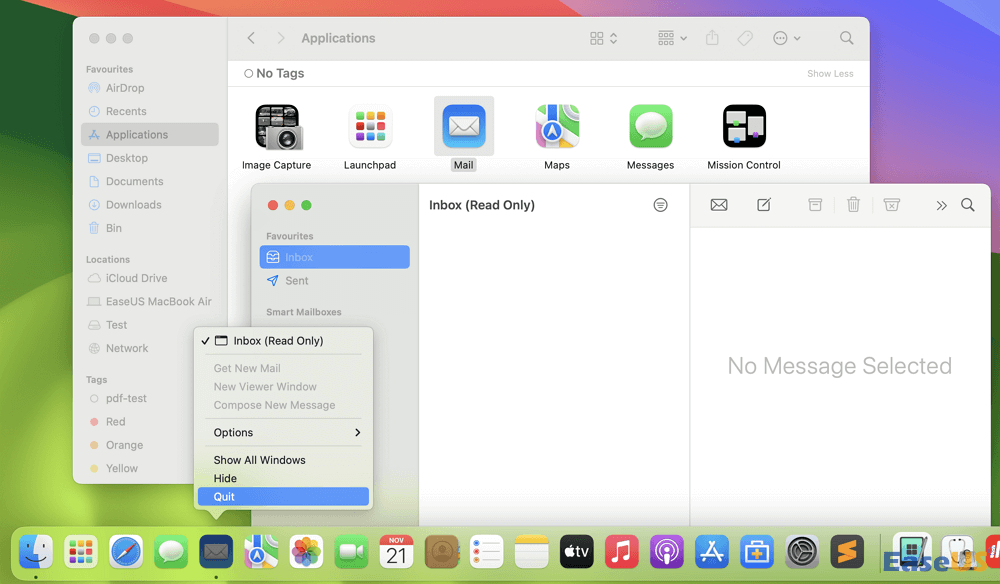
Step 3. Hit the Force Quit shortcut "Option + Command + Esc" to force close the application window. Now, hit "Mail" followed by "Force Quit".
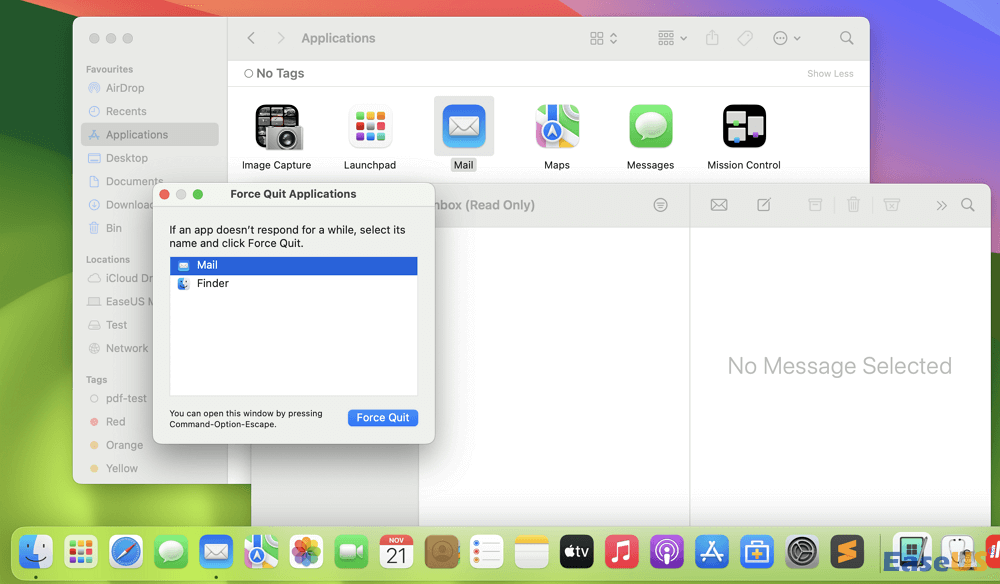
Once you force quit the application, relaunch it and see if the issue has been resolved. How to fix force quit not working on Mac? Don't worry! You can apply several methods to force quit an application you want.

Force Quit Not Working on MacBook Pro/Air, How to Fix
This article discusses effective ways to solve the Force Quit feature not working on the Mac issue. Read more >>
Fix 2. Restart Your Mac
In case the Apple Mail is working slowly or unresponsive, the issue might be with another application functioning on Mac. When an application functions through tough processes and consumes maximum RAM or has gotten a bug, mail will grapple with operating correctly.
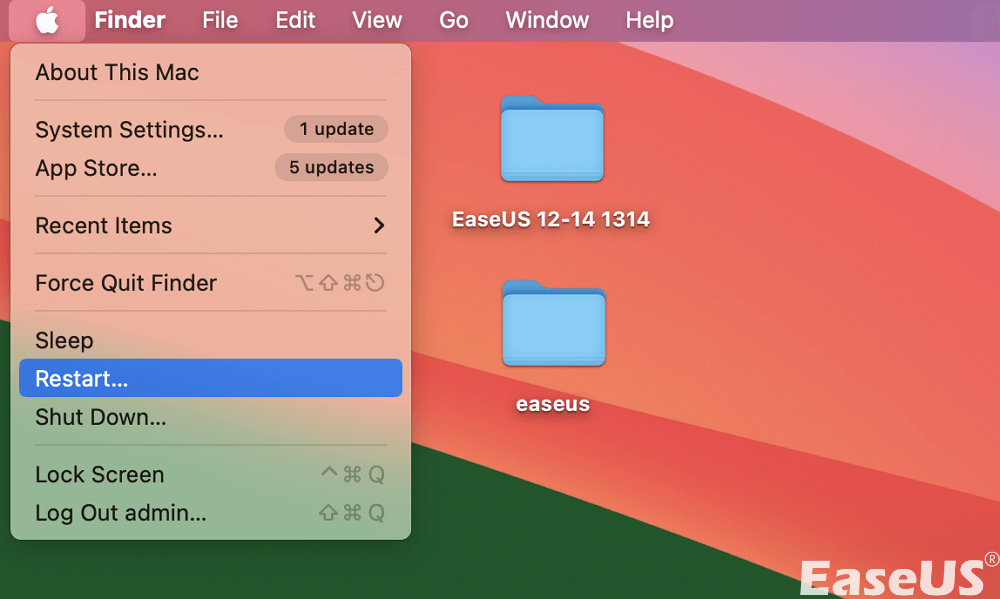
You can navigate to the Apple menu. Hit "Restart" from the menu bar. If this does not work, consider hard restarting your Mac.
Fix 3. Reset the Mail App
Irrespective of the issue with mail, resetting the application is the best fix that works often. Unlike iPadOS and iOS, you can't delete mail on your Mac entirely; therefore, resetting is a top-notch way to revert it to its previous state. Go through the steps below to reset the mail application:
Step 1. Launch "Finder" and hit "Go"> "Go to Folder" from the menu bar.

Step 2. You need to copy & paste the folder address ~/Library/Containers and hit the "Return" button. This will reveal every system file and folder on your MacBook.
Step 3. In the search box, type "mail" and hit "containers" to exhibit only mail folders. Now, opt for all and move to Trash. If you accidentally deleted important emails on your Mac, use the "Put Back" feature in Trash to restore mail on your Mac.
Or you can install EaseUS Data Recovery Wizard for Mac Pro, a professional and trusted data recovery tool that can recover deleted emails on a Mac with a user-friendly process!
Step 4. In Finder, press "Command + Shift + G", copy/paste ~/Library/Mail, and hit the "Return" option. Now, look for "mail" and delete the files and folders.
Step 5. Hit "Command + Shift + G" and copy/paste ~/Library/Application Scripts. Select the required files for deletion after searching "Mail" and clicking "Application Scripts".
Sometimes, the Finder error will occur, so you can't find any files or folders via the Finder program. In this case, read the article below to fix the error!

Fix Mac Finder Not Showing Files, Folders [2023]
This article discusses how to fix the Mac Finder not showing files and folders. Read more >>
Fix 4. Check the Mail App Activity
Occasionally, you could realize that there are no emails. You are unable to locate a specific email in the inbox when you need it. However, you can solve this issue by following the steps listed below:
Step 1. Launch the mail application.
Step 2. Hit "Window > Activity".
Now, you might notice if any processes are functioning in the background. This application might be installing a large attachment or paused loading texts to enhance the battery life or impede overheating chances.
Share this article on social media to help others learn how to fix the Mail not working on Mac error.
Fix 5. Disable Your Mail Account and Try Again
In case you have several accounts, it would be better to disable them and then reload again individually to try and find a corrupted account. Steps are the following to manually turn off your mail accounts:
Step 1. Launch the Apple Menu and click "System Settings".
Step 2. Opt for "Internet Accounts".
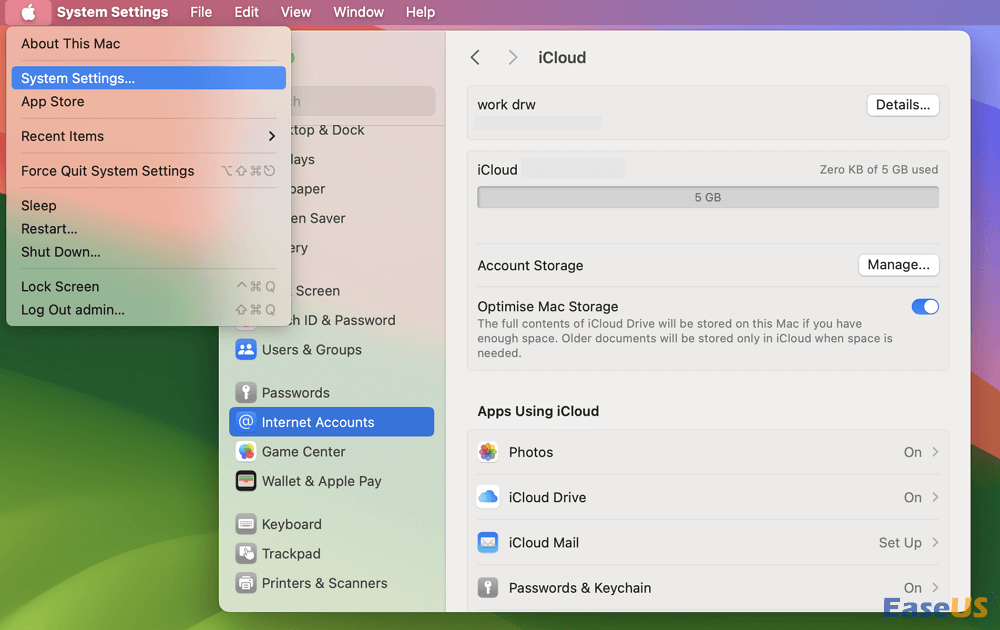
Step 3. Opt for your iCloud Mail from the list and disable it.
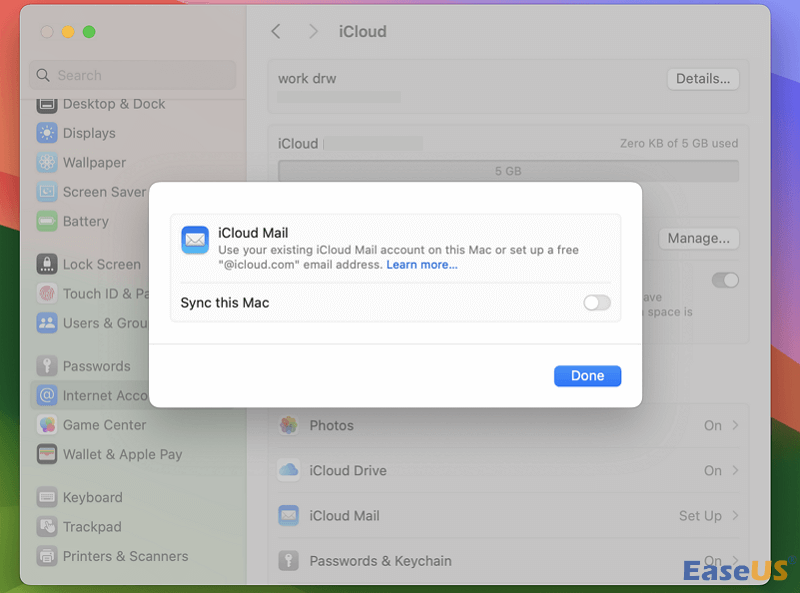
Step 4. Reload the mail after you have turned off every mail account, and see if it worked.
Fix 6. Check the System Status of iCloud Mail
Apple's servers may be causing the problem rather than the Mail program itself. However, take into account that the advice only applies to iCloud Mail.
Navigate to the Apple System Status page and examine iCloud Mail to see if that is the situation. If it is green, there aren't any problems right now. Your sole choice in the event of a problem is to stand by and wait for Apple to resolve it.

Fix 7. Downgrade from macOS Sonoma to Ventura
After switching to the updated platform, multiple individuals have complained that Mail isn't functioning. This can be the result of an unforeseen bug. Hence, users are advised to downgrade from Sonoma to Ventura.

Out of several methods of downgrading from macOS Sonoma to Ventura, the best way is to do this with the Mac Time Machine. Go through the steps below to retrieve your system from a Time machine backup and downgrade from macOS Sonoma to Ventura.
Step 1. Establish your Mac with the Time Machine backup disk.
Step 2. Relaunch your Mac while pressing down the "Command + R" keys to start your Mac in Recovery Mode. Or press the power button until the option instructions appear on your screen.

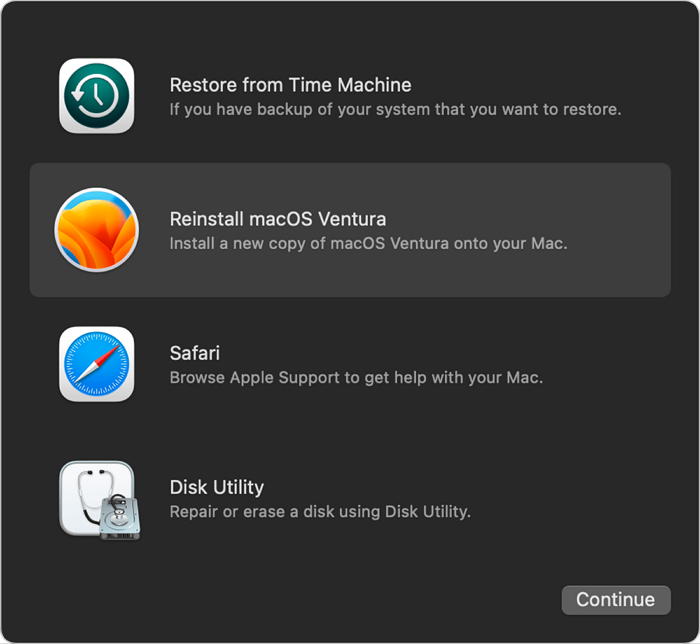
Step 3. Navigate to the "Utilities" menu in macOS and opt for "Restore from Time Machine Backup".
Step 4. Opt for the disk you employ with Time Machine, and hit the "Next" button.
Step 5. Once you discover the backup file containing your Ventura installation, hit "Continue".
Step 6. Go through the on-screen instructions to bring back the backup on your Mac.
Conclusion
Don't freak out if you're having problems with Apple Mail on your Mac. We illustrated that you can fix the issues by attempting the troubleshooting techniques. Whichever problem you're having with Apple Mail, one or more solutions will enable you to resume sending and receiving emails. If nothing can assist, you may always get professional help by contacting Apple Customer Support.
Mail Not Working on Mac FAQs
Go through the FAQs below to comprehend the topic in a better way:
1. Why isn't my email working on my Mac?
It's possible that emails aren't appearing in Inbox because the app hasn't loaded them properly. Waiting for at least ten seconds should be your initial course of action. Verifying your internet connection is an additional easy fix. Obviously, if your Mac is offline, you won't receive the notifications, and they are unlikely to load.
2. How do I reset the Mail app on my Mac?
In order to reset the mail application on your Mac, follow the steps below:
Step 1. Launch "Finder" and hit "Go"> "Go to Folder" from the menu bar.
Step 2. You need to copy & paste the folder address ~/Library/Containers and hit the "Return" button. This will reveal every system file and folder on your MacBook.
Step 3. In the search box, type "mail" and hit "containers" to exhibit only mail folders. Now, opt for all and move to Trash.
Step 4. In Finder, press "Command + Shift + G", copy/paste ~/Library/Mail, and hit the "Return" option. Now, look for "mail" and delete the files and folders.
Step 5. Hit "Command + Shift + G" and copy/paste ~/Library/Application Scripts. Now, select the required files for deletion after searching "Mail" and clicking "Application Scripts".
Was This Page Helpful?
Brithny is a technology enthusiast, aiming to make readers' tech lives easy and enjoyable. She loves exploring new technologies and writing technical how-to tips. In her spare time, she loves sharing things about her game experience on Facebook or Twitter.
Related Articles
-
Step-by-Step Guide to Backup Drivers Windows 10 [Powerful Solutions]
![author icon]() Cici/2024-11-25
Cici/2024-11-25 -
How to Check RAM on MacBook Pro/Air | 3 Tested Ways to Free Up It
![author icon]() Brithny/2024-10-25
Brithny/2024-10-25 -
How to Recover Your Deleted Firefox Browsing History
![author icon]() Tracy King/2024-07-24
Tracy King/2024-07-24 -
Fix boot sector of FAT16/FAT32/NTFS partitions
![author icon]() Daisy/2024-08-22
Daisy/2024-08-22

EaseUS Data Recovery Services
EaseUS data recovery experts have uneaqualed expertise to repair disks/systems and salvage data from all devices like RAID, HDD, SSD, USB, etc.