
Today, businesses are in support of the Bring Your Own Device (BYOD) system. In BYOD, businesses give Windows To Go USB drives to create a secure workspace environment on any gadget rather than providing a computer to employees.
Windows To Go allows users to use all the full Windows installation features, including troubleshooting, diagnostic and security tools.
So, today if you are wondering whether to go for Windows To Go or stick with the standard Windows installation on a computer, this post will better throw light on the topic for you.
What's Windows To Go?
Windows To Go is a Microsoft feature that allows you to boot and run Windows OS from the certified USB flash drives or external hard disk. You will get a fully manageable corporate Windows environment on the USB.
However, in 2019, Microsoft has discontinued Windows To Go. That means in Windows updates after May 2020; Windows To Go is no longer available.
Here are the Windows environments on which you will get Windows To Go:
- Windows 8 Enterprise
- Windows 8.1 Enterprise
- Windows 10 Education
- Windows 10 Enterprise
* You may be interested in how to create Windows To Go without Enterprise.
Along with the compatible Windows OS, you also need to get a certificate USB drive built for high random read/write speed to run Windows on it. Additionally, these are some technical specifications that Windows To Go host computer must have:
- 1 GHz or faster processor
- 2 GB or higher RAM
- DirectX 9 graphics device with WDDM 1.2 or greater graphics driver
- USB 2.0 port or higher
If you have a compatible host computer and USB drive with you, follow these steps to create the Windows To Go workspace:
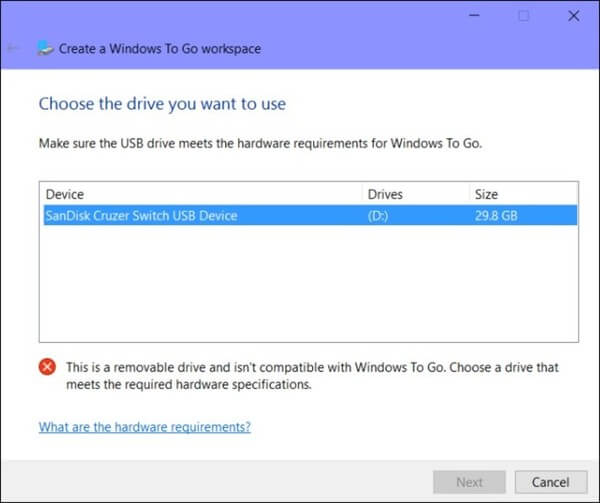
Step 1. On your compatible Windows computer, open the Start menu, type Windows To Go, and press Enter.
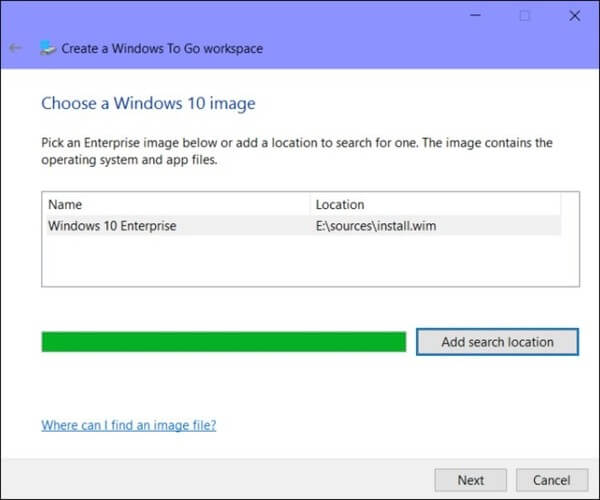
Step 2. In this process, you can use the Windows operating system available on a physical DVD or an ISO disk image. You can click on the Add Search Location button to navigate the image.
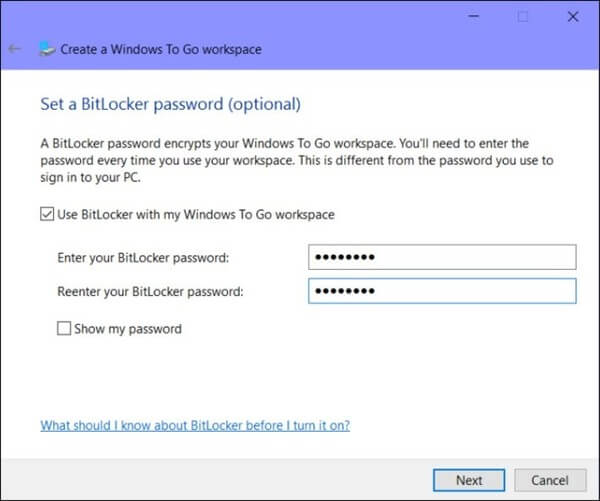
Step 3. The next step is optional. You can enable BitLocker Drive Encryption on your USB and set a password to protect your driver. This is helpful in case you lost your Windows To Go USB drive.
Step 4. Finally, Windows will transfer the Windows operating system image to the USB drive. Remember this process will format your USB drive, so make sure to backup your USB data beforehand.
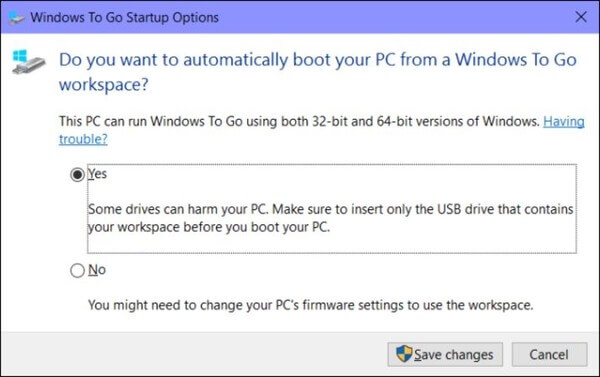
Step 5. Now, to create a Windows To Go environment on a certified computer, go to Start menu > Type Windows To Go > Enter > Choose Yes > Save Changes and restart your system. Windows To Go will now initialize depending upon the host computer's USB bus, memory, and CPU hardware.
What's Windows Standard Installation?
As the name suggests, Windows standard installation is a simple installation of the Windows operating system on a computer. You can either download the Windows OS from Microsoft Store or install Windows from DVD or USB disk.
Windows standard installation is compatible with all the Windows versions. However, you just have to check specific installation requirements for all the Windows OS on the Microsoft website.
Here are a few easy steps for Windows standard installation for Windows 10 using bootable USB:
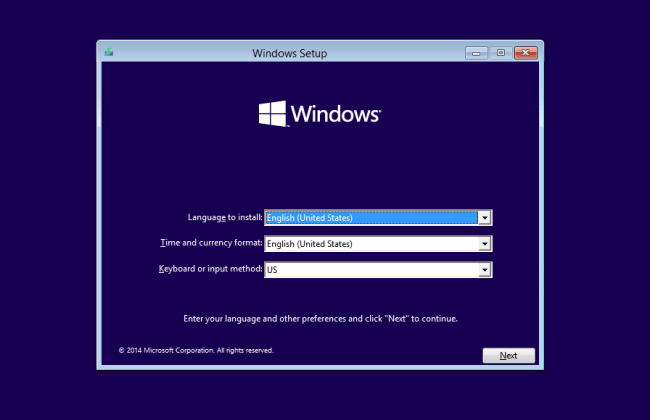
Step 1. Insert your USB device into your computer and start up the computer.
Step 2. Select your preferred language, timezone, keyboard settings, and currency. Once you are satisfied with custom settings, click Next.
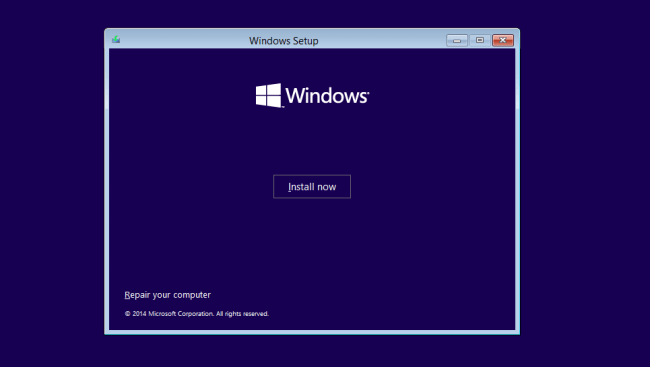
Step 3. Click on the Install Now button and select the Windows 10 edition you have purchased. Again on the Next button to start the installation process.
Step 4. Select the installation type - Upgrade and Custom. In the Upgrade installation, you can keep your current settings, programs, and files on the computer. In contrast, Custom allows a fresh Windows installation.
Step 5. Next, you need to create partitions on your hard drive to store files. Here, you can choose the existing partition and format it or delete everything from your hard drive and create new partitions on your disk.
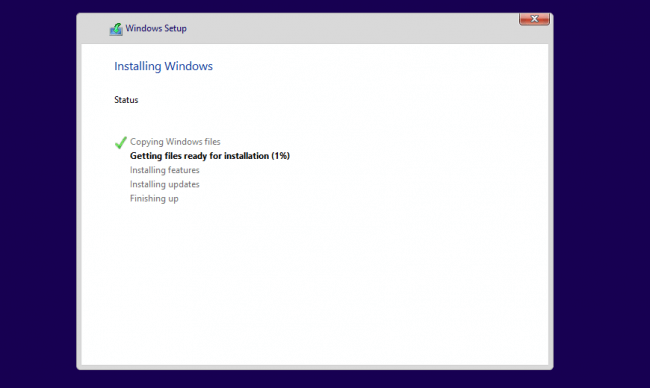
Step 6. Once you have created the desired disk partitions, click on the Next, and Windows 10 installation will begin for you. Note your computer might reboot a few times during the installation, so don't panic.
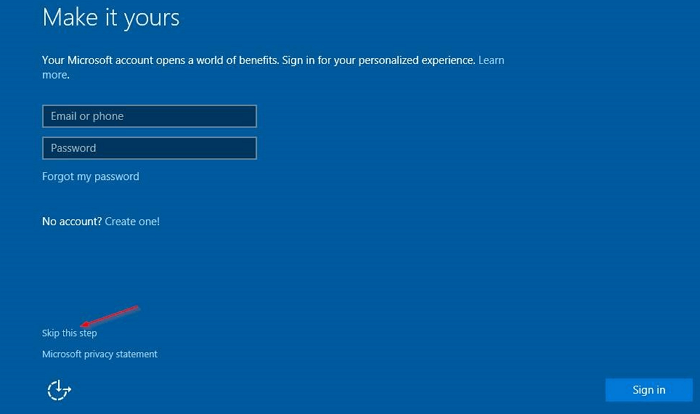
Step 7. Your computer will automatically restart one last time after the installation completes. When it starts up for the first time, you can customize your Microsoft settings.
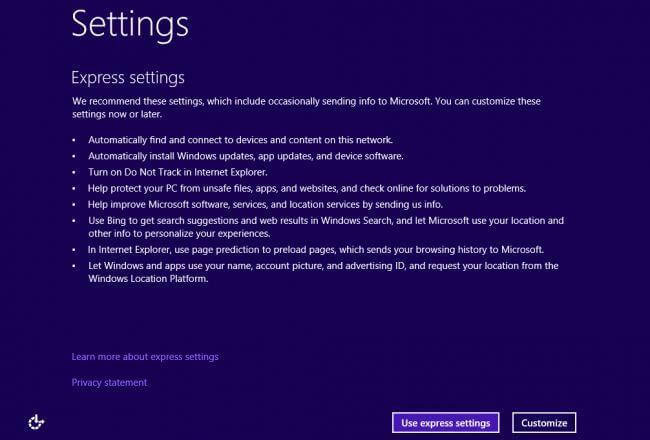
Step 8. Finally, set up your Microsoft account to use all the Windows 10 features.
Windows To Go vs. Standard Installation: Which Suits You Better
As you know what Windows To Go and standard installation is, the next important question is which one is better for you. For this, let's understand the difference between both Windows environments:
1. Internal Disks
To make sure data isn't accidentally disclosed, internal hard disks on the host computer are offline by default in Windows To Go. However, that's not the case with the standard installation where internal disks will be online.
2. Trusted Platform Module (TPM)
Usually, BitLocker Drive Encryption requires a system with a TPM chip. But TPM isn't used in the Windows To Go environment as the TPM is tied to a specific computer. Since Windows To Go moves between computers, BitLocker will be used for password security purposes only.
3. Hibernation
Hibernate is disabled to ensure that the Windows To Go environment can easily move between computers. However, you can enable it from the Group Policy settings.
4. Windows Recovery Environment
Unlike Windows standard installation, Windows Recovery Environment isn't available on Windows To Go. You have to reimage it with a fresh image of Windows to recover data.
5. Refreshing or Resetting
You can reset or refresh the manufacturer's standard to the computer while running on the Windows To Go workspace.
6. Windows Upgrade
You can't upgrade your Windows 8 Windows To Go to the Windows 10 Windows To Go. The Windows version you have once selected for Windows To Go, you have to always stick with it.
So, if Windows To Go offers you flexibility and ease, it also takes away many default Windows functions from you. Therefore, it is hard to tell which Windows framework is better for you - Windows To Go vs. Windows Standard Installation.
The best advice here would be first to define your Windows requirements and accordingly select the installation type.
100% Better Alternative for Windows To Go
If you prefer the Windows To Go workspace but have the latest Windows 11 host computer, no need to worry. Here using the EaseUS OS2Go, you can effortlessly make portable Windows 11/10 on USB.
This is a robust tool to create a Windows To Go environment on all the latest Windows. Additionally, the program lets you run all the Windows 11 features and programs on your host computer.
EaseUS OS2Go can also help you run Windows on Mac and carry your workspace in your pocket. Further, it is super simple to create a Windows To Go environment with EaseUS OS2Go as follows.
Step 1. Install EaseUS OS2Go on your Windows computer, it will display your system drive's used space. Plug in a USB drive that is larger than the system drive used space. Choose the target USB drive and click Next to continue.

Step 2. EaseUS OS2Go will notify you that the following operation would delete all data on your drive. Make sure that you have backed up all the important data. Click the Continue button to proceed.

Step 3. Adjust disk layout. The default disk layout on the target drive will be exactly the same as the resource drive. You could also edit the layout according to your needs. Tick the option there if you're using a Solid State Drive as the Windows bootable drive. Next, click Proceed.

Step 4. Then EaseUS OS2Go will start to create the portable USB drive. It usually takes a while depending on your OS and Network condition. When the progress reaches 100%, the USB drive should be bootable now.

Step 5. Insert the portable Windows USB and start your computer. Press the required key (F2, DEL, F10...) to access BIOS. Choose to boot from the USB disk.
Note: Please make sure that the boot mode (UEFI or Legacy) of the portable USB and your target computer are the same, otherwise you may not be able to boot.
Final Words
Windows To Go and standard installation are two great options to run the Windows framework. Windows To Go allows you to carry your entire system in your pocket and run Windows on any gadget. However, it is not available for the latest Windows 10 or 11 updates, which is unfortunate.
But thankfully, EaseUS OS2Go has now made it possible for Windows 11 users to boot Windows 11 via a portable USB. In fact, this software can also help you run Windows on Mac devices. So, if you want to run Windows To Go on Windows 11, try EaseUS OS2Go free trial today.
Was This Page Helpful?
Related Articles
-
Free Download Windows 8/8.1 (ISO File) for 32-Bit/64-Bit PCs
![]() Brithny/2026-06-17
Brithny/2026-06-17 -
How to Play Call of Duty on Your Mac with 3 Methods
![]() Jean/2026-06-17
Jean/2026-06-17 -
How to Play League of Legends (LOL) on Mac with 3 Solutions
![]() Jean/2026-06-17
Jean/2026-06-17 -
Rufus vs. Etcher: Which One Is a Better Option to Create Bootable USB Drive
![]() Jean/2026-06-17
Jean/2026-06-17