Quick Navigation:
- 1. Fix Time Machine Stuck at Waiting to Complete First Backup (6 methods - easy and quick!)
- 2. Helpful Tips to Avoid Time Machine Backup Failure
- 3. Recover Data Without Time Machine Backup (Once for all!)
Time Machine utility on Mac allows you to create a backup of your Mac's data. You can backup data on any external disk to make your data safer from any loss.
But, Mac users sometimes face issues with their Time Machine backup utility. The error states that it is waiting to complete the first Backup. Hence, you are unable to create any new backup. But don't worry, as our goal is to help you fix this issue.
Before you see the fixes to the time machine stuck at waiting to complete the first Backup, let's see the reasons below why the issue appears in the first place.
- Problem with your backup drive: A probable cause for this issue is due to your backup drive where Time Machine is creating the Backup. Make sure to check if you can use your backup drive usually.
- Pending software updates: Your Mac should be using the latest macOS version to run Time Machine smoothly. If not, you need to update your macOS.
- Internet connectivity: Inconsistent WiFi network or slow internet can also cause this error. Therefore, it is highly recommended to use reliable and good speed internet for Time Machine backups.
- Incomplete backup process: Users sometimes lose patience and turn off their Macs while the Time Machine backup runs. It can throw problems for you in the future, so it is better to always complete a Backup before signing off.
You need to avoid and keep in mind the things mentioned above to run Time Machine backups without problems. In the next section, you will see how to fix the time machine stuck waiting to complete the first backup issue.
Time Machine Restore Button Greyed Out, How to Fix?
Time Machine, the built-in backup feature of your Mac, allows you to backup all the files, including apps, music, photos, email, documents, and system files automatically.

How to Fix Time Machine Stuck at Waiting to Complete First Backup
The good news is that you can fix the time machine stuck waiting to complete the first backup issue. Below, you will see our list of six complete compiled solutions that you can do on your own to get rid of this error.
- 1. Cancel Backup Progress and Restart to Backup Again
- 2. Run First Aid on the Time Machine Backup Drive
- 3. Exclude Affected Directories for Backup
- 4. Start Your Mac in Safe Mode for First Backup
- 5. Format Time Machine Backup Drive to APFS
- 6. Install Available New macOS Update
1. Cancel Backup Progress and Restart to Backup Again
The first method you can try is to cancel your ongoing Backup and back up again. Follow the steps below to do that:
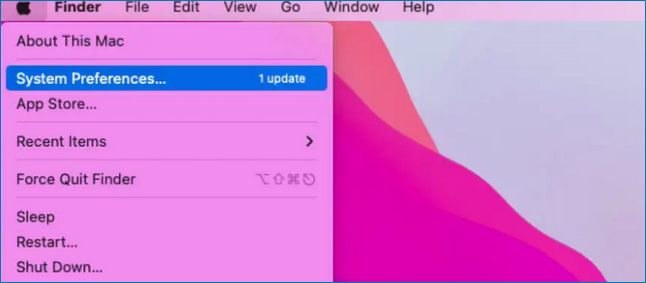
Step 1. From Apple Menu, select System Preferences.
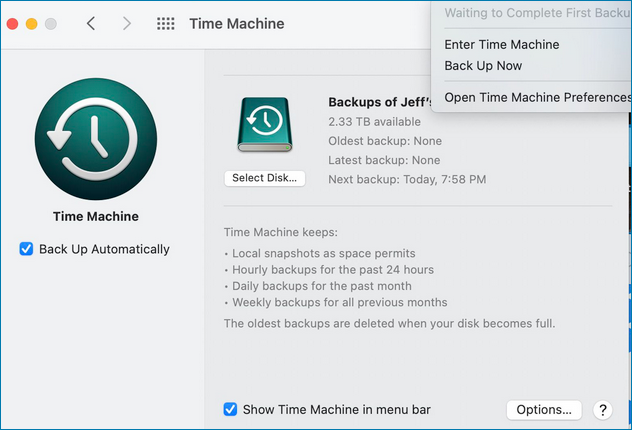
Step 2. Open Time Machine.

Step 3. Click the x icon to stop the ongoing backup progress.

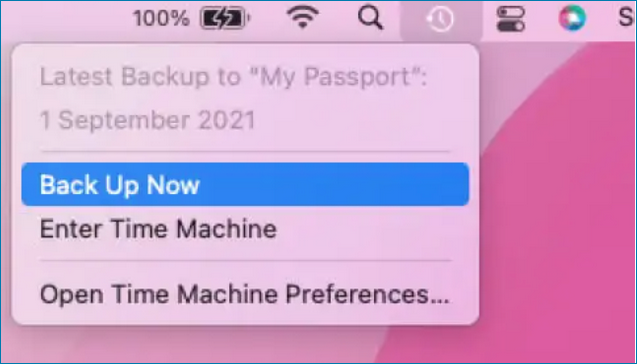
Step 4. Restart your Time Machine Backup again by clicking on the Time Machine icon from the Menu bar and selecting Back Up Now.
2. Run First Aid on the Time Machine Backup Drive
File system errors on your Time Machine Backup Drive can also cause the issue. You can use Mac's built-in disk utility to help you fix file system errors on your Backup drive.
Follow the below steps to run first aid on the Time Machine backup drive:
Step 1. Launch Disk Utility by pressing CMD + Space key and typing Disk utility.
Step 2. Select your Time Machine backup drive from the left sidebar.
Step 3. Click on the First Aid button.

It will scan and check for file system errors in your backup drive. Once done, it will fix them, and then you will be able to run Time Machine backups without any issue.
3. Exclude Affected Directories for Backup
Sometimes there are affected directories that won't let Time Machine backups complete. For example, they prevent Mac from pausing or stopping backups because these directories run into the "Failed to proactively acquire device lock assertion" error.
You need to identify these directories and exclude them from Time Machine backup. Follow the below steps to exclude affected directories for Backup:
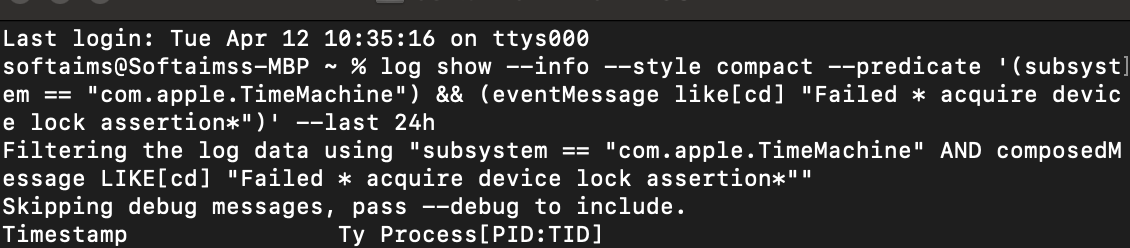
Step 1. Open Mac Terminal and enter the below command.
log show --info --style compact --predicate '(subsystem == "com.apple.TimeMachine") && (eventMessage like[cd] "Failed * acquire device lock assertion*")' --last 24h
Running the command will list the directories for you as output.
Step 2. From Apple Menu, select System Preferences and open Time Machine.
Step 3. Click on Options from Time Machine and use the Plus icon to exclude these directories from Backup.
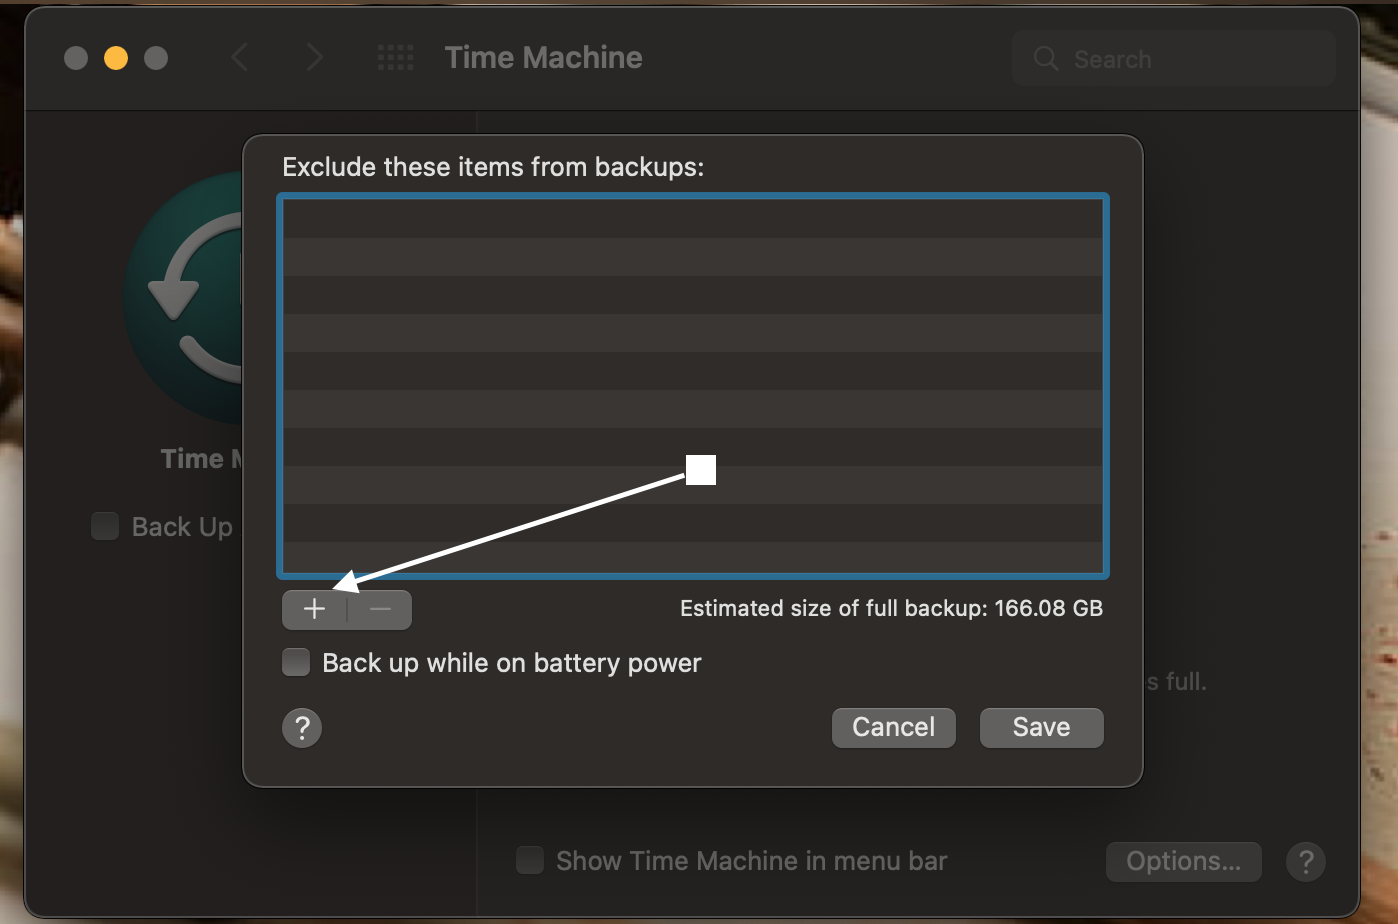
Once done, click on the Save button to exclude the files from Backup.
4. Start Your Mac in Safe Mode for First Backup
The first Time Machine backup is always time-consuming. So, you can boot your Mac in Safe Mode to prevent any incompatible software from stopping you from Backup.
Follow the below steps to start your Mac in Safe mode for your first Backup:
Step 1. Turn off your Mac.
Step 2. Press and hold the power button until the below screen appears.
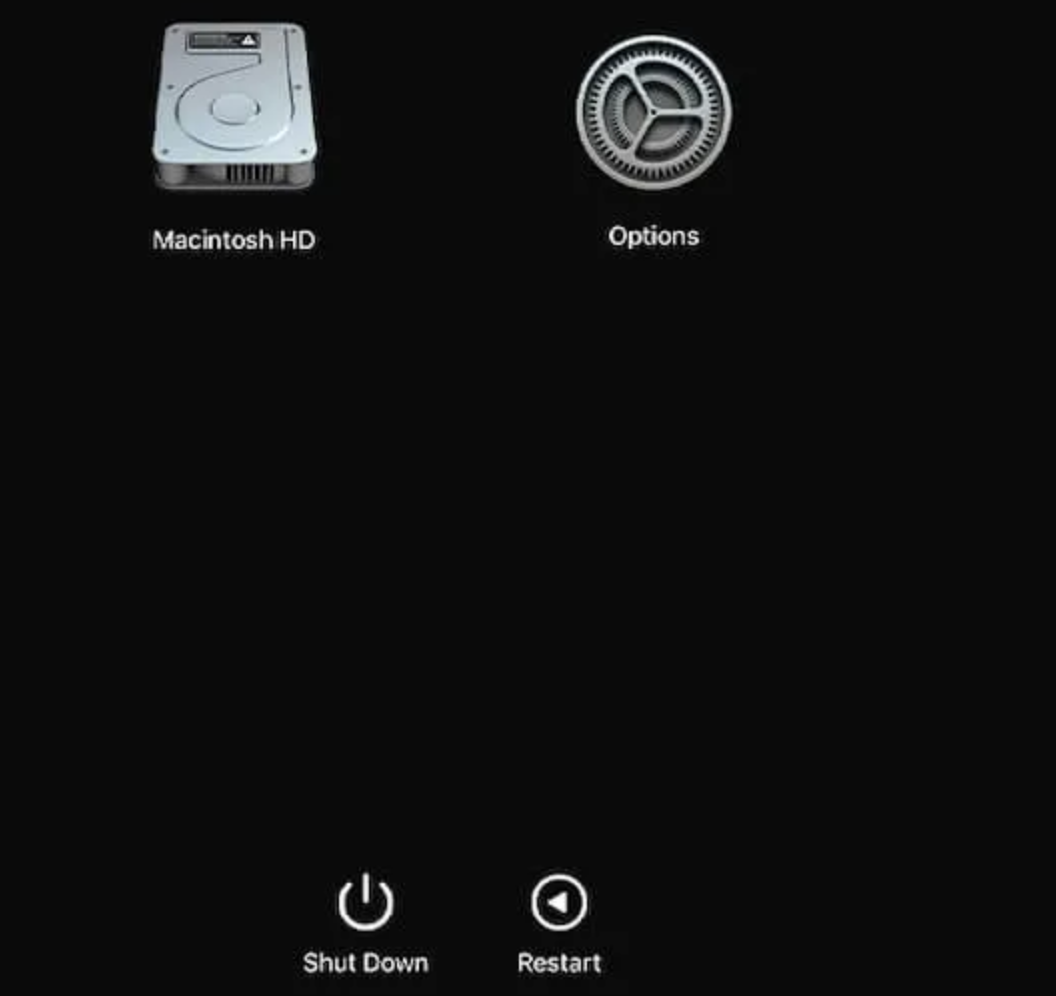
Step 3. Load your Mac in Safe Mode and start Time Machine backup
5. Format Time Machine Backup Drive to APFS
It is recommended to use APFS (Apple File System) for your backup Time Machine drive. You can format the backup drive to APFS format by following the steps below:
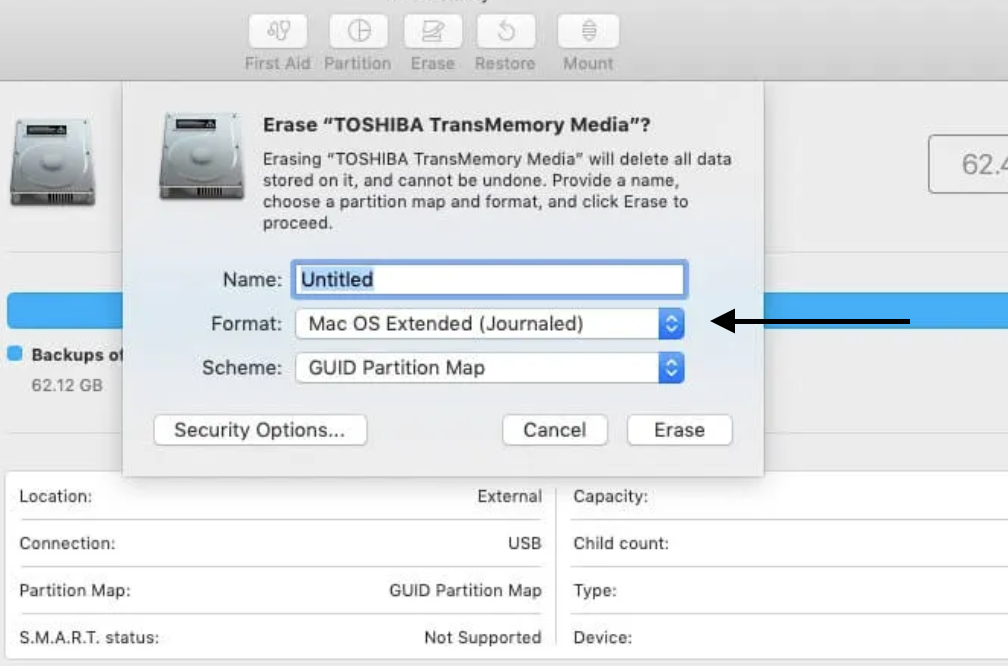
Step 1. Launch Disk Utility by pressing CMD + Space key and typing Disk utility.
Step 2. Select your Time Machine backup drive from the left sidebar.
Step 3. Click on Erase button from the top, select APFS as Format, and hit the Erase button.
6. Install Available New macOS Update
If there is any new macOS update, you need to install that as soon as possible because pending updates can also cause Time Machine backup issues.
Follow the steps below to install new macOS updates:
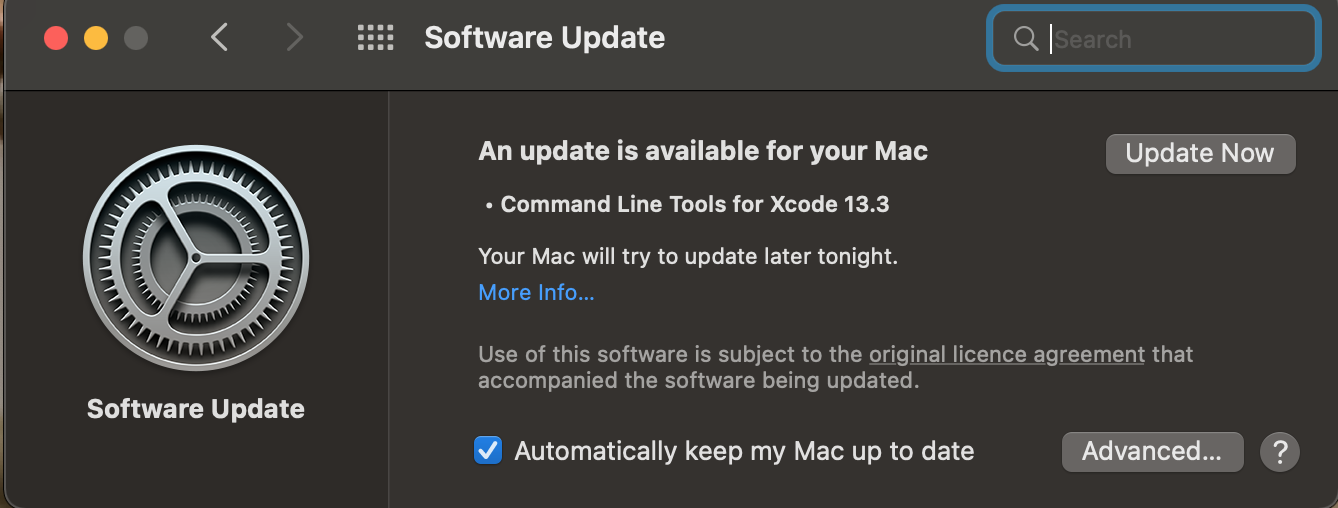
Step 1. Press CMD + Spacebar and type Software Update.
Step 2. If there is any update available, click on Upgrade Now button.
Helpful Tips to Avoid Time Machine Backup Failure
Although this article deals with the "Can't complete first backup" issue, there are other issues with Time Machine backups. For example, users have also come across:
- 1. Time Machine couldn't complete the Backup to "TimeCapsule."
- 2. The Backup was not performed because an error occurred while copying files to the backup disk.
- 3. The backup volume is read-only.
And, there are more errors that you can encounter with your Time Machine. You can avoid falling to backup essential data by using the following tips:
Time Machine backup failed, not enough space: You can face this error if you do not have enough space on your backup drive. You can solve this by extending your backup drive storage, deleting unnecessary files, or excluding large files from the Backup.
Time Machine backup not backing up automatically: You need to enable the automatic backup option from Time Machine settings. If they are not enabled, you will always have to perform the Time Machine backup manually.
But what if you still lose your data? In that case, you need data recovery software to help you recover data from your Mac. See the next section to see how you can recover your Mac's lost data if Time Machine fails.
How to Recover Data Without Time Machine Backup
EaseUS Data Recovery Wizard for Mac is a reliable tool for macOS and old Mac OS X. It offers up to 2 GB of free data recovery, including 500 MB available by default and an extra 1.5 GB unlocked after sharing on Facebook and X. It allows you to recover files on Mac without Time Machine Backup or when your Time Machine fails.
The software is highly recommended because it can recover your data from any scenario. Whether you deleted a file, lost it somehow, or the file is corrupt, EaseUS Data Recovery Wizard for Mac can help you recover your data in simple steps.
Step 1. Select the drive to be scanned
In the main EaseUS Data Recovery Wizard window, there will be a list of the drives connected to your Mac. Select the drive you need to recover lost/deleted files from, and click the "Search for lost files" button.
Step 2. Select your lost data/files
EaseUS Data Recovery Wizard for Mac will immediately scan your selected disk volume and display the scanning results on the left pane. You can sort the results to find the wanted files if you are looking for certain files.

Step 3. Recover lost/deleted data
Once you have found the desired files, preview the files and then click "Recover" to begin the recovery of your deleted/lost Mac files.

Was This Page Helpful?
Cedric Grantham is a senior editor and data recovery specialist of EaseUS. He mainly writes articles and how-to tips about data recovery on PC and Mac. He has handled 10,000+ data recovery cases and is good at data recovery of NTFS, FAT (FAT32 and ExFAT) file systems, and RAID structure reorganization.
Jean is recognized as one of the most professional writers in EaseUS. She has kept improving her writing skills over the past 10 years and helped millions of her readers solve their tech problems on PC, Mac, and iOS devices.
Related Articles
-
Mount Failed with 66: Volume Could Not Be Mounted - 3 Ways Here!
![author icon]() Brithny/May 19, 2026
Brithny/May 19, 2026 -
How to Recover Deleted Partition on Mac [4 Tested Solutions]
![author icon]() Jaden/Jun 30, 2026
Jaden/Jun 30, 2026 -
Photos Disappeared from Mac After Tahoe! How to Recover
![author icon]() Jaden/Jun 16, 2026
Jaden/Jun 16, 2026 -
How to Fix Time Machine Backup Error 19 With Nas
![author icon]() Jaden/Jun 30, 2026
Jaden/Jun 30, 2026