So you emptied your Mac Trash by accident? Ugh, that feeling - you realize something you needed is just… gone? Don't worry too much yet. Most of the time, those files aren't actually erased. Whether it's a work doc, a random photo, or some video you told your friend you'd send, this post will show you a few real ways to recover emptied Trash on Mac.
We will cover both what macOS can do on its own and - if that doesn't cut it - a trusty tool called EaseUS Data Recovery Wizard for Mac.
| Workable Solutions | Step-by-step Troubleshooting |
|---|---|
| Fix 1. Use Time Machine Backup | Open Time Machine from the Applications folder, and navigate to the folder...Full steps |
| Fix 2. Restore from iCloud Drive | Open iCloud.com in a browser. Go to "iCloud Drive > Recently Deleted". Select the file...Full steps |
| Fix 3. Use Data Recovery Software | Choose "Macintosh HD – Data" and click Scan. The software will locate deleted files...Full steps |
Why Files Disappear from Mac Trash
Here's the thing about macOS: when you delete a file, it just moves to the Trash. And emptying the Trash? That doesn't actually wipe the data right away. All it does is tell your Mac, "Hey, this space can be reused for new stuff". So until something new gets written over it, your old files are still recoverable with the right tools. The key is to act fast and avoid saving anything new to your disk.
I accidentally hit "Empty Trash" in my deleted folder by accident when trying to recover deleted files. How can I recover the files lost? How can I easily bring back the files that were in my deleted folder before I emptied it? - from Apple Discussion
Key points:
- macOS file systems (APFS and HFS+) retain deleted data temporarily.
- Recovery success decreases as new files overwrite deleted data.
- Time Machine or third-party recovery software improves your chances of full recovery.
Source: Apple Support
2 Built-in Recovery Options to Recover Mac Trash
Before using third-party software, try macOS built-in recovery options.
Option 1. Use Time Machine Backup
If you regularly back up your Mac with Time Machine, you can restore files from Time Machine backups:
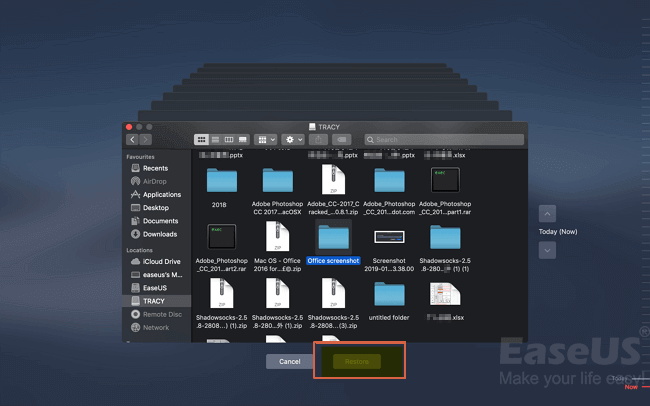
Step 1. Open Time Machine from the Applications folder.
Step 2. Navigate to the folder where the deleted file was located.
Step 3. Browse through previous snapshots using the timeline.
Step 4. Select the file and click Restore.
Option 2. Check iCloud Drive
If your files were stored in iCloud Drive, you might find them in the Recently Deleted folder:
Step 1. Open iCloud.com in a browser.

Step 2. Go to "iCloud Drive > Recently Deleted". This is the iCloud trash folder.
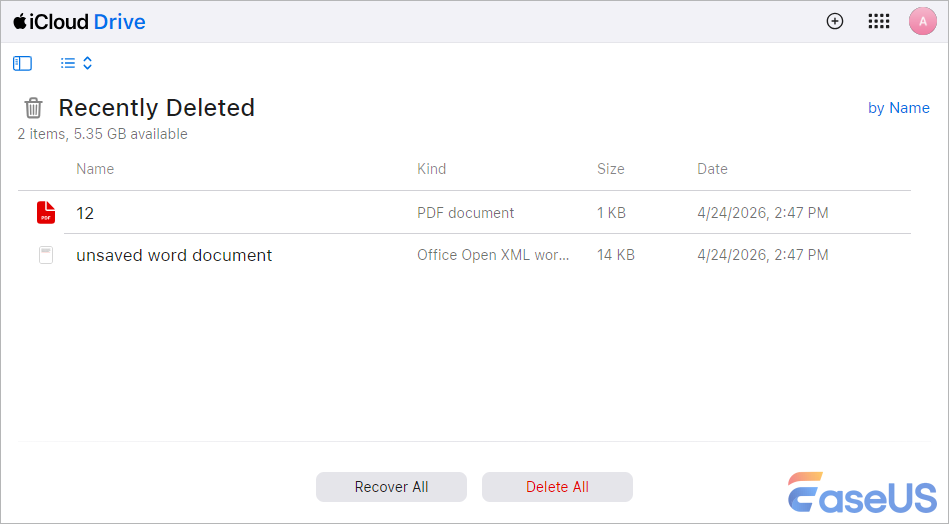
Step 3. Select the file and click Recover.
⭐Important: Do not add new files to the disk until recovery is complete to avoid overwriting your deleted files.
The iCloud Recently Deleted folder supports restoring deleted items within the last 30 days. If you want to recover files that have been deleted a month ago, check out this post:

How to Recover Deleted Files from iCloud
Deleted files will move to a folder called 'Recently Deleted' and be stored for 30 or 40 days until permanently deleted. Learn how to restore them in this post. Read more >>
Recover Emptied Trash Using EaseUS Data Recovery Wizard for Mac
If you're after a faster shot at getting your stuff back, especially if the built-in stuff didn't work, EaseUS Data Recovery Wizard for Mac is pretty solid. It plays nicely with pretty much every macOS version out there. Emptied Trash? Formatted a disk by accident? Worse? It's got you covered.

Works with pretty much any macOS version. Trash, formatted drives, you name it. And here's the kicker - even if you already emptied the Trash and don't use Time Machine, EaseUS data recovery software can recover deleted files from your Mac without Time Machine backups.
Step 1. Download and install the software. But here's a gotcha: don't install it on the same drive you lost files from. Otherwise, you might accidentally overwrite what you're trying to recover.
Step 2. Fire it up and select the drive where your Trash lives - usually something like "Macintosh HD – Data". Click Scan. The software will locate deleted files.

Step 3. Browse the scan results. Use the filter and search functions to find your files quickly. Preview files to confirm they are intact.

Step 4. Pick what you want to recover, then hit "Recover". Save them somewhere else: a different drive, an external disk, whatever. Just not the same place.

Check the official Mac data recovery software true review in 2026:
EaseUS Data Recovery Wizard for Mac Review 2026: Is It Worth It?
by u/EaseUS_Official in EaseUSTech
Share this post on SNS and help more people learn how to recover emptied Trash on a Mac!

Tips to Prevent Future Data Loss

Do regular backups. Seriously. Turn on Time Machine, or just get into the habit of tossing important stuff onto an external drive or the cloud
Stop messing with the drive. I know it's tempting, but after you accidentally delete something, stop adding new files. Every new save makes recovery harder.
Keep recovery software handy. Have something like EaseUS installed and ready. Trust me, you don't want to be scrambling to download it when you're already panicking.
Stay organized. Clean up your Trash and folders regularly so you don't send the wrong thing to oblivion in the first place.
Frequently Asked Questions
1. Can I recover emptied Trash files without using any software?
Sure - if you've got backups turned on. On a Mac, that means Time Machine or iCloud.com. On Windows, look at File History, OneDrive, or "Previous Versions" of folders. No backups? Then you'll probably need software. And either way, stop using the drive right away so your files don't get overwritten. Bottom line: you only have a backup if you actually set one up - like Time Machine or iCloud. Otherwise, you're looking at third-party tools.
2. What macOS versions work with EaseUS?
EaseUS Data Recovery Wizard for Mac supports a pretty wide range - roughly from macOS 10.9 (that's Mavericks) up to the latest macOS 26 Tahoe. Some versions, especially if you grab it from the App Store, need macOS 10.15 or newer. Also runs fine on Intel Macs and Apple Silicon (M1, M2, M3, M4). No weird compatibility issues.
3. Is EaseUS Data Recovery Wizard safe to use on a Mac?
Yes, it's generally considered safe. It's a legit, read-only tool, so it won't mess with your original data while scanning. And it works nicely with modern Apple Silicon chips (M1 through M4).
4. Can I recover a file that's been partially overwritten?
Yeah, that one's tricky. The more new stuff that has been written over your old file, the worse your chances get. Partial recovery? Rare, but not totally hopeless - depends on how much got replaced. If only a tiny piece got overwritten, recovery software might still save the rest. Your best bet, though? File history, cloud backups, or shadow copies. But don't expect miracles.
Was This Page Helpful?
Brithny is a technology enthusiast, aiming to make readers' tech lives easy and enjoyable. She loves exploring new technologies and writing technical how-to tips. In her spare time, she loves sharing things about her game experience on Facebook or Twitter.
-
EaseUS Data Recovery Wizard is a powerful system recovery software, designed to enable you to recover files you’ve deleted accidentally, potentially lost to malware or an entire hard drive partition.
Read More -
EaseUS Data Recovery Wizard is the best we have seen. It's far from perfect, partly because today's advanced disk technology makes data-recovery more difficult than it was with the simpler technology of the past.
Read More -
EaseUS Data Recovery Wizard Pro has a reputation as one of the best data recovery software programs on the market. It comes with a selection of advanced features, including partition recovery, formatted drive restoration, and corrupted file repair.
Read More
Related Articles
-
Trash Not Working Mac? Here to Avoid Bypassing Mac Trash
![author icon]() Jaden/Jun 30, 2026
Jaden/Jun 30, 2026 -
How to Recover Deleted or Disappeared Notes on Mac (2026 Guide)
![author icon]() Tracy King/Jun 30, 2026
Tracy King/Jun 30, 2026 -
Numbers Files Disappeared on Mac: Causes & Fixes
![author icon]() Dany/Jun 16, 2026
Dany/Jun 16, 2026 -
Best Mac SD Card Recovery Free Download in 2026
![author icon]() Brithny/Jun 17, 2026
Brithny/Jun 17, 2026