- Video Recovery
- SD Card Recovery
- Recycle Bin Recovery
- Recover Data from USB
- Recover Deleted Emails
- Hard Drive Not Showing Up in Windows
- Recover Unsaved Word Documents
- Recover Deleted Files in Windows 10
- Recover Files from Virus Infected Hard Drive
- Best Free Photo Recovery Software
- Recover Files from Formatted Hard Drive
Quick Navigation:
- 1. Why Need to Format Your Mac Before Selling It
- 2. Erase Everything on Your Mac (2 Effective Methods!)
- 3. Restore Your Data from Backup (Quick Steps!)
- 4. Bonus Tip: Recover Mac Data After Mis-Format
You must go out a series of fundamental procedures to protect the privacy of your personal information that is presently stored on your Mac before you dispose of it, donate it, or otherwise part with possession of it to another person.
You might believe that you have removed sensitive files from your macOS hard drive and emptied the Trash can. Still, the truth is that your Mac stores important and sensitive information about you and your data in a wide variety of locations.
These locations include the Trash can and several other places. If you ever wish to sell or donate a Mac, you need to know how to Format Mac for Sale. So, without further ado, let's get started!
Why Need to Format Your Mac Before Selling It
The following reasons listed below are quite important that will make you format your Mac before selling it to somebody:
- To ensure nobody can have access to your important information after buying it.
- Ensure your Mac is operating well and good before you hand it to someone else.
- To ensure it doesn't have viruses and malware installed in it.
- To ensure any private information is well and truly erased from the Mac.
Formatted Recovery Mac: How to Recover Data from Formatted Mac Hard Drive
We always experienced the fresh new feeling we get after formatting the Mac drive.
Erase Everything on Your Mac
To erase or format everything on your macOS, you must follow the two guidelines listed below.
1. Backup Your Important Data Using Time Machine
Your applications, music, papers, images, emails, and system files are all backed up by Time Machine and any other computer data. If it is turned on, it will back up the files on your Mac hourly, daily, or weekly, depending on your choice.
Every hour, Time Machine will scan your computer to look for files that have been added, modified, or deleted to create fresh backups of your Mac. The program maintains a daily backup for the most recent thirty days of data.
Additionally, it will maintain weekly backups so long as there is space left on the storage device. The oldest backups will be removed and erased when there is no more space available on the storage device.
Step 1. You may add an external hard disk to your Mac by connecting it.
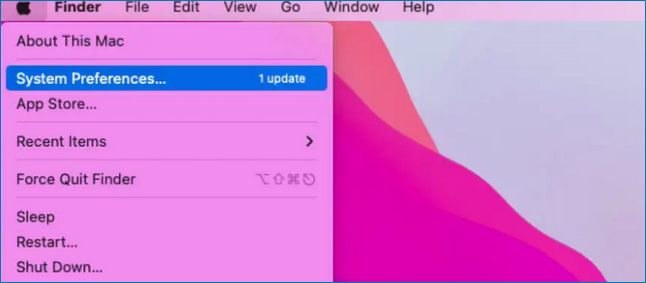
Step 2. After that, choose the Apple symbol located in the menu bar.
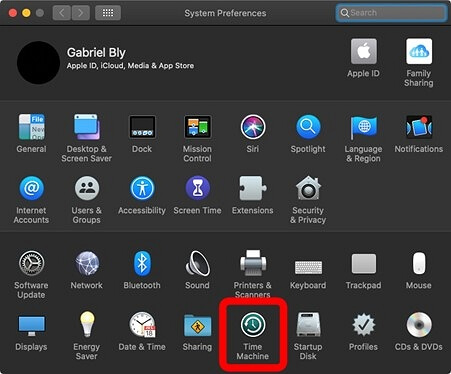
Step 3. Next, choose the System Preferences menu option.
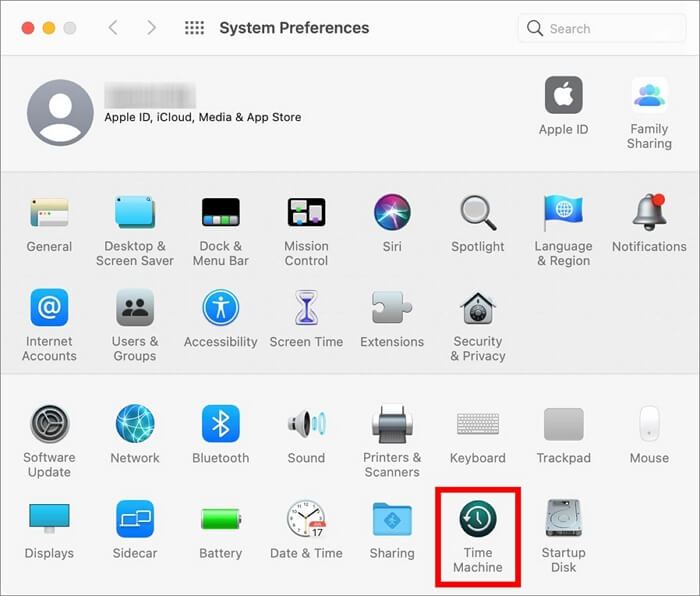
Step 4. After that, choose the Time Machine option.
Step 5. After that, choose the backup disk you want to use.
Step 6. After that, choose a disk drive and click the Use Disk button.
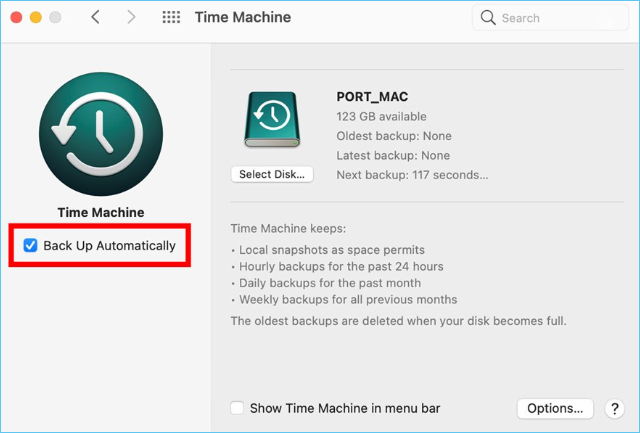
Step 7. Check the box next to Back Up Automatically to complete the process. This should begin the process of backing up your Mac straight away.
Note: You can initiate the backup process manually on your Mac if it does not begin automatically.
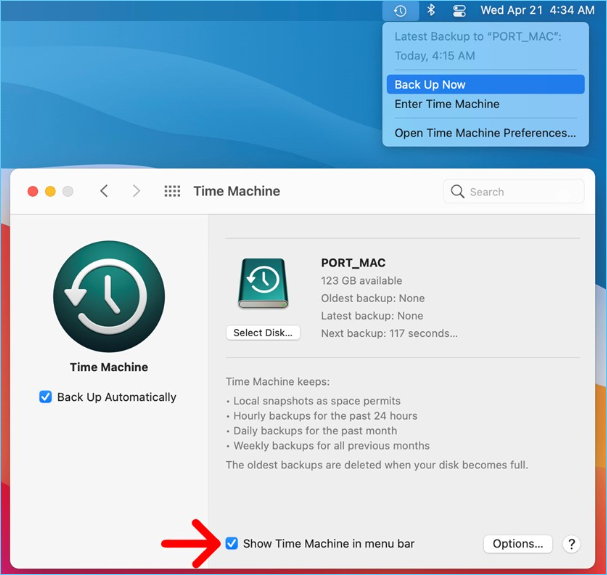
Step 8. To do this, check the box next to Show Time Machine in the menu bar and click the button.
Step 9. Then, choose Back Up Now by clicking the Time Machine symbol in your menu bar.
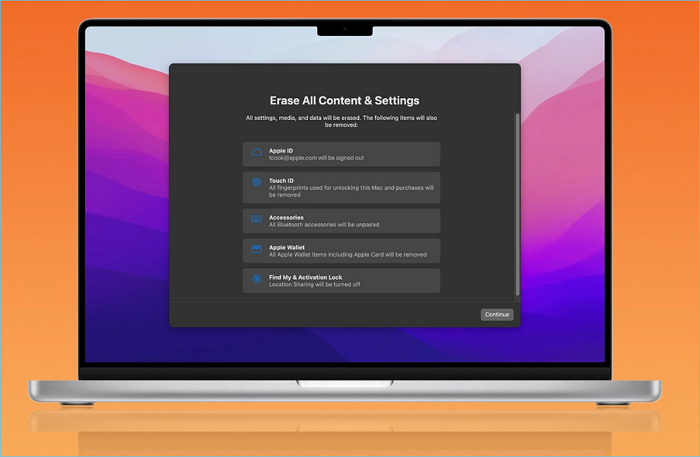
2. Reset macOS
Now, to reset your macOS, follow the procedure below:
Step 1. Turn on the Mac while simultaneously pressing and holding the Command and R buttons on the keyboard. When you see the Apple logo, you may release the button.

Step 2. Choose the language you want to continue in.
Step 3. Select Disk Utility, then click the Continue button.

Step 4. Select your starting disk from the sidebar, which should be titled Macintosh HD by default, and then click the option labeled Erase.
Step 5. Select Mac OS Extended (Journaled) from the drop-down menu, and then click the Erase button once you have decided what name you want to give the disk after it has been wiped.
Note: (If you wish to add a layer of protection to your disc by encrypting it, choose the "Journaled, Encrypted" option. You will be asked to create a password for this.) Select the GUID Partition Map option.
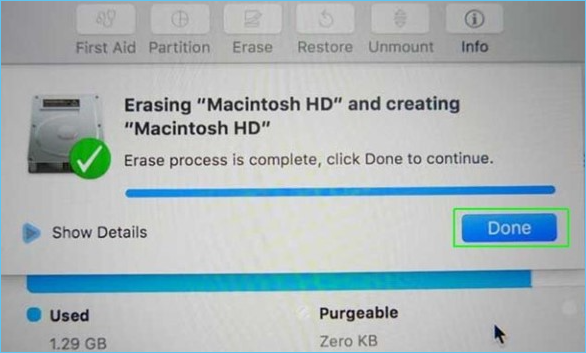
Step 6. After clicking Erase, you may close the window, followed by Done.
Step 7. Connect to your wireless network by clicking the Wi-Fi icon in the upper right-hand corner, exactly as you would normally do on your Mac, if you haven't already.
Step 8. Select Reinstall macOS from the drop-down box that appears after clicking Continue after making your selection.

Step 9. Press Continue. Choose to Continue on the pop-up box that appears after you click Continue here.
Step 10. After reading the software licensing agreement, click the Agree button to continue.
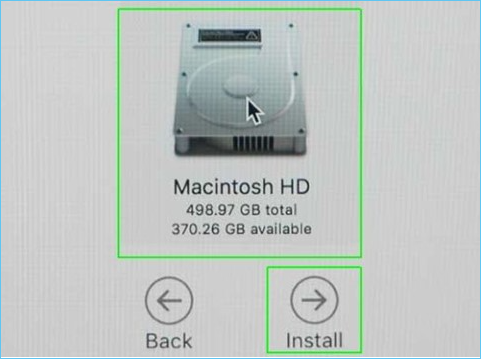
Step 11. Select your boot disk, then click the Install button.
Step 12. Attend the beginning of the installation process before continuing. (You should pause what you're doing for a moment and utilize this opportunity to stretch your legs. Getting a sandwich is very recommended, but not required.)
Step 13. The computer will restart, and the installation process will resume.

Restore Your Data from Backup
If you want to restore your backed-up data from Time Machine on Mac, here's how you can do it:
Step 1. From the Apple menu, choose System Preferences.
Step 2. Time Machine symbol may be selected.
Step 3. Show Time Machine in the menu bar by checking the box.
Step 4. After clicking the Time Machine symbol in the Menu bar, press Enter Time Machine.

Step 5. Restore the file or folder by searching for it and clicking on it.
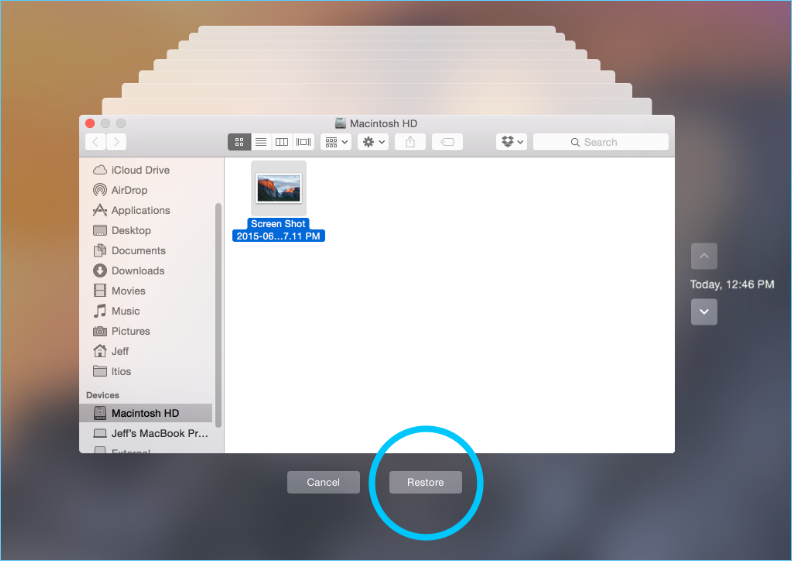
You're ready to go. Using Time Machine, you may restore the file to its original place on your computer.
Bonus Tip: Recover Mac Data After Mis-Format
EaseUS is a well-known and widely used brand when it comes to utility software. It is possible to examine all recovered data after scanning with EaseUS Data Recovery Wizard for Mac Either file type or location may be used as a filter. Once you've finished identifying and choosing the most critical files, click the "Recover" button to begin the recovery process.
EaseUS Data Recovery Wizard for Mac
- Recover lost or deleted Mac files, documents, photos, audio, music, and emails effectively.
- Recover files from formatted hard drive, emptied recycle bin, memory card, flash drive, digital camera, and camcorders.
- Quick Mode and Deep Scan mode are two effective data scanning modes that may help you achieve better results.
You can follow the steps below to learn how to use this efficient software:
Step 1. Select the drive to be scanned
In the main EaseUS Data Recovery Wizard window, there will be a list of the drives connected to your Mac. Select the drive you need to recover lost/deleted files from, and click the "Search for lost files" button.
Note: Before data recovery, you'd better click "Disk Backup" from the left sidebar to create a backup of your Mac to avoid further data loss. After backing up, the software can recover data from the Mac backup, and your computer can wirte new data again.

Step 2. Select your lost data/files
EaseUS Data Recovery Wizard for Mac will immediately scan your selected disk volume and display the scanning results on the left pane. You can sort the results to find the wanted files if you are looking for certain files.

Step 3. Recover lost/deleted data
Once you have found the desired files, preview the files and then click "Recover" to begin the recovery of your deleted/lost Mac files.

Conclusion
We hope to have answered all of your queries regarding formatting MacOS before selling it to somebody. Make sure to backup all of your important data and erase everything irrelevant. Then, use the restore that data as we have described above. We highly recommend using EaseUS Data Recovery Wizard to restore any lost data.
Was This Page Helpful?
Cedric Grantham is a senior editor and data recovery specialist of EaseUS. He mainly writes articles and how-to tips about data recovery on PC and Mac. He has handled 10,000+ data recovery cases and is good at data recovery of NTFS, FAT (FAT32 and ExFAT) file systems, and RAID structure reorganization.
Jean is recognized as one of the most professional writers in EaseUS. She has kept improving her writing skills over the past 10 years and helped millions of her readers solve their tech problems on PC, Mac, and iOS devices.
-
EaseUS Data Recovery Wizard is a powerful system recovery software, designed to enable you to recover files you’ve deleted accidentally, potentially lost to malware or an entire hard drive partition.
Read More -
EaseUS Data Recovery Wizard is the best we have seen. It's far from perfect, partly because today's advanced disk technology makes data-recovery more difficult than it was with the simpler technology of the past.
Read More -
EaseUS Data Recovery Wizard Pro has a reputation as one of the best data recovery software programs on the market. It comes with a selection of advanced features, including partition recovery, formatted drive restoration, and corrupted file repair.
Read More
Related Articles
-
How to Clear DNS Cache on a Mac [Recovery Tip]
![author icon]() Jaden/Jul 24, 2024
Jaden/Jul 24, 2024 -
iCloud Files Disappeared? 4 Ways to Recover Your Lost iCloud Files
![author icon]() Brithny/Jul 24, 2024
Brithny/Jul 24, 2024 -
Macintosh HD not Mounted | Get Back Lost Files Without Data Loss
![author icon]() Brithny/Jul 24, 2024
Brithny/Jul 24, 2024 -
5 Best Free Snipping Tools for Mac
![author icon]() Jean/Jul 24, 2024
Jean/Jul 24, 2024