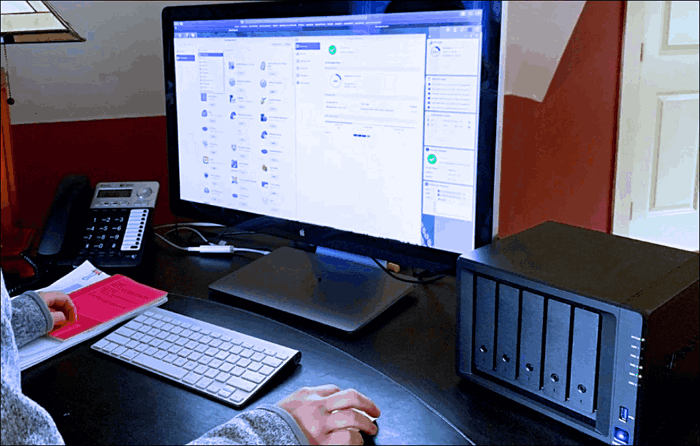
Data backup is critical for both individuals and businesses. Synology Nas is a hardware device that stores data and needs to be connected to the network. It provides space to store data for the entire local network with excellent stability and security. For this reason, Synology Nas is used by many individuals and businesses as their backup solution for data.
Regarding the best way to back up data to Synology, Time Machine is an absolutely unbeatable utility for Mac users. In this article, we will bring you the solution of how to backup files from Mac to Synology NAS with Time Machine and other practical guides about this Mac built-in software.
Brief Review of Time Machine
First, let us get more information about Time Machine with a brief review of it below.
What Is Time Machine
Mac Time Machine is a software built into macOS whose main duty is to help Mac users back up and restore their data. It made its debut on Mac OS X Leopard, and since then, Time Machine has been continuously improved and optimized with Mac updates.
At present, Time Machine has become the top choice for backing up data in the minds of many Mac users due to its useful features and easy-to-use user interface.
The Functions of Time Machine
Mac Time Machine backup function provides security protection for Mac users' files, including documents, pictures, videos, etc. Time Machine uses incremental backup mode. With its functions, you can create Time Machine backup schedule, and then it will automatically run in the background and help you to back up your important data according to personal settings.
However, does the Time Machine backup everything? The answer is no. Time Machine also has some limitations. It cannot back up system logs, applications, cache files, files in the Bin, iCloud, Spotlight indexer, etc. When you want to use it to create a backup plan for certain data, make sure that Time Machine can provide coverage for that kind of file first.
Although Time Machine can't back up everything on your Mac, it is still a good helper to back up a Mac computer if you just use it for the purpose of keeping your computer data safe on a daily basis.
In addition to the backup feature, Time Machine also has the ability to restore backups. When your Mac is at risk of data loss due to a virus or hardware failure, restoring data from Time Machine can restore your computer to the normal state it was in days or weeks ago.
How to Backup Mac to Synology NAS with Time Machine
After learning about Time Machine and its features, you can follow the exact steps below to back up your Mac to Synology Nas with Time Machine now.
Part 1. Create Shared Folder on NAS
Step 1. Log in to the Synology DiskStation Manager(DSM) with the Administrator account.
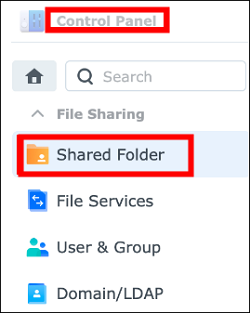
Step 2. Navigate to Control Panel> Shared Folder> Create.
Step 3. In the Shared Folder Creation Wizard window, set the folder name and the location you want.
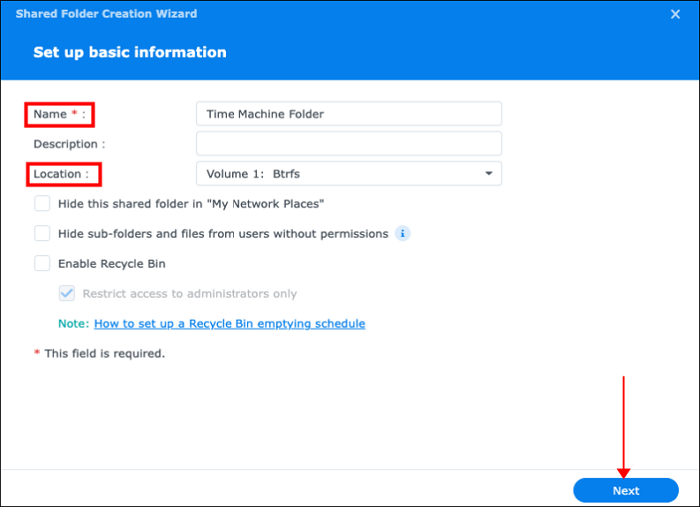
Step 4. After setting the advanced settings, hit the Next button to finish the creating process.
Part 2. Set the Shared Folder as Backup Destination
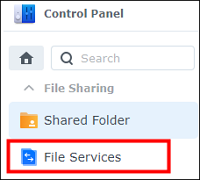
Step 5. Now open the Control Panel> File Services in the Synology DSM.
Note: If your DSM version is 7.0 or above, head to Step 6.1. If the DSM version is 6.2 or below, go to Step 6.2.
Step 6.1. Navigate to SMB/AFP tab, and check the Enable SMB/AFP service option.
Step 6.2. Navigate to SMB/AFP/NFS tab and check the Enable SMB/AFP service for SMB/AFP
Step 7. Now head to the Advanced tab and check the Enable Bonjour Time Machine Broadcast via SMB/AFP option.
Step 8. Hit the Set Time Machine Folders> choose the shared folder you created before> save the settings.
Step 9. In the end, you can set a DSM user account on NAS for Time Machine and a quota for the backups.
Part 3. Backup Mac to Synology NAS with Time Machine
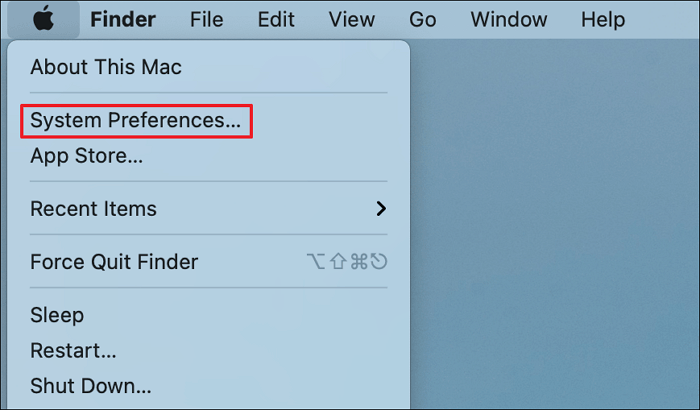
Step 10. Navigate to System Preferences on your Mac, and find and open the Time Machine app.
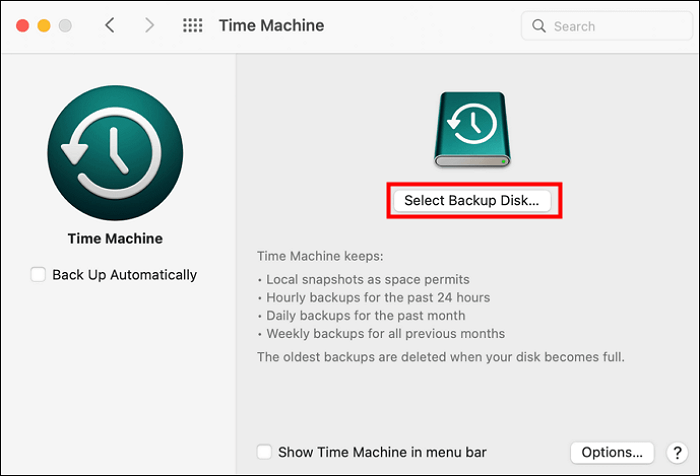
Step 11. Choose the Select Backup Disk option in Time Machine and choose the shared folder you created. Then hit Use Disk.
Step 12. While a prompt pops up, enter the username and password and hit Connect button.
Step 13. Now Time Machine will start the backup process.
Pro Tip: How to Backup Mac to Synology NAS without Time Machine
As mentioned above, Time Machine does not provide a complete backup of your computer. If you would like to back up your system data other than normal files, Time Machine won't be able to do it. That's when you need the help of EaseUS Todo Backup.
EaseUS Todo Backup for Mac is professional software that can create all your personal backup solutions for Mac users. Similar to Time Machine, Ease supports automatic backups and allows users to keep their data secure at the backup cycles they need.
It can provides three backup modes: full, incremental, and differential, and can perform file backup, disk backup, external drive backup, system backup, app data backup, and even help you clone disks and migrate Windows systems.
With the support of EaseUS, you can save copies of your data on Synology NAS, local disks, external hard drives, and other third-party platforms.
Here is a tutorial on how to backup Mac to Synology NAS without Time Machine:
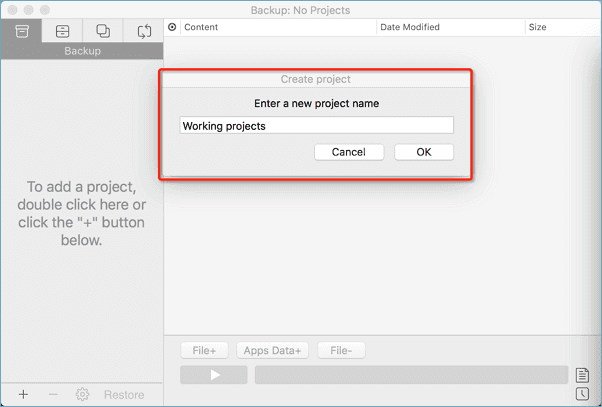
Step 1. Launch and run EaseUS Todo Backup for Mac.
Click the first Backup tab or simply click the + button in the bottom-left corner to create a backup project - name the backup project and click OK.
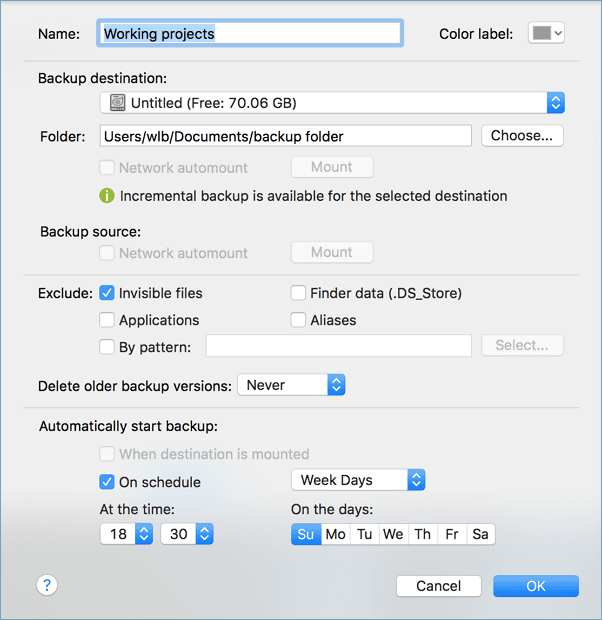
Step 2. Set up the backup destination where you want to store Mac files as backups, automatic backup frequency, etc and click OK.
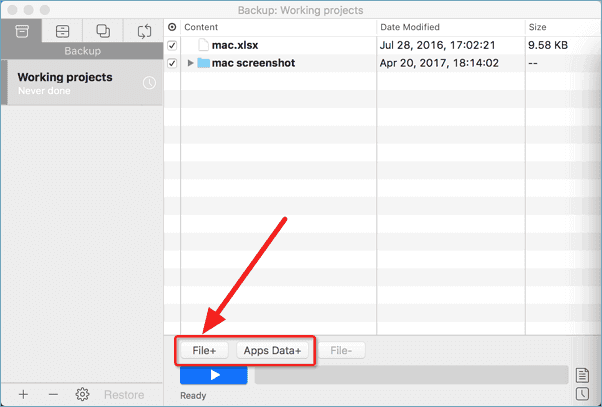
Step 3. Add files and folders to the backup project.
Click File+ to selectively choose files and folders to add to the backup and click the blue start button to back up your Mac to another drive or external device.
How to Restore Mac Backups from Synology NAS with Time Machine
If you want to restore your backups from Synology NAS after a data disaster, then you can refer to the following steps.
Step 1. Navigate to System Preferences on your Mac, and find and open the Time Machine app.
Step 2. Check the local backups and snapshots.
Step 3. Select the data you want to restore and hit the Restore button.
Step 4. Then you will find the data you restored in its original file location.
Conclusion
We have shown you how to backup Mac to Synology NAS with Time Machine, and give you more useful tips about what Time Machine is and how to restore Mac backups with Time Machine.
Although Time Machine is a very useful backup program, it does have some limitations. If you want to create more advanced backup plans, EaseUS Todo Backup for Mac would be the best alternative to Time Machine!
Do not miss these posts below!
FAQs
1. Can you use Time Machine to backup to a NAS?
Yes, I can use Time Machine to back up a NAS. You can create a shared folder on your NAS, set the shared folder as the backup destination on Time Machine, and now you can back up your Mac with Time Machine easily.
2. Does Time Machine backup everything?
No, Time Machine does not back up everything. It cannot back up system logs, applications, cache files, files in the Bin, iCloud, Spotlight indexer, etc. When you want to use it to create a backup plan for certain data, make sure that Time Machine can provide coverage for that kind of file first.
Was This Page Helpful?
Related Articles
-
How to Create a Disk Image on Mac
![author icon]() Jean/2026-06-17
Jean/2026-06-17 -
Does Time Machine Backup Everything? [Detailed Info]
![author icon]() Jerry/2026-06-15
Jerry/2026-06-15
-
Transfer Files and Applications to New Mac without Migration Assistant
![author icon]() Tracy King/2026-06-17
Tracy King/2026-06-17 -
Guide on How to Clone Mac Hard Drive to SSD
![author icon]() Jean/2026-06-17
Jean/2026-06-17
EaseUS Todo Backup For Mac
- Set up an automated backup schedule in stealth mode.
- Compress backups to save storage space.
- Encrypt your backup to protect privacy.