Do you know how to backup photos on Mac to external drive? Don't worry! This page will provide three ways to back up photos on Mac to an external drive and free users who are under storage space pressure and afraid of photo loss.
Introduction
Photos record important memory and most Mac users store their photos on Mac. However, duplicate pictures may cause a huge headache, especially if they try to keep the photos organized and safe. At this moment, what should we do? Back up our photos to external hard drives. However, is an external hard drive good for photo backups? Continue to read.
Is an External Hard Drive Good for Storing Photos?
Sure, it is. Standard portable external hard drives are very popular since they are portable and bring great convenience to our access to photos. The specific advantages of an external hard drive are as follows:
- Extra storage
- Plug and play
- Reasonably priced
- No internet connection required
We have learned external hard drives are reliable, but how can we back up Mac photos to external hard drives? Let's find a specific answer in the next paragraph.
How Do I Backup My Mac Photos to an External Hard Drive?
There are several ways to back up photos on Mac to an external hard drive. First, users can manually copy their photos to an external hard drive. Time Machine also can help back up Mac photos, but it can be troublesome and may give a burden on the operating speed. Hence, if you want to back up your Mac photos easily and efficiently, you may like to know a professional photo backup tool, EaseUS Todo Backup for Mac. But how to use these ways to backup Mac to external hard drive?
Tip. If your device is MacBook Pro, this link below may help you:
How to Backup Photos on Mac to External Drive - 3 Ways
In this part, users can learn the specific guides on how to backup photos on Mac to an external drive. First, let's learn the easiest way.
Way 1. How to Backup Photos on Mac to External Drive - EaseUS Todo Backup for Mac
EaseUS Todo Backup for Mac supports all Mac systems, and backup Mac without Time Machine while reducing data loss. Therefore, all Mac users can use it to perform photos and other data backups. Besides, as a utility backup tool, EaseUS Todo Backup for Mac can back up photos to a hard drive, network volume, CD, DVD, or an external hard drive.
In this paragraph, you can know the specific steps for backing up Mac photos to an external hard drive.
Now, let's see how to back up Mac photos to external hard drives with the professional backup tool.
Step 1. Launch and run EaseUS Todo Backup for Mac.
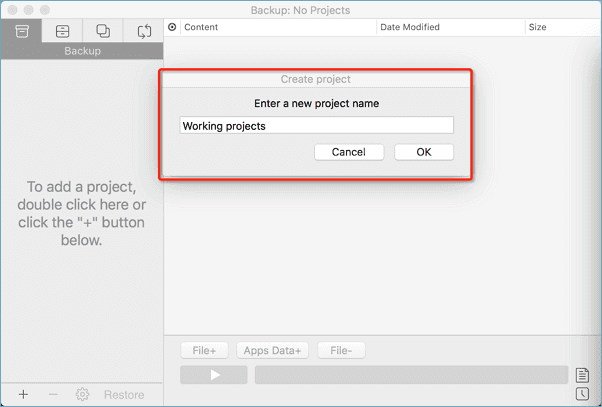
Click the first Backup tab or simply click the + button in the bottom-left corner to create a backup project - name the backup project and click OK.
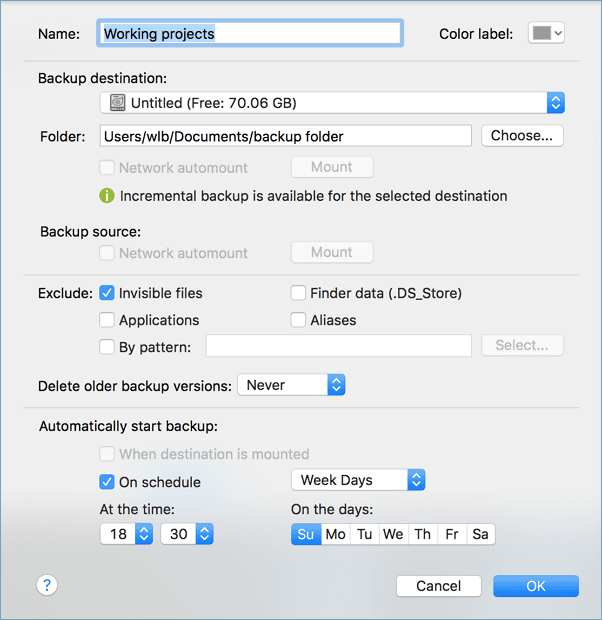
Step 2. Set up the backup destination where you want to store Mac files as backups, automatic backup frequency, etc and click OK.
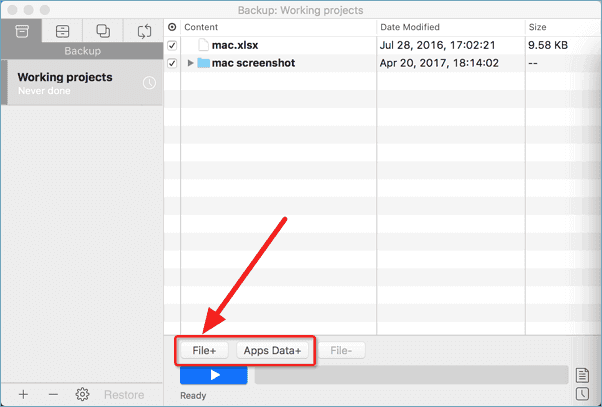
Step 3. Add files and folders to the backup project.
Click File+ to selectively choose files and folders to add to the backup and click the blue start button to back up your Mac to another drive or external device.
Besides backing up photos, what else can EaseUS Todo Backup for Mac help? Continue reading.
What Else Can EaseUS Todo Backup for Mac Do?
As you see, EaseUS Todo Backup for Mac is rather professional and efficient in backing up Mac photos. Besides that, it still has many other features. There is a list to help you learn:
- File and folder sync
- Clone Mac hard drive to SSD
- Automated backup schedule available
- Compress backups to save storage space
- Safely back up any data from Mac devices
- Full, differential, and incremental backup modes
Therefore, if you have backup problems, don't hesitate to download it and let it help.
Way 2. How to Backup Photos on Mac to External Drive - Time Machine
Time Machine is a built-in backup tool for Mac devices. Users can use it to back up photos without downloading anything else.
Now, let's see how to back up photos on Mac to an external drive.
Step 1. Connect an external hard drive to the targeted Mac.
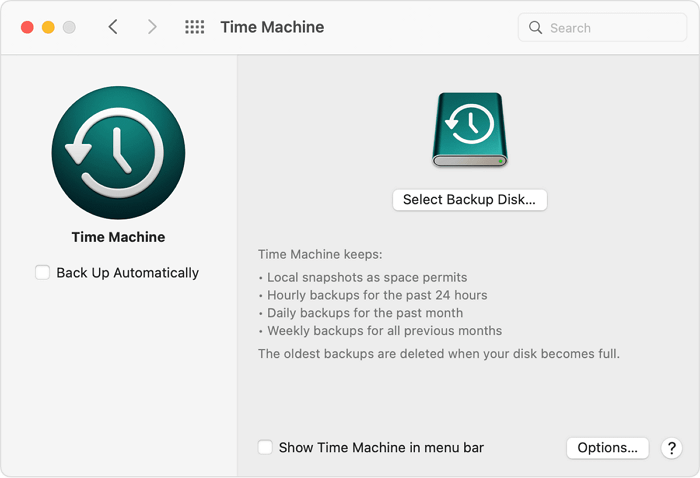
Step 2. Go click Apple > System Preferences > Time Machine.
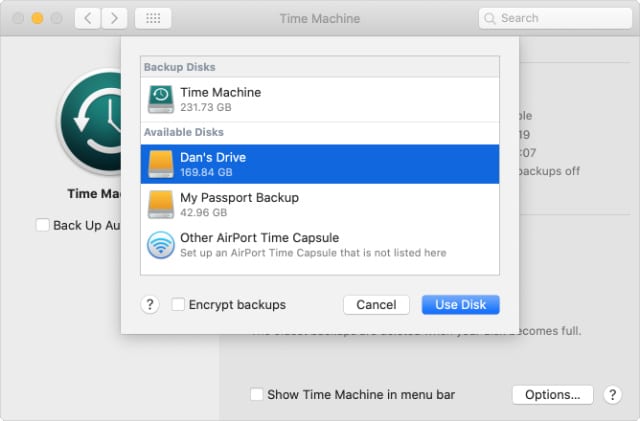
Step 3. Click "Select Backup Disk"
Step 4. Choose the external hard drive and click "Use Disk".
Step 5. Select the photos that you want to back up and start backing up.
Now, let's learn how to manually back up or move photos on Mac to an external drive.
Way 3. How to Backup Photos on Mac to External Drive - Manually Transfer
Besides the two ways above, users can also manually backup photos on Mac to an external drive. Let's see the detailed steps.
Step 1. Connect your external storage device.
Step 2. Navigate to your photo folder.
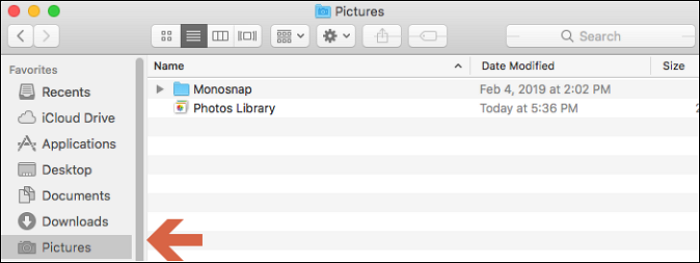
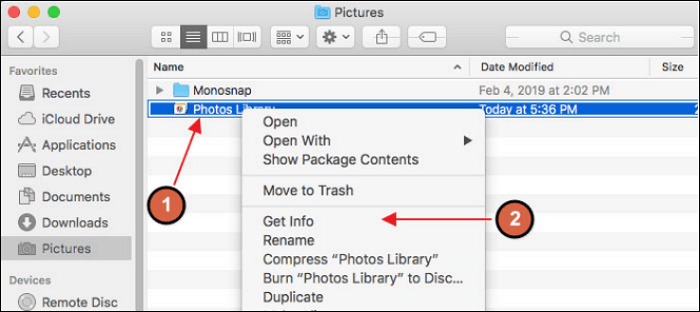
Step 3. Right-click on "Photos library" and select "Get Info". Make sure that you own enough free space on the external drive.
Step 4. Drag the photos you want to back up to the external hard drive.
Step 5. Wait for the backup to finish.
This part gives three guides on how to back up photos on Mac to an external drive. Users are free to choose one based on their basic needs. However, EaseUS Todo Backup for Mac is a better choice if users want to free their hands.
Bonus Tip: Why Can't I Move Photos from Mac to External Hard Drive?
There are many possible explanations for the issue, but users can solve the problem after a little bit of investigation and troubleshooting in most cases. First, check the hard drive's cables and make sure everything is connected to your device properly. If everything is okay, there are several factors to consider. There is a table to show you.
| Factors | Solutions |
|---|---|
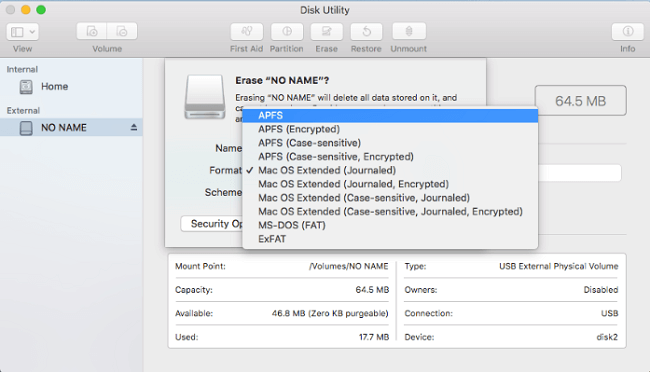
| Incompatibility of the File System | Reformat the external hard drive |
| Permission Settings | Ignore permissions |
| Formatting Errors | Check and repair hard drive errors |
Here, if you want to know the specific steps for solving the problems such as the incompatibility of the file system, this link can help you:
Fix External Hard Drive 'Read Only' Error on Mac Without Losing Data
Don't worry when your external hard drive displays as read-only on Mac. This page includes 3 reliable solutions to removing the 'read-only' error from your Mac external hard drive.
Conclusion
This page tells about how to back up photos on Mac to an external drive. Mac Users can manually back up photos or use Time Machine to back up photos to external hard drives. But if users want to efficiently backup photos while occupying less storage space, this page also introduces a multifunctional backup software for Mac, EaseUS Todo Backup for Mac.
It can help users to back up Mac photos or other data to a local drive, network drive, and external hard drives. So just download it and try it.
FAQs About How to Backup Photos on Mac to External Drive
Do you have any other questions about Mac photo backups? In this part, there are three questions about how to back up photos on Mac to an external drive. Continue to read if you need.
1. How do I export my entire Mac Photo Library?
Follow these steps and export the Photo Library.
Step 1. In the Photos program on your Mac, select the item you want to export.
Step 2. Choose File > Export.
Step 3. Select the file type for the exported photos.
Step 4. Click "Export".
2. What is the best way to back up photos on a Mac?
You can manually back up photos, use Time Machine, or use EaseUS Todo Backup for Mac. EaseUS Todo Backup for Mac is a better choice if you want to free your hands.
3. Where are Mac photos stored?
The System Photo Library is in the Pictures folder on Mac. Users can also create additional photo libraries on Macs and other storage devices.
Was This Page Helpful?
Related Articles
-
Time Machine Backup Keeps Failing - How to Fix?
![author icon]() Jerry/2026-06-15
Jerry/2026-06-15 -
How to Backup Outlook Emails on Mac [A Step-by-step Guide]
![author icon]() Sherly/2026-06-17
Sherly/2026-06-17
-
![author icon]() Jean/2026-06-17
Jean/2026-06-17 -
Guide on How to Clone Mac Hard Drive to SSD
![author icon]() Jean/2026-06-17
Jean/2026-06-17
EaseUS Todo Backup For Mac
- Set up an automated backup schedule in stealth mode.
- Compress backups to save storage space.
- Encrypt your backup to protect privacy.