Are you wondering if you should upgrade from Monterey to Ventura? The answer depends on your needs, and only you can choose. If you want to learn how to upgrade from Monterey to Ventura, read the sections below. Here's a table that includes several ways to upgrade from macOS Monterey to Ventura.
| Workable Solutions | Step-by-step Troubleshooting |
|---|---|
| 1. Upgrade from Monterey to Ventura with Software Update | Go to the Apple menu, and select "System Settings" from the drop-down menu...Full steps |
| 2. Upgrade from Monterey to Ventura with App Store | Go to the App Store, and search for macOS Ventura. Click on the Get button to see the Get button...Full steps |
| 3. Upgrade from Monterey to Ventura with Bootable Installer | Download macOS Ventura from the App Store and click on the option "Quit Install macOS"...Full steps |
Should You Upgrade from Monterey to Ventura
If you don't know whether to upgrade from Monterey to Ventura, there are some excellent features that macOS Ventura has, but there are some issues. It is vital to know more to make a well-informed decision. For that, learn more about the new features before upgrading to macOS Ventura.
Learn New Features of macOS Ventura
Knowing about the new features is essential if you are eager to upgrade from macOS Monterey to macOS Ventura. Check them out here:
- Focus
- Live Text
- Visual Look Up
- Stage Manager
- System Settings
- Continuity Camera
- Freeform
- Spotlight
- Passkeys
- iCloud Shared Photo Library
Here Are the Macs Support Ventura Version
Before you can upgrade to macOS Ventura, ensure you can. It means only some models are compatible with this upgrade. You need to check and see if your system falls in the list shared here:
- iMac Pro (2017)
- MacBook (2017 and later)
- MacBook Pro (2017 and later)
- iMac (2017 and later)
- MacBook Air (2018 and later)
- Mac Mini (2018 and later)
- Mac Pro (2019 and later)
- Mac Studio (2022)
1. Upgrade from Monterey to Ventura with Software Update
We attached a video to help users have a better understanding of how to upgrade from Monterey to Ventura.
- 00:26: Go to System Preferences from the Apple icon.
- 00:38: Click Upgrade Now from the Software Update box.
- 00:56: Follow the on-screen instructions.
The easiest way to upgrade from Monterey to Ventura is to use the Software update option. For that, users need to follow a few simple steps:
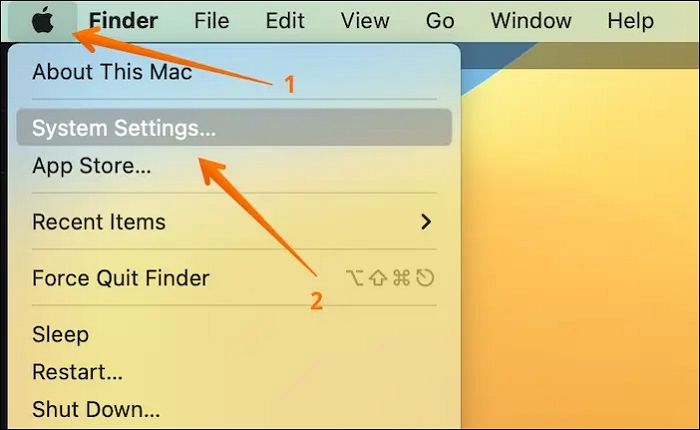
Step 1. Go to the Apple menu.
Step 2. Select "System Settings" from the drop-down menu.
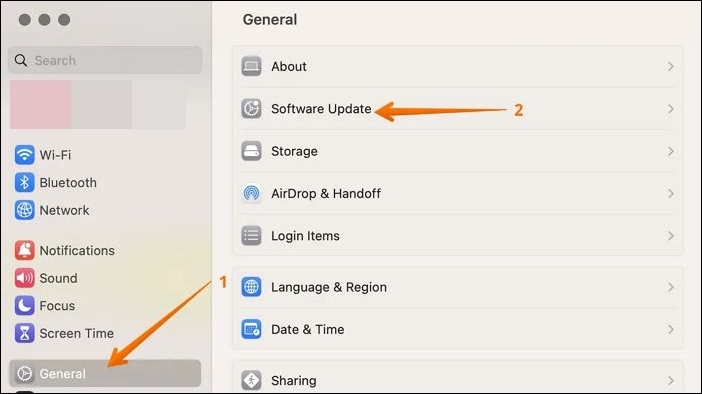
Step 3. On the sidebar, click "General" followed by "Software Update" from the right-hand side.
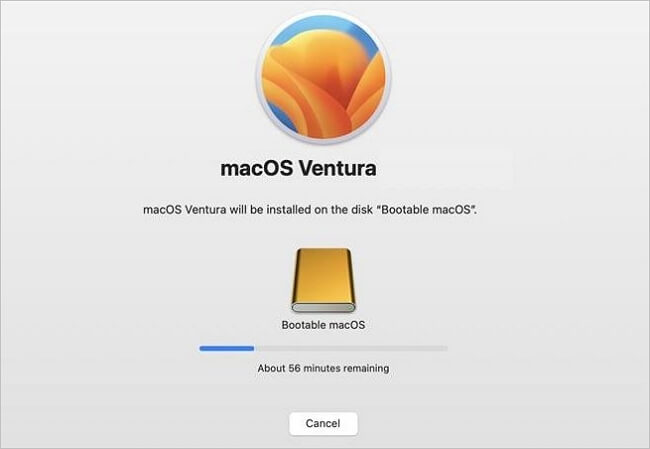
Step 4. When you see the Ventura update, click "Update Now".
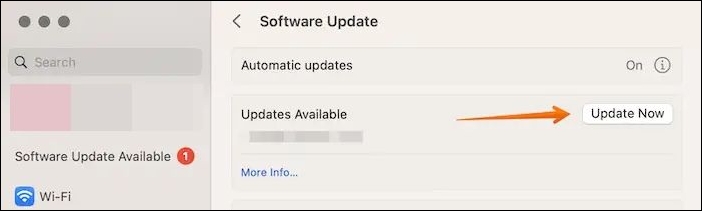
Step 5. The download will start.
- Notice:
- Ensure you have at least 12.5 GB of free space on the system. After the downloading is done, follow the on-screen instructions to install it. If the macOS Ventura update is not showing up, you have five solutions to fix it. Read more by clicking Fix macOS Ventura Update Not Showing Up on Mac in 5 Proven Ways.
Share this article on social media to read it anytime.
2. Upgrade from Monterey to Ventura with App Store
Sometimes, updating from System Preferences can cause some errors. In that case, you can opt for an alternative. You can also upgrade from Monterey to Ventura via the App Store. Take a look at the steps you need to follow:
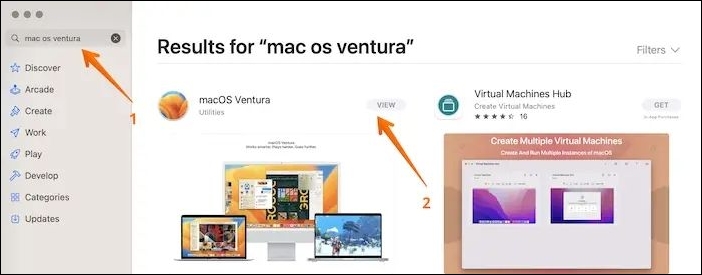
Step 1. Go to the App Store.
Step 2. Search for macOS Ventura.
Step 3. Click on the "Get" button. You will see 'Get' instead of 'View'.
Step 4. If asked, enter your Apple ID and password.
Step 5. Select "OK".
Step 6. Allow some time for the download to complete.
Step 7. Open the macOS Installer.
Step 8. Follow on-screen instructions to update Ventura.
If the upgrade process stuck or you cannot upgrade to macOS Ventura, check the following passage to learn detailed solutions:
Mac Won't Update? Here Are 7 Ways to Fix macOS 13 Ventura Upgrade Failed
If your Mac failed to upgrade to macOS Ventura, you still have methods to fix this issue. You'll learn 7 methods in this passage.
3. Upgrade from Monterey to Ventura with Bootable Installer
Another way to upgrade from Monterey to Ventura is to use a bootable installer, such as a bootable USB drive. However, the process is complicated and must be done if the other ways don't work.
Firstly, you need to create macOS Vnetura bootable USB. For that, take a look at these steps:
Step 1. Download macOS Ventura from the App Store.
Step 2. Now, click on the option "Quit Install macOS".
Step 3. Open "Terminal".
Step 4. Connect the USB to the system.
Step 5. Type the command below (Make sure to use the name of your USB instead of MyVolume).
- sudo /Applications/Install\ macOS\ Ventura.app/Contents/Resources/createinstallmedia --volume /Volumes/MyVolume.
Step 6. Hit the "Return" button.
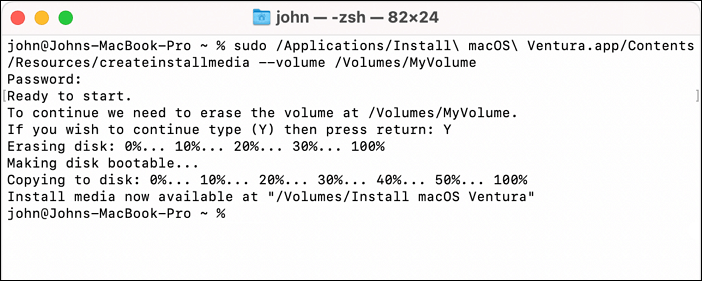
Step 7. Enter your password.
Now, you can use this bootable USB to upgrade to Ventura. The steps differ based on the Mac model you have.
Note: The application path may change depending on the OS you plan to upgrade.
Follow the steps below to upgrade from macOS Monterey to Ventura for Apple Silicon Macs:
Step 1. Connect the bootable USB to the system.
Step 2. Turn your Mac on.
Step 3. Press the power button and hold it.
Step 4. When the startup window appears, release the key.
Step 5. Select the bootable drive.
Step 6. Click on "Install macOS Ventura".
Step 7. Now, choose "Continue".
Step 8. Follow the on-screen instructions.
Follow the steps below to upgrade from macOS Monterey to Ventura for Intel-based Macs:
Step 1. Connect the bootable USB to the system.
Step 2. Turn your Mac on.
Step 3. Press the "Option" key and hold it.
Step 4. When the startup window appears, release the key.
Step 5. Select the bootable drive.
Step 6. Click on "Install macOS Ventura".
Step 7. Now, choose "Continue".
Step 8. Follow the on-screen instructions.
How to Retrieve Lost Files After macOS Upgrading?
When you upgrade from Monterey to Ventura, data loss may occur. In that case, choosing a professional data recovery tool is a great idea. Try EaseUS Data Recovery Wizard for Mac. It is an efficient data recovery software exclusively designed for hassle-free data restoration and helps you recover deleted files on macOS Ventura.
EaseUS Data Recovery Wizard
- Recover lost or deleted files. It can recover lost photos after macOS Ventura update and can recover other files.
- Support SD card recovery on Mac, formatted hard drive recovery, flash drive recovery, digital camera recovery, etc.
- Recover lost files after macOS Monterey update, sudden deletion, formatting, hard drive corruption, etc.
Irrespective of the data loss situation, you can get it back. Besides, it is easy to use and aids users in retrieving data in a few steps.
Step 1. Select the location
Select the disk where you lost data after updating to macOS Sonoma/Ventura/Monterey/Big Sur. Then, click "Search for lost files".

Step 2. Find lost data after the scan
EaseUS Data Recovery Wizard for Mac will immediately scan your selected disk volume and display the scanning results on the left pane. Use the file type and file path to find wanted data on Mac.

Step 3. Recover data after macOS update
Select the target files that were unknowingly lost during or after the update and click the "Recover" button to get them all back.

Conclusion
Do you want to upgrade from Monterey to Ventura? The revelation of new features is bound to make users excited. However, you need to ensure your system is compatible with the upgrade.
There are multiple ways to upgrade from Monterey to Ventura. For instance, you can visit the App Store or download the Software Update. Amidst the upgradation process, data loss might occur. For that, check out EaseUS Data Recovery Wizard for Mac. It is a reliable yet user-friendly recovery tool. If you haven’t tried this software, check it out today!
Upgrade from Monterey to Ventura FAQs
Have you tried upgrading from Monterey to Ventura? However, it is advisable to know more, so take a look at these questions and answers:
1. How to install macOS Ventura on an unsupported Mac?
You will need the installer to install macOS Ventura on an unsupported Mac. You can use the OpenCore-Patcher app to install Ventura. The process is complicated and requires users to follow the steps carefully.
2. Is macOS Ventura better than macOS Monterey?
Yes, macOS Ventura is better than macOS Monterey. Comparing macOS Monterey VS Ventura, Ventura has many new features, such as Spotlight, Freeform, Stage Manager, etc. It is a great successor to Monterey.
3. Can I downgrade from Ventura to Monterey?
Yes, you can downgrade from Ventura to Monterey. You can enter the "Recovery Mode" and select the "Reinstall macOS" option. That way, you can get back the older version.
4. What's new in macOS Ventura?
There are new features in macOS Ventura. These include smart search corrections, missing recipients and attachments, image search, extension syncing, passkeys, resizable windows, etc. There are many more features too!
Was This Page Helpful?
Dany is an editor of EaseUS who lives and works in Chengdu, China. She focuses on writing articles about data recovery on Mac devices and PCs. She is devoted to improving her writing skills and enriching her professional knowledge. Dany also enjoys reading detective novels in her spare time.
Related Articles
-
Invalid Value for Registry JPG/JPEG/PNG Files on Windows 10? Fix it Now!
![author icon]() Jean/2026-05-21
Jean/2026-05-21 -
Wi-Fi not Working on Laptop, but Working on Phone | Solutions
![author icon]() Daisy/2025-07-04
Daisy/2025-07-04 -
How to Fix/Remove Bad Image Error Windows 10
![author icon]() Jean/2025-07-04
Jean/2025-07-04 -
How to Factory Reset Laptop without Password? [Everything You Should Know]
![author icon]() Tracy King/2026-06-29
Tracy King/2026-06-29
EaseUS Data Recovery Services
EaseUS data recovery experts have uneaqualed expertise to repair disks/systems and salvage data from all devices like RAID, HDD, SSD, USB, etc.