Imagine working for hours collecting and arranging data and then accidentally losing text in the Notes app - isn't it frustrating? Whether it's a simple typo, an accidental keystroke, or a mistaken deletion, losing critical data may interrupt your business and add extra stress. In such cases, understanding how to undo deleted text in Notes on Mac becomes vital.
This article will show you three practical ways to undo erased text in Notes for Mac, allowing you to rapidly restore your lost information and restart your work without any problem. We'll look at everything from keyboard shortcuts to menu commands to third-party recovery tools to see how you can retrieve deleted text and lost notes on your Mac.
By following the step-by-step instructions and using the suggested tools, you'll have the knowledge and resources you need on how to undo deleted text in notes on a Mac successfully.
Fix 1. How to Undo Deleted Text in Notes on Mac | with Shortcut
In addition to the edit menu, you may utilize basic keyboard shortcuts to swiftly undo your actions if you make mistakes while typing in your Notes app. The shortcuts are considerably easier to operate and will become more familiar with continued usage. Use the following keyboard shortcut to undo text notes:
Step 1. Open the "Notes" program on your Mac and choose the note you wish to modify.
Step 2. To reverse your previous mistake or action, just hit "Command+Z" on your Mac keyboard.
Step 3. To redo an action, use the keyboard shortcut "Shift+Command+Z."

While creating txt files on Mac with Note, you may need to use this undo shortcut very often. Don't forget to share this shortcut on social media to help more Mac users!
Fix 2. Undo Deleted Text in Notes on Mac with Menu Command
One of the most typical ways to undo or redo activities on a Mac device is to use the menu option that appears when you open the Notes app as a window tab and slide over to Edit. Follow these procedures to utilize the Undo and Redo menu options for Notes:
Step 1. Launch the Notes app on your Mac and choose the note where you want to use the undo or redo action on Mac.
Step 2. Scroll to the top of your screen to locate the navigation bar.
Step 3. Then, click "Edit" to see the drop-down choice, "Undo Typing" to undo your most recent action, or Redo if that is your preferred option.

Fix 3. Undo Deleted Notes on Mac with Recovery Software
EaseUS Data Recovery Wizard for Mac is dependable for recovering lost Mac notes.
This sophisticated program can recover erased notes, recently deleted notes, or notes lost due to system crashes. Its powerful and advanced scanning algorithms can search your Mac's storage deeply to find and recover lost notes swiftly.
EaseUS recovery tool can recover deleted Notes on Mac from HDDs, SSDs, fusion drives, Time Machine backup drives, SD cards, memory cards, and USB drives. The program is ideal for all technical levels, as it has a simple recovery method and an easy-to-use interface. Thus, it can quickly recover lost notes for both beginner and expert Mac users.
The program supports TXT, DOC, DOCX, XLS, XLSX, PPT, PDF, and many more file formats, making data recovery easy. Now, let's look into the step-by-step process of using this powerful recovery software to undo deleted notes on your Mac:
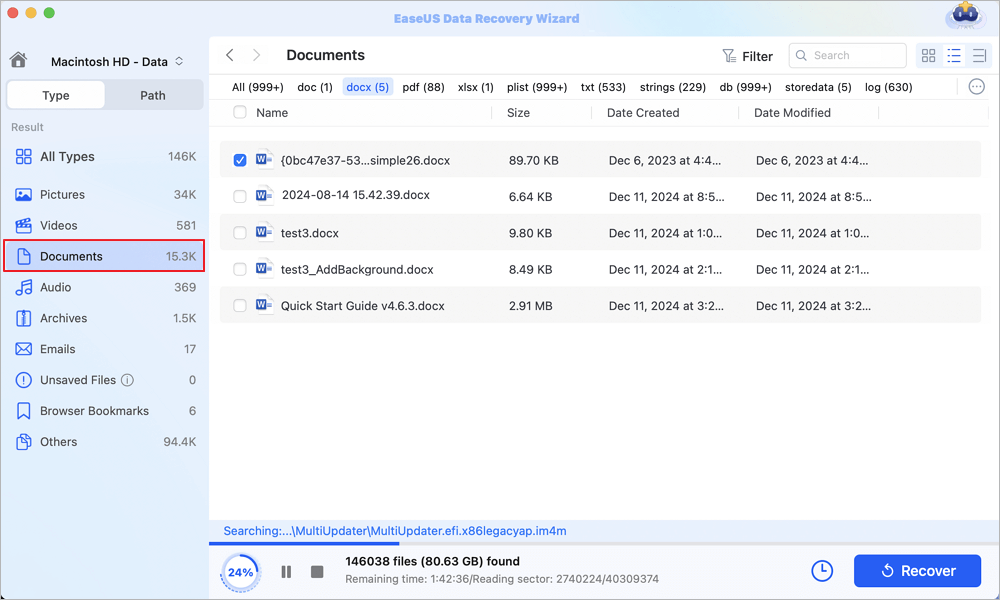
Step 1. Scan for lost documents
Select the location where your important Word/Excel/PPT/Numbers/Pages documents were lost and click "Search for lost files".

Step 2. Find lost documents on Mac
EaseUS Data Recovery Wizard for Mac will immediately start a scan on your selected disk volume. Meanwhile, the scanning results will be presented in the left pane. Select "Documents" and you can quickly filter the DOC/PDF/PPT/XLS files you've lost earlier.
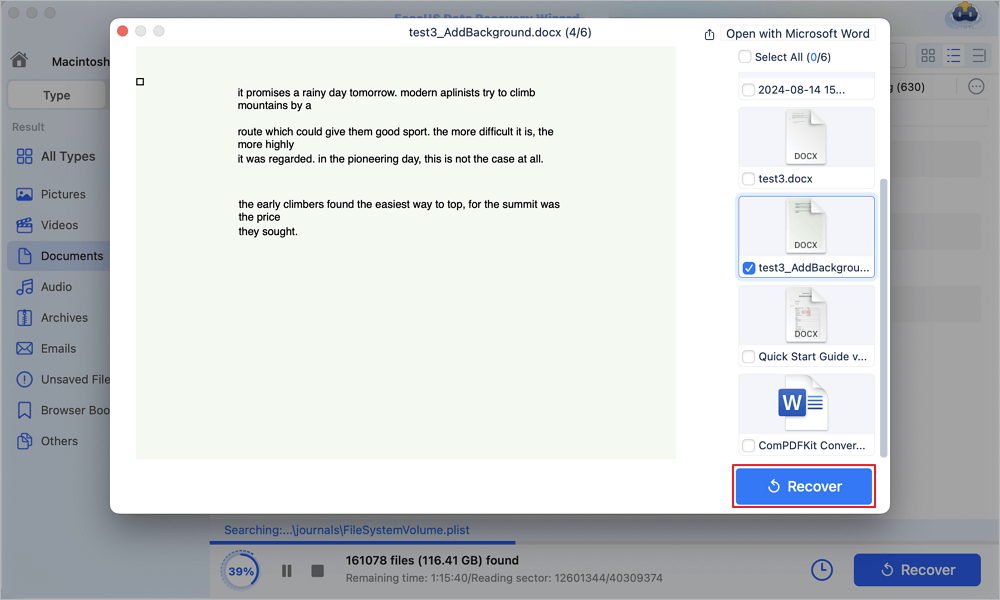
Step 3. Recover lost/deleted documents
Select the target files and preview them by double-clicking them. Then, click "Recover" to get lost documents back at once.
Don't let deleted notes cause you stress. EaseUS Data Recovery Wizard for Mac simplifies and speeds up the recovery procedure. Share this method on social media to help your friends and coworkers retrieve their erased notes!
Bonus Tip: How to Undo Deleted Text in Notes on iPhone
To rapidly undo in Notes on iPhone or Notes on iPad, use the secret Undo button. Follow the steps below:
Step 1. Open the "Notes" app on your iPhone or iPad and choose the note you wish to modify.
Step 2. With your Note open, press the screen to display the hidden toolbar at the top.
Step 3. Find the "Undo" button, which is represented by a curved arrow pointing left, and press it to undo your most recent activity.

| 💡Note: You can also undo delete by shaking the iPhone, and then the Undo option will show up |
Summary
Accidentally losing critical Mac notes is irritating, but it doesn't have to be permanent. The three approaches in this article allow you to reverse erased Notes content and recover crucial data. There are shortcuts, menu commands, and specialized recovery software like EaseUS Data Recovery Wizard for Mac.
EaseUS Data Recovery Wizard for Mac is a reliable and practical tool for regaining access to lost notes and data. Its user-friendly design and sophisticated recovery functions make it essential for Mac data loss victims. Trust EaseUS to recover lost notes and protect your essential data.
Undo Delete in Notes FAQs
Below, we have some common queries about how to undo delete in notes:
1. Does the undo option work in Notes on Mac?
Yes, the undo option is fully functional in Notes on Mac. If you accidentally erase text, go to the "Edit" option at the top of your screen or press "Command + Z." This quick command instantly restores your deleted content, allowing you to maintain the integrity of your notes effortlessly.
2. Can you recover deleted Notes on Mac?
Yes, you can recover deleted Notes on Mac. The Notes app has a "Recently Deleted" section, which saves your deleted notes from the past 30 days. Finding the note you want to recover, right-clicking it, and selecting "Recover Note" will save you from irreversible loss.
3. Does Notes have the auto-save option on Mac?
Yes, Notes on Mac features an auto-save function. The program automatically stores your notes as you write or edit them. Notes automatically saves your updates in real time, so no information is lost if you're interrupted.
Was This Page Helpful?
Jaden is one of the editors of EaseUS, who focuses on topics concerning PCs and Mac data recovery. Jaden is committed to enhancing professional IT knowledge and writing abilities. She is always keen on new and intelligent products.
Dany is an editor of EaseUS who lives and works in Chengdu, China. She focuses on writing articles about data recovery on Mac devices and PCs. She is devoted to improving her writing skills and enriching her professional knowledge. Dany also enjoys reading detective novels in her spare time.
-
EaseUS Data Recovery Wizard is a powerful system recovery software, designed to enable you to recover files you’ve deleted accidentally, potentially lost to malware or an entire hard drive partition.
Read More -
EaseUS Data Recovery Wizard is the best we have seen. It's far from perfect, partly because today's advanced disk technology makes data-recovery more difficult than it was with the simpler technology of the past.
Read More -
EaseUS Data Recovery Wizard Pro has a reputation as one of the best data recovery software programs on the market. It comes with a selection of advanced features, including partition recovery, formatted drive restoration, and corrupted file repair.
Read More
Related Articles
-
3 Ways to Fix Invalid B-tree Node Size Error and Recover Data
![author icon]() Jean/Jun 30, 2026
Jean/Jun 30, 2026 -
How to Format a USB Flash Drive Without Losing Data on Mac [3 Proven Methods in 2026]
![author icon]() Brithny/May 19, 2026
Brithny/May 19, 2026 -
Disk Not Ejected Properly Mac | How to Fix & Prevent
![author icon]() Dany/Jun 30, 2026
Dany/Jun 30, 2026 -
How to Fix Seagate External Hard Drive Not Mounting on Mac
![author icon]() Brithny/Jun 17, 2026
Brithny/Jun 17, 2026