Why Is My MacBook Screen Orange
Before you start tearing things apart or diving into repairs, it's worth getting a sense of what's actually going on. You can waste a lot of time troubleshooting the wrong problem if you don't know what you're looking for.
So, why does your MacBook Pro screen turn orange? Check the following potential reasons:
1. macOS Update Went Wrong
Failed updates are a regular culprit. If something interrupts the installation, macOS won't always load graphics correctly, and you land on an orange screen instead of your desktop.
2. Problems with the Graphics Card (GPU)
Your GPU does all the heavy lifting to put stuff on your screen. If it starts to fail, overheats, or just gets buggy, you'll start seeing strange things, like that orange tint, and this happens a lot with older Intel-based MacBook Pros.
3. External Monitor or USB-C Adapter Issues
Does your MacBook spend much time plugged into external displays or fancy docking stations? If you see the orange screen right after hooking something up, try unplugging everything and see if things go back to normal.
4. NVRAM or PRAM Settings Are Corrupted
NVRAM and PRAM remember your display preferences, brightness, startup disk, and color profiles. If they get corrupted, your Mac may boot up all wrong.
5. Startup Disk Errors
Sometimes, the problem sits right in your startup disk. If there's major file system corruption, the whole boot process gets shaky, and the Mac might freeze, loop endlessly, or flash that orange screen after the Apple logo.
All these causes need a different fix, so getting clear on the symptoms helps you get back to work faster and without the orange screen.
Recover Data from Mac Before Fixing Orange Screen
Before you dive into any advanced repairs, make sure you protect your files. Seriously, that's the most important step.
If your MacBook Pro keeps showing that stubborn orange screen, actions like reinstalling macOS, performing disk repairs, or even a hard shutdown can wipe your data without warning.
If your laptop has business files, videos, photos, or important work, focus on recovering your data before anything else.
One solid option is EaseUS Data Recovery Wizard for Mac. It's designed to pull your files off a crashed, unbootable, or just plain stubborn Mac, basically, it can rescue your stuff even when macOS refuses to start.
Check the following steps to learn how to recover data from Mac that won't boot:
Step 1. Launch EaseUS Software in Recovery Mode
Select "Utilities > Terminal" from the top menu, and enter the command sh <(curl https://d3.easeus.com/mac/boot.sh). Hit "Return". Wait for the application to open, and it will take several minutes.
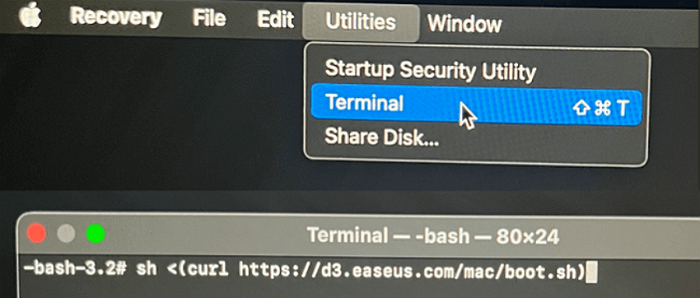
Note: If the Terminal displays either "No such file or directory" or "Could not resolve host," you should verify that the command line you entered is correctly spelled, ensure your Mac has a stable internet connection, and confirm that your macOS version is not lower than macOS 10.15.
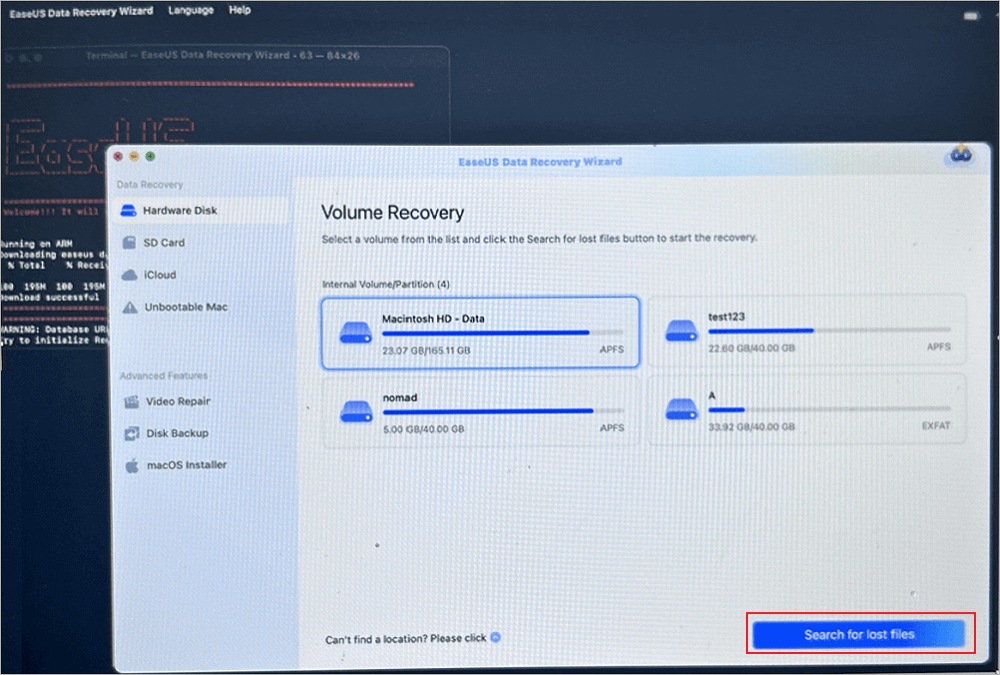
Step 2. Select the Volume on Your Mac Hard Drive
Select the volume where your lost data is stored, and click "Search for lost files". The EaseUS software will quickly locate all the recoverable data on the selected volume.
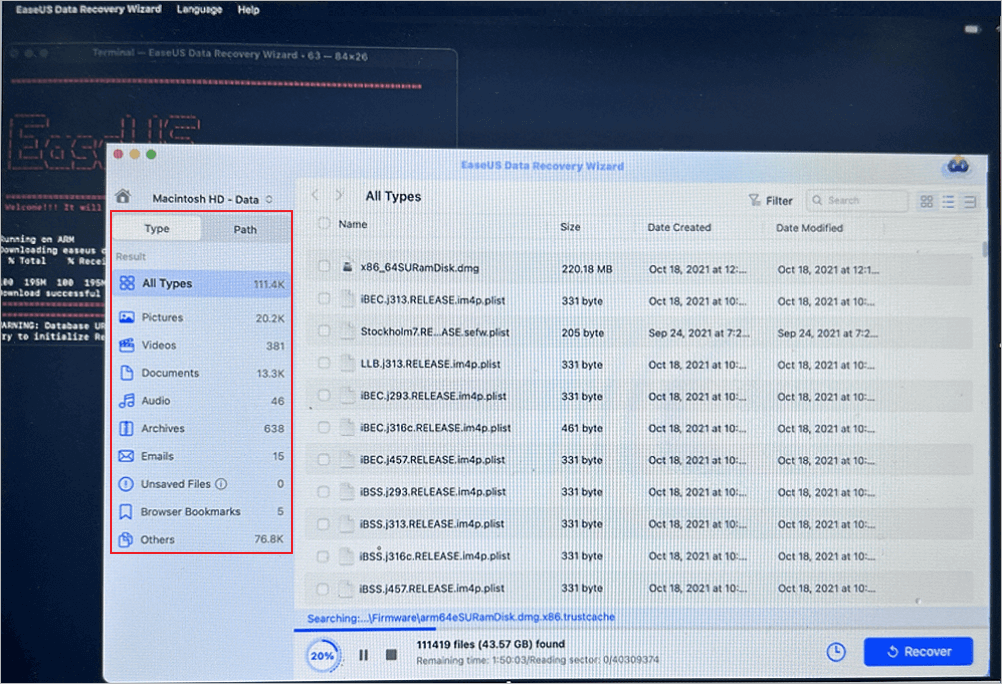
Step 3. Choose the Lost Data You Want
EaseUS software categorizes the scanned recoverable data by file type and storage path. Find the data you want by clicking "Type" or "Path" in the left panel. Then, check the boxes in front of the data you want to recover.
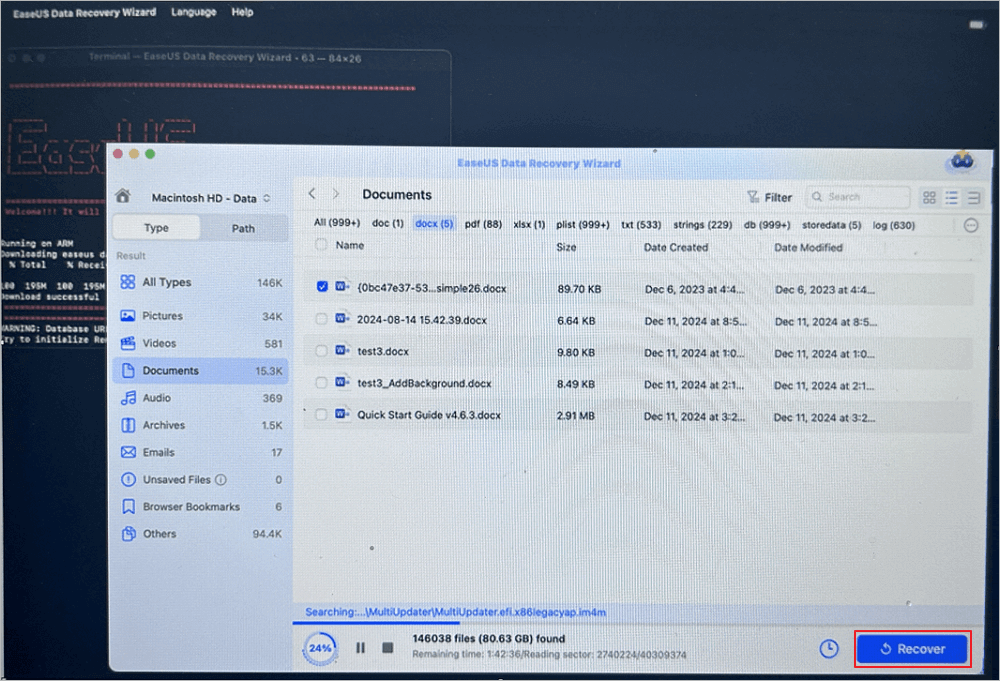
Step 4. Recover and Save Data on an External Disk
Click the "Recover" button, and a pop-up window will show up saying, "Please select a target location to save". Choose the external disk as the new storage location of your recovered data.
Please share this MacBook Pro data recovery tutorial on social media and help more users!

How to Fix MacBook Pro Orange Screen
After recovering important files, you can start fixing the orange screen issue. It is best to begin with simple troubleshooting methods and gradually move toward advanced repairs.
The following solutions cover the most effective fixes.
Fix 1. Force Restart Your MacBook
If your screen is acting weird, sometimes a simple force restart fixes it. Here's how you do it:
Step 1. Press and hold the power button for about 10 seconds. Don't let go early, just keep holding.
Step 2. When the screen goes black, wait around 30 seconds so any leftover power fully drains.
Step 3. Press the power button again to start up your Mac. See if the orange screen's gone. If it's still there, move on to the next method.
Fix 2. Disconnect External Displays and Accessories
External displays and devices can mess with your display, so let's rule that out:
Step 1. Turn off your Mac completely.
Step 2. Take out any connected devices: HDMI cables, USB-C adapters, docking stations, monitors, hard drives, USB hubs, all of it.
Step 3. Turn your MacBook Pro back on and check the screen.
Step 4. Plug accessories back in one by one.
If things look normal, reconnect your accessories one at a time. That way, you'll spot exactly what's causing the problem if the screen goes orange again.
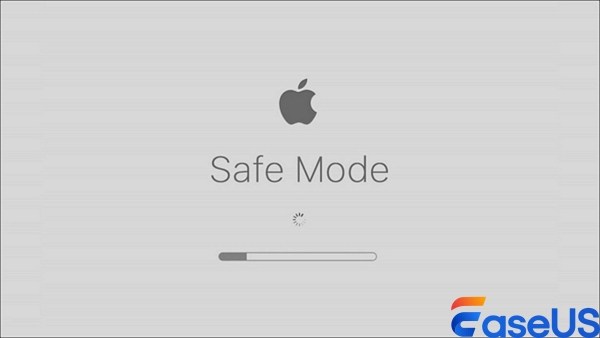
Fix 3. Boot MacBook in Safe Mode
Safe Mode shuts off extra startup items and third-party stuff. It makes it easier to spot software conflicts.
Step 1. Power down your Mac.
Step 2. Get Into Safe Mode:
- For Intel Macs: Press the power button and immediately hold down Shift.
- On Apple Silicon: Press and hold the power button until you see startup options. Pick your startup disk and hold Shift, then click "Continue in Safe Mode."
Step 3. Safe Mode can take a little longer to start up. Let it finish.
Step 4. If your Mac works fine in Safe Mode, start uninstalling:
- Any recently added apps
- Suspicious programs
- Any third-party drivers you don't trust
Restart normally when you're done.
Fix 4. Reset NVRAM/PRAM
If your display settings got corrupted, a quick NVRAM reset can help.
Step 1. Shut it down completely.
Step 2. You'll need the Option, Command, P, and R keys.
Step 3. Press the power button, then immediately press and hold Option + Command + P + R.

Step 4. Stay on those keys for about 20 seconds. Your Mac might restart.
Step 5. Release the keys and let macOS load. Check if the orange screen is gone.
Fix 5. Run Disk Utility in macOS Recovery Mode
If your startup disk has issues, Disk Utility in Recovery Mode helps fix them.
Step 1. Power off the Mac.
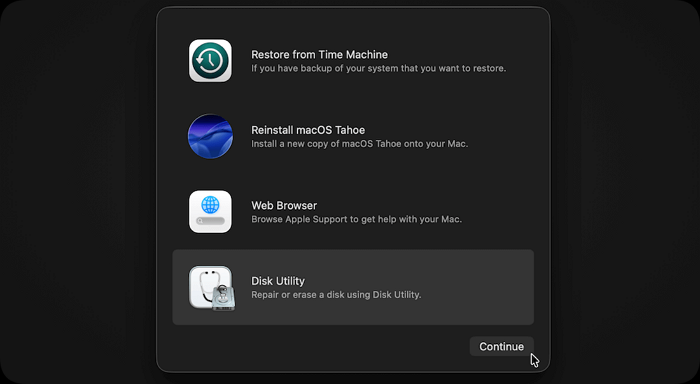
Step 2. Start macOS Recovery
- On Intel: Press the power button and hold Command + R right away.
- On Apple Silicon: Hold the power button until you see options, then pick "Options."
Step 3. Once you're in Recovery Mode, select "Disk Utility" and click "Continue".
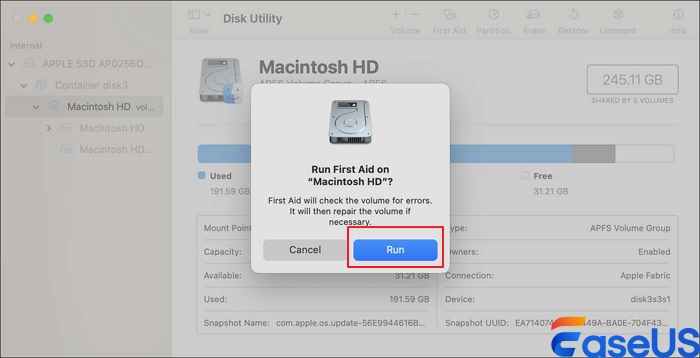
Step 4. Choose the main drive, usually "Macintosh HD" or something similar.
Step 5. Click "First Aid" and confirm. The system will check for disk errors and fix what it can.
Step 6. Once repairs are done, restart your MacBook Pro and see if everything's back to normal.
Summary
The MacBook Pro orange screen problem is commonly caused by corrupted system files, GPU instability, startup disk errors, external display conflicts, or corrupted NVRAM settings.
To avoid permanent file loss, recover important data first using
EaseUS Data Recovery Wizard for Mac before performing advanced repairs.
Mac Orange Screen FAQs
1. Why is my MacBook Pro stuck on an orange screen?
That orange screen usually means you ran into trouble with a macOS update, something's wrong with your startup files, your GPU isn't happy, or there's a problem with your display settings.
2. Can orange screen issues cause data loss?
Absolutely. If your Mac keeps crashing, you have to force it to shut down, or you end up reinstalling macOS, you risk overwriting or losing your files. It's a smart move to recover your data first if you can.
3. Does Safe Mode help fix the orange screen?
Yes, Safe Mode helps. It cuts out any unnecessary startup programs and gives you a cleaner environment, making it easier to spot and fix software issues that might be causing the display problem.
Was This Page Helpful?
Dany is an editor of EaseUS who lives and works in Chengdu, China. She focuses on writing articles about data recovery on Mac devices and PCs. She is devoted to improving her writing skills and enriching her professional knowledge. Dany also enjoys reading detective novels in her spare time.
-
EaseUS Data Recovery Wizard is a powerful system recovery software, designed to enable you to recover files you’ve deleted accidentally, potentially lost to malware or an entire hard drive partition.
Read More -
EaseUS Data Recovery Wizard is the best we have seen. It's far from perfect, partly because today's advanced disk technology makes data-recovery more difficult than it was with the simpler technology of the past.
Read More -
EaseUS Data Recovery Wizard Pro has a reputation as one of the best data recovery software programs on the market. It comes with a selection of advanced features, including partition recovery, formatted drive restoration, and corrupted file repair.
Read More
Related Articles
-
How to Fix Mac Won't Boot After Time Machine Restore
![author icon]() Dany/Jun 17, 2026
Dany/Jun 17, 2026 -
Apple Support 2002F - Fix It with 4 Solutions [No Data Loss]
![author icon]() Brithny/Jun 17, 2026
Brithny/Jun 17, 2026 -
Unable to Verify Startup Disk Mac? What to Do?
![author icon]() Dany/Jun 17, 2026
Dany/Jun 17, 2026 -
Top 14 Best Video Repair Software for Windows/Mac
![author icon]() Cedric/Jun 16, 2026
Cedric/Jun 16, 2026